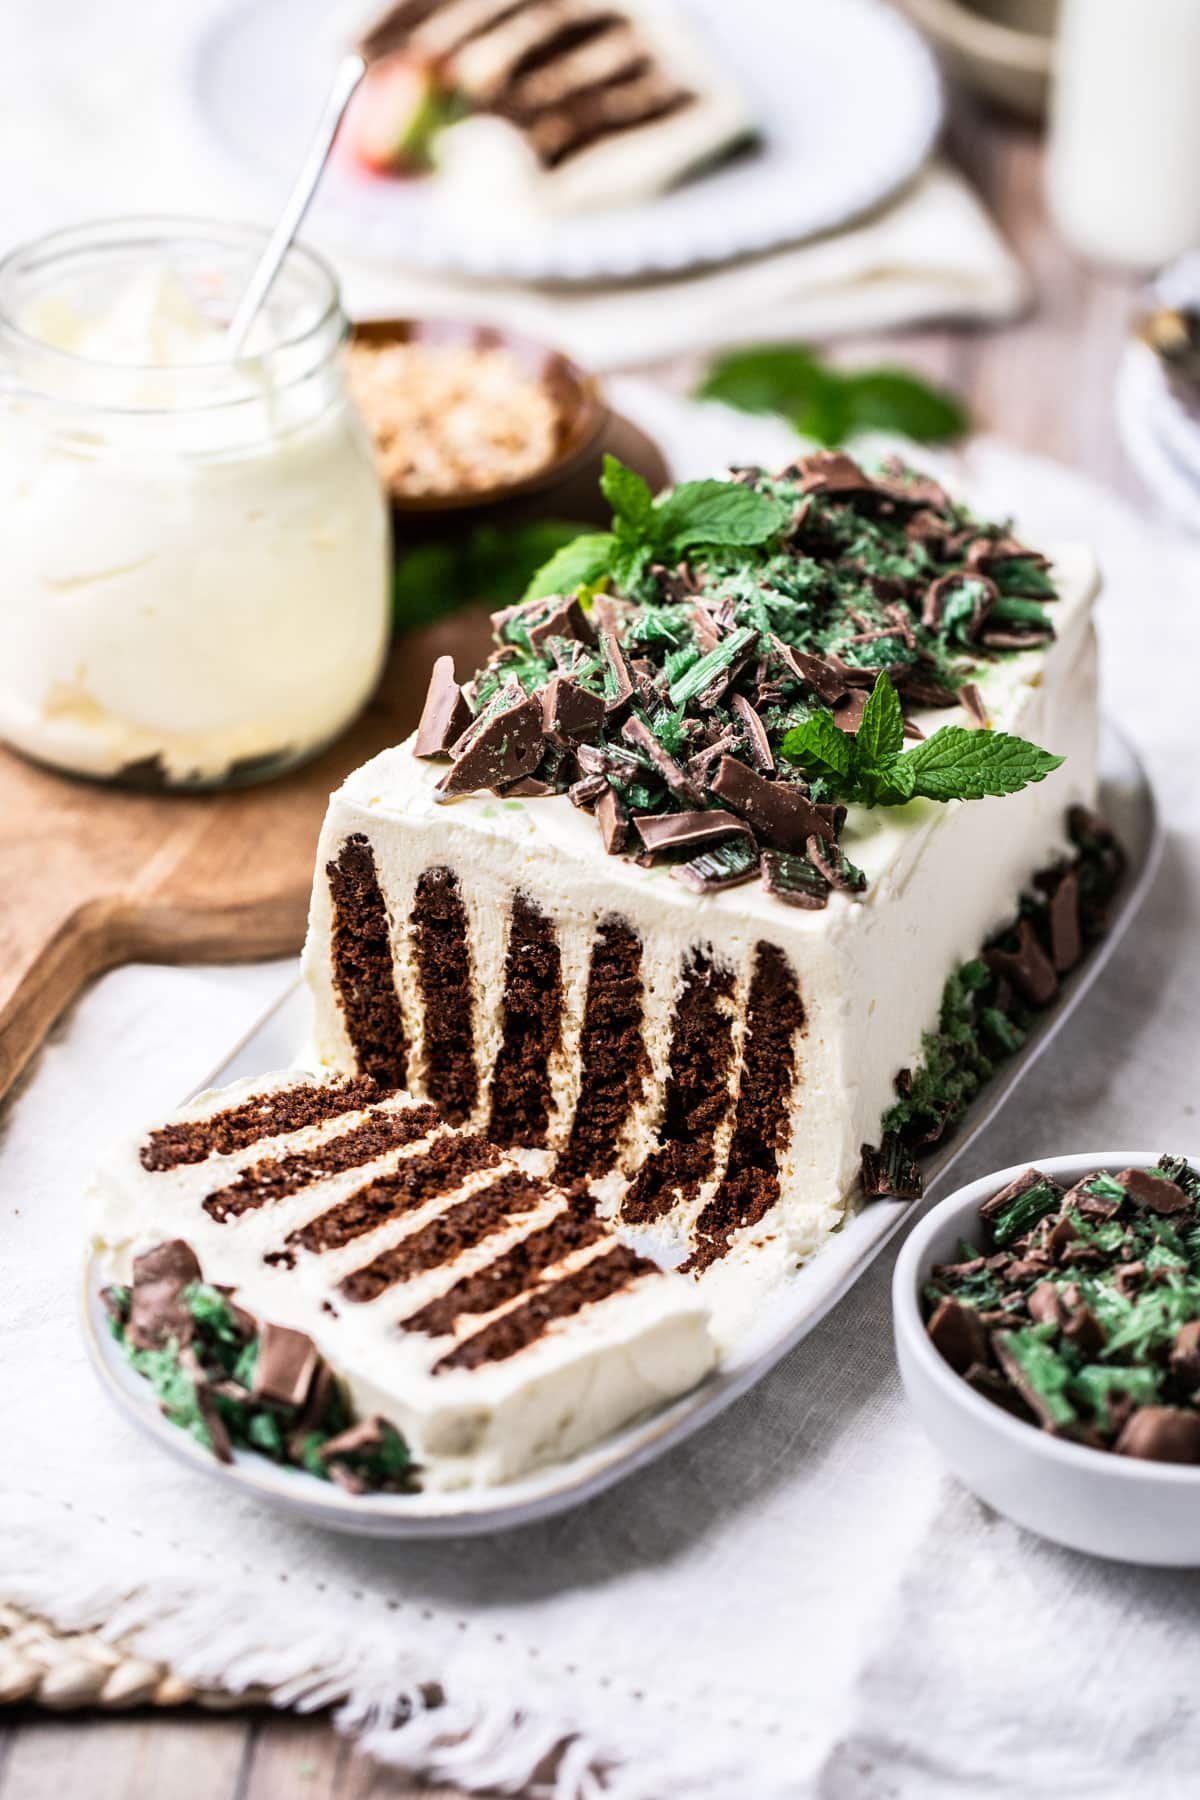
An iconic Australian dessert, Chocolate Ripple cake is made with Arnott’s Chocolate Ripple biscuits and sweetened whipped cream. Decorated with crushed Peppermint Crisp or your favourite toppings, it’s perfect for Christmas and entertaining. And it comes together in a matter of minutes – no baking required!
Jump to:
Why you’ll love this recipe
- Quick and easy – this recipe ticks all of the boxes for a delicious, fuss-free dessert. Chocolate Ripple biscuits and freshly whipped cream magically transform into a soft and fluffy cake in the fridge overnight, with minimal effort.
- Only 4 ingredients, including store-bought biscuits.
- Customisable – decorate it any way you like! Top with fresh fruits or chocolates, or use this recipe as a base and then adapt the toppings to make it your own. The shape of the cake can also be personalised. Make into a traditional log shape, a festive wreath for Christmas celebrations or into cute individual serves. See my variation notes and topping ideas below.
- Perfect for any occasion – it’s the perfect summer dessert. Serve it at Christmas, summer BBQs, celebrations, birthdays or special occasions.
- Make ahead – it tastes even better the next day, making it perfect for entertaining or when you need something fuss-free.
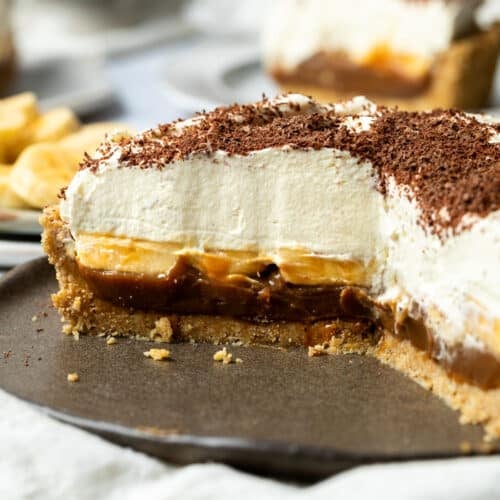
Need some more fuss-free dessert ideas? Try this no-bake banoffee pie, passion fruit slice or raspberry jelly slice.
Chocolate ripple cake ingredients
** This post contains tips and instructions to achieve the best possible results. This photo is a great guide for when you are in the supermarket, but for full ingredient quantities and methods, please scroll down to the detailed recipe card below!
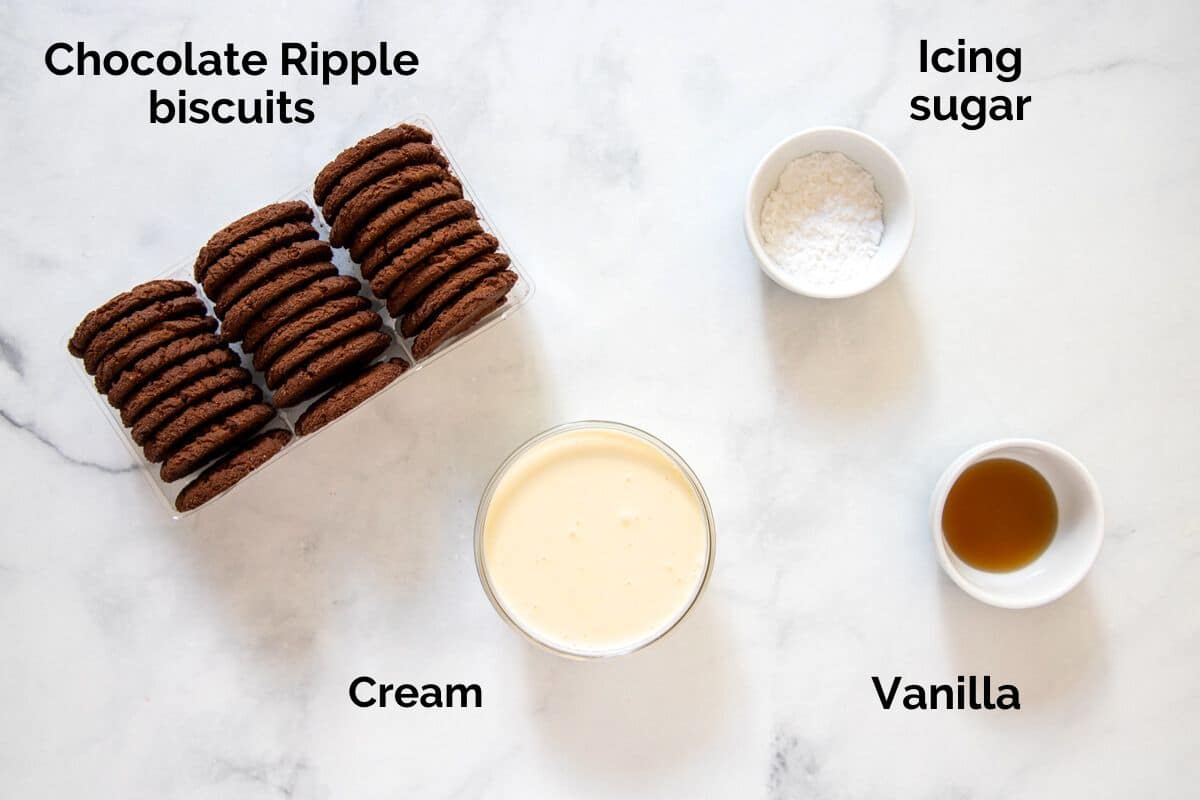
- Chocolate Ripple biscuits – Arnotts Chocolate Ripple biscuits are crunchy, plain cocoa biscuits with signature ‘ripples’ on top. They are commonly used in Australia for baking, cheesecake and dessert bases, as well as the base of the iconic Chocolate Ripple cake. You will need 1 x 250-gram packet (or one and a half packets and a little extra cream if you’re making a Chocolate Ripple wreath). These biscuits can be purchased in Australian supermarkets and online. But if you can’t find them, any of your favourite crunchy, sweet biscuits can be used. There is also a gluten-free version available, if you require the dessert to be gluten-free.
- Cream – use thickened cream, heavy cream or whipping cream that is at least 35% fat. Don’t use light or low-fat cream, as it won’t whip or hold its shape.
- Icing sugar – a touch of icing sugar (powdered sugar/confectioners’ sugar) is added for sweetness and to help the cream hold its shape. Regular caster sugar can also be used, or sugar can be left out if you prefer it a little less sweet or plan on adding lots of sweet toppings.
- Vanilla – vanilla helps to enhance the flavours in the cake. The vanilla flavour will really shine, so use a good quality vanilla paste or extract, rather than synthetic vanilla essence.
How to make chocolate ripple cake
Full ingredient notes and quantities can be found in the detailed recipe card below. But here is a brief overview of what you can expect;
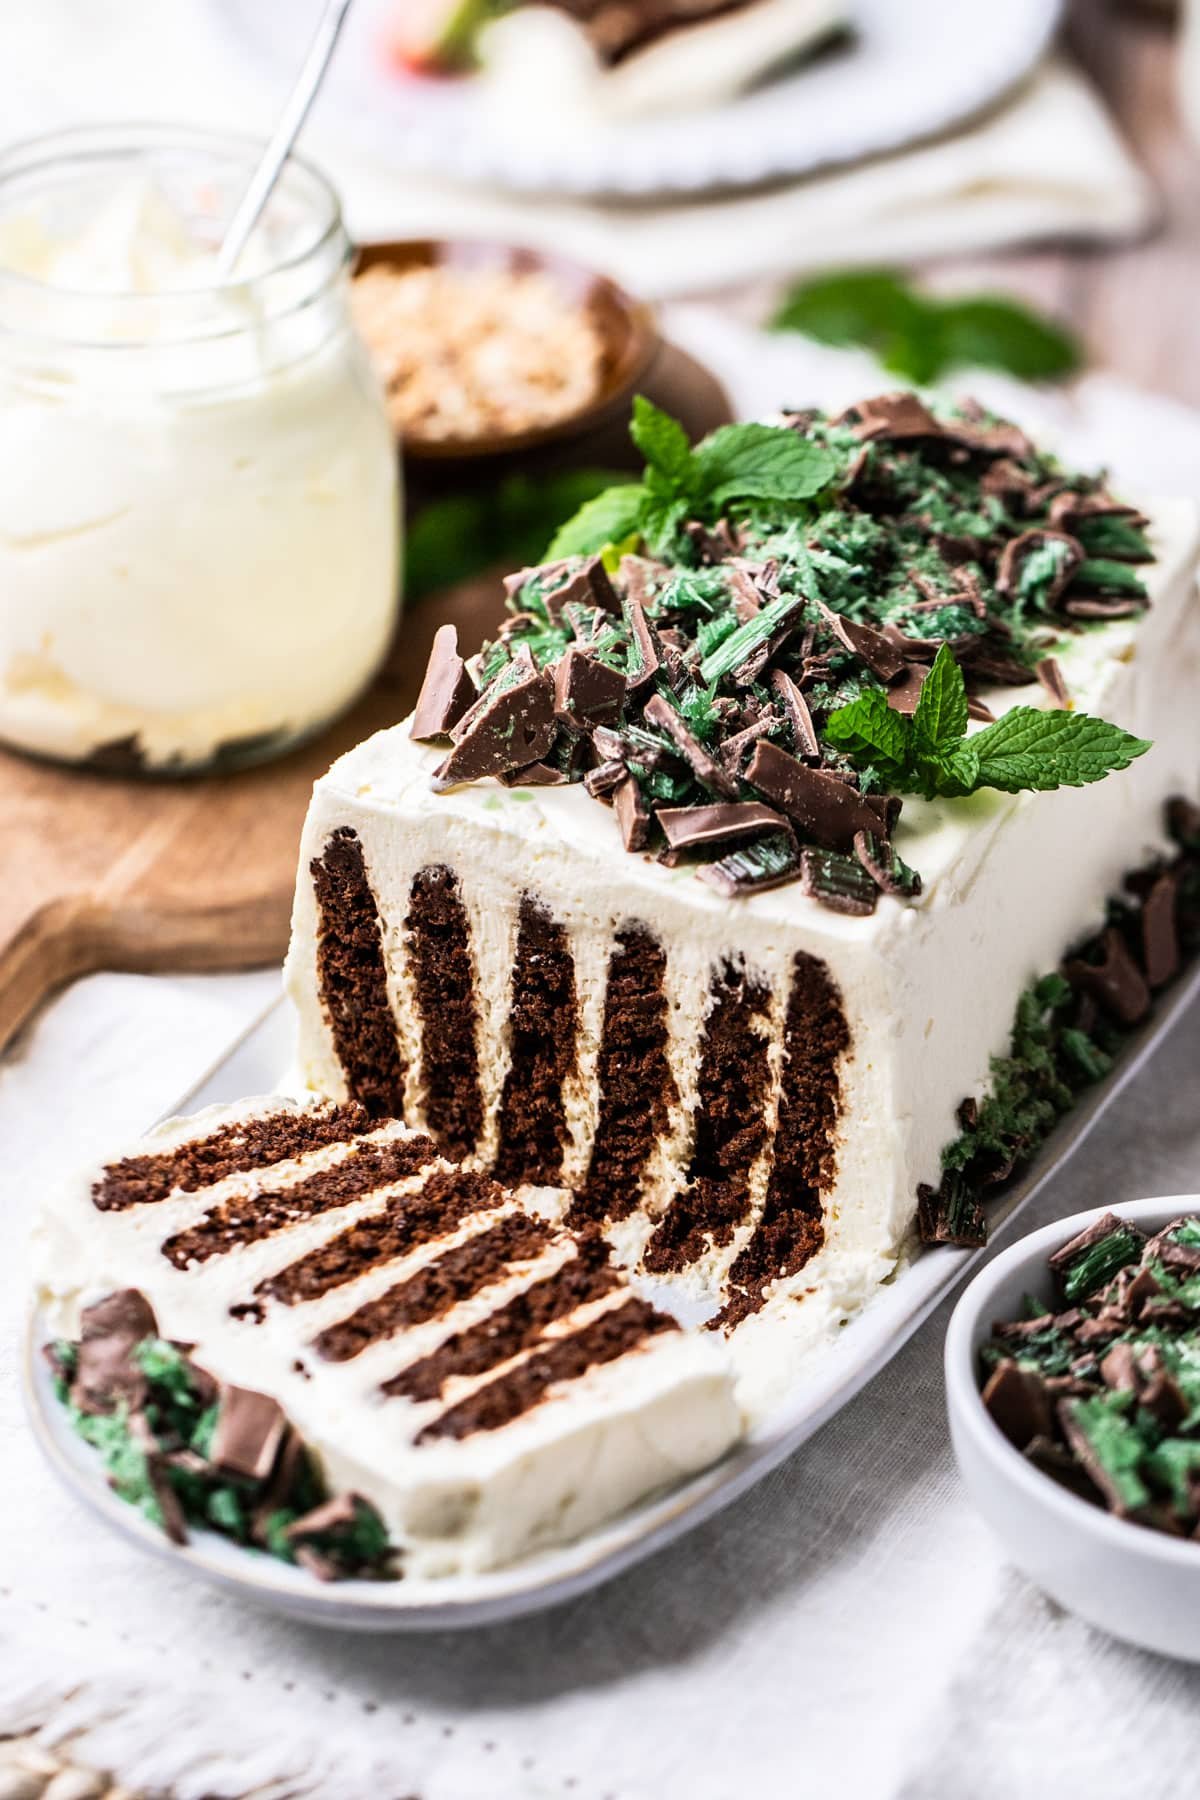
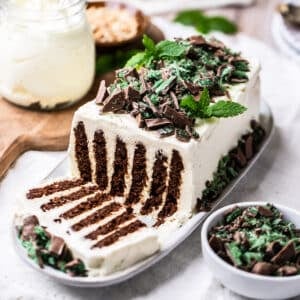
All you need is a packet of Chocolate Ripple biscuits and sweetened whipped cream, layered and assembled to your desired shape. As the cake chills in the fridge overnight, the cream softens and transforms the biscuits to the spongy, cake-like texture that Choc Ripple cake is known for!
For a traditional log-shaped cake;
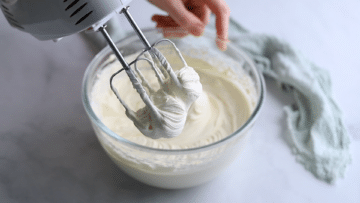
- Step 1: Whip the cream along with the icing sugar and vanilla until it reaches stiff peaks. Be careful not to over-beat the cream, or it will become grainy.
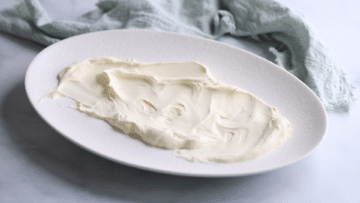
- Step 2: Spread a little cream over your serving plate of choice.
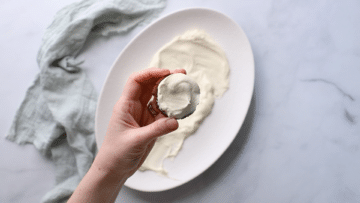
- Step 3: Layer. Spread one tablespoon of the cream onto a Chocolate Ripple biscuit.
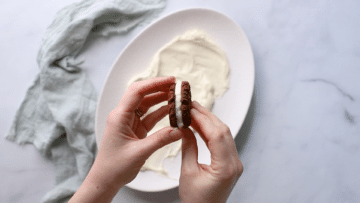
- Step 4: Place another biscuit on top and press together gently to seal. Continue to layer cream + biscuit + cream until you reach a stack of 5 – 6 biscuits (or to your desired size).
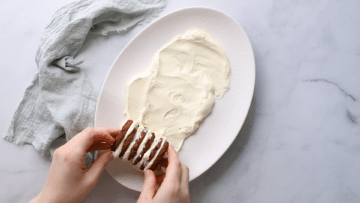
- Step 5: Place the stack of biscuits and cream onto the serving plate.
- Step 6: Repeat with the remaining biscuits until you have formed a rectangular log shape.
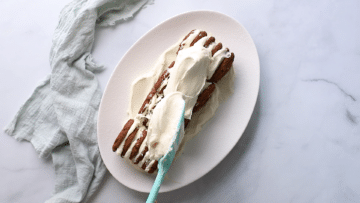
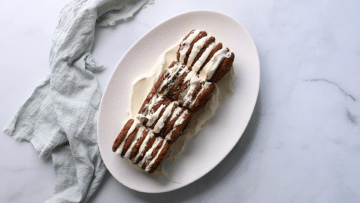
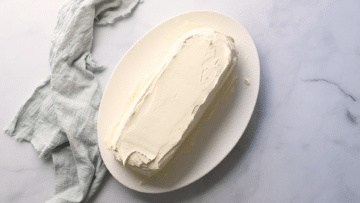
- Step 7: Cover the top and sides of the biscuits completely with the remaining cream and use a spatula to smooth the edges.
- Step 8: Cover and refrigerate for 6-8 hours (overnight is best) for the biscuits to soften and change texture in the cream.
Note: The cake takes 6-8 hours to set and soften, so is best made the night before you want to enjoy it.
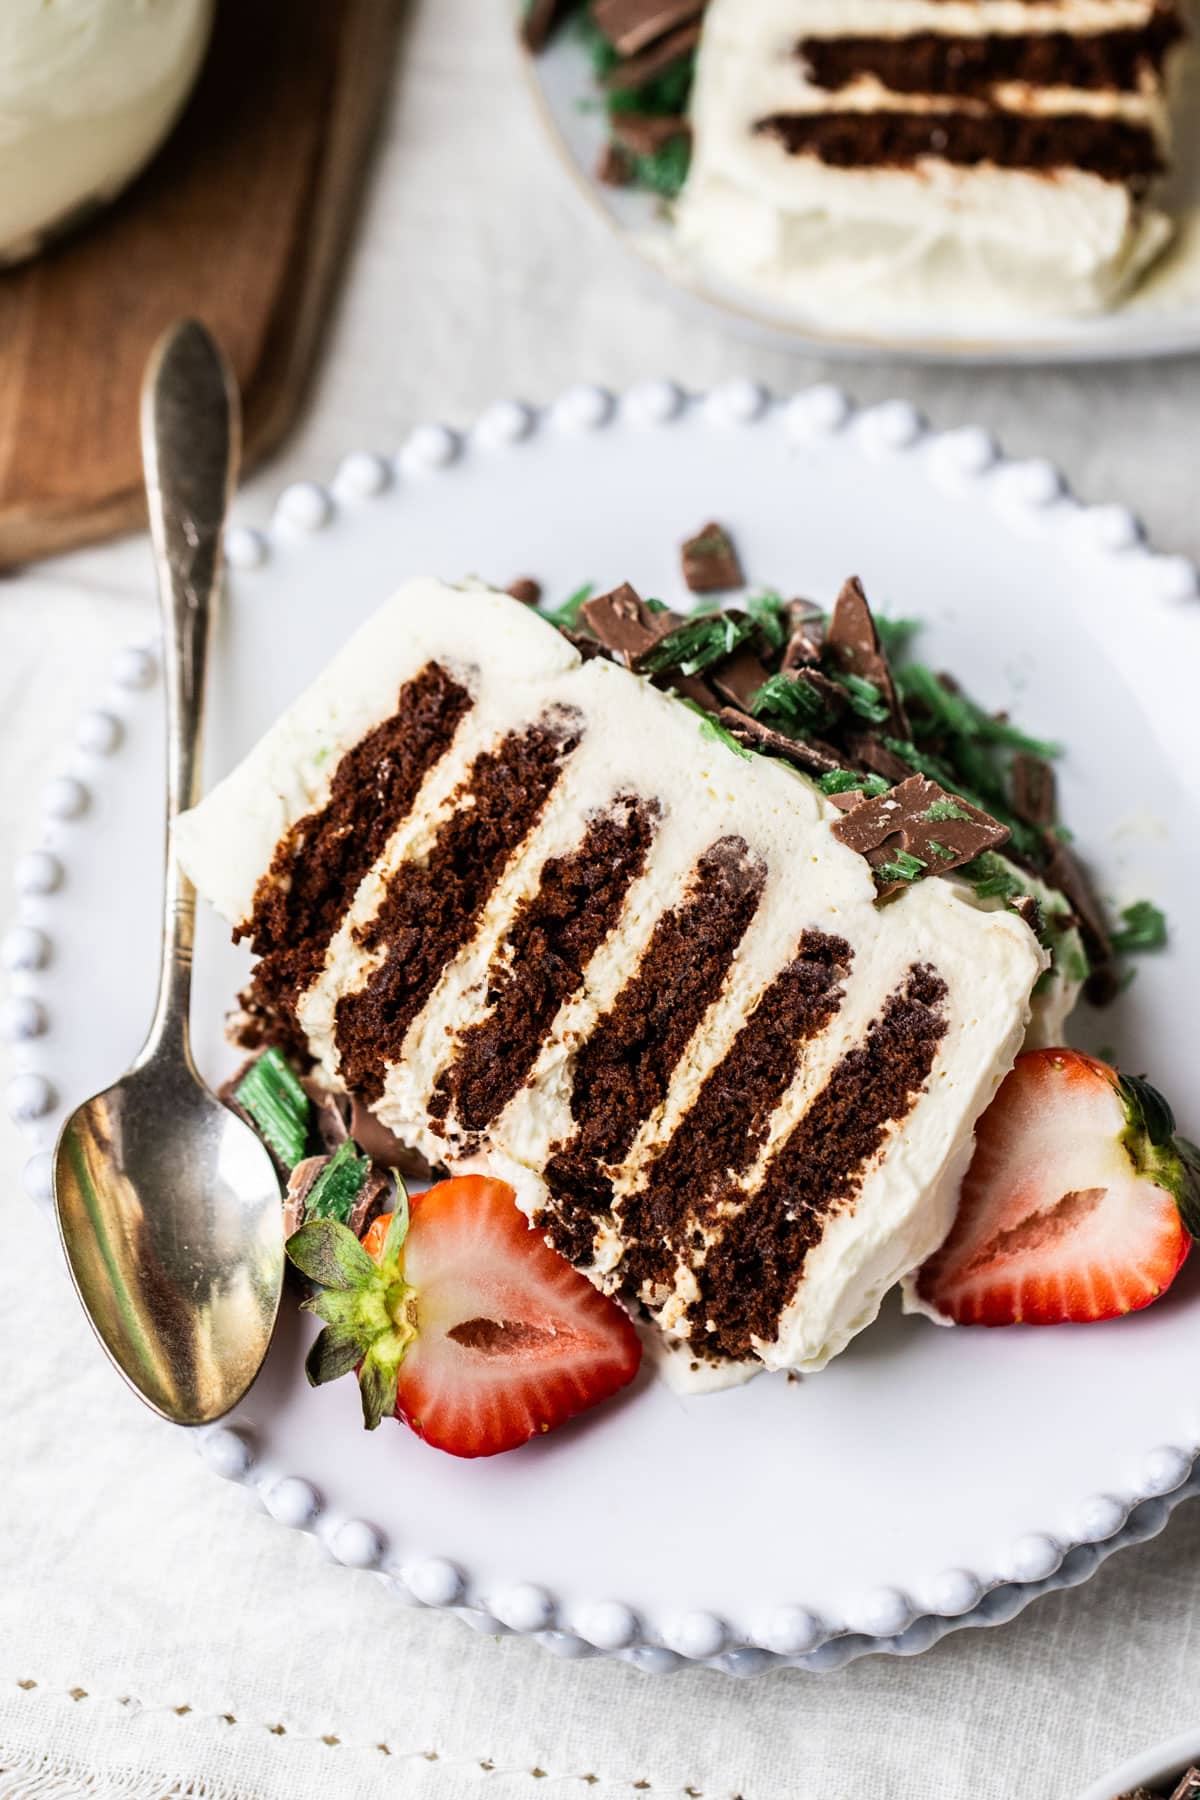
Decorate: when you are ready to serve, decorate the cake with fresh berries, chocolate or your choice of sweet toppings. Slice and serve chilled.
Recipe variations
Use this recipe as a base and then make the cake into your desired shape. When decorating, add your favourite toppings to make it your own.
To make it into a wreath;
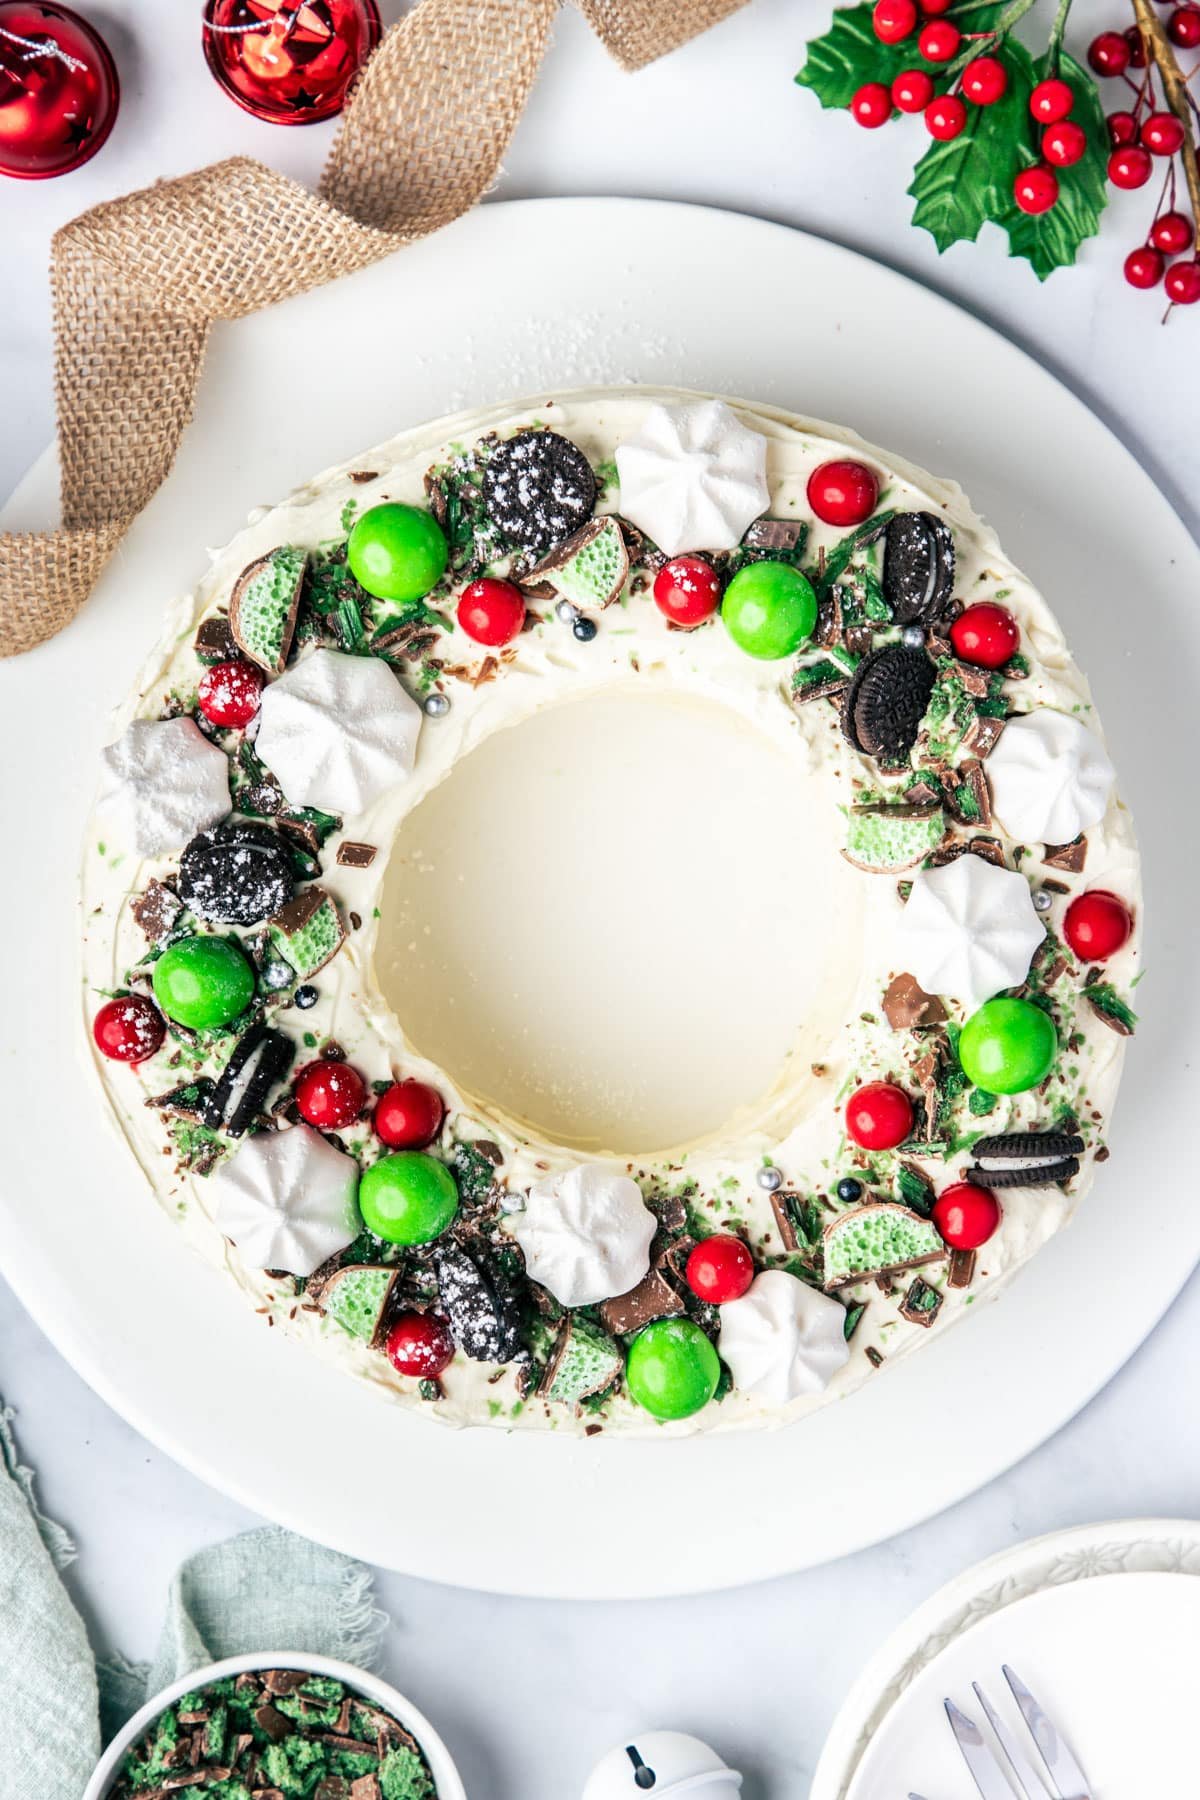
For a stunning Christmas centrepiece: follow the recipe steps as normal, but use one and a half packets of Chocolate Ripple biscuits and 3 cups of cream instead of the specified amounts. Arrange the biscuits and cream into a circle on a large serving plate before covering with cream.
When the cake has been chilled and you are ready to serve, decorate with your favourite Christmas-themed lollies and chocolates. I use mini meringues, peppermint balls, Jaffas, mint Aero and Peppermint Crisp.
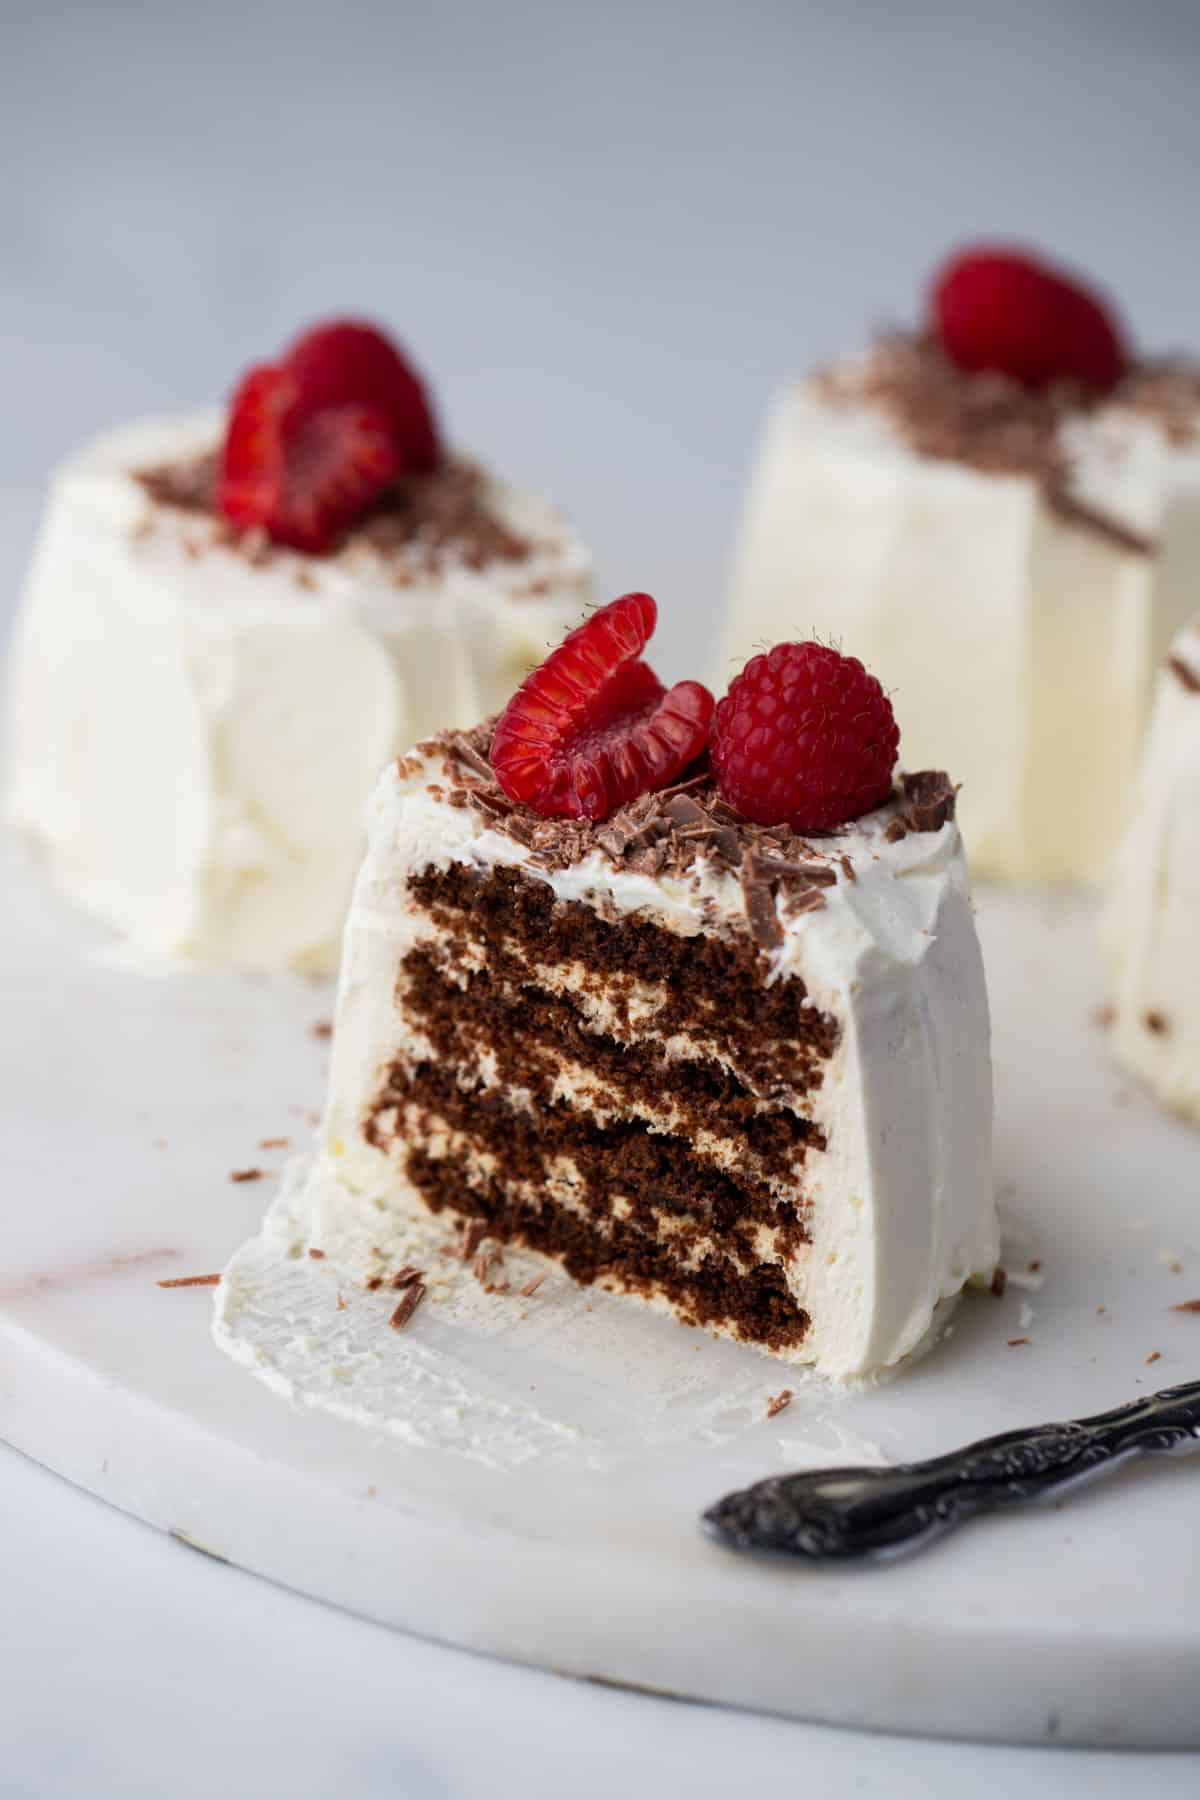
To make individual Chocolate Ripple cakes;
Individual Choc Ripple cakes are a great idea when entertaining. Everyone gets their own little cake and you can even set up a sweet station at the table for everyone to decorate their own, just the way they like!
Make stacks of 4 biscuits layered with cream, then cover the top and sides with cream and smooth.
Chill until soft (6-8 hours) and decorate just before serving. I used fresh raspberries and chocolate shavings. One packet of Chocolate Ripple biscuits will make 6 individual serves when stacked 4-high. The recipe can be multiplied to make more, if required.
Topping and flavour variations;
- Peppermint – add a teaspoon (or to taste) of peppermint extract or essence to the cream, in place of the vanilla. When ready to serve, decorate with dark chocolate curls, crushed Peppermint Crisp bars and mint Aero, or your favourite peppermint chocolate.
- Double chocolate – add 1-2 tablespoons of natural unsweetened cocoa powder to the whipped cream when you add the vanilla and sugar. Beat on low speed until combined and assemble as normal. Decorate with your favourite chocolate treats.
- Honeycomb – top with crushed chocolate honeycomb and add a drizzle of salted caramel sauce when serving.
- Caramel – keep the chocolate Ripple biscuits, or swap them for Butternut Snaps. Serve with chopped Caramilk chocolate, caramel sauce and some crunchy caramel popcorn.
- Black forest – add 1-2 tablespoons of cocoa powder to the whipped cream. Top with fresh or canned pitted cherries and dark chocolate curls. A little Kirsch or cherry brandy can also be brushed over the biscuits before assembly.
- Additional topping ideas – try any of the following toppings; fresh berries, sliced kiwi fruit, chopped chocolate, lollies, mini meringues, crushed Peppermint Crisp bars (my favourite!), mini or regular Oreos, mint leaves or crumbled candy canes.
Expert tips
- Make ahead – this recipe requires 6-8 hours to soften before eating. I recommend making it the day before so you have plenty of time.
- How to cover – the cake needs to be covered while setting in the fridge, or it will dry out. But this can be challenging, as plastic wrap can stick to the cream and make a mess. I recommend poking some toothpicks halfway into the top of the cake and covering over the top with cling wrap. The toothpicks will stop the wrap from touching the cake, leaving the cream smooth. Alternatively, place the entire cake (serving dish and all) into an airtight container with a high lid, if you have one that is big enough.
- Decorate when ready to serve – Some chocolates can bleed colour onto the cream and fruits can make the cream soggy. I recommend adding your desired toppings to the cake at serving time, for maximum freshness.
FAQs
Chocolate Ripple cake is best eaten the day after it is made, but it will keep in an airtight container in the fridge for 2-3 days. I recommend waiting to decorate until you are ready to serve.
Chocolate Ripple cake requires 6-8 hours in the fridge, to allow the biscuits to soften before eating. I recommend making it the day before you want to serve it.
I don’t recommend freezing Chocolate Ripple cake. While it technically can be frozen, the cake loses a lot of its texture in the freezer and the freshness isn’t the same. It is best eaten fresh, within 2-3 days.
If you can’t find Arnott’s Chocolate Ripple biscuits or want to try something different, you can substitute for any crunchy, plain and sweet chocolate-flavoured biscuit or cookie. Or to mix-up the flavour, Butternut Snap biscuits, Ginger Nuts or Biscoff cookies can be used. For a gluten-free version, use gluten-free Chocolate Ripple biscuits.
Related recipes

Tried this recipe? Please leave a star ⭐⭐⭐⭐⭐ rating or leave a review below and let me know how you went!
Hungry for more? Subscribe to my newsletter and follow along on Facebook, Instagram and Pinterest for the latest recipes and news.
Chocolate Ripple Cake Recipe
Ingredients
- 250 grams Chocolate Ripple biscuits approx. 27 biscuits. (if you are making it into a wreath, you will need 375 grams, 1 and ½ packets).
- 600 ml thickened cream (if you're making a wreath, you will need 3 cups of cream).
- 1 teaspoon vanilla extract extract or paste
- 1-2 tablespoon icing sugar (or more or less, to taste)
To top (optional, or choose your own!)
- 2 Peppermint Crisp bars crushed or chopped
- fresh berries
- mini meringues
- coloured chocolate balls for a Christmas themed cake
Instructions
- ** This cake needs 6-8 hours to soften, so it should be prepared the day before it is required and chilled in the fridge until you are ready to decorate.
- Set aside a flat serving platter or plate of your desired size.
- Start by whipping the cream, vanilla and icing sugar with electric handheld beaters or a stand mixer. The cream should form firm peaks and hold its shape, but be careful not to overbeat.
- Spread a small amount of the cream over your prepared serving plate, in the shape that you are going to make your cake.
For a traditional log shape
- Pick up a biscuit and spread 1 tablespoon of cream over the bottom, to cover. Place another biscuit on top and gently press to seal them together. Continue layering the biscuits and cream into stacks of 5-6 biscuits high, with cream in between each biscuit.It's ok if cream spills from the sides, as the entire cake will be covered in cream.
- Place the biscuit stacks onto your prepared serving platter. Arrange them into 4 or 5 rows (resembling a rectangular log shape).
- Use a spatula to spread the remaining cream over the top and sides of the biscuits, until completely covered. You shouldn't be able to see any biscuits through the cream.
- Cover the cake or add to an airtight container and refrigerate for 6-8 hours (or overnight) until set. See notes below on how to cover.
- When you are ready to serve, decorate the cake with your favourite toppings (Peppermint Crisp bars, crushed chocolate, mini meringues, fresh berries. Then slice and serve chilled.
For a wreath
- Pick up a biscuit and spread 1 tablespoon of cream onto the bottom, to cover. Place another biscuit on top and gently press to seal them together. Continue to layer the biscuits together with a tablespoon of cream in between.It's ok if cream spills from the sides, as the entire cake will be covered in cream.
- Shape the biscuit and cream layers into a circular shape, onto the serving platter or plate you have chosen.
- Use a spatula to spread the remaining cream over the top and sides of the biscuits, until completely covered. You shouldn't be able to see any biscuits through the cream.
- Cover the cake or add to an airtight container and refrigerate for 6-8 hours (or overnight) until set. See notes below on how to cover.
- When you are ready to serve, decorate the cake with your favourite toppings (Peppermint Crisp bars, crushed chocolate, mini meringues, fresh berries. Then slice and serve chilled.
For individual Chocolate Ripple cakes (makes 6)
- Pick up a biscuit and spread 1 tablespoon of cream onto the bottom, to cover. Place another biscuit on top and gently press to seal them together. It's ok if cream spills from the sides, as the entire cake will be covered in cream.
- Continue to layer the biscuits (with cream between each layer) to form individual cakes of about 4 biscuits high. Place them onto your chosen platter, with a little cream at the bottom.
- Use a spatula to spread the remaining cream over the top and sides of the biscuits, until completely covered. You shouldn't be able to see any biscuits through the cream.
- Cover the cakes or add to an airtight container and refrigerate for 6-8 hours (or overnight) until set. See notes below on how to cover.
- When you are ready to serve, decorate the cakes with your favourite toppings (Peppermint Crisp bars, crushed chocolate, mini meringues, fresh berries. Then slice and serve chilled.
Video
Notes
- Chocolate Ripple biscuits – found in Australian supermarkets, Chocolate Ripple biscuits are crunchy, plain cocoa biscuits with signature ripples on top. Aside from snacking, Chocolate Ripple biscuits are commonly used in Australia for baking, cheesecake and dessert bases, as well as the iconic Chocolate Ripple cake. You will need one 250-gram packet (or one and a half packets and a little extra cream if you’re making it into a wreath). They can be purchased online, but if you can’t find them, any of your favourite crunchy, sweet biscuits can be used. There is also a gluten-free version available, if you require the dessert to be gluten-free.
- Cream – use thickened cream, heavy cream or whipping cream that is at least 35% fat. Don’t use light or low-fat cream, as it won’t whip or hold its shape.
- Make ahead – this recipe requires 6-8 hours to soften before eating. I recommend making it the day before so you have plenty of time.
- How to cover – the cake needs to be covered while setting in the fridge, or it will dry out. But this can be challenging, as plastic wrap can stick to the cream and make a mess. I recommend placing some toothpicks into the top of the cake and covering with cling wrap. The toothpicks will hold the cling wrap away from the sides, leaving the cake untouched. Alternatively, place the entire cake (serving dish and all) into an airtight container with a high lid, if you have one that is big enough.
- Decorate when ready to serve – Some chocolates can bleed colour onto the cream and fruits can make the cream soggy. I recommend adding your desired toppings to the cake at serving time, for maximum freshness.
- How do I store it? Chocolate Ripple cake is best eaten the day after it is made, but it will keep in an airtight container in the fridge for 2-3 days. I recommend decorating when you are ready to serve.
- If you can’t find Arnott’s Chocolate Ripple biscuits or want to try something different, you can substitute for any crunchy, plain and sweet chocolate-flavoured biscuit or cookie. Or to mix-up the flavour, Butternut Snap biscuits, Ginger Nuts or Biscoff cookies can be used. For a gluten-free version, use gluten-free Chocolate Ripple biscuits.
- The nutrition information is based on the recipe being made into 8 slices, with one slice being one serve. The nutritional information is an estimate only and does not take into account any additional toppings or sides served with the cake.
- This recipe is made using Australian cups and spoon measurements. Due to cup sizes varying from country to country, I advise adjusting if necessary.
Nutrition
Are you following us on Facebook, Instagram and Pinterest?
Update Notes: This recipe was originally published in December 2020, but was re-published with new information and photos in September 2023.


Blitzo says
Amazing! such an easy and yummy cake, it is so perfect for Christmas. Love the idea of decorating it with peppermint crisps for a real festive flavor. THANKS!
Jb says
My teenage sisters used to make chocolate ripple cake when I was a kid, adding plenty of brandy. Loved it but haven’t seen it since…so I just made one. Looking forward to tomorrow!
Andrea Geddes says
Hi JB! Oh that sounds delicious, I hope you get some happy memories tomorrow when you try it. Enjoy!
Sarah says
I remember making this at Christmas as a kid, so much fun to turn biscuits into a cake! Such a great Aussie dessert 🙂
Andrea Geddes says
Hi Sarah! It’s such a great recipe for kids to be involved in too. So fun and festive!
Sylvie says
Such an easy and delicious cake, it is so perfect for the holidays too! Love the idea of decorating it with peppermint crisps for a real festive flavour 🙂
Andrea Geddes says
Thanks Sylvie! Peppermint Crisp is my favourite way to eat it over Christmas! It makes a great last minute dessert.
Bec says
I love your topping ideas for this classic Aussie dessert, I’ve only ever had it without toppings!
Andrea Geddes says
Thanks Bec! Peppermint Crisp is always my favourite, but it’s so much fun to play around with different topping ideas to suit! I hope you got some inspiration. Andrea x