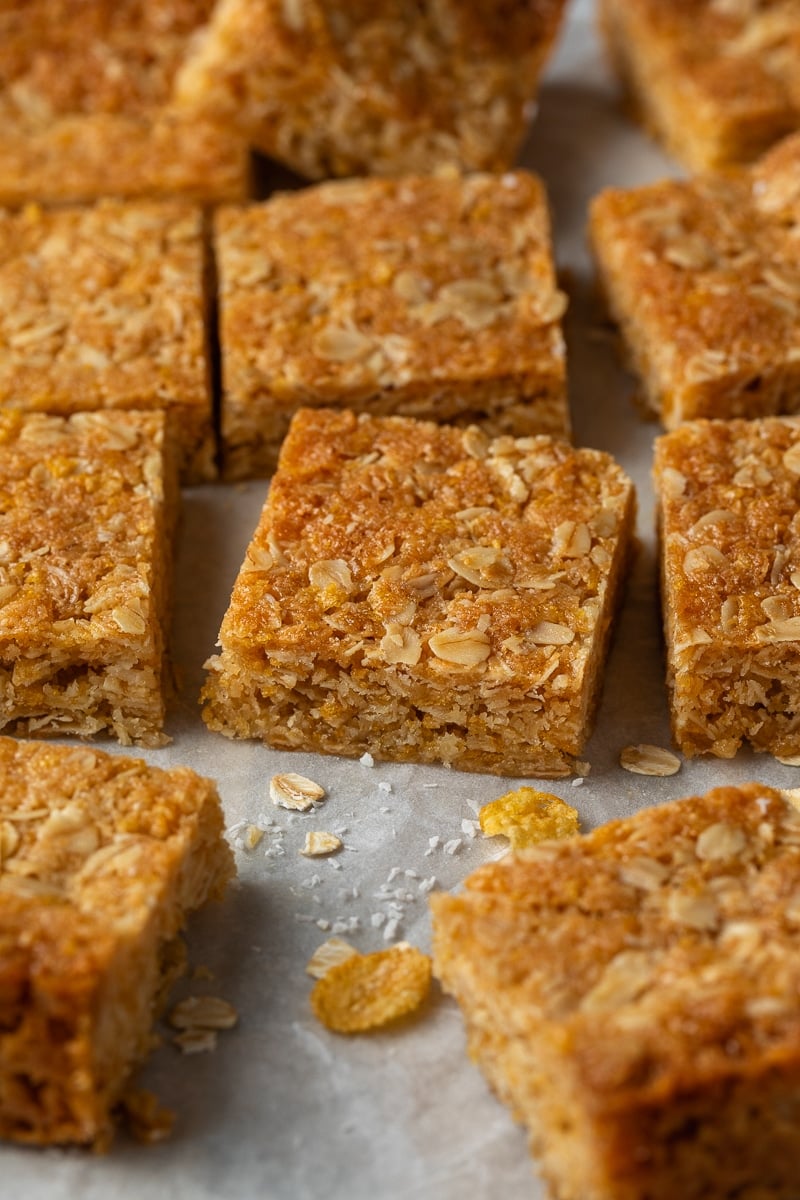
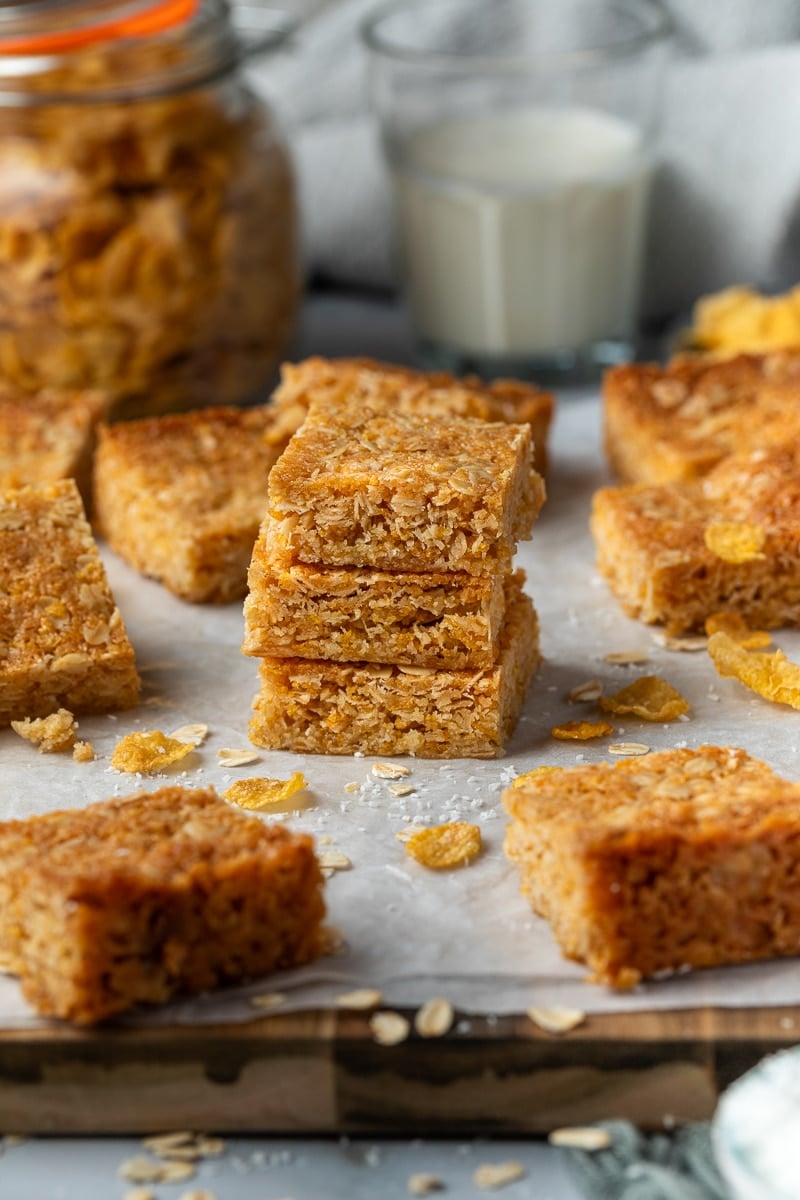
Deliciously chewy Cornflake slice, made from scratch. These golden, buttery squares are made with Corn Flakes, honey, oats and coconut and are the perfect balance of chewy and crispy – perfect for parties and lunchboxes!
Jump to:
Why you’ll love this recipe
- Easy to make – an easy recipe that comes together with simple pantry ingredients. No mixers needed.
- Texture – the middle is soft and chewy, with the perfect amount of crunch around the edges.
- Old-fashioned favourite – a favourite Australian recipe; just like these cornflake cookies and honey joys, but in slice form.
- Perfect for any occasion – add them to lunchboxes for an easy treat, or serve them at parties, birthdays or picnics.
- You can make them ahead of time.
Ingredients you will need
** This post contains tips and instructions to achieve the best possible results. This photo is a great guide for when you are in the supermarket, but for full ingredient quantities and methods, please scroll down to the detailed recipe card below!
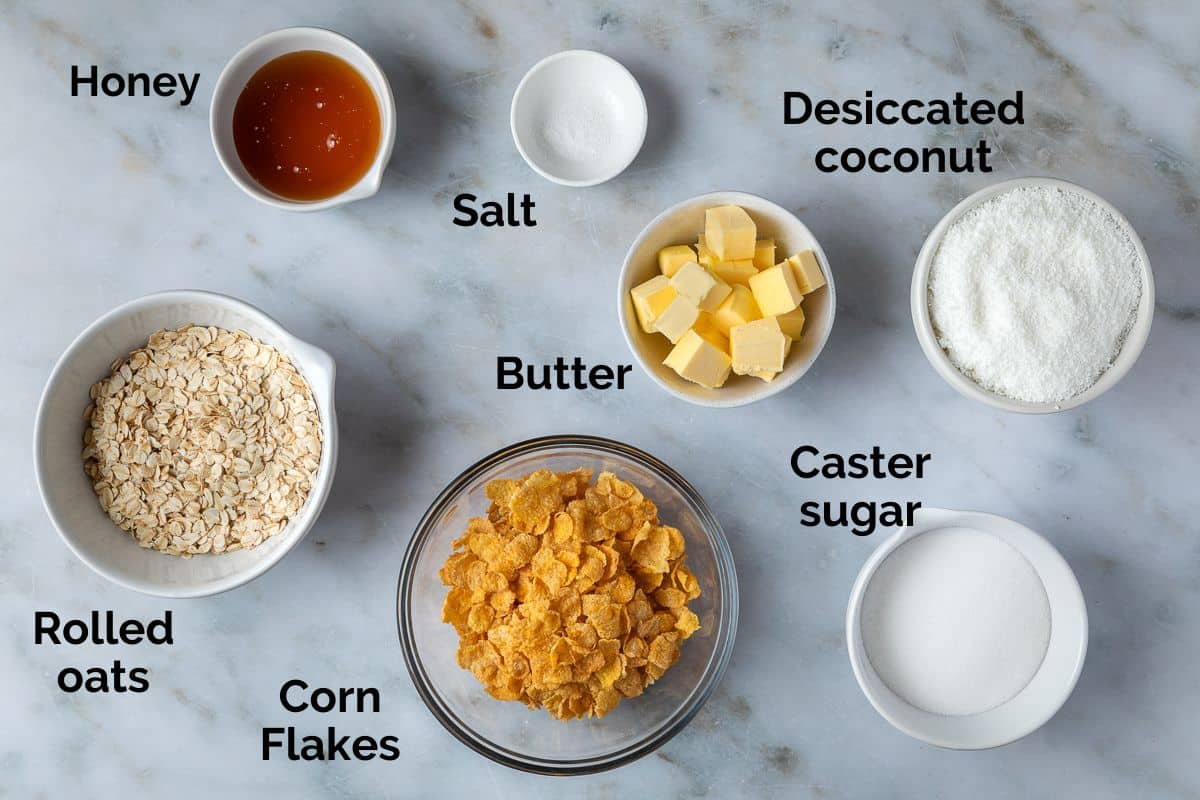
- Corn Flakes – Kelloggs Corn Flakes (or any generic brand of cornflakes) are used for the base of the slice. I recommend using a fresh box of Corn Flakes, for maximum crunch and flavour.
- Butter – use unsalted butter, rather than salted butter. It will be easier to control the saltiness of the slice by adding a pinch of salt to the mixture.
- Rolled oats – for the chewy texture. Use rolled oats, rather than quick or instant oats.
- Coconut – fine, desiccated coconut adds texture and chewiness to the slice. Don’t use larger, shredded coconut or coconut flakes, as the slice may fall apart.
- Honey – any honey will work. But a good quality honey will give a more intense honey flavour to the slice. Choose your favourite from a local farmers’ market, grocer or wholefoods store.
Step by step instructions
Full ingredient notes and quantities can be found in the detailed recipe card below. But here is a brief overview of what you can expect;
- Crush the cornflakes – use a wooden spoon to gently crush the cornflakes, leaving some larger pieces for texture.
- Stir the dry ingredients (coconut and oats) into the cornflakes.
- Make the honey mixture by melting the honey, butter, sugar and a pinch of salt together in a small saucepan. Gently cook until foamy.
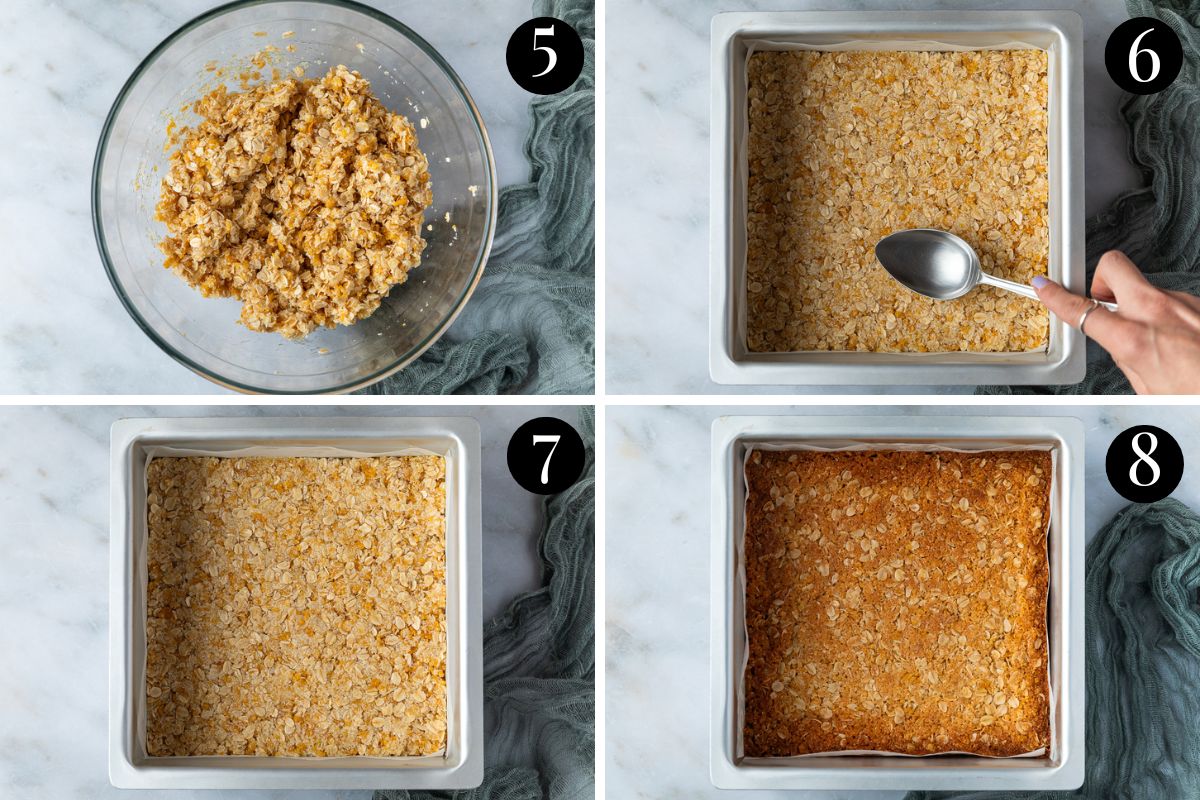
- Pour the melted honey mixture over the dry ingredients and stir to combine.
- Bake – use the back of a spoon to press the mixture firmly into a lined baking tin. Bake until lightly golden.
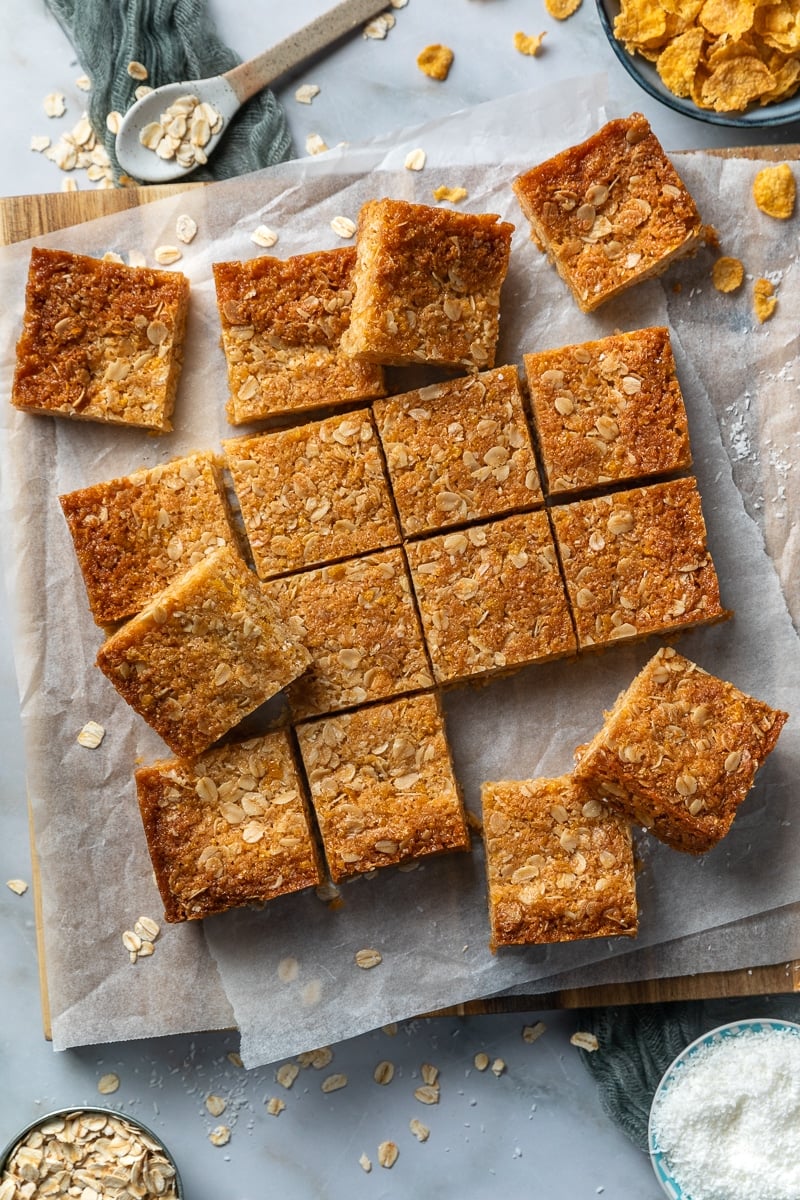
- Cool – the slice must be cooled completely in the tin before attempting to lift or slice it. Once cooled, slice into pieces of desired size.
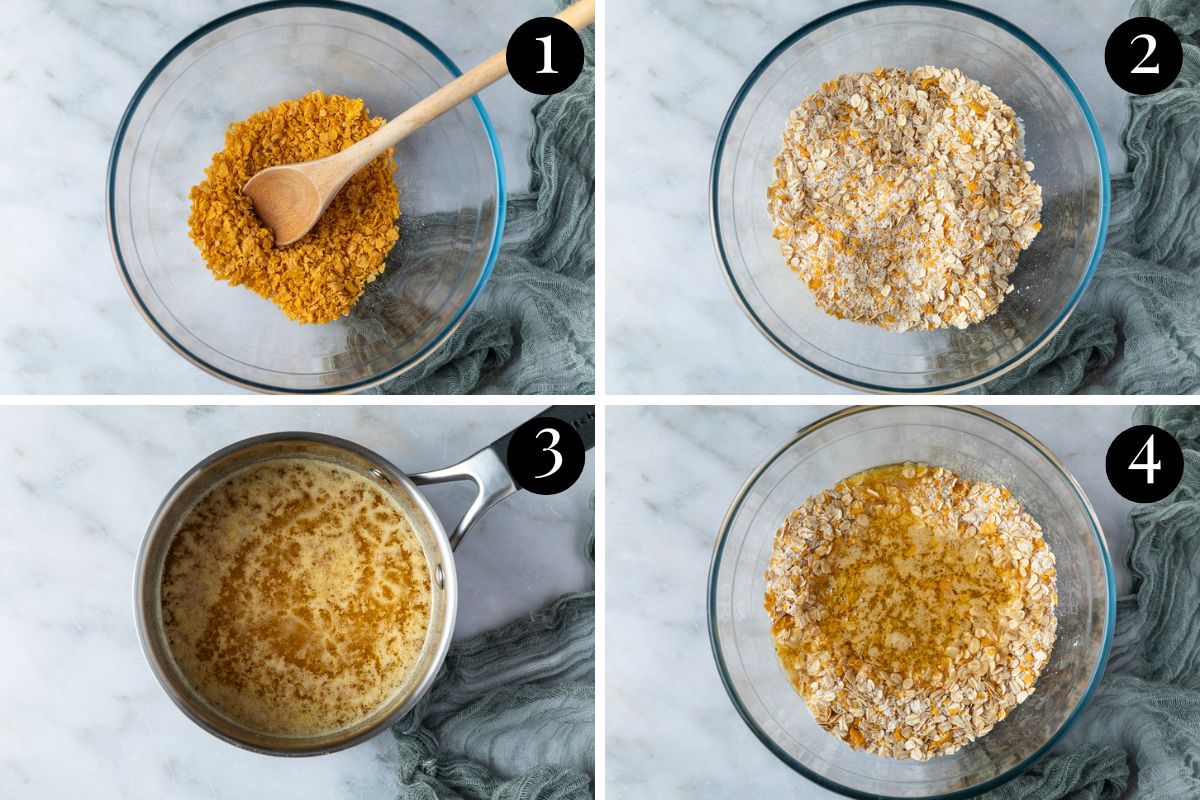
Make sure the slice is pressed into the tin very firmly so that it holds its shape when cooled.
Expert tips
- When lining the baking tin, leave the sides of the baking paper a little longer, for easy removal of the slice. To lift the cooled slice from the tin, simply loosen the edges and use the sides of the paper to lift.
- The slice must be completely cooled in the tin before slicing. It will be soft and fragile when it comes out of the oven. If you attempt to remove it from the tin or cut it while still warm, it will fall apart. Let the slice cool completely in the tin for at least 2-3 hours, until it becomes firm enough to cut.
- Don’t crush the cornflakes completely. Gently crush them, leaving large and small pieces which add to the texture.
- Take care with the melted honey mixture. It will be very hot.
- Use a fresh box of Cornflakes. For maximum texture, crunch and flavour, use a fresh, unopened box of Cornflakes, rather than an old box that may have become stale.
- Weigh your ingredients with a baking scale, for accuracy. For best results, use kitchen scales to measure your ingredients.
FAQs
Cornflake slice is best kept in an airtight container at room temperature for 4-5 days. The slice can also be stored in the fridge for 7 days, but will lose its chewiness and become hard which can make it difficult to bite. If storing the slice in the fridge, allow it to return to room temperature before eating.
To freeze, wrap the slices in baking paper to protect them from freezer burn before placing in an airtight container in the freezer. Freeze for up to 3 months and thaw at room temperature when ready to enjoy.
The slice must be allowed to completely cool in the tin before attempting to lift or slice it. It will be soft and fragile when removed from the oven. As it cools, the butter will help to set the slice, making for easy slicing. Patience is key – allow it to cool completely and firm up before slicing. If the weather is particularly warm, you can place it into the fridge for a short time to set before slicing.
Related recipes
Tried this recipe? Please leave a star ⭐⭐⭐⭐⭐ rating or leave a review below and let you know how you went!
Hungry for more? Subscribe to my newsletter and follow along on Facebook, Instagram and Pinterest for the latest recipes and news.
Cornflake Slice
Ingredients
- 60 grams Kelloggs Corn Flakes or other Corn Flakes brand. Use a fresh, unopened packed for best results.
- 120 grams rolled oats
- 120 grams desiccated coconut fine, desiccated coconut (not shredded)
- 150 grams caster sugar
- 125 grams unsalted butter
- pinch salt to taste. Regular table salt.
- ⅓ cup honey
Instructions
- Pre-heat oven to 160°C (320 F). Grease a square, 20 x 20 cm baking/slice tin with butter. Line the tin with baking paper, leaving the sides of the paper longer for easy removal of the slice.
- Place the cornflakes into a large mixing bowl and use a wooden spoon (or potato masher) to gently break them into smaller pieces. Don’t crush them too finely, we still want some texture.
- Add the oats and desiccated coconut to the cornflakes and mix to combine.
- In a small saucepan, add the caster sugar, butter, salt and honey and stir over medium-low heat until the mixture has melted and become foamy.
- Carefully pour the honey mixture into the cornflake mixture and stir to combine.
- Use the back of a metal spoon to very firmly press the slice mixture into the prepared tin. Make sure it is firmly pressed and compacted.
- Bake the slice for 15-20 minutes, or until lightly golden on top.
- Allow the slice to cool completely in the tin at room temperature before removing from the baking tin. Moving it while warm will result in the slice breaking apart. Wait at least 2-3 hours before attempting to lift it from the tin.
- Use the baking paper to gently lift the cooled slice and transfer to a chopping board. Use a sharp knife to cut the cooled slice into pieces.
Notes
- When lining the baking tin, leave the sides of the baking paper a little longer, for easy removal of the slice. To lift the cooled slice from the tin, simply loosen the edges and use the sides of the paper to lift.
- The slice must be allowed to completely cool in the tin before slicing. It will be soft and fragile when it comes out of the oven. If you attempt to remove it from the tin or cut it while still warm, it will fall apart. Let the slice cool completely in the tin for at least 2-3 hours, until it becomes firm enough to cut.
- Don’t crush the cornflakes completely. Gently crushing them leaves large and small pieces, adding to the texture of the slice.
- Take care with the melted honey mixture. It will be very hot.
- Use a fresh box of Cornflakes. For maximum texture and crunch, use a fresh, unopened box of Cornflakes, rather than an old box that may have become stale.
- Weigh your ingredients with a baking scale, for accuracy. For best results, use kitchen scales to measure your ingredients.
- Storage: Cornflake slice is best kept in an airtight container at room temperature for 4-5 days. The slice can also be stored in the fridge for 7 days, but will lose its chewiness and become hard which can make it difficult to bite. If storing the slice in the fridge, allow it to return to room temperature before eating.
- Please note that the nutrition information is based on the slice being cut into 16 pieces, with one piece being one serve. The nutritional information is an estimate only and does not take into account any additional toppings or sides served with the slice.
- This recipe is made using Australian metric cups and spoon measurements. Any reference to cups or spoons in this recipe is in Australian metric. Due to cup sizes varying from country to country, I advise adjusting if necessary.





Natalie says
Very tasty and easy to make. I added melted milk chocolate over the top after baking for something extra which tasted good. Thanks for an easy school bake stall friendly slice!
Andrea Geddes says
Thanks for taking the time to leave a reply! I’m so glad you enjoyed the slice. Andrea 🙂