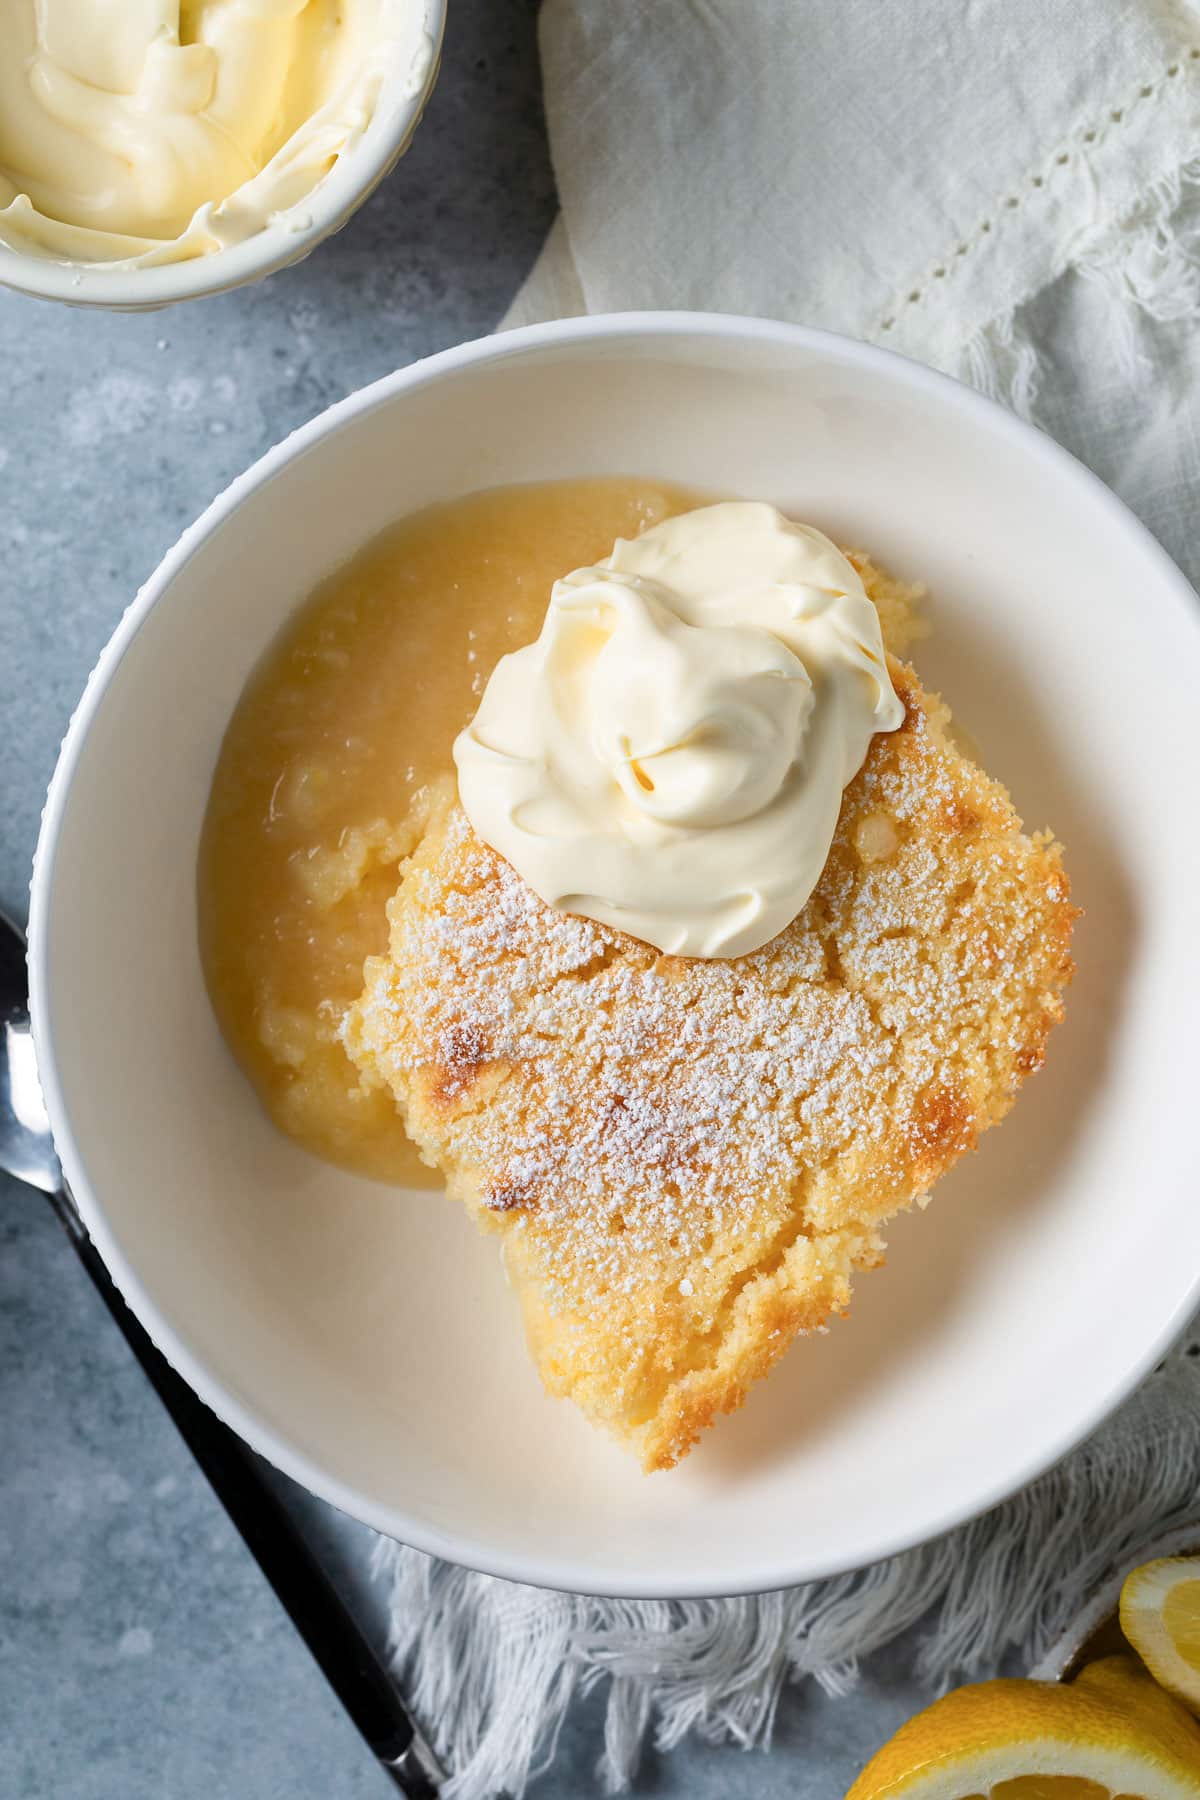
You will love this lemon delicious pudding, made from scratch with real lemons. One simple batter magically transforms into two delicious layers as it bakes; a light and fluffy sponge with a zesty lemon sauce underneath. Easy to make and ready in less than an hour, this dessert is perfect for lemon lovers.

Jump to:
Why you’ll love this recipe
- Easy to make – fresh lemons and 5 simple cake ingredients are all you need. And just 10 minutes prep-time. The oven does the rest!
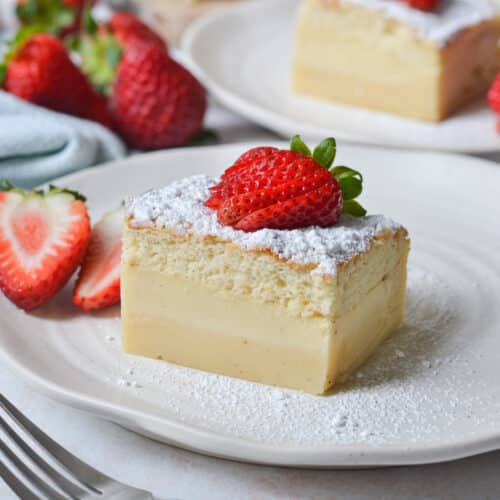
- Part lemon cake, part lemon curd, formed from one simple batter. Just like this magic custard cake, the layers will magically separate as they bake, forming a light sponge cake layer on top of a bright and tangy lemon sauce underneath.
- Ready to eat in under an hour.
- Light and lemony – this self-saucing pudding boasts a beautiful lemon flavour with both fresh lemon juice and tangy lemon zest.
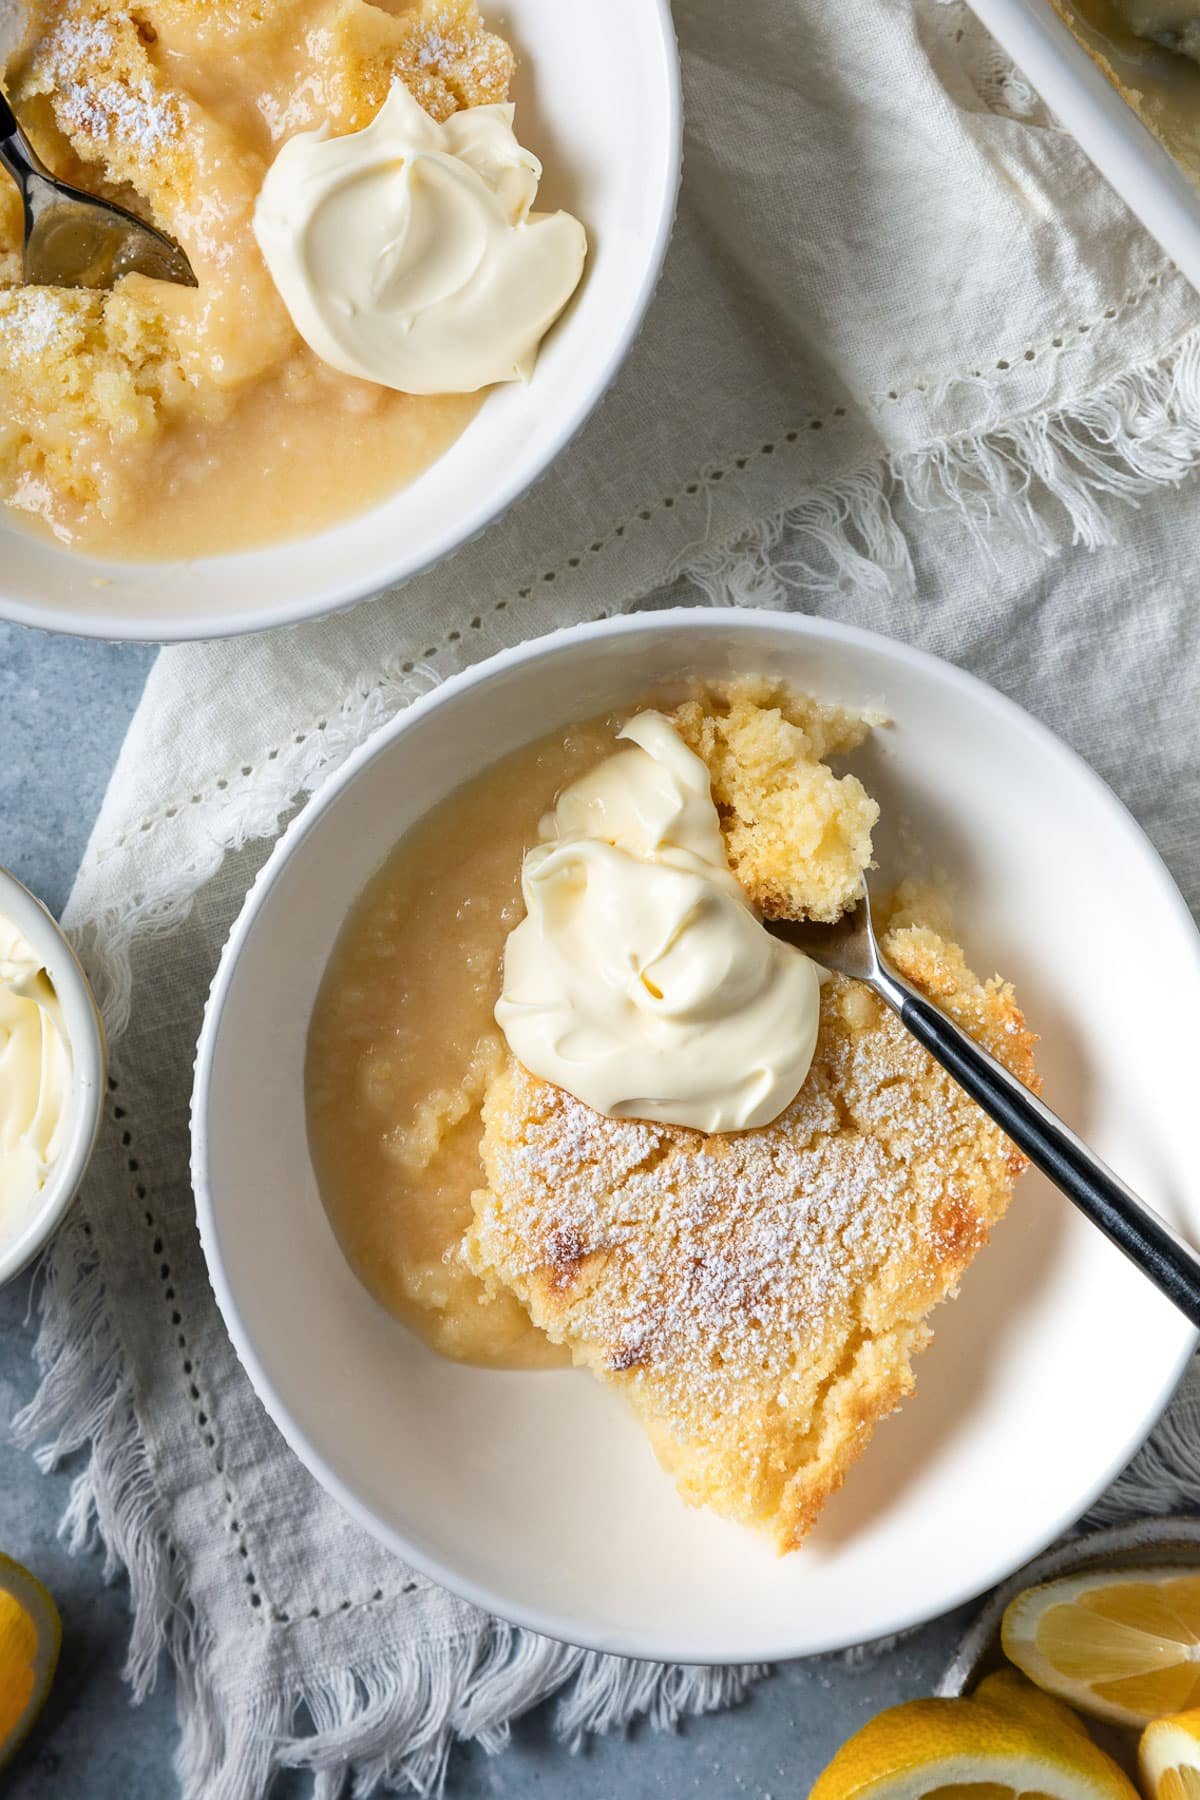
- A simple and nostalgic family pudding – an old-fashioned favourite, complete with a dollop of cream or a big scoop of vanilla ice cream for the ultimate comfort dessert.
- Freezer friendly – perfect for making ahead.
While we’re talking lemon desserts, you’ll love this lemon syrup cake, smooth lemon butter and lemon curd slice!
For more delicious pudding ideas, try this self-saucing chocolate pudding, apple sponge pudding and sticky date pudding!
Lemon delicious ingredients
** This post contains tips and instructions to achieve the best possible results. This photo is a great guide for when you are in the supermarket, but for full ingredient quantities and methods, please scroll down to the detailed recipe card below!
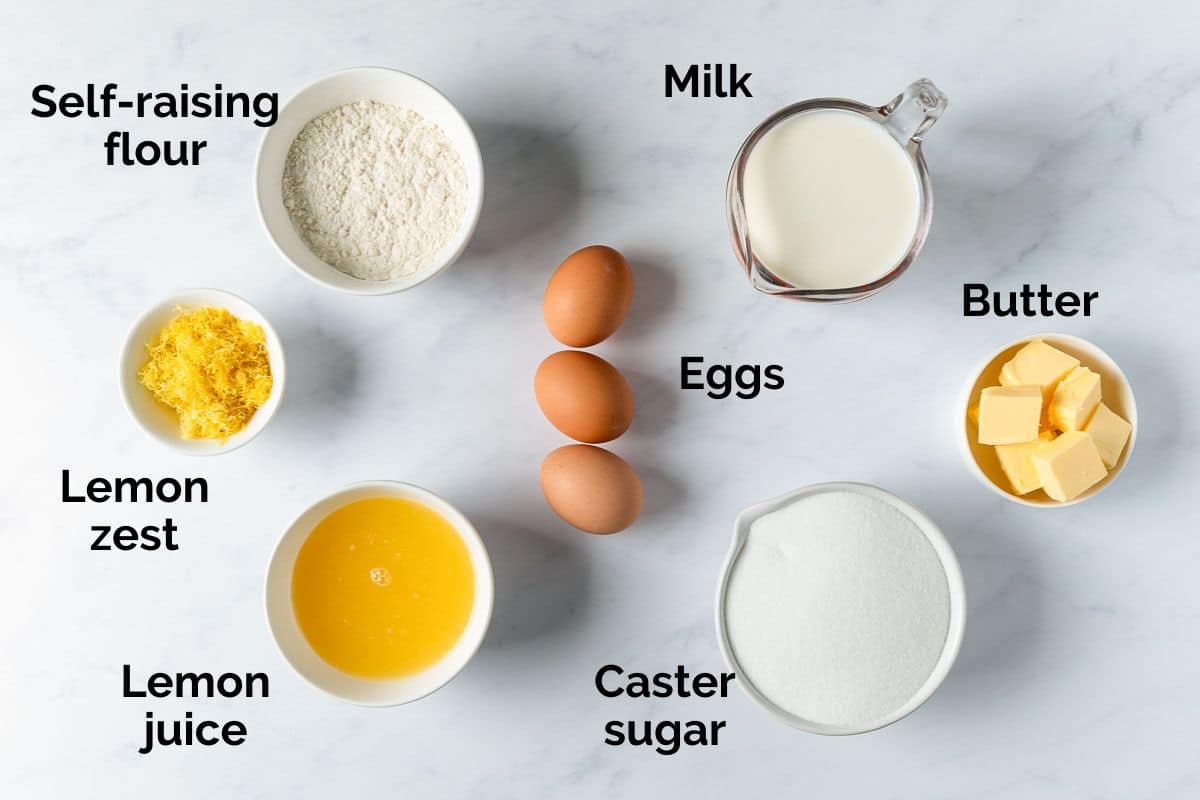
- Lemons – lemon delicious pudding calls for both lemon juice and lemon zest. So fresh lemons are recommended, for optimal flavour. For this recipe, you’ll need around 3-4 medium-sized, juicy lemons. Meyer lemons are best, for their tart-sweet flavour and high juice content, but any lemons can be used.
- Eggs – separate your eggs before beginning and set them aside, ready to use. The egg yolks are used to form the cake batter. And the egg whites are whipped and folded in separately, to help the pudding rise and to create the two distinct pudding layers. Make sure the eggs are at room temperature before starting.
- Milk – I recommend whole, full-fat milk for the richest taste and texture, but low-fat milk can also be used if this is what you have.
- Caster sugar – superfine caster sugar is used to add sweetness to the cake batter. Be sure to use the full amount, or the pudding will be quite tart and the pudding won’t thicken properly.
- Butter – make sure it’s softened at room temperature, before beating.
- Self-raising flour – self-raising flour is a mixture of plain flour, baking powder and salt that gives the pudding a lovely, fluffy texture. If you don’t have self-raising flour, you can make your own by mixing 2 teaspoons of baking powder into every 1 cup of plain flour, along with a pinch of salt. Be sure to weigh the flour, for accuracy.
- Icing sugar – for dusting over the top of the finished pudding, before serving. Entirely optional, but highly recommended!
Step by step instructions
Full ingredient notes and quantities can be found in the detailed recipe card below. But here is a brief overview of what you can expect;
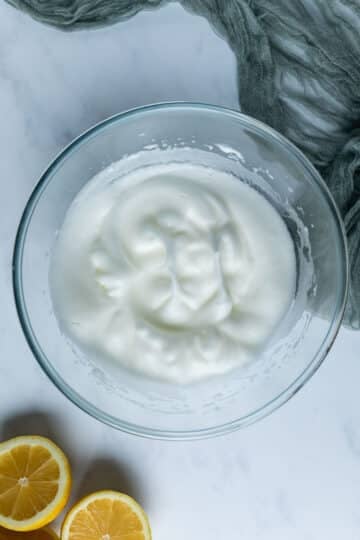
- Step 1: Beat the egg whites in a clean, dry bowl until stiff peaks form. Set aside.
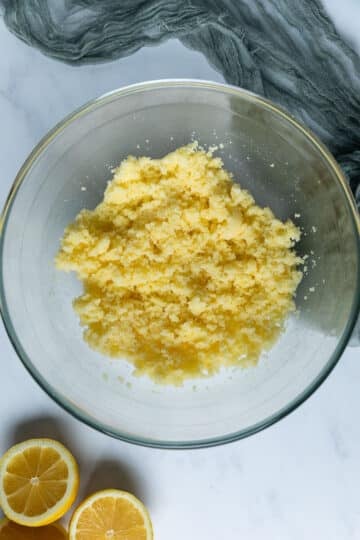
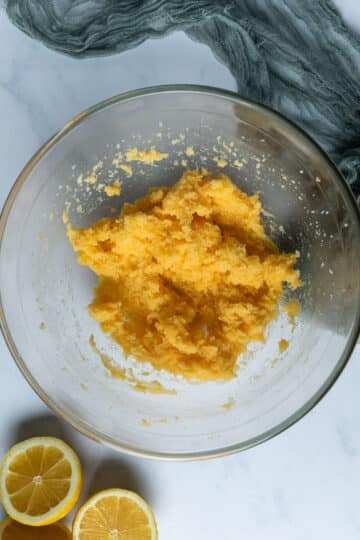
- Step 2: Beat the butter, caster sugar and lemon zest together until pale.
- Step 3: Continuing to beat, add the egg yolks, one at a time, until combined.
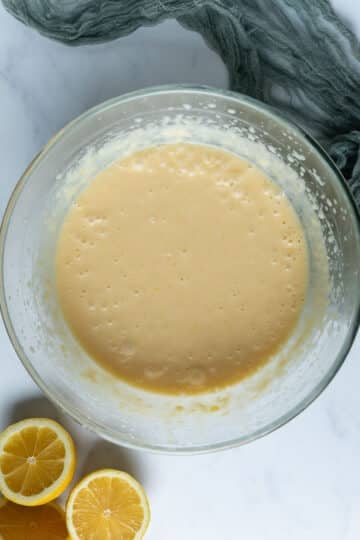
- Step 4: Add the milk and self-raising flour and carefully beat on low speed, until combined. While beating, carefully add the lemon juice, until just combined.
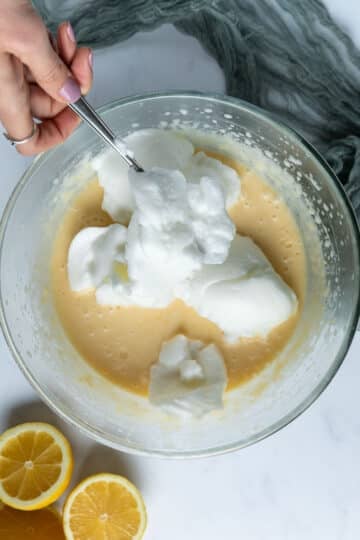
- Step 5: Gently fold in the beaten egg whites. Do this slowly and carefully, so as not to knock the air out of the egg whites.
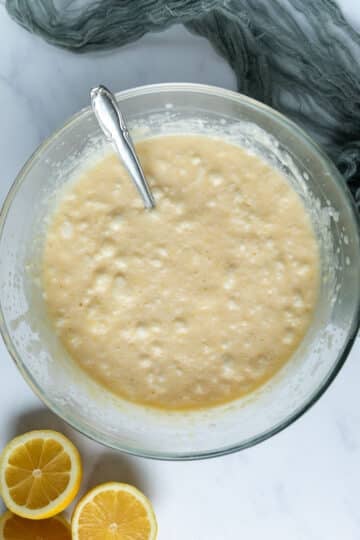
- Step 6: When the egg whites are incorporated, the batter should nearly double in volume and be foamy, creamy and mostly smooth (a few small lumps are ok).
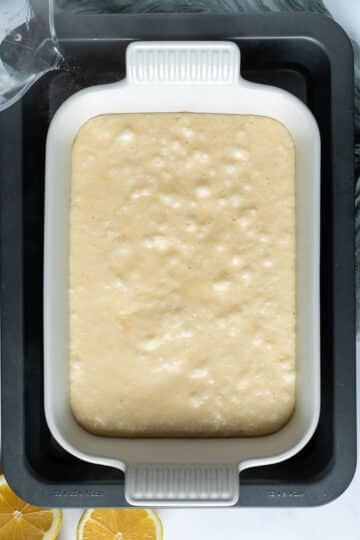
- Step 7: Carefully pour the batter into a prepared baking dish and gently place the pudding dish into another deep baking tray. Create a water bath by gently pouring boiling water into the bottom tray, about halfway up the sides of the pudding dish.
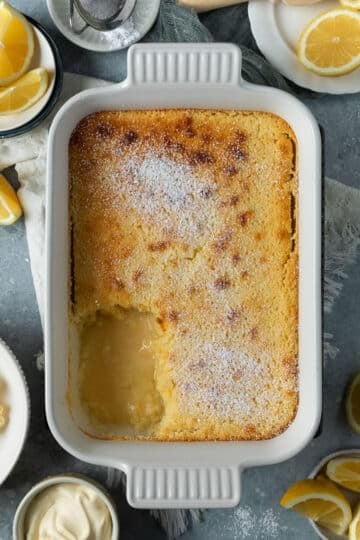
- Step 8: Bake according to the instructions in the recipe card, until lightly golden on top, fluffy and cooked through in the middle.
Leave the pudding in the dish for 10 minutes before serving. This will allow the sauce to thicken. Decorate with a dusting of icing sugar over the top and add ice cream or a dollop of cream when serving.
Expert tips
- Use a scale to measure your flour. Too much flour can lead to the pudding being too dense and thick and the layers won’t be as distinct. If you don’t have a scale, be sure to fluff your flour with a spoon and scoop it into the measuring cup before levelling it off with a knife. This is the best method to measure flour without packing too much into the cup.
- Room temperature ingredients – make sure the ingredients (butter, eggs, milk, lemon juice) are at room temperature. If they’re cold, they will solidify the butter and deflate the egg whites.
- If you forgot to remove your eggs from the fridge, you can quickly bring them to room temperature by placing them in a bowl and covering them with warm water for 5 minutes. Room temperature eggs will incorporate more easily into the batter, making a fluffier pudding.
- It’s easier to zest a lemon before juicing, so be sure to zest them first.
- Don’t overmix the batter. Gently fold the egg whites into the cake batter and don’t overmix, or the air will be pushed out and the cake won’t rise as nicely. A few lumps of egg whites are perfectly fine.
- Use any oven-safe casserole or pudding dish that has at least a 6-cup capacity (1.5L). Don’t use a dish with a removable bottom or the batter will leak!
- Don’t skip the water bath. A water bath creates a moist and humid environment for the pudding to cook. This is imperative for its soft and tender pudding-like texture.
- Test the pudding by inserting a skewer or toothpick into the middle. It should come out mostly clean, with a few crumbs sticking.
- Once the pudding has been removed from the oven, let it sit for 10 minutes before serving. The sauce will continue to thicken during this time.
Lemon delicious FAQs
Leftover lemon delicious can be stored in the fridge, covered with plastic wrap for 3-4 days.
Lemon delicious can be frozen in freezer-safe containers for up to 3 months. Allow the pudding to cool completely and store whole, or in individual serves. Thaw in the fridge overnight before reheating.
To reheat individual serves, place bowls of the pudding into the microwave one at a time and heat until steaming hot all the way though. The entire pudding can also be reheated in a microwave-safe dish, until steaming hot.
Dust the top of the pudding with icing sugar and serve with a large scoop of vanilla ice cream, a dollop of double cream or some smooth vanilla custard. You’ll love the contrast between hot and cold!
Related recipes
Tried this recipe? Please leave a star ⭐⭐⭐⭐⭐ rating or leave a review below and let you know how you went!
Hungry for more? Subscribe to my newsletter and follow along on Facebook, Instagram and Pinterest for the latest recipes and news.

Lemon Delicious Pudding (Self-Saucing)
Equipment
- baking dish (at least 6 cup (1.5L) capacity)
- baking tray with sides – for the water bath. The baking dish used for the pudding needs to fit flat inside the baking tray. The sides should be at least 3cm in height.
- electric beaters
Ingredients
- 3 large eggs – at room temperature
- 80 grams butter – unsalted, softened at room temperature. Plus a little extra for greasing the baking dish.
- 315 grams caster sugar
- zest of 1-2 lemons – use 2 lemons if you want it to be extra lemony
- 1 ½ cups milk
- 80 grams self-raising flour
- ⅔ cup lemon juice – freshly squeezed lemon juice
To serve
- icing sugar for dusting
- vanilla ice cream or double cream
Instructions
- Pre-heat oven to 170°C/338℉. (150℃ fan forced). Grease a 6-cup capacity (1.5L) baking dish with butter.
- Place the baking dish into a large baking tray with sides that are at least 3 cm deep. **The pudding will be baked in a water bath inside the bottom baking tray.
- Separate the eggs, placing the egg whites into a mixing bowl and the yolks in a separate bowl or jug.
- Using electric handheld beaters, beat the egg whites on high speed until stiff peaks form. Set aside.
- Place the butter, caster sugar and lemon zest into a mixing bowl and beat until pale and combined.
- Add the egg yolks, one at a time, beating between each addition, until well combined.
- Add the milk and self-raising flour and carefully beat on low speed, until the mixture is smooth and just combined.
- Add the lemon juice and beat on low speed, until just combined.
- Gently spoon the beaten egg whites over the top of the batter. Working slowly and carefully so as not to deflate the egg whites, gently fold the egg whites into the batter until combined (a few small lumps are ok). The mixture should almost double in volume and become thick, foamy and airy. Don't overmix!
- Carefully pour the pudding batter into the prepared baking dish.
- Add water for the water bath: without splashing into the pudding or baking dish, carefully pour boiling water into the bottom baking tray, until it reaches about halfway up the outer sides of the baking dish.
- Carefully place the baking tray into the oven. Be mindful of the boiling water when you do this.
- Bake for 40-45 minutes, until the pudding is lightly golden on top and fluffy in the middle.
- Remove from the oven and allow the pudding to sit in the dish for 10 minutes before serving. The sauce will continue to thicken during this time. Decorate the top of the pudding with a dusting of icing sugar and serve warm with double cream or ice cream.
Notes
- I highly recommend using a scale to measure your flour. Too much flour can lead to the pudding being too dense and thick. If you don’t have a scale, be sure to fluff your flour with a spoon and scoop it into the measuring cup before levelling it off with a knife. This is the best method to measure flour without packing too much into the cup.
- Room temperature ingredients – make sure the cold ingredients (butter, eggs, milk) are at room temperature. If they’re cold, they will solidify the butter and possibly deflate the egg whites.
- If you forgot to remove your eggs from the fridge, you can quickly bring them to room temperature by placing them in a bowl and covering them with warm water for 5 minutes. Room temperature eggs will mix more easily into the batter.
- It’s easier to zest a lemon before juicing, so be sure to zest them first.
- Don’t overmix the batter. Gently fold the egg whites into the cake batter and don’t overmix, or the air will be pushed out and the cake won’t rise as nicely.
- Use any oven-safe casserole or pudding dish that has at least a 6-cup capacity (1.5L).
- Don’t skip the water bath. A water bath creates a moist and humid environment for the pudding to cook. This is imperative for its soft and tender pudding-like texture.
- Test the pudding is ready by inserting a skewer or toothpick into the middle. It should come out mostly clean, with a few crumbs sticking.
- Once the pudding has been removed from the oven, let it sit for 10 minutes before serving. The sauce will continue to thicken during this time.
- Storage; Leftover lemon delicious can be stored in the fridge, covered with plastic wrap for 3-4 days.
- Freezing; Lemon delicious can be wrapped well and frozen in freezer-safe containers for up to 3 months. Allow the pudding to cool completely and store whole or in individual serves. Thaw in the fridge overnight before reheating.
- Reheating; To reheat individual serves, place bowls of the pudding into the microwave one at a time and heat for 45-60 seconds, or until steaming hot all the way though.
- Please note that the nutrition information is based on the pudding being divided into 6 bowls, with one bowl being one serve. The nutritional information is an estimate only and does not take into account any additional toppings or sides served with the pudding.
- This recipe is made using Australian cups and spoon measurements. Any reference to cups or spoons in this recipe is in Australian metric. Due to cup sizes varying from country to country, I advise adjusting if necessary.
Nutrition
Are you following us on Facebook, Instagram and Pinterest?
Update Notes: This recipe was originally published in April 2023, but was re-published with new information and photos in February 2025.


Leave a Reply