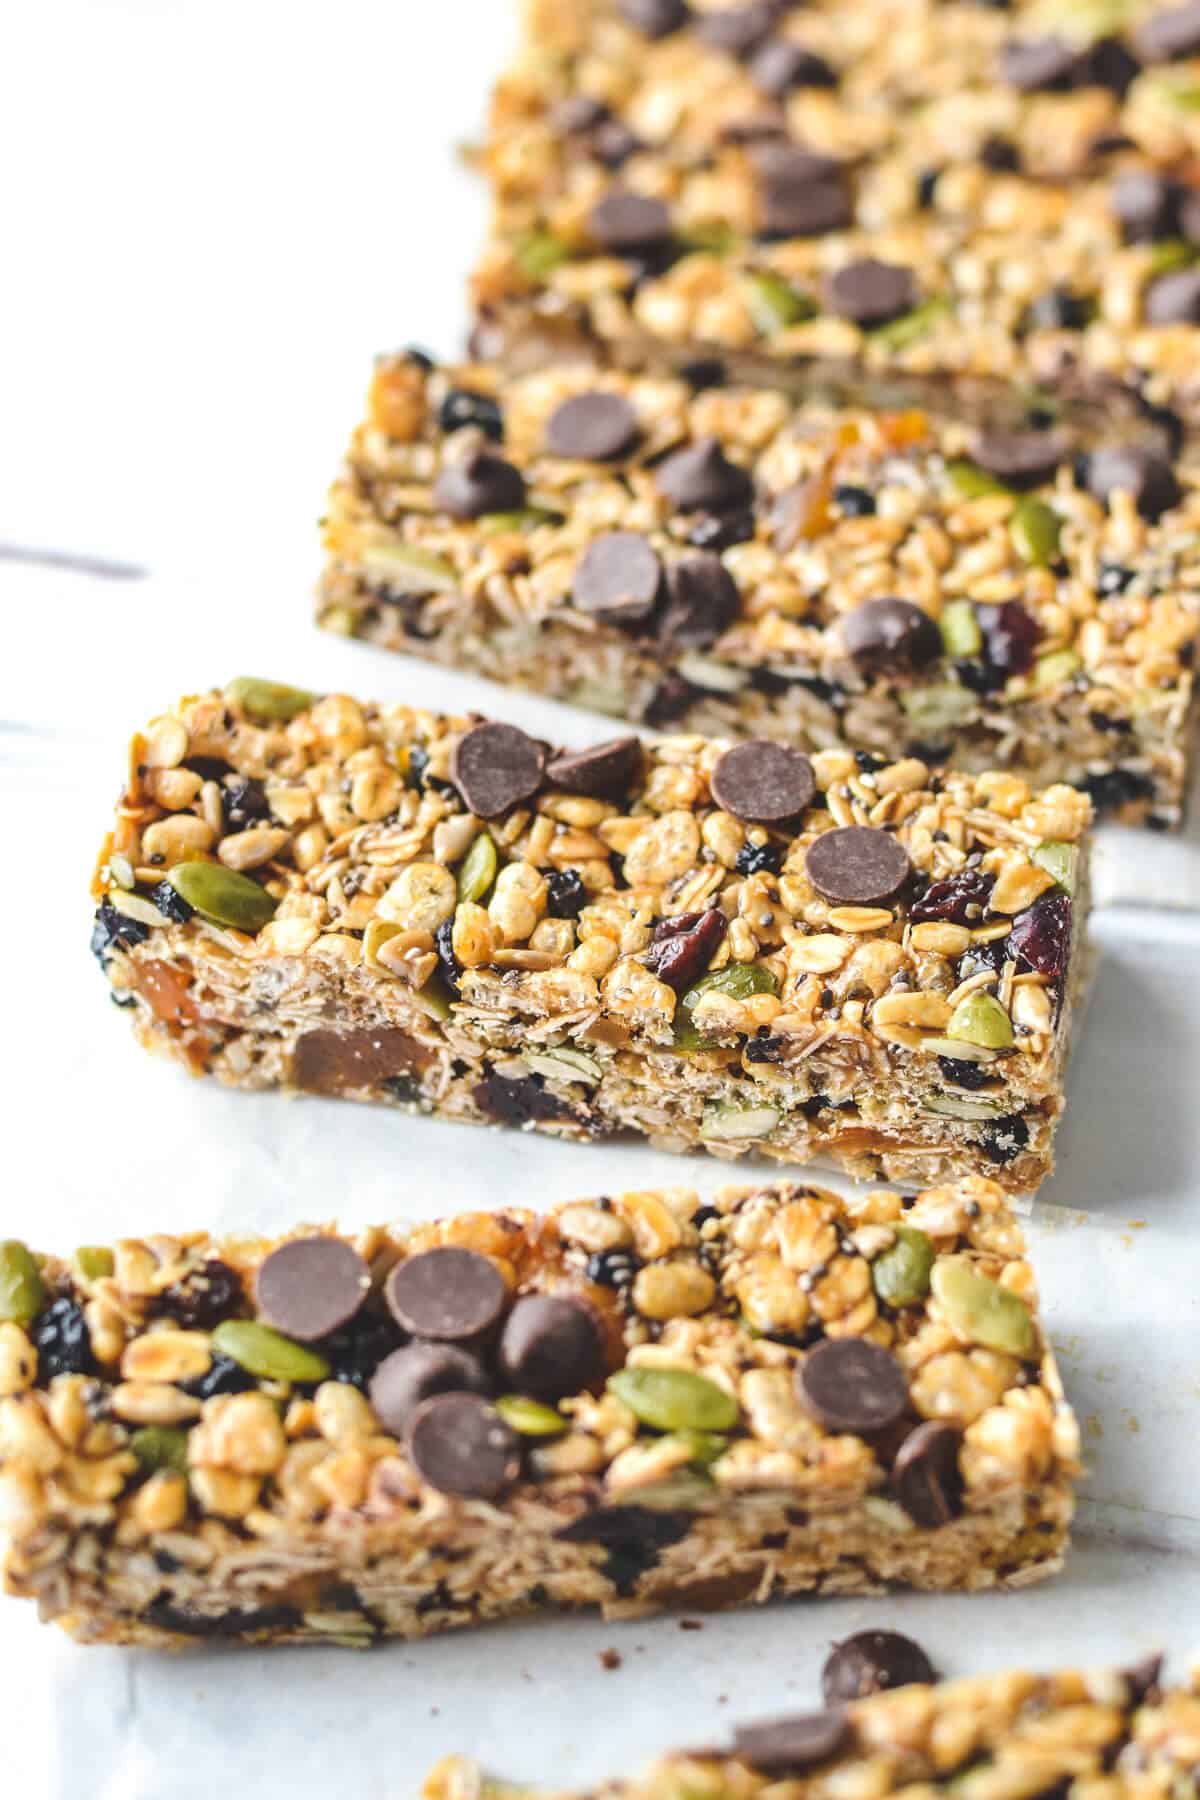
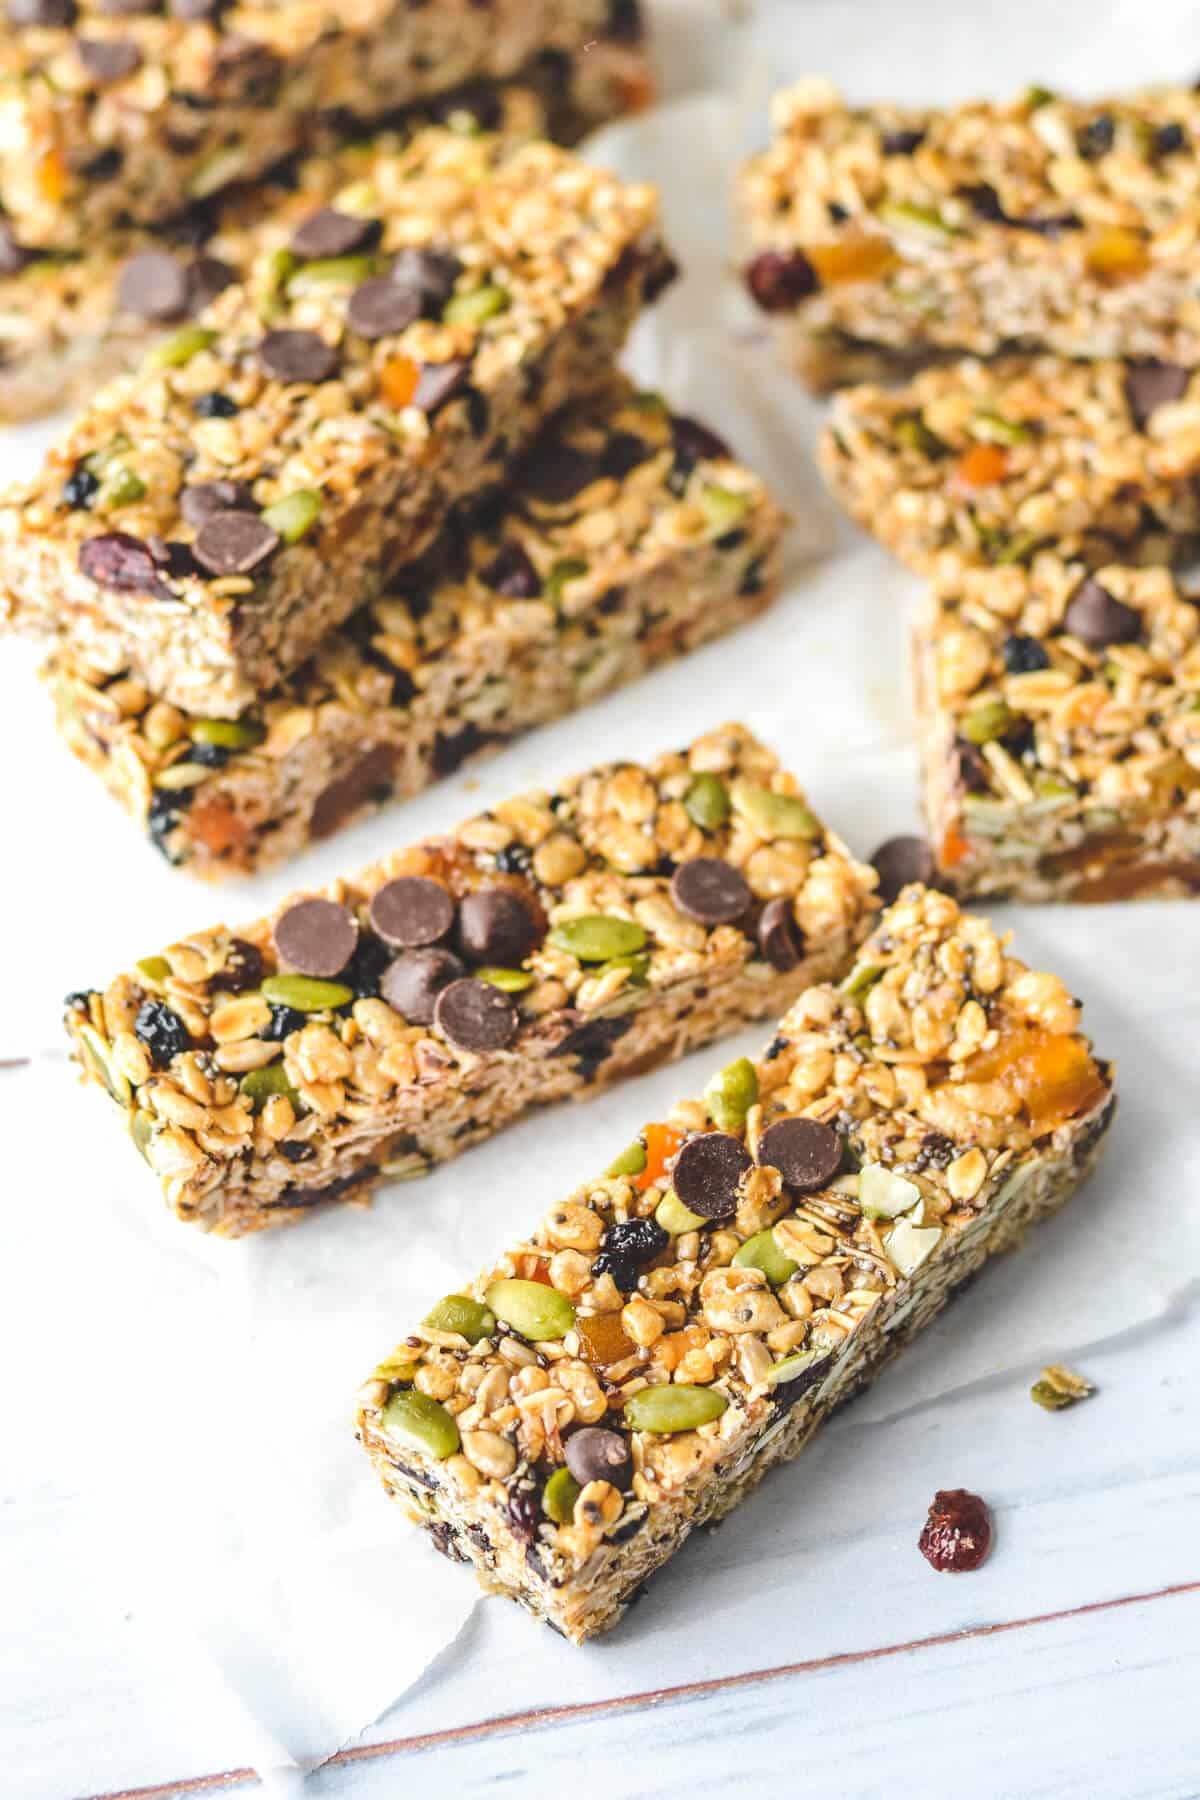
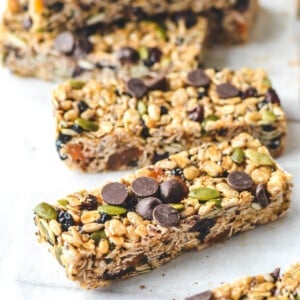
Packed full of chewy dried fruit and crunchy seeds, these delicious homemade muesli bars make a healthy snack that everyone will love! There’s no baking required, they are quick and easy to prepare with basic pantry ingredients and they are a guaranteed lunchbox favourite! 🙂
Why you’ll love this recipe
- Healthy. Who needs packaged bars filled with additives when you can easily make your own at home? These bars are full of nutritious ingredients designed to keep you full till your next meal. And making them from scratch means you know exactly is going into them.
- Dietary restriction friendly. These bars are nut-free, egg-free and can also be made vegan, if required.
- Quick and easy to make. You can even recruit the kids to help!
- So full of flavour, you’ll never buy store-bought bars again!
- Refined sugar free. Low GI and high in protein.
- No bake. Skip the oven and allow these bars to set in the fridge or freezer.
- They can pass for a quick breakfast, lunchbox addition or healthy snack on the go.
- Freezer-friendly. Make a double or triple batch and keep them in the fridge or freezer so you’ll always have some ready to go.
Ingredients you will need
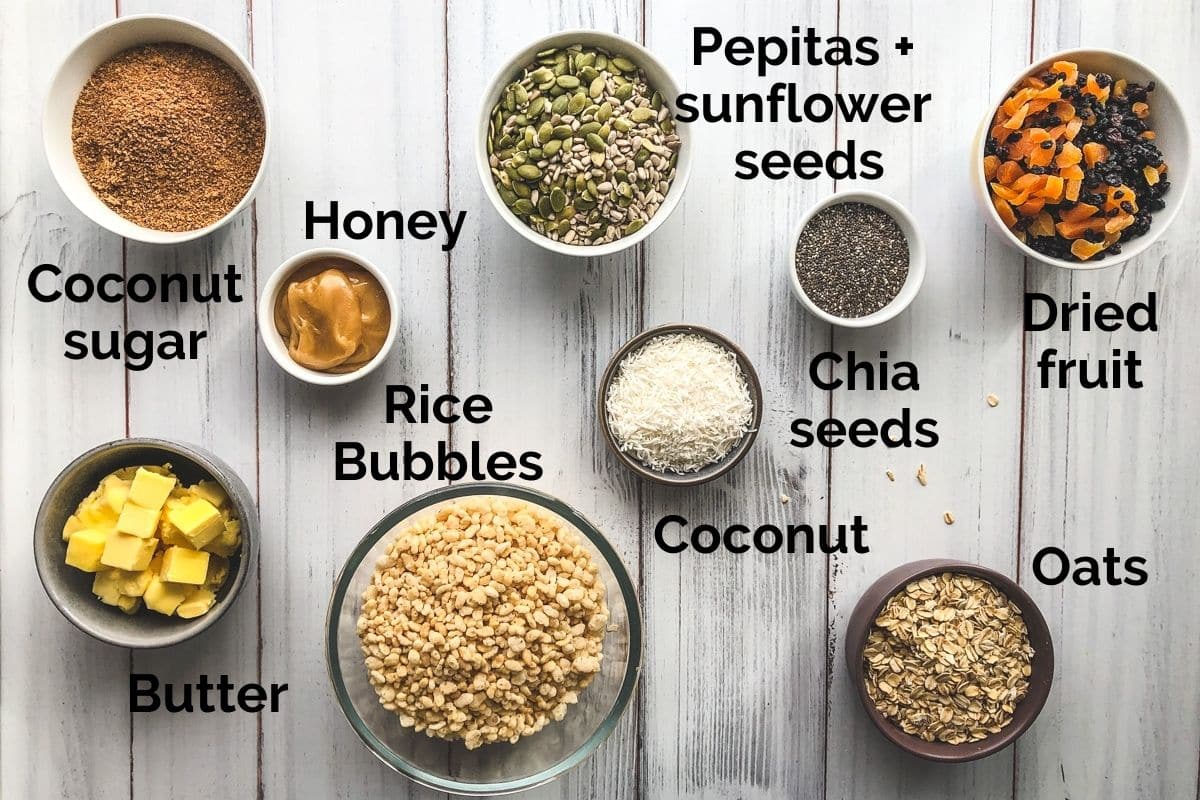
** This post contains tips and instructions to achieve the best possible results. The photo above is a great guide for when you are in the supermarket, but for full ingredient quantities and methods, please scroll down to the detailed recipe card below!
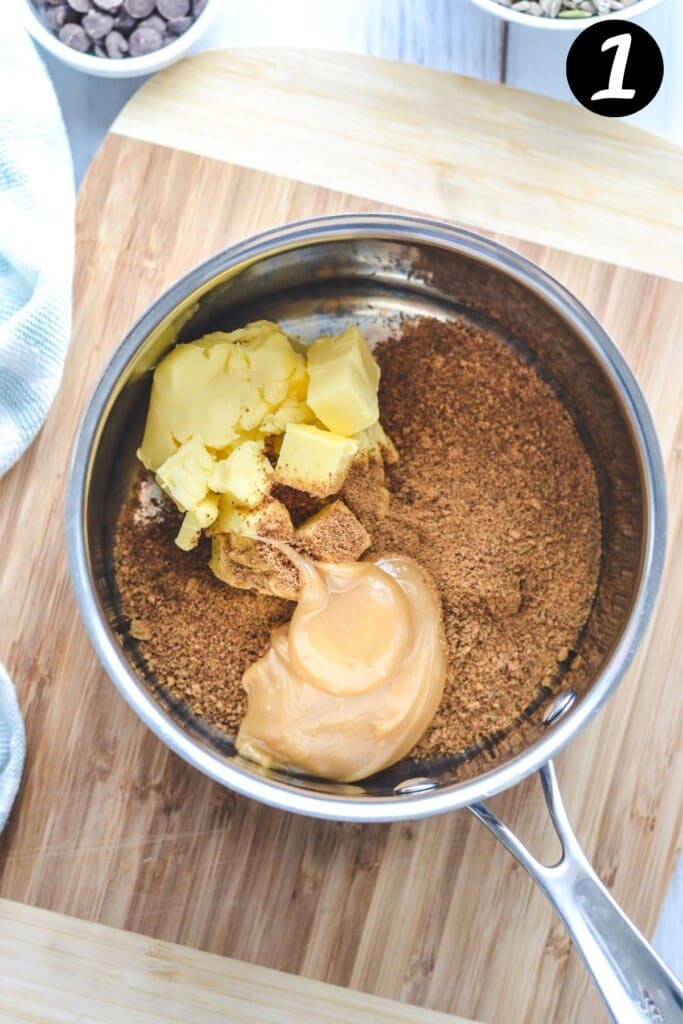
All of the ingredients in these bars are bound together by creating a sticky mixture of coconut sugar, honey and butter.
- Coconut sugar; to bind and add sweetness (but not too much sweetness!). It can be found in most health food stores and supermarkets. Alternatively, you could use brown sugar.
- Honey is used for flavour and as a sticky binding agent. If you want vegan granola bars, swap the honey for rice malt syrup or maple syrup.
- Butter is used for flavour and as the main binding agent. For dairy-free muesli bars, swap the butter for coconut oil. The bars will be a little looser and taste slightly different if made with coconut oil, but will still hold together.
- Oats give the bars a lovely, chewy texture and provide a range of health benefits. Regular or rolled oats can be used.
- Seeds. A mix of sunflower seeds, pepitas (pumpkin seeds) and chia seeds add healthy fats, protein and crunch. Find them all in your local supermarket.
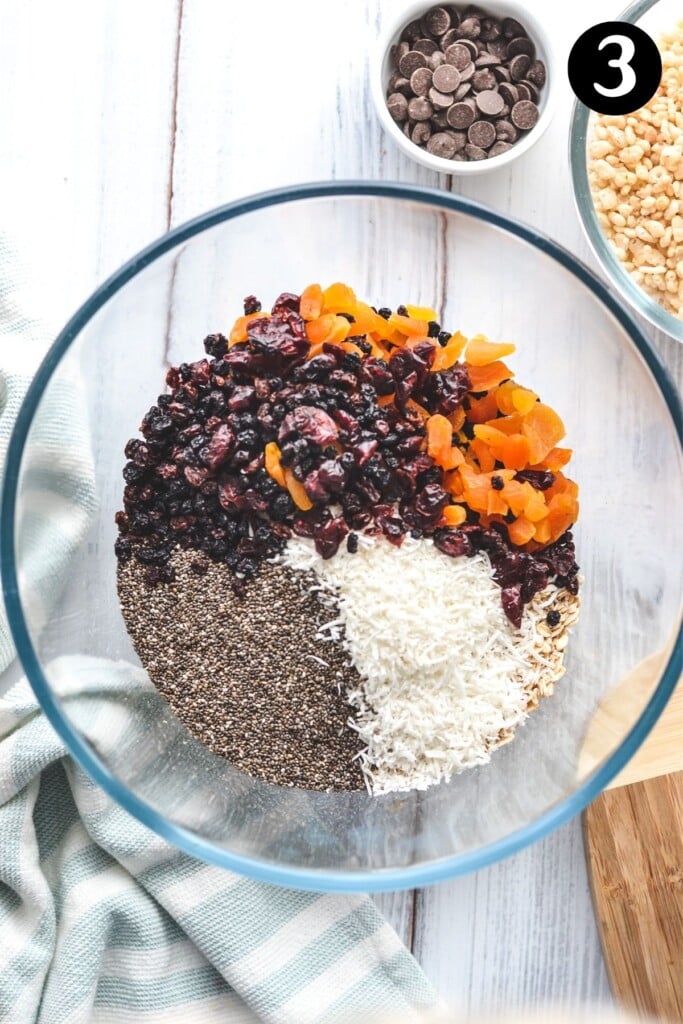
- Dried fruit. Use a mix of tart and sweet dried fruits. Currants, dried cranberries and apricots are a great combo. But sultanas, dried blueberries or even dried apples work well too.
- Rice Bubbles (Rice Krispies) add an extra layer of chewiness to the bars.
Step by step guide
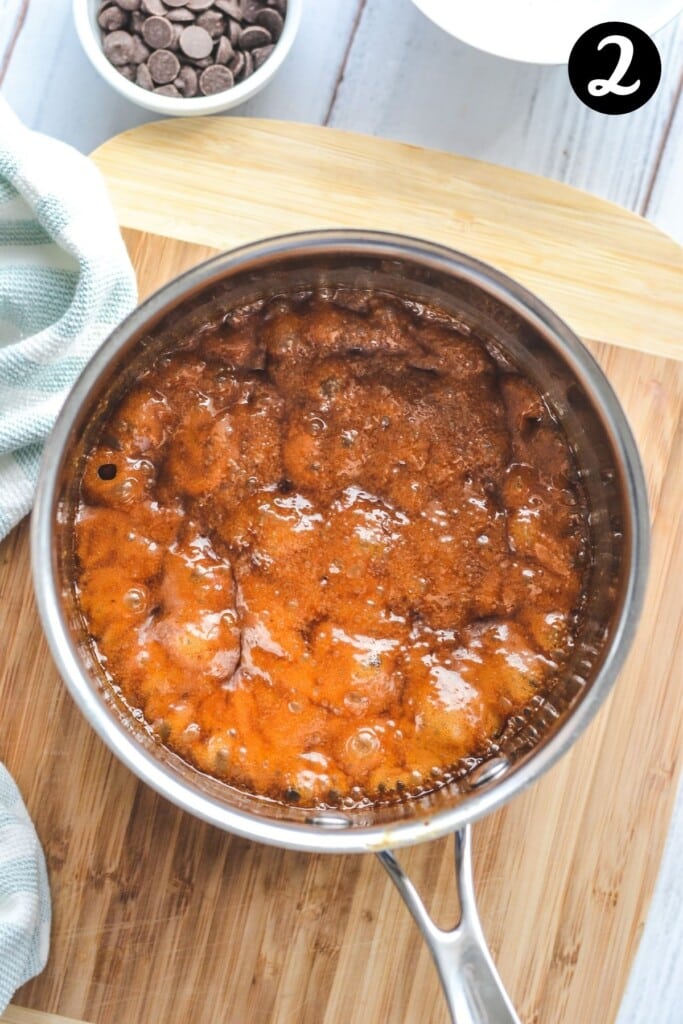
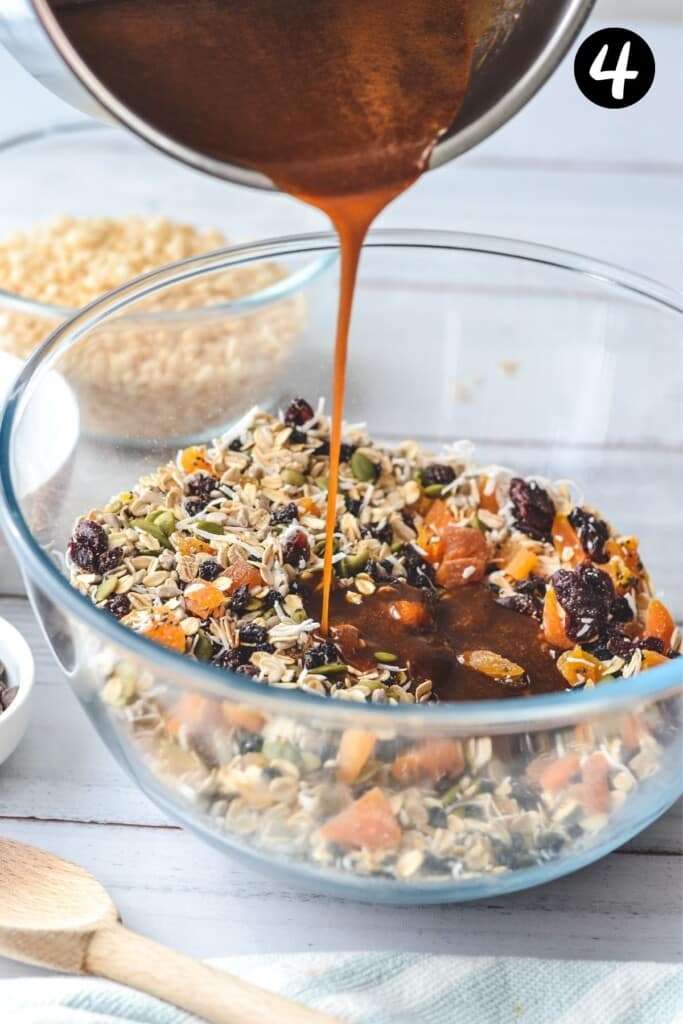
- Make the sticky binding mixture by melting the butter, honey and coconut sugar and gently simmer together in a pan until combined and bubbly.
- Mix the muesli bar ingredients together in a large bowl.
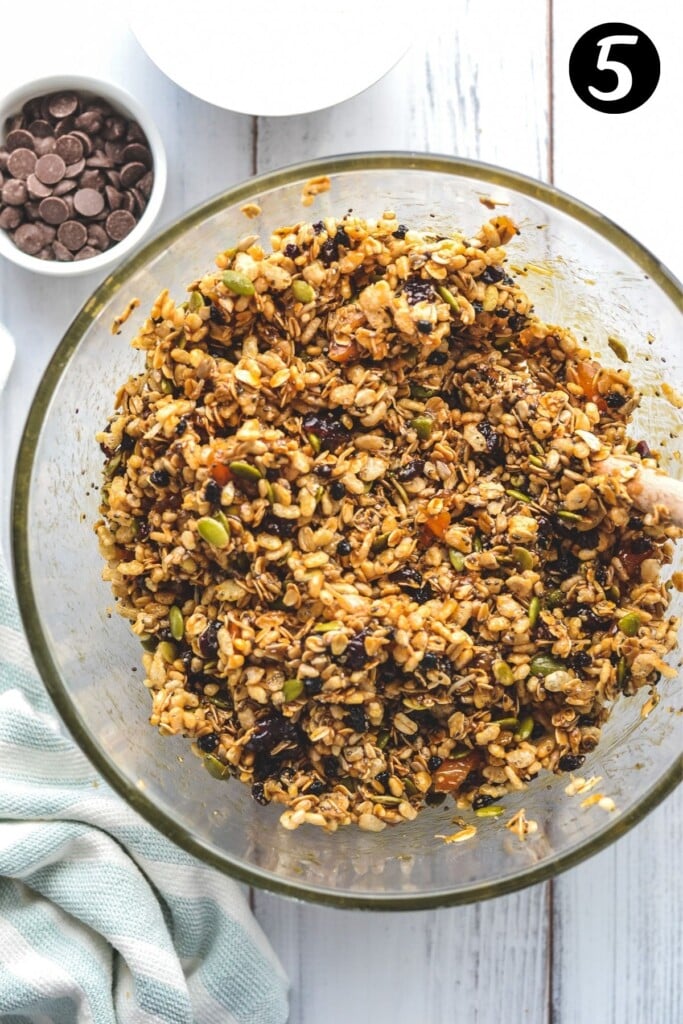
- Pour the hot binding mixture into the dry ingredients and stir until completely combined.
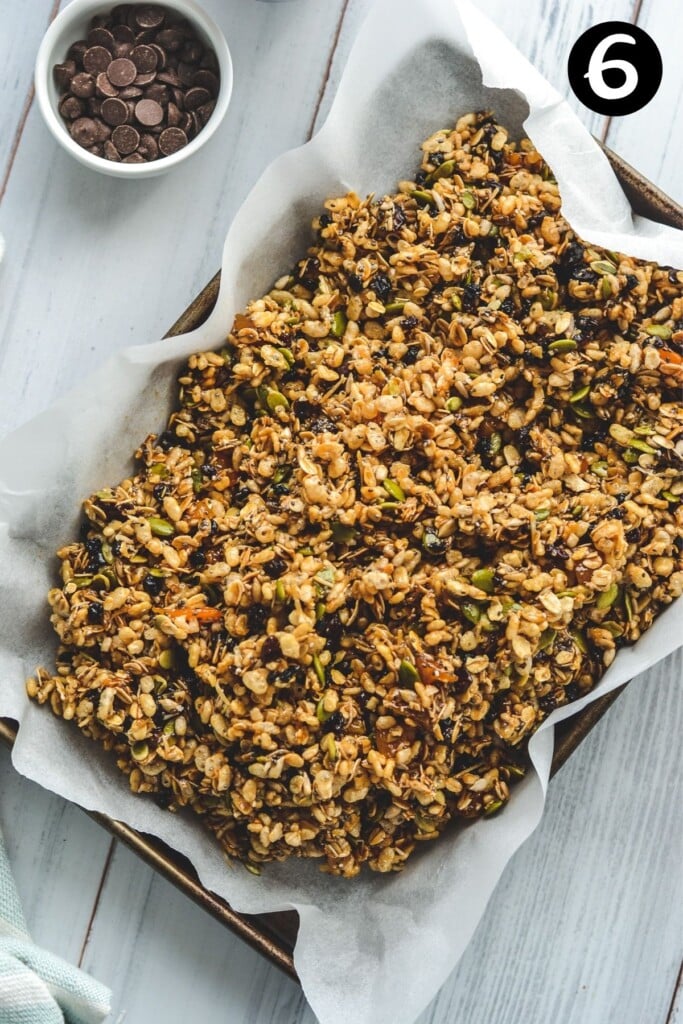
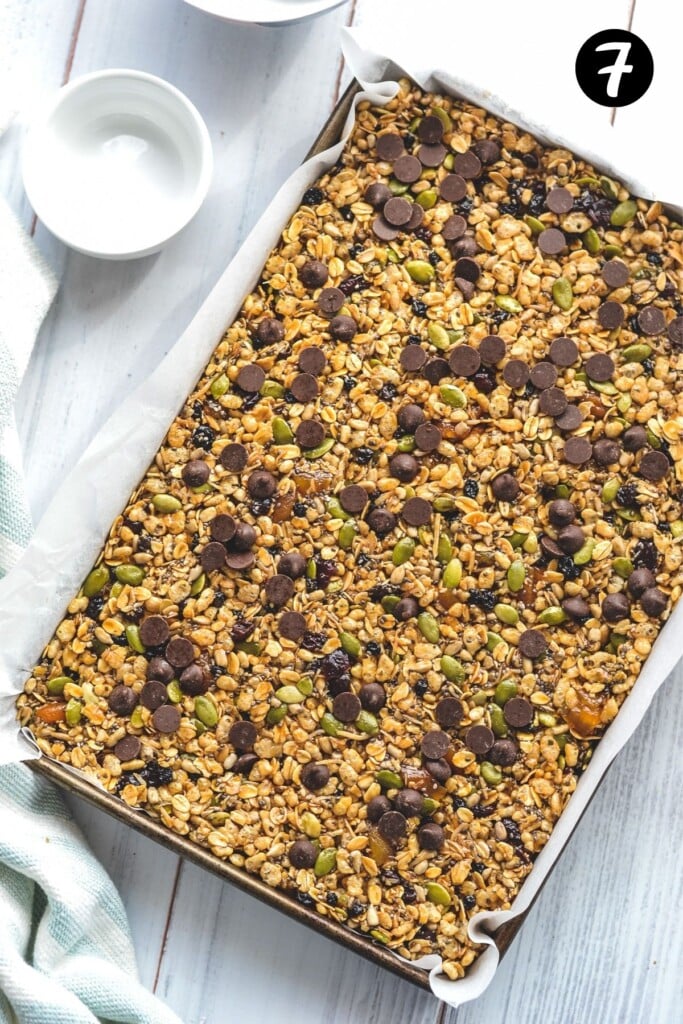
- Press the mixture into a lined 20 x 30 cm (8 x 12 “) slice tin. **Be sure to press the mixture in very firmly to help it hold together. Use a metal spoon or the bottom of a cup with a layer of baking paper over the top to prevent sticking. Top with chocolate chips (optional, but recommended!) and;
- Set in the fridge or freezer for at least an hour before slicing.
Full ingredient list and instructions are found in the recipe card below.
Expert tips
- This recipe is versatile, so you can easily mix and match your favourite dried fruits, flavours, seeds or chocolate. Just swap them for equal quantities of the existing recipe.
- Although it is not required, the seeds and coconut can be quickly toasted together in a frying pan over medium-high heat before stirring them through the fruit mixture.
- Be sure to press the mixture very firmly into the tin to help everything bind together. Use a metal spoon or use your hands or the bottom of a cup with a layer of baking paper in between.
- Don’t cut the chilling time short. It may be tempting to slice at eat these bars right away, but in order for them to become chewy and hold firmly together, they need to chill. Pop the pan into the fridge or freezer for at least an hour before slicing.
- Storage; keep these bars in the fridge, stored in an airtight container for up to a week. You can also pop them in the freezer and keep them for 3 months. Separate any layers with baking/paper to prevent sticking.
- For lunchbox prep, make a double or triple batch and keep them in the freezer, ready to grab-and-go for the school term ahead. They will thaw in lunchboxes by snack time!
Add-in ideas
Keep the recipe as is, or try adding some of the following flavours;
- Dried cranberries or blueberries. Include these in the quantities of dried fruit recommended below.
- Sesame seeds. Add ¼ cup to the mixture.
- Chocolate chips. These are optional, but can be sprinkled over the top and pressed into the slice at the end.
- Cinnamon. Add ½ tsp or to taste for a lovely warm flavour.
- Vanilla. 1 teaspoon added to the honey mixture adds extra flavour.
- Linseed meal. Add up to ¼ cup into the seed mixture.
- Cacao nibs can be sprinkled over the top at the end.
- Hemp seeds. Add up to ¼ cup to the seed mixture.
- Freeze dried strawberries. Include these in the quantities of dried fruit recommended below.
- 2 tbs tahini or sunflower butter. Add this to the honey mixture before pouring it over the muesli mixture.
FAQs
They’ll keep covered in the fridge for a week, or can be frozen in an airtight container for up to 3 months. You can eat them straight from the fridge, but let them thaw for 10-15 minutes if removing them from the freezer.
In this recipe, coconut sugar, honey and butter is melted together to form a sticky “glue” that holds the bars together when set in the fridge. Alternatively, you can use equal quantities of brown sugar, rice malt syrup and coconut oil.
If they are placed in airtight lunchboxes, homemade muesli bars don’t need wrapping. But to keep them safe for portable snacking, they can be wrapped in a piece of baking/parchment or wax paper or cling wrap.
Related recipes
Tried this recipe? Please leave a star ⭐⭐⭐⭐⭐ rating or leave a review below and let me know how you went!
Hungry for more? Subscribe to my newsletter and follow along on Facebook, Instagram and Pinterest for the latest recipes and news.
Homemade Muesli Bars
Ingredients
- 130 grams butter (½ cup)
- ¾ cup coconut sugar (100 grams)
- 4 heaped tbsp honey
- ½ cup pepitas
- ½ cup sunflower seeds
- 1 cup dried fruit choose a mix of your favourites; currants, apricots, cranberries, blueberries, sultanas, apples.
- ¼ cup chia seeds
- ½ cup shredded coconut
- 1 cup oats
- 2 cups Rice Bubbles also called Rice Krispies
Optional, for topping
- ⅓ cup chocolate chips dark, milk or white.
Instructions
- Line a 20 x 30cm (8 x 12") slice tin with baking paper.
- In a small saucepan, heat the butter, coconut sugar and honey over low heat, stirring occasionally.
- Mix the remaining ingredients in a large mixing bowl and stir to combine.
- Add the honey mixture to the seed mixture and stir to combine.
- Using the back of a metal spoon (or the bottom of a cup with a layer of baking paper over the slice), very firmly press the muesli bar mixture into the slice tin until firm and flat. Once the mixture has slightly cooled, press the choc chips gently into the top (they will melt otherwise!).
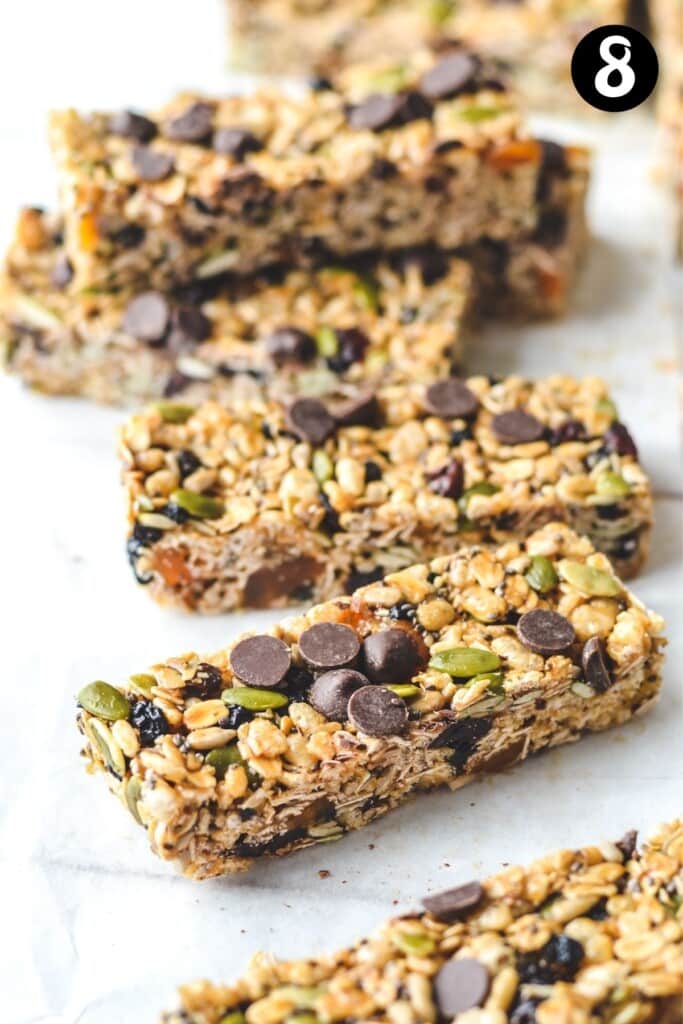
- Place the slice into the fridge or freezer for at least an hour to set before slicing. Slice into pieces of desired size (this recipe makes around 18-20 bars).
- Store in the fridge for up to 7 days, or store in an airtight container in the freezer for up to 3 months.
Notes
- This recipe is versatile, so you can easily add your favourite dried fruits, flavours, seeds or chocolate.
- Be sure to press the mixture very firmly into the tin to help everything bind together. Use a metal spoon or use your hands or the bottom of a cup with a layer of baking paper in between.
- Don’t cut the chilling time short. It may be tempting to slice at eat these bars right away, but in order for them to become chewy and hold firmly together, they need to chill. Pop the pan into the fridge or freezer for at least an hour before slicing.
- Storage; keep these bars in the fridge, stored in an airtight container for up to a week. You can also pop them in the freezer and keep them for 3 months. Separate any layers with baking/paper.
- For lunchbox prep, make a double or triple batch and keep them in the freezer, ready to grab-and-go for the school term ahead. They will thaw in lunchboxes by snack time!
- Please note that the nutrition information is based on these bars being sliced into 18 pieces, with each piece being one serve. The nutritional information is an estimate only.
- This recipe is made using Australian cups and spoon measurements. Due to cup sizes varying from country to country, I advise adjusting if necessary.
Nutrition
Update Notes: This recipe was originally published in December 2018, but was re-published with new information and photos in August 2021.


Janet says
Delicious- it was a hit for a work morning tea
Andrea Geddes says
Hi Janet! I’m so happy to hear this. Thanks for taking the time to leave a comment and let me know! Andrea.
Georgie says
A weekly staple for lunch boxes – so easy & versatile
Andrea Geddes says
Hi Georgie! I’m so happy to hear that you love these bars! Thanks for taking the time to leave a comment and let me know! Andrea 🙂
Mez says
These were delicious! I added a 1/2 tsp of salt and brought it to another level. My kids love them and so do I! Thankyou.
Andrea Geddes says
Hi Mez! I’m SO happy that you loved these bars, they are my favourite! A little salt sounds like a lovely addition. Thanks for taking the time to let me know! Andrea 🙂
Shilpi & Etienne says
These bars look great for snacking! I am constantly on the look out for healthy snack options so thanks for sharing this recipe!
Andrea Geddes says
Thanks so much, I hope you love them!