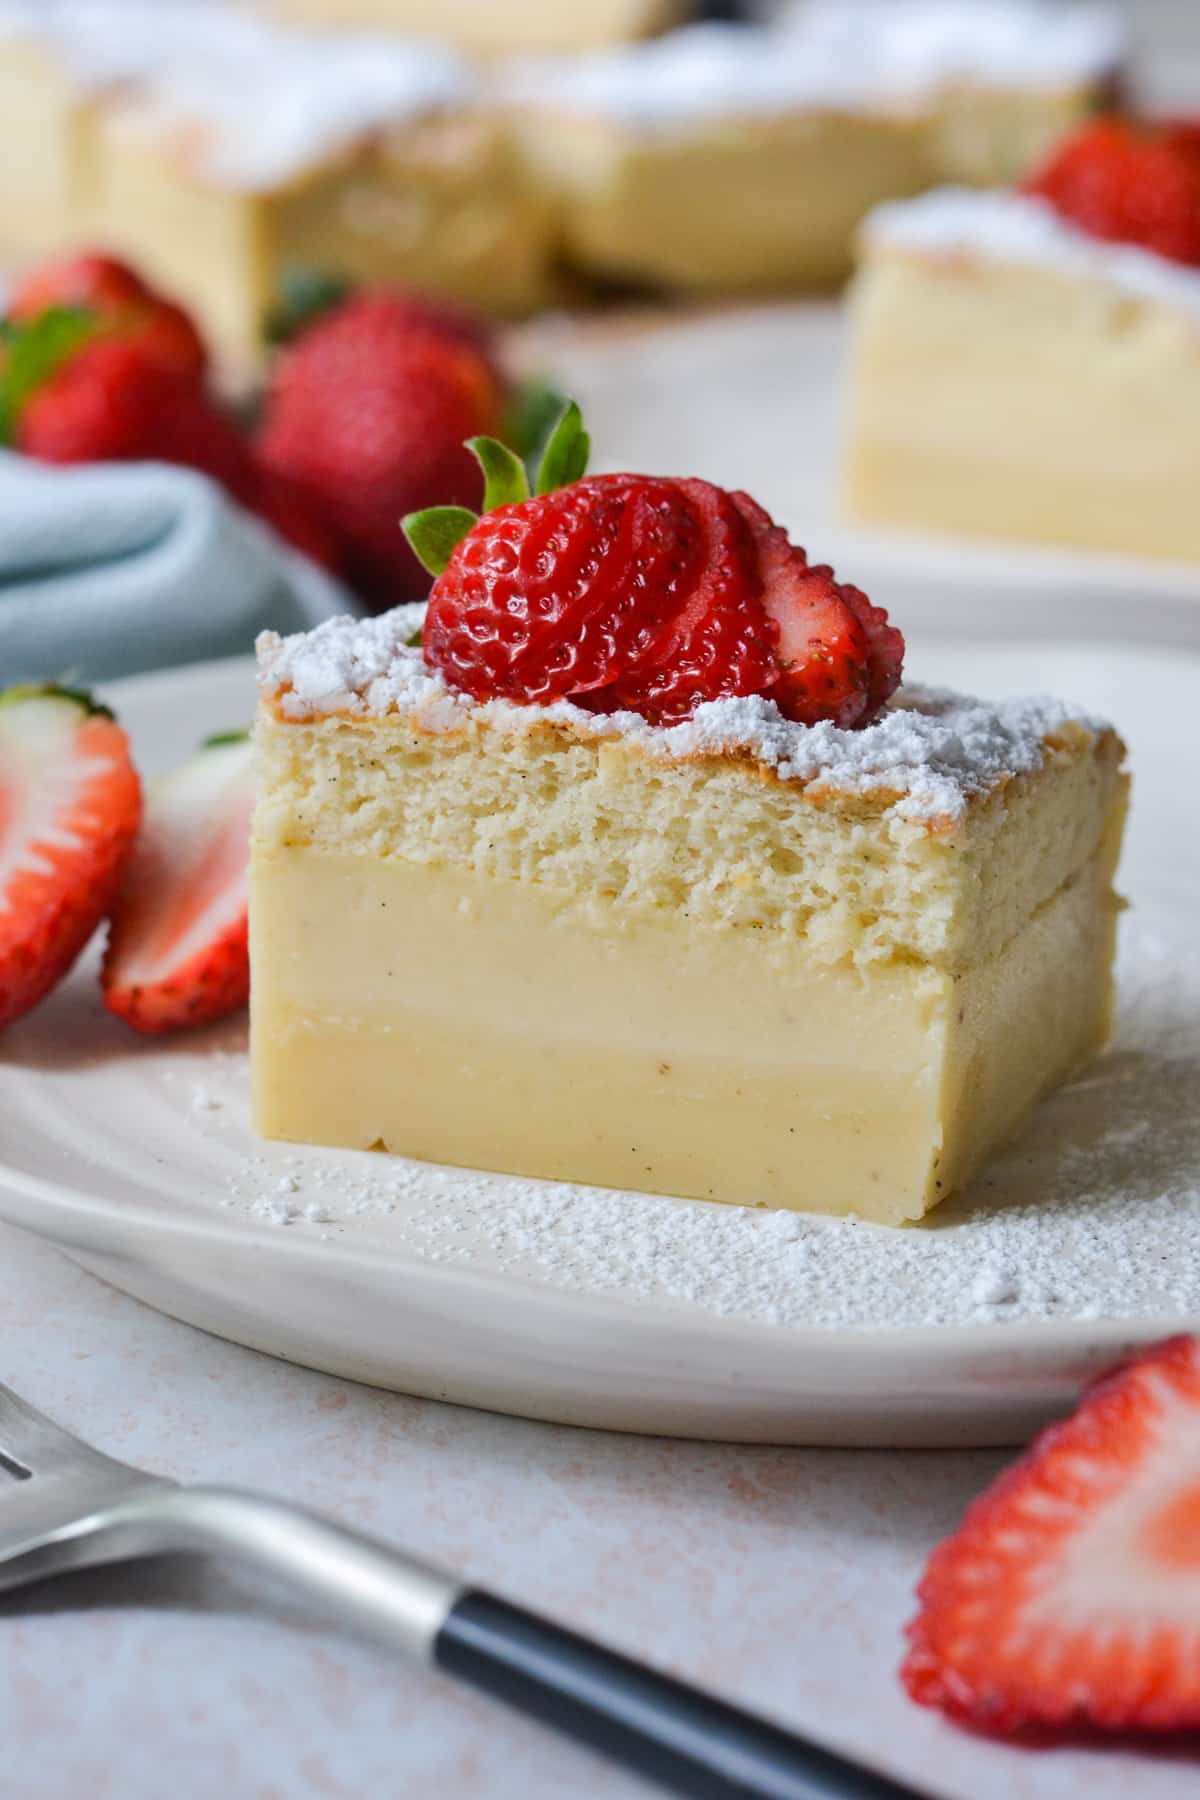
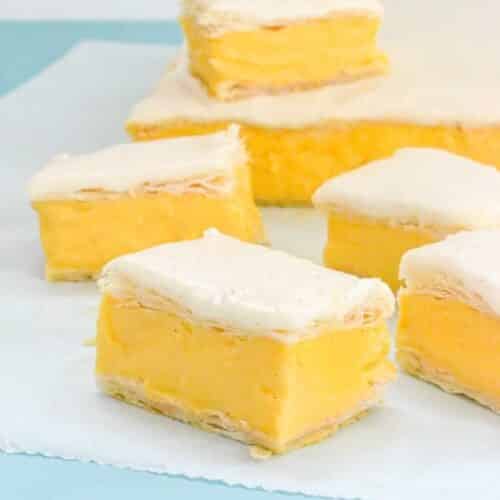
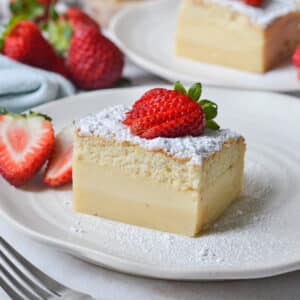
This creamy vanilla custard cake is a simple, one-pan recipe that magically transforms into 3 layers while it bakes. The top is golden brown and fluffy, similar to genoise sponge cake. The middle layer is smooth, silky custard and the base is dense and rich, like vanilla fudge. A delicious and easy one-pan dessert, with minimal effort from you!
Why you’ll love this recipe
- So easy; no difficult techniques. Just one cake tin and one batter that will magically separate into three delicious layers while baking. The oven does most of the work!
- No fancy ingredients! Just 7 simple pantry ingredients like eggs, flour, sugar and butter. In fact, I bet you’ll have these ingredients in your pantry already, ready to go!
- Like this vanilla custard slice, this cake is perfect for parties, entertaining or afternoon tea. This is truly one of the easiest cakes you will make, not to mention impressive and delicious!
- Silky smooth and so creamy! A little dusting of icing sugar or ground nutmeg and some fresh strawberries makes it the perfect dessert.
Ingredients you will need
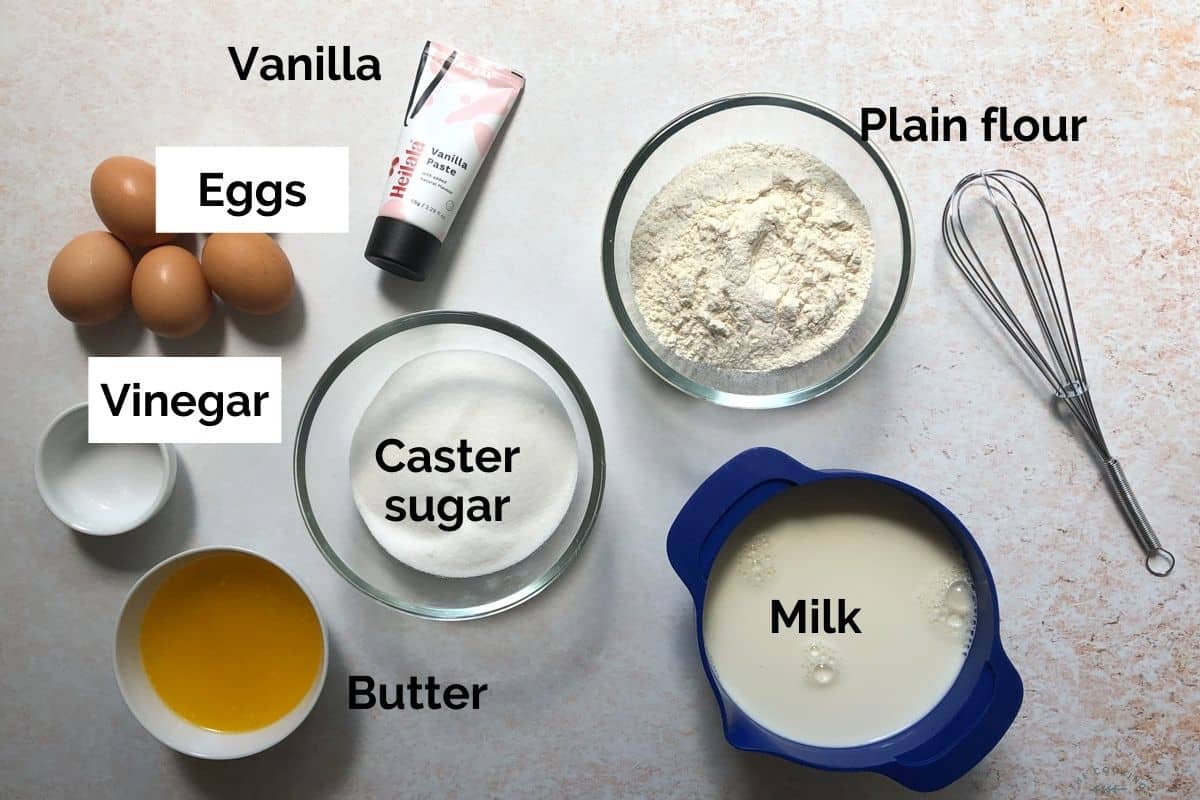
** This post contains tips and instructions to achieve the best possible results. The photo above is a great guide for when you are in the supermarket, but for full ingredient quantities and methods, please scroll down to the detailed recipe card below!
Eggs – fresh eggs are recommended and they are best at room temperature. This is because room temperature eggs aerate more easily, which helps the cake to rise. If you keep your eggs in the fridge, simply take them out the night before making this cake. Or, if you are in a hurry, place them in a bowl of warm water while you prepare the other ingredients.
Flour – plain, white flour is used in this recipe and it needs to be sifted for a light and fluffy cake.
Vinegar – a little white vinegar helps to stabilise the beaten egg whites and helps the mixture hold the air whisked into it. You won’t taste it in the finished cake.
Vanilla – either vanilla essence or vanilla bean paste can be used for a smooth vanilla flavour, depending on preference.
Milk – full fat/whole milk is best. The milk will be heated to lukewarm (but not hot or boiling).
Butter – for best results, regular, unsalted butter should be used rather than butter replacements, spreads or margarine.
Step by step instructions
Step 1- Line a square 20cm (8 inch) baking tin with paper that extends up over the edges. This will help you to gently lift the finished cake from the tin without having to flip it upside down.
Step 2- The egg yolks and sugar are beaten with a stand mixer or hand-held beater until pale and fluffy. This will take around 5 minutes and they should look almost white when ready.
Step 3- Add the vanilla and butter and continue to beat.

Step 4- Beat in the flour on low speed until just combined.
Step 5- heat the milk in a saucepan or in the microwave until warm (but not hot) to touch. Carefully beat in the milk.
Step 6- egg whites. The egg whites should be beaten to stiff peaks that hold their shape without dropping. The vinegar is then added to help stabilise the mixture.

Step 7- fold in the egg whites. Using a spatula, gently fold the egg whites into the egg yolk mixture. ** Note: do not over-beat the mixture. It will look lumpy, but this is normal! There should be some fluffy lumps left behind. The batter will also appear quite runny, but everything will come together as it bakes.
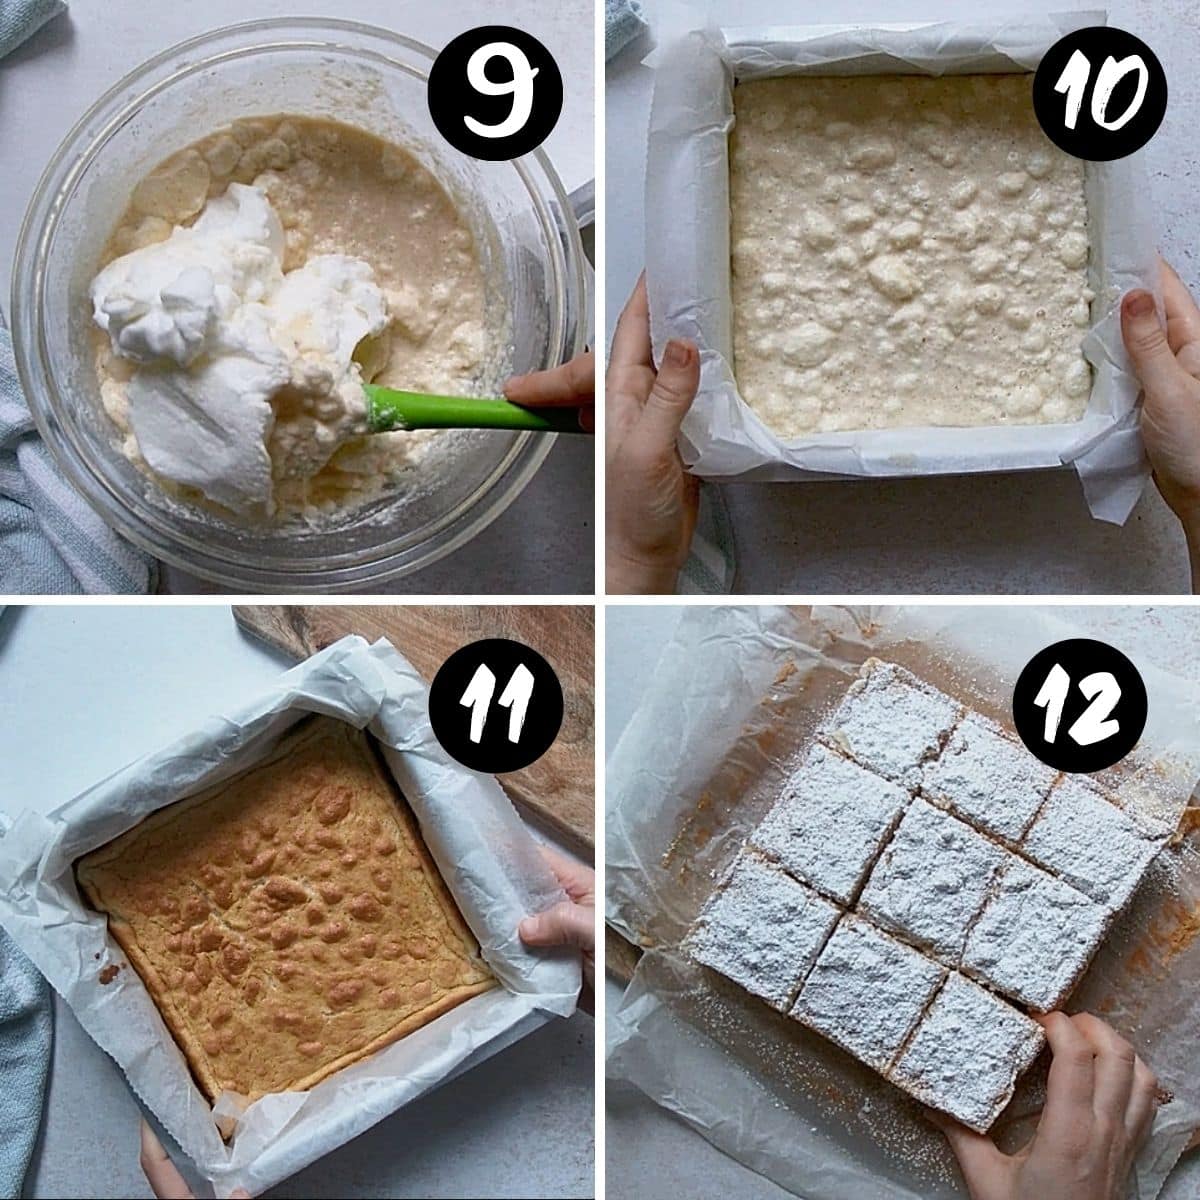
Allow the cake to come to room temperature after baking and then refrigerate for at least four hours (or overnight) before removing from the tin and serving. The layers continue to set in the fridge, so this step is important.
Full ingredient list and instructions are found in the recipe card below.
Expert tips
- Use room temperature eggs. Leave them out of the fridge overnight, or place them in a bowl of warm water and wait for 5 minutes.
- Large eggs are used in this recipe. Due to eggs varying in size, I have included weights (in grams) for both the egg whites and yolks.
- The milk should be warm to touch (36-40 degrees Celsius/98-105 Farenheit). Be careful not to overheat. If the milk is too hot, set it aside to cool slightly.
- Use the right size cake tin. A tin that is too big will make the batter too shallow and will make it difficult for the layers to form.
- Don’t over-mix! This step is critical for the formation of the individual custard cake layers. Gently fold the egg whites into the batter, but don’t over-mix. A lumpy batter is ok, it will resolve when baking.
- The baking time can vary for this cake depending on the oven and type of tin used. I have tested this cake many times in different ovens and tins and the baking time is slightly different each time. Generally, 35-50 minutes is required, but start to test at 30 minutes. The cake is ready when it is golden on the top, set around the edges and has a slight wobble in the middle, but does not “jiggle” when gently shaken.
- Don’t try to lift the cake from the tin before it has set in the fridge, or it will break.
- Storage; store this cake in the fridge for 3-4 days.
- Rest! Magic custard cake needs time to rest. The cake needs time to come to room temperature and then rest in the fridge (at least 4 hours, or overnight) for the layers to finish setting properly.
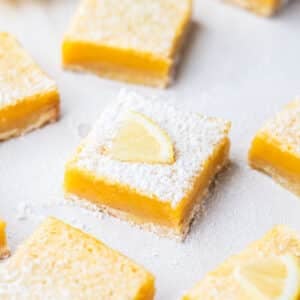
- For lemon custard cake, add 1 tablespoon of lemon zest and ¼ cup lemon juice to the batter before baking.
- For a custard tart flavour, add a dusting of nutmeg over the top instead of icing sugar. It tastes so good!
FAQs
Custard cake uses basic cake ingredients like eggs, sugar, flour, butter and milk. But the cake’s thin batter and slow baking process causes the ingredients to separate into 3 individual layers. Science is so cool! Because this cake batter is more liquid than most and baked at a lower temperature for a longer time, the mixture slowly settles into a dense fudge-like layer at the bottom and a custard centre, while the the sponge-cake like cake layer is provided by the egg whites rising to the top of the mixture.
Because this cake is custard-based, it should be kept covered in the fridge and consumed within 3 days.
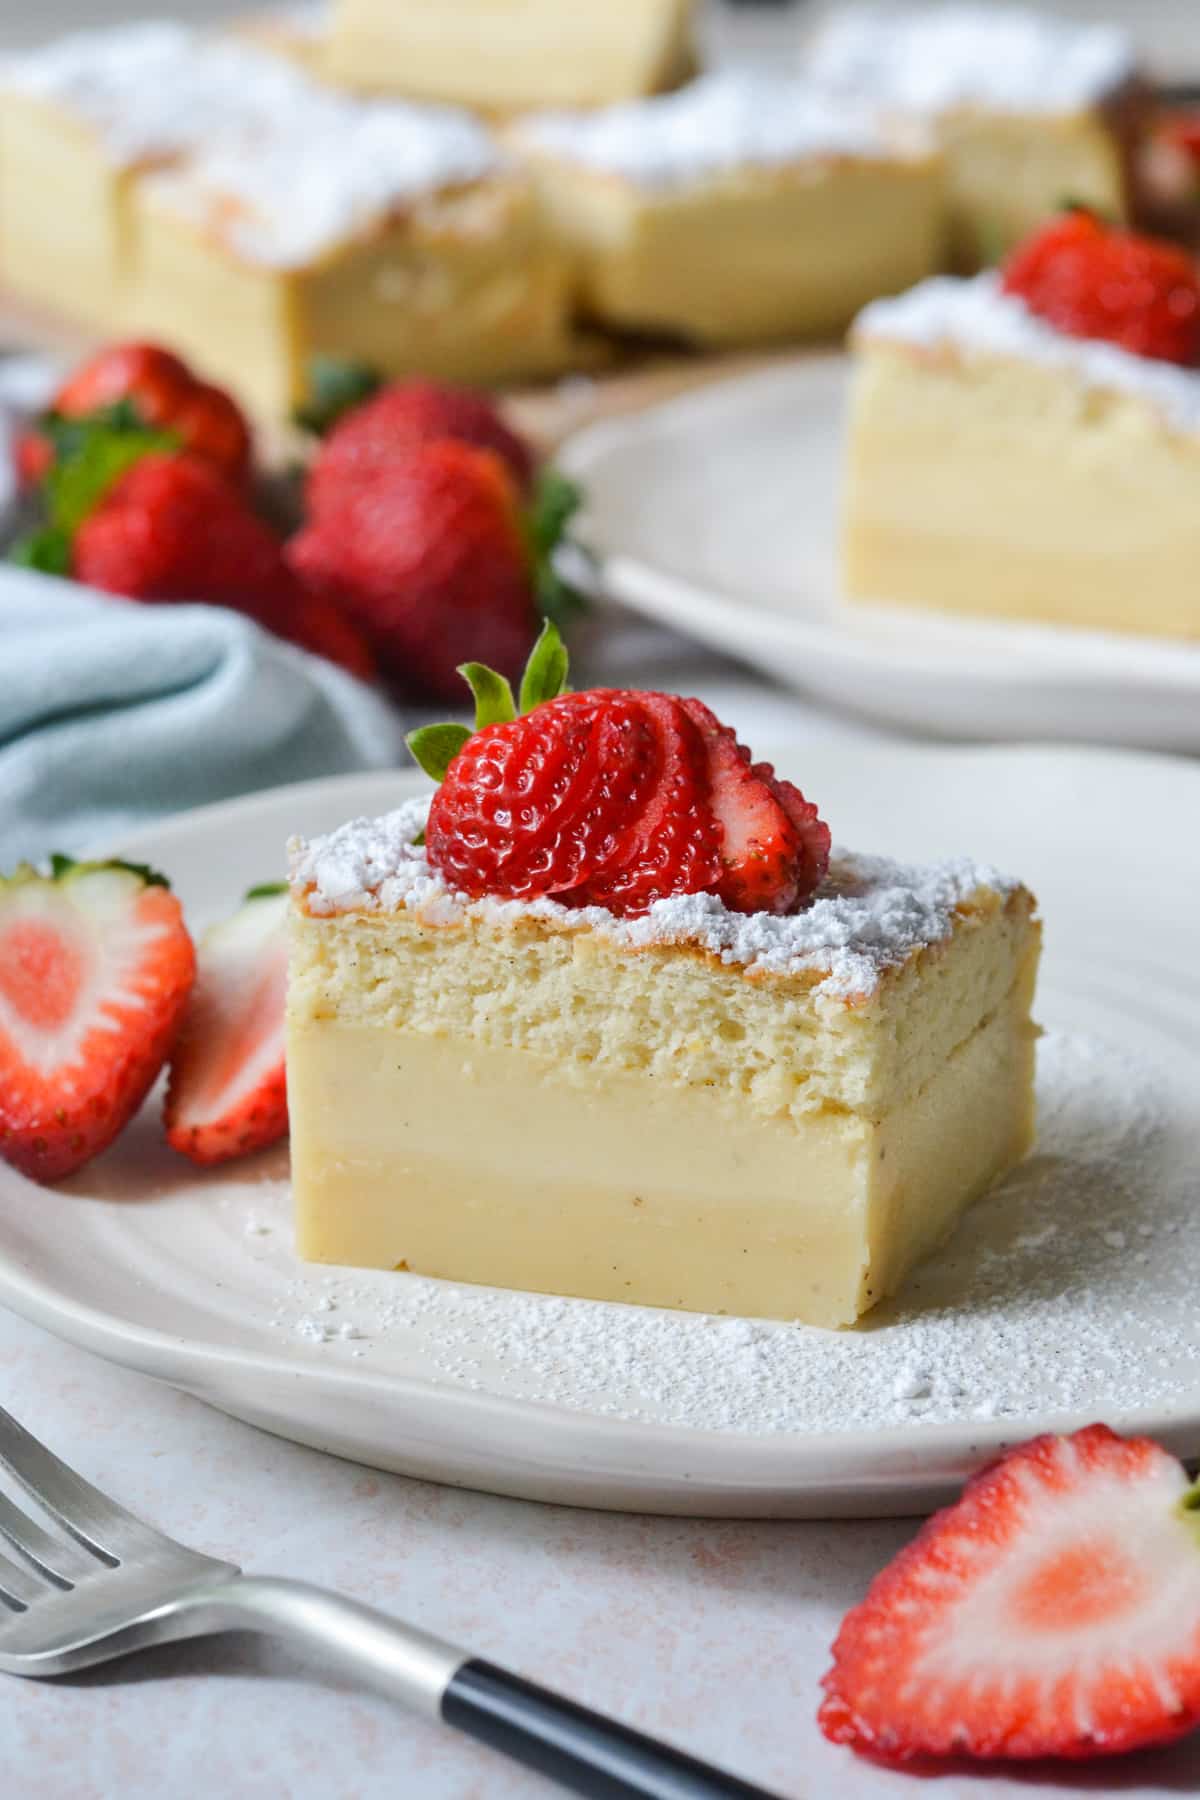
A simple sprinkle of icing sugar/powdered sugar is all this cake needs. It tastes lovely on its own, or you can serve it with some fresh berries of your choice, stewed rhubarb or berry coulis. For a citrus twist, add 1 tablespoon of lemon zest and ¼ cup lemon juice before baking. My favourite addition is a generous sprinkle of ground nutmeg, which makes it taste like custard tart!
Related recipes
Tried this recipe? Please leave a star ⭐⭐⭐⭐⭐ rating or leave a review below and let me know how you went!
Hungry for more? Subscribe to my newsletter and follow along on Facebook, Instagram and Pinterest for the latest recipes and news.
Magic Custard Cake Recipe
Ingredients
- 4 large eggs room temperature, separated into whites and yolks (130 grams egg whites and 55-60 grams egg yolks).
- ¾ cup caster sugar raw or white caster sugar
- 3 teaspoons vanilla bean paste
- 125 grams butter , melted
- 112 grams plain flour , sifted
- 2 cups milk (1 cup = 250ml)
- ½ teaspoon white vinegar
To serve
- icing sugar
- ground nutmeg optional
- fresh berries
Instructions
- Pre-heat the oven to 160 °C/320 F. Grease a 20cm x 20cm (8 x 8 inch) square baking tin with butter and line with baking paper. The baking paper should extend up the sides of the tin, for easy cake removal.
- Place the egg yolks into a large mixing bowl with the caster sugar. Beat with an electric beater for 5 minutes, until the mixture is thick and pale.
- Add the vanilla and melted butter and beat on low speed until combined.
- Add the sifted flour and gently mix until just combined.
- Heat the milk in the microwave or stovetop, until it is warm to touch, but not hot or boiling. Add the milk to the egg yolk mixture and whisk to combine (or continue to beat and add a little at a time). The mixture will be quite runny. This is normal.
- Add the egg whites to a separate mixing bowl and beat with the electric mixer (clean beaters) until stiff peaks form. Add the vinegar and continue to beat for an extra minute.
- Using a spatula, gently fold the egg whites into the thin cake batter, one third at a time. There will still be some small lumps of egg whites floating on the top of the batter. This is fine.
- Pour the cake batter into the prepared cake tin. Bake for around 40-50 minutes (start to check for doneness at 30 minutes) or until the sides of the cake are set, the top is golden brown and there is a very slight 'jiggle' when shaken. The cake should not wobble too much when tested, or it is not quite ready. Cooking times will vary depending on the oven and tin used.
- Remove the cake from the oven and allow to sit at room temperature for an hour before covering and transferring to the fridge. Allow the cake to sit in the fridge for 4 hours (or overnight) before slicing, to allow the layers to set.
- When ready to serve, slice the cake into pieces and serve with a dusting of icing sugar or ground nutmeg. You can also serve with fresh berries and/or whipped cream. Enjoy!
Video
Notes
- Use room temperature eggs. Leave them out of the fridge overnight, or place them in a bowl of warm water and wait for 5 minutes.
- Large eggs are used in this recipe. Due to eggs varying in size, I have included weights (in grams) for both the egg whites and yolks.
- The milk should be warm to touch (36-40 degrees Celsius/98-105 Farenheit). Be careful not to overheat. If the milk is too hot, set it aside to cool slightly.
- Use the right size cake tin. A tin that is too big will make the batter too shallow and will make it difficult for the layers to form.
- Don’t over-mix! This step is critical for the formation of the individual custard cake layers. Gently fold the egg whites into the batter, but don’t over-mix. A lumpy batter is ok, it will resolve when baking.
- The baking time can vary for this cake depending on the oven and type of tin used. I have tested this cake many times in different ovens and tins and the baking time is slightly different each time. Generally, 35-50 minutes is required, but start to test at 30 minutes. The cake is ready when it is golden on the top, will feel firm to touch, is set around the edges and has a slight wobble in the middle, but does not “jiggle” when gently shaken.
- Storage – store this cake in the fridge for 3-4 days.
- Rest! Magic custard cake needs time to rest. The cake needs time to come to room temperature and then rest in the fridge (at least 4 hours, or overnight) for the layers to finish setting properly.
- For lemon custard cake, add 1 tablespoon of lemon zest and ¼ cup lemon juice to the batter before baking.
- For a custard tart flavour, add a dusting of nutmeg over the top instead of icing sugar. It tastes so good!
- Please note that the nutrition information is based on the mixture being sliced into 9 pieces, with one slice being one serve. The nutritional information is an estimate only.
- This recipe is made using Australian cups and spoon measurements. Due to cup sizes varying from country to country, I advise adjusting if necessary.
- There are many variations of custard cake online. This recipe is based on this Magic Cake, made famous by Jo Cooks.


Nan Stanley says
Oh my,what a fabulous cake. I dusted it with powdered sugar & topped it with a strawberry. Yummy to say the least. My hubby loved it. This is a keeper!
Andrea Geddes says
I’m so happy to hear that you and your hubby enjoyed this cake! It’s a family favourite. Thanks so much for taking the time to leave a review! Andrea 🙂
Bryan Gogal says
That’s probably the best photo I’ve seen yet that shows what a MAGIC CUSTARD CAKE is suppose to look like – 3 distinct layers. Your Genoise layer is spectacular!
Andrea Geddes says
Hi Bryan! Thank you so much, it’s such a lovely cake! Andrea 🙂