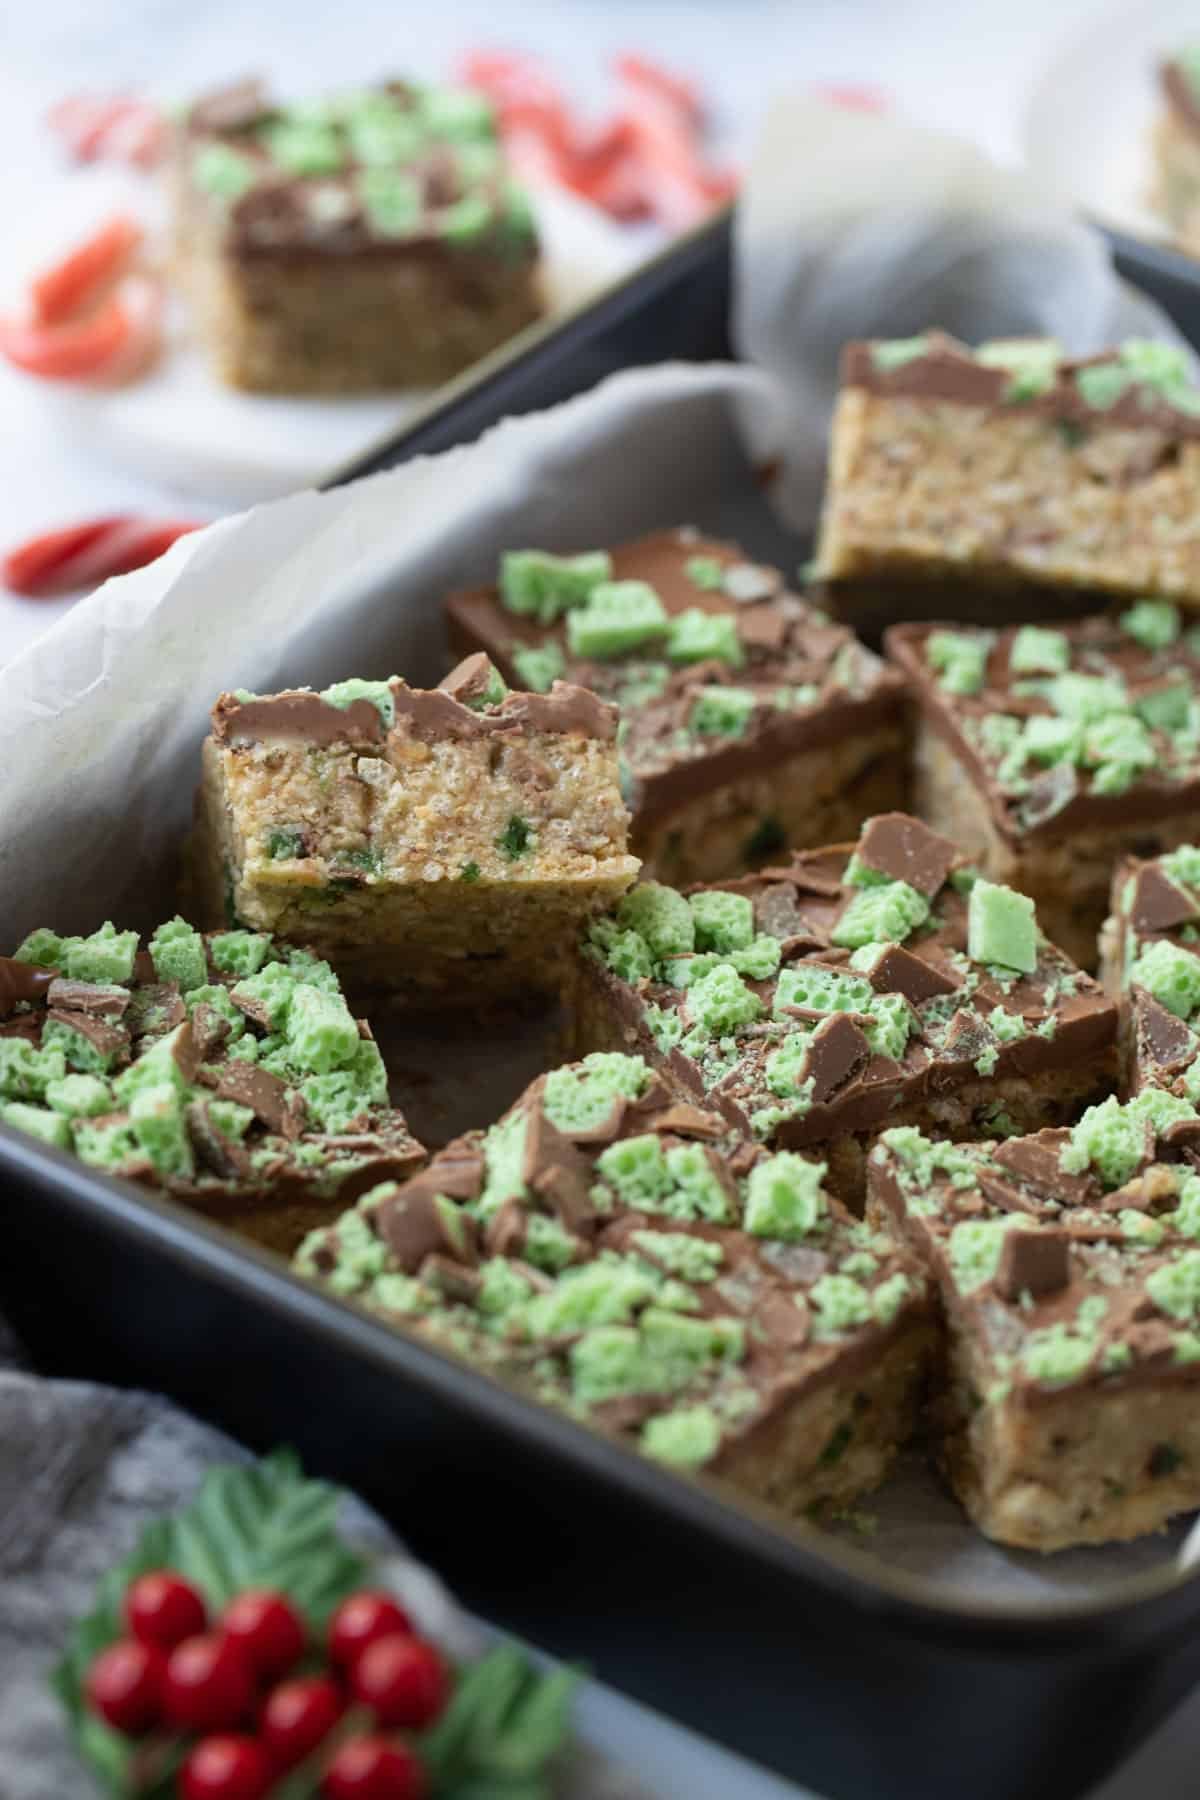
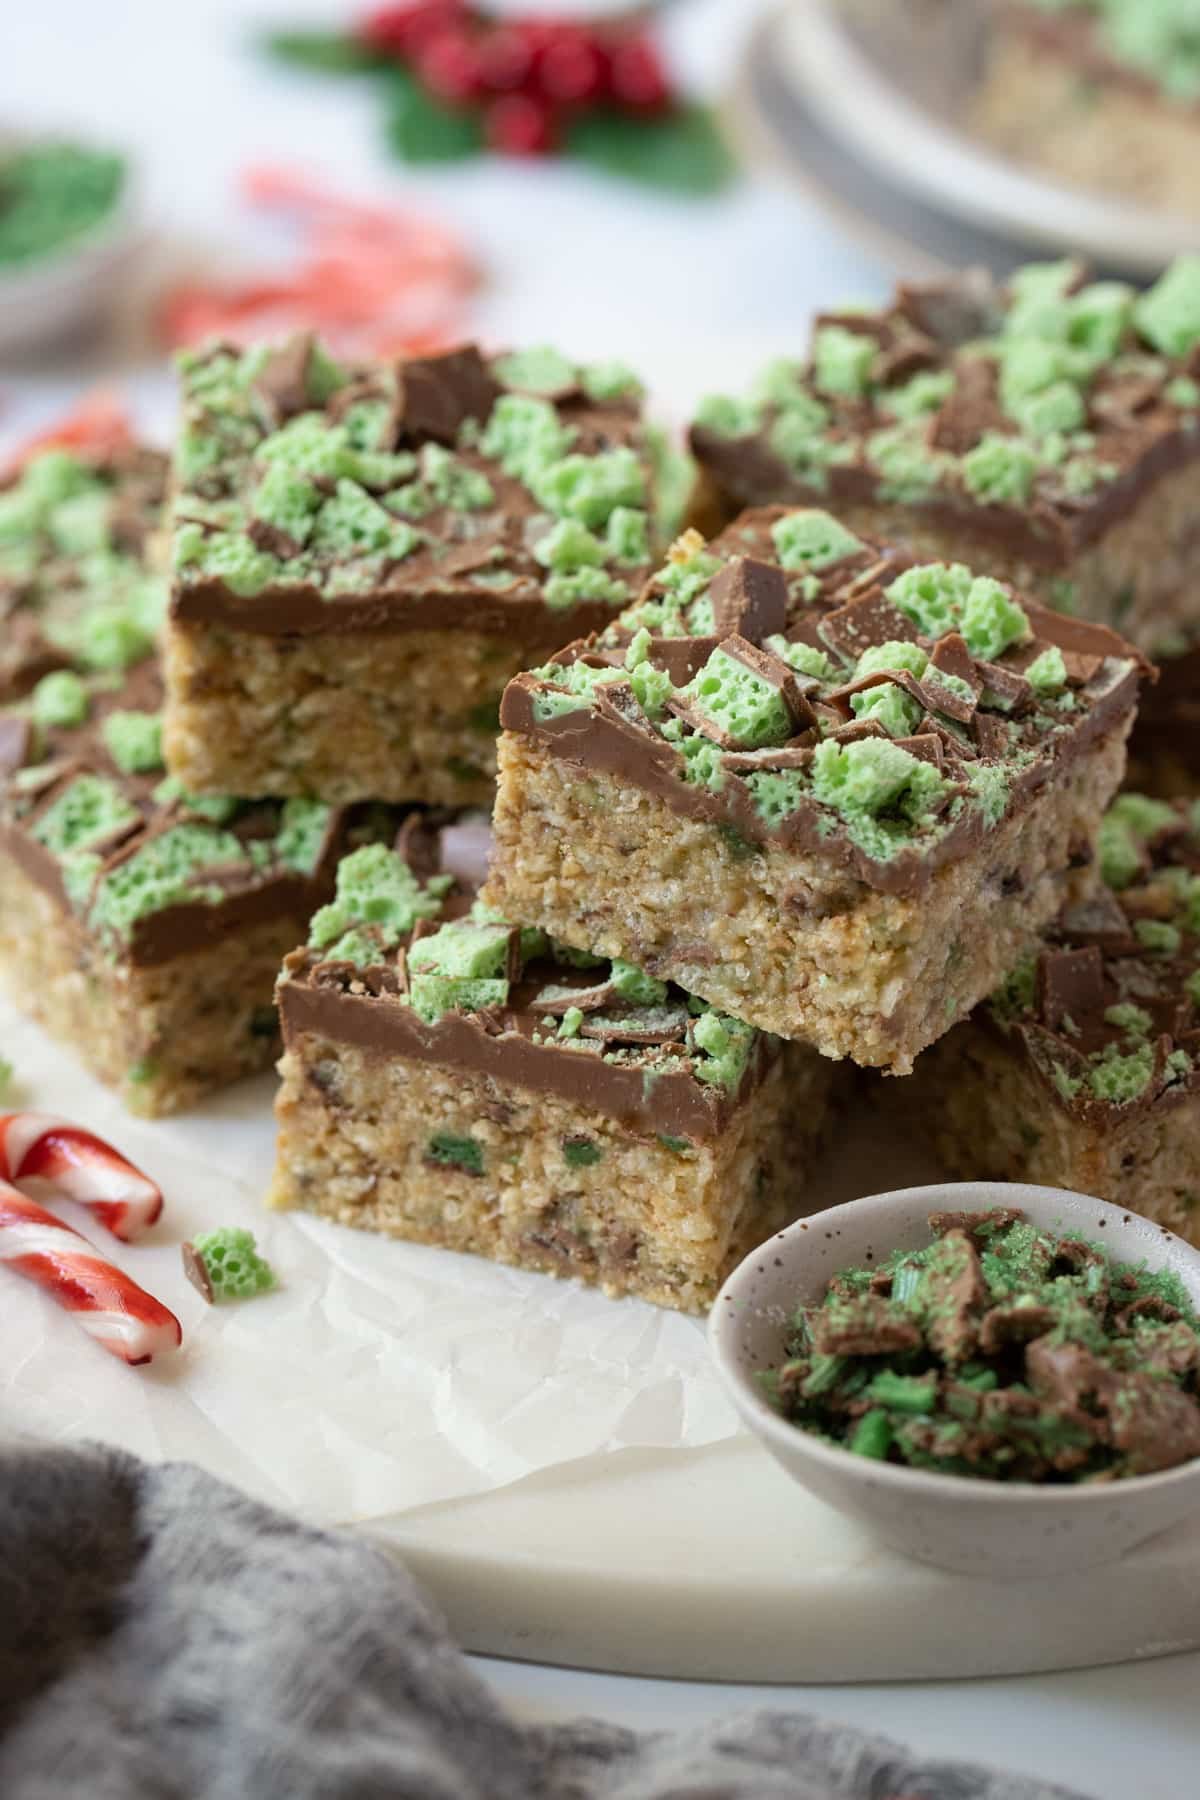
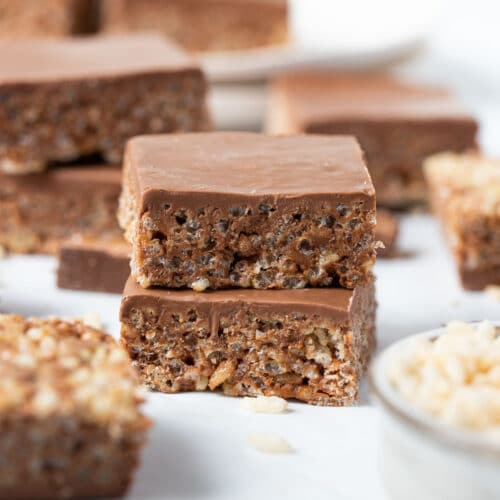
You’ll love this easy no-bake peppermint slice. It features a deliciously chewy biscuit base made with condensed milk and loads of Peppermint Crisp chocolate. Topped with creamy milk chocolate and extra crushed peppermint, it is incredibly delicious and so easy to make! No baking required.
Why you’ll love this recipe
- Quick and easy – no oven, no fancy equipment required. All you need is a bowl, a slice tin and about 5 minutes to prepare it!
- No baking – simply press the slice into the tin and let the refrigerator do all of the work.
- Simple ingredients – you’ll only need 8 basic pantry staples like store-bought biscuits, condensed milk, butter and chocolate.
- Stores well – it will keep in the fridge for 5-6 days.
- Make ahead – it can be made ahead for easy entertaining.
- A peppermint lover’s dream – it’s the perfect ratio of chocolate + peppermint!
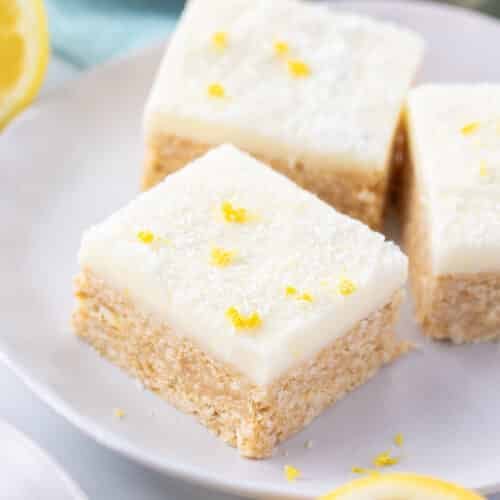
No bake slices are so easy to make and perfect for parties, celebrations and last-minute gifts. Try this classic lemon coconut slice, Mars bar slice or Maltesers slice too!
Ingredients you will need
** This post contains tips and instructions to achieve the best possible results. This photo is a great guide for when you are in the supermarket, but for full ingredient quantities and methods, please scroll down to the detailed recipe card below!
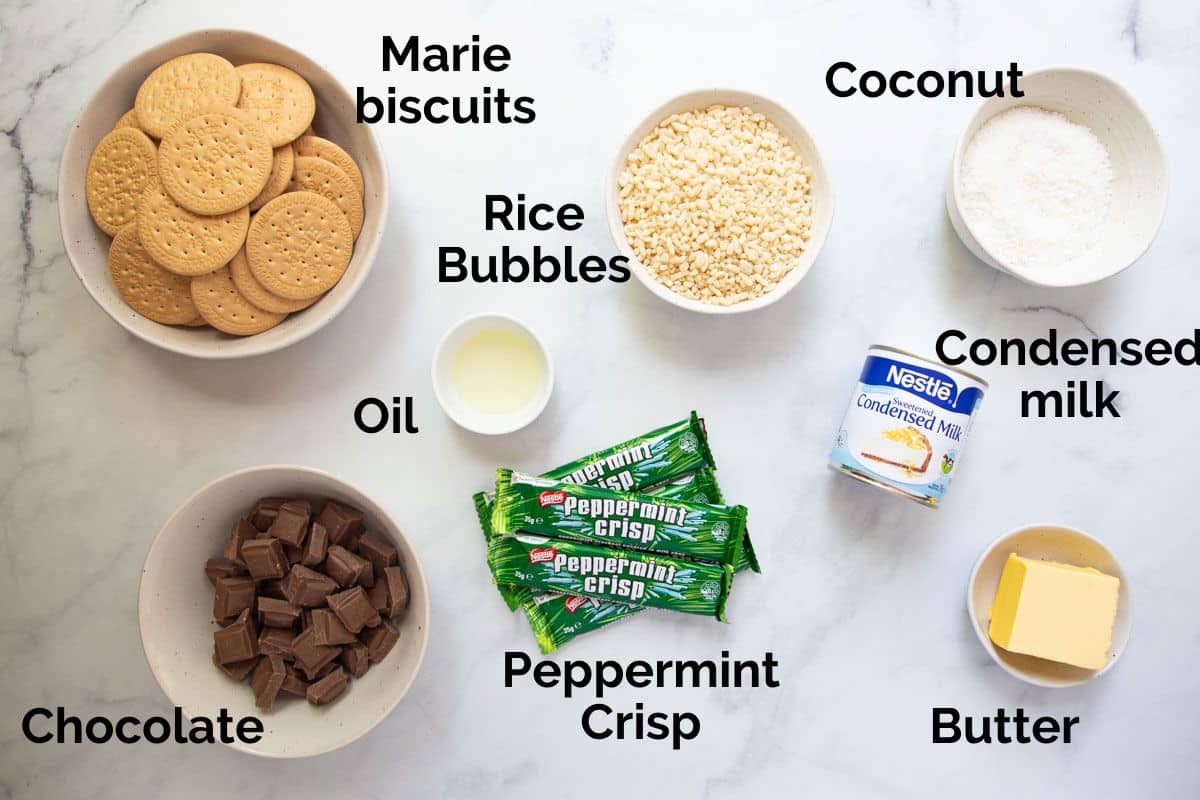
- Sweet biscuits – plain, sweet store-bought biscuits are best! If you’re in Australia, I recommend using Arnott’s Marie or Arrowroot biscuits, or Digestives. In other areas like the US, Graham crackers or any other plain, sweet cookie will work.
- Peppermint Crisp – a South African chocolate bar that can be found in most Australian supermarkets. It has a brittle, crystalline/sugar peppermint flavoured centre that is coated in milk chocolate. If you can’t source Peppermint Crisp chocolate, you can use any other type of peppermint candy bars, like Aero, blocks of Cadbury peppermint chocolate, or whatever is available in your area.
- Sweetened condensed milk – cow’s milk that is sweetened with sugar and heated to remove some of the water content. The result is a concentrated milk product that is thick and sweet, and commonly used in desserts and no-bake slices like this one. Here, it binds the biscuit base together, as well as sweetening the slice. Use full-fat, sweetened condensed milk. Light or skim condensed milk will not set the slice as firmly. Don’t swap for evaporated milk.
- Rice Bubbles/Rice Krispies – add texture and chewiness to the slice.
- Coconut – this recipe uses desiccated coconut for a finer texture. You could also use the larger, shredded coconut pieces if you prefer, but the texture of the base will turn out slightly different.
- Butter – melted butter is used to bind the base together. I recommend using real, unsalted butter rather than margarine or dairy spreads.
- Chocolate – milk chocolate is a great option. I also love the contrast of peppermint with a slightly bitter, dark chocolate. Milk, white or dark chocolate can be used, but choose a good quality chocolate that you know and love to eat. It will make all the difference in the final result!

Step by step guide
Full recipe quantities and instructions can be found in the detailed recipe card below.
Step 1 – Make the biscuit base;
Place the crushed biscuits, coconut, Rice Bubbles and crushed Peppermint Crisp together in a bowl and stir to combine.
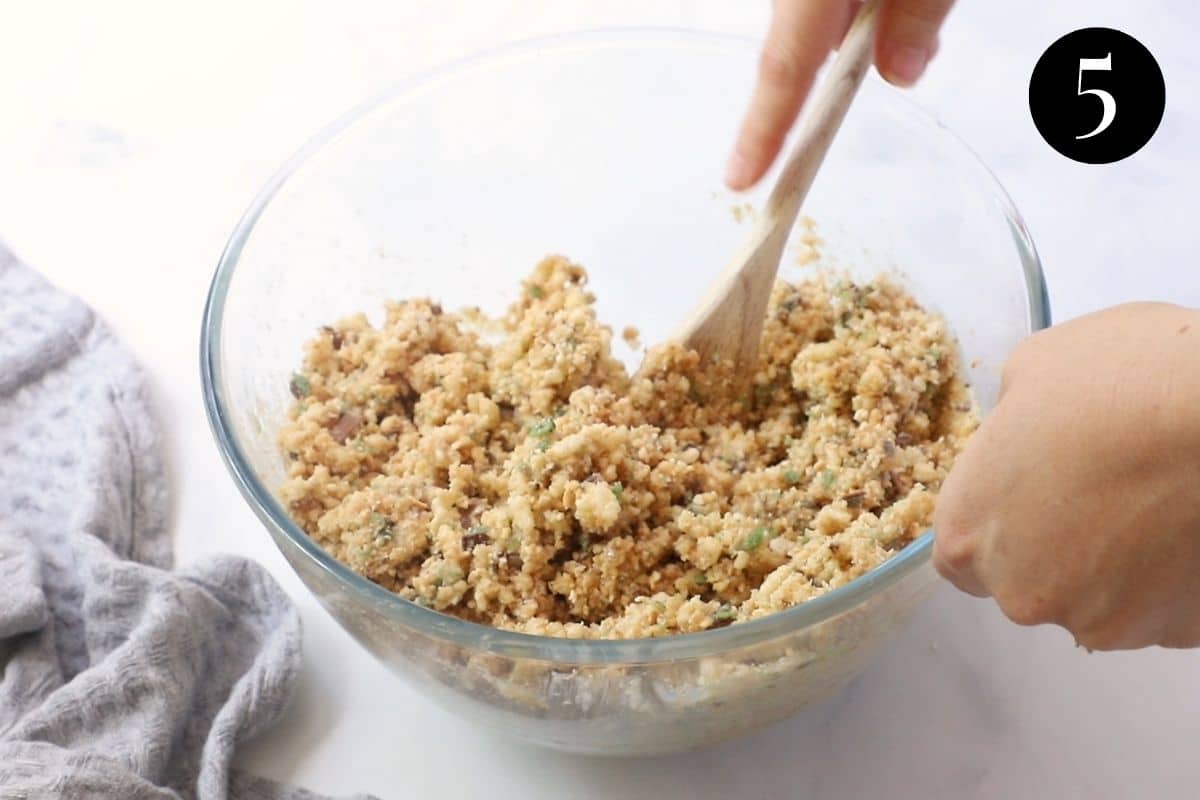
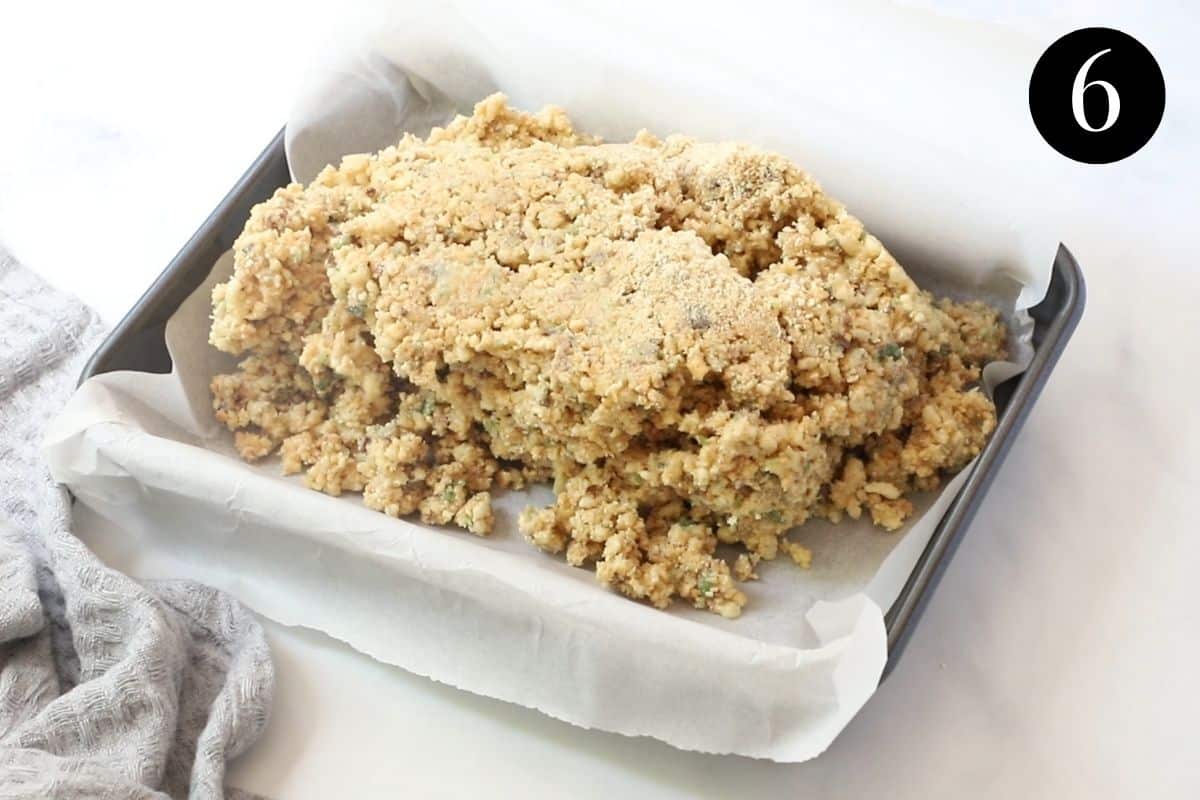
Add the condensed milk and melted butter and stir until the mixture is completely combined and sticking together.
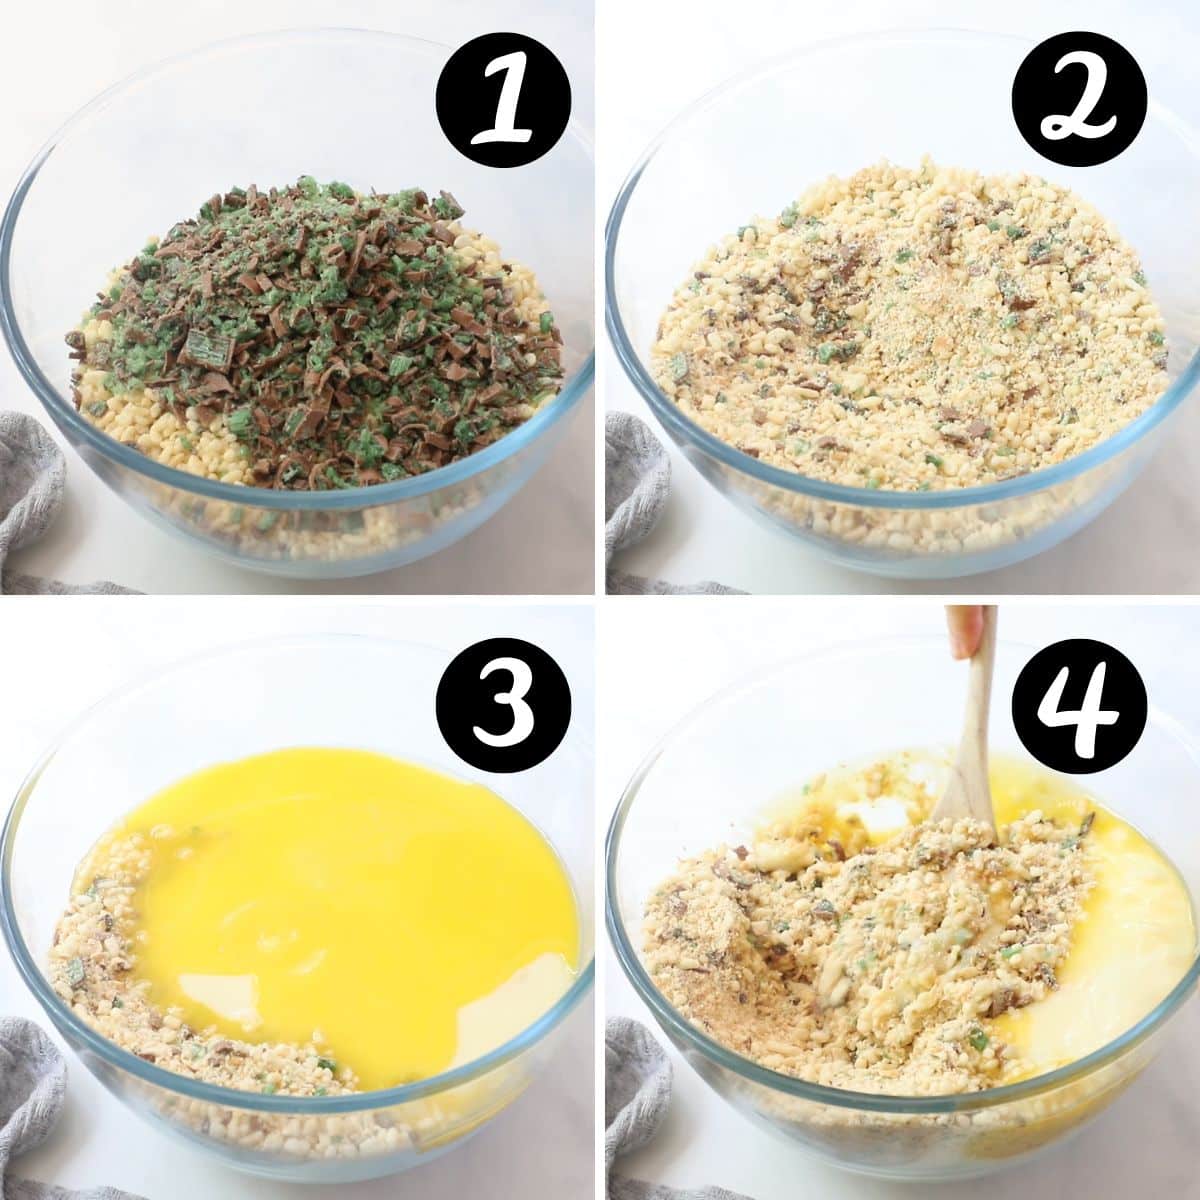
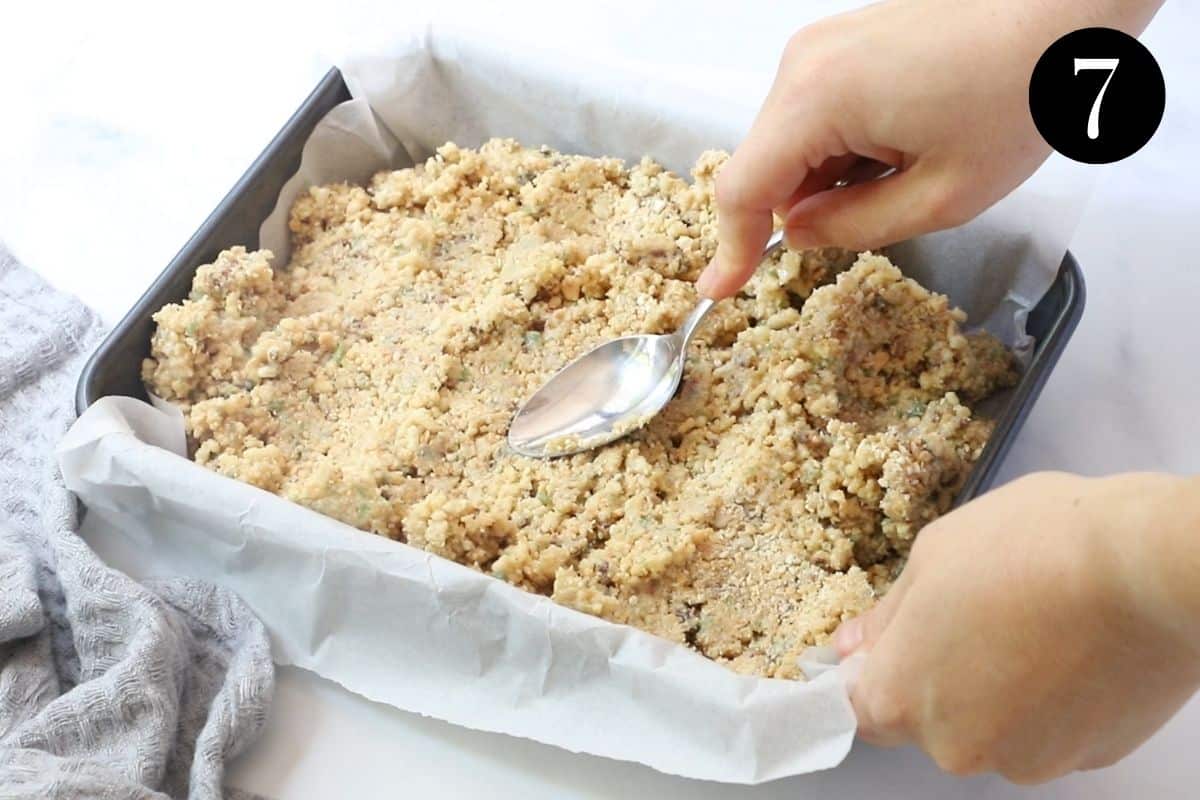
Step 2 – Press into slice tin;
Using the back of a metal spoon, very firmly press the biscuit mixture into a lined slice tin, until level and smooth.
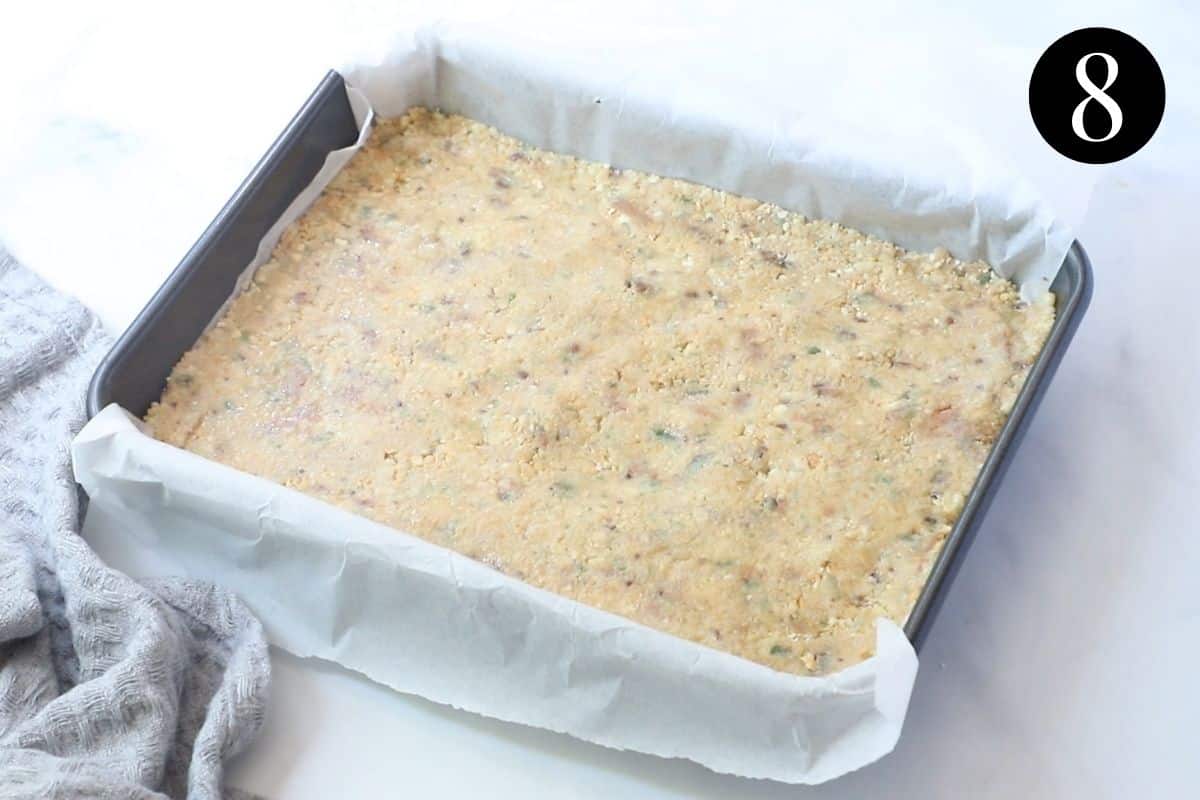
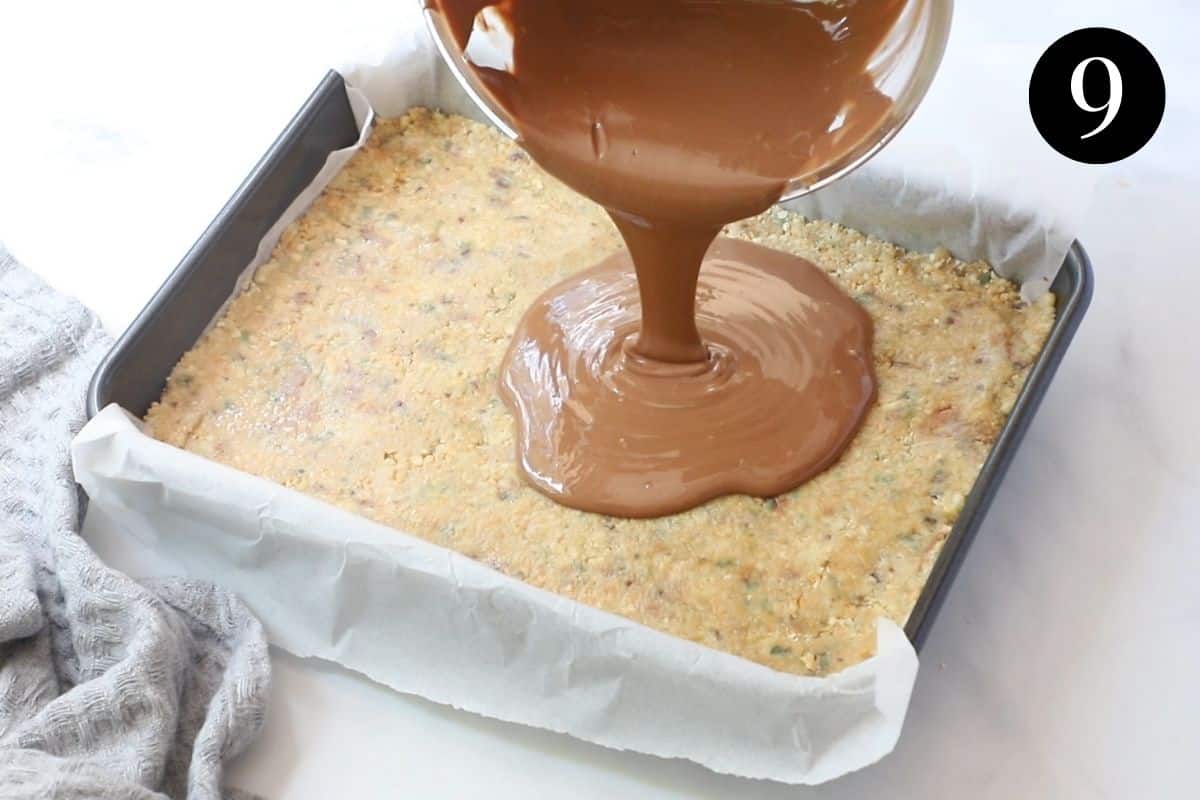
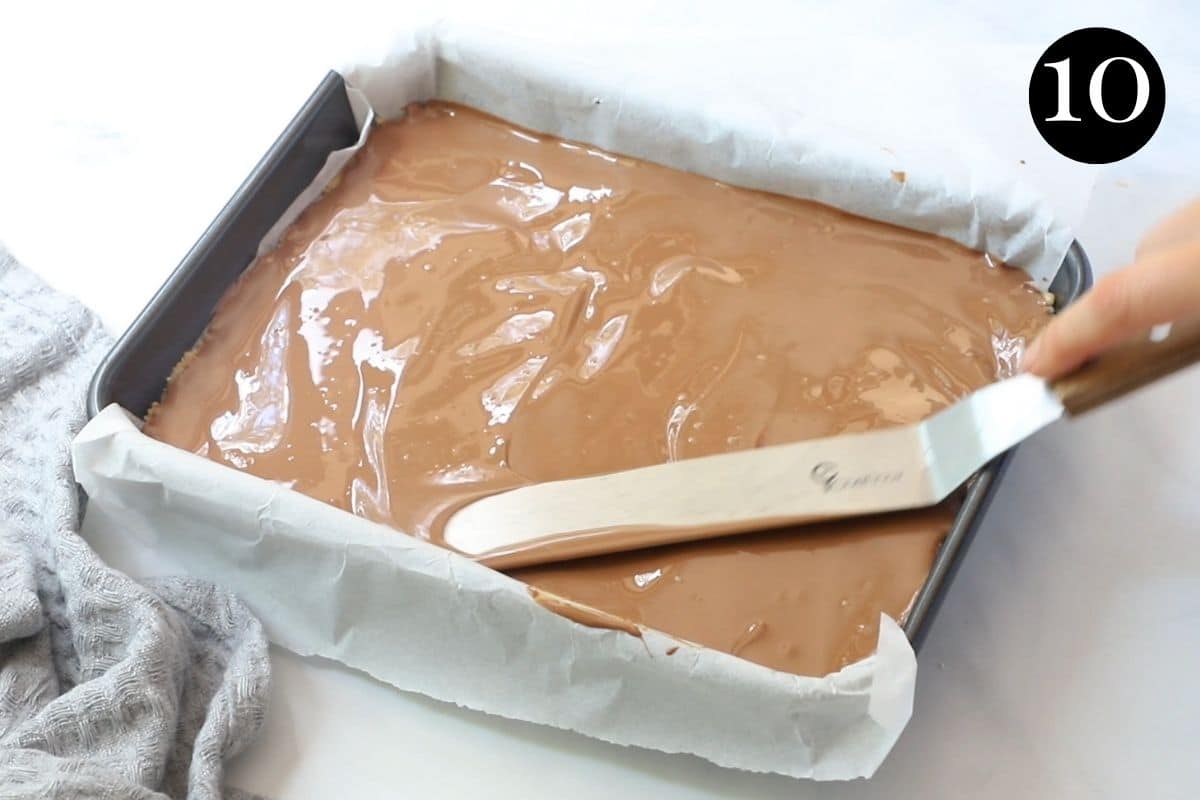
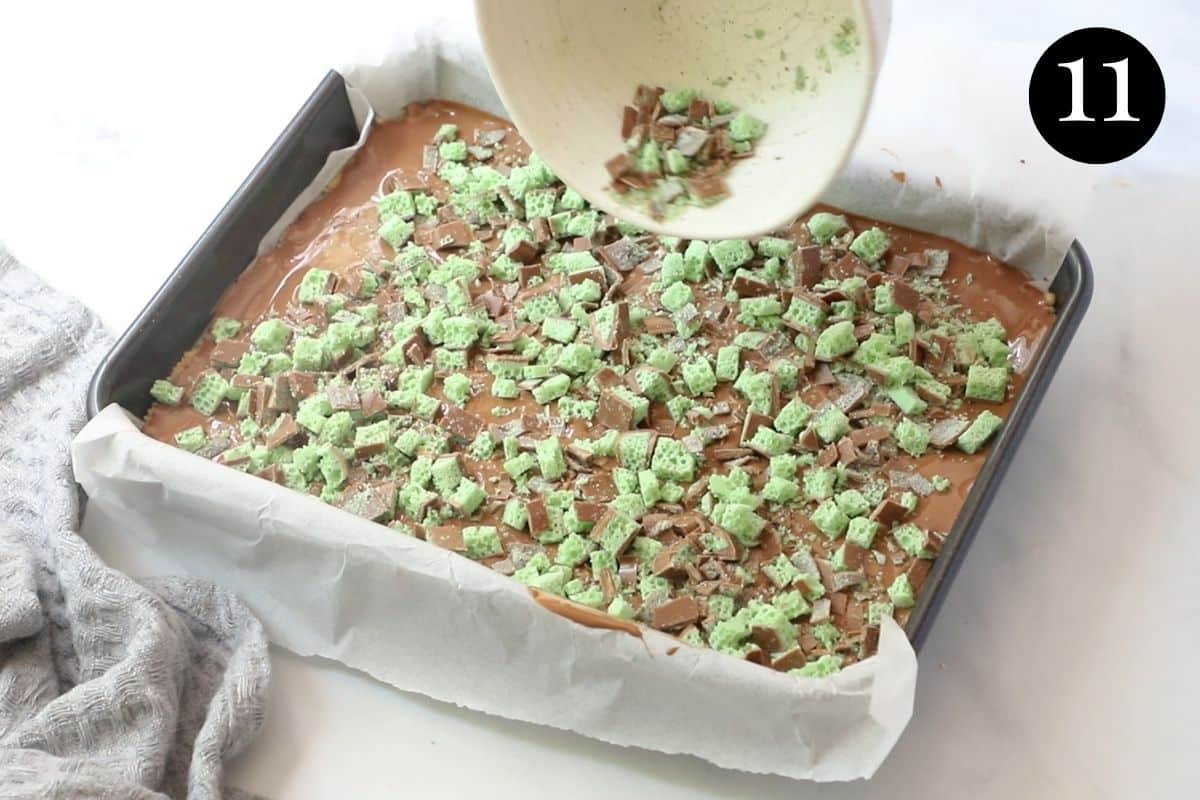
Step 3 – Top with chocolate;
Add the melted chocolate to the top of the slice and level with a spatula. While the chocolate is melted, decorate the top with crushed peppermint chocolate, or your toppings of choice.
Refrigerate until fully set (around 2-3 hours) before slicing.
Expert tips
- If you don’t have a food processor, crush the biscuits in a bowl using the end of a rolling pin. Some smaller chunks are ok.
- The mixture should be fully combined with the condensed milk and butter. If there are dry pockets that have not been fully incorporated, the biscuit base can be crumbly when slicing.
- Make sure you press the mixture into the tin very firmly. This will ensure even slices that are easy to cut and hold, without crumbling.
- Decorate the slice with your favourite peppermint chocolates or treats. You can add chopped pieces of Mint Slice biscuits, crushed candy canes, Aero chocolate, more Peppermint Crisp or your favourite peppermint treats.
- To make the chocolate layer easier to slice, stir 1 tablespoon of vegetable oil or canola oil through the melted chocolate before spreading it over the biscuit base. It will make the chocolate glossy and easier to cut, without cracking.
- Leave the sides of the baking paper a little longer and allow them to hang over the sides of the tin, to help remove the slice when it is set.
- Storage; this slice can be made ahead and stored in an airtight container in the fridge for 5-6 days.
FAQs
This slice can be frozen for up to 2 months. To freeze, place the slice (whole or cut into pieces) into a good quality, freezer-safe container before placing in the freezer. To thaw, place the slice in the fridge overnight, or sit at room temperature for 1-2 hours before serving. Store in the fridge and consume within 1-2 days of thawing.
It needs to be chilled for at least 2-3 hours before it is sliced. Time in the fridge allows the slice to set and firm up, ready for slicing.
Any type of sweet, plain tea biscuit will work. In Australia, Nice, Scotch Finger, Arrowroot or plain (not chocolate coated) Teddy Bear biscuits can be used. Elsewhere, Digestives or Graham Crackers are a great alternative.
Related recipes

Tried this recipe? Please leave a star ⭐⭐⭐⭐⭐ rating or leave a review below and let you know how you went!
Hungry for more? Subscribe to my newsletter and follow along on Facebook, Instagram and Pinterest for the latest recipes and news.

Peppermint Slice (No-Bake)
Ingredients
For the biscuit base
- 250 grams Marie biscuits One packet (approx. 2 ¼ cups, when crushed)
- 4 bars Peppermint Crisp chocolate 140 grams, or use any other chopped peppermint chocolate of choice, very finely chopped
- ¾ cup desiccated coconut
- 1 ½ cups Rice Bubbles Rice Krispies
- 1 can condensed milk 395 gram can (approx. 1 cup)
- 125 grams butter ½ cup, melted
For the top
- 250 grams milk chocolate melted. Or use dark or white chocolate, if preferred.
- 1 tablespoon vegetable oil optional
- 2 cups crumbled peppermint chocolate, extra for topping Peppermint Crisp bars or Aero
Instructions
For the biscuit base
- Line a 25 x 18cm (9.8 x 7 inches) slice tin with baking paper.
- Using a food processor or a rolling pin, crush the biscuits into a fine crumb. You can leave a few small lumps if you like, or make them completely fine.
- Chop the Peppermint Crisp bars on a board with a sharp knife.
- Combine the crushed biscuits, coconut, Rice Bubbles and chopped Peppermint Crisp into a large mixing bowl and stir until completely combined.
- Add the condensed milk and melted butter and stir until the mixture is completely combined and sticking together.
- Pour the mixture into the prepared slice tin and use the back of a metal spoon to press the mixture firmly into the tin.
For the chocolate topping
- Break the chocolate into pieces and place it into a microwave safe bowl. Microwave on medium (50%) power in 30 second bursts, stirring between each addition, until the chocolate has melted and is completely smooth.
- **Optional** stir 1 tablespoon of vegetable oil through the melted chocolate to make the chocolate topping a little softer.
- Spread the melted chocolate evenly over the top of the biscuit base. While the chocolate is still melted, sprinkle the chocolate with the additional crushed peppermint chocolate pieces.
- Refrigerate overnight, or for at least 2-3 hours before slicing.
- Once chilled, slice and serve. Enjoy!
Video
Notes
- If you don’t have a food processor, crush the biscuits in a bowl using the end of a rolling pin. Some smaller chunks are ok.
- Make sure you press the mixture into the tin very firmly. This will ensure even slices that are easy to cut and hold, without crumbling.
- Decorate the slice with your favourite peppermint chocolates or treats. You can add chopped pieces of Mint Slice biscuits, crushed candy canes, Aero chocolate or more Peppermint Crisp.
- To make the chocolate layer easier to slice, stir 1 tablespoon of vegetable oil or canola oil through the melted chocolate before spreading it over the biscuit base. It will make the chocolate glossy and easier to cut, without cracking.
- Leave the sides of the baking paper a little longer and allow them to hang over the sides of the tin, to help remove the slice when it is set.
- Storage; this slice can be made ahead and stored in an airtight container in the fridge for 5-6 days.
- Freezing; This slice can be frozen for up to 2 months. To freeze, place the slice (whole or cut into pieces) into a good quality, freezer-safe container before placing in the freezer. To thaw, place the slice in the fridge overnight, or sit at room temperature for 1-2 hours before serving. Store in the fridge and consume within 1-2 days of thawing.
- It needs to be chilled for at least 2-3 hours before it is sliced. Time in the fridge allows the slice to set and firm up, ready for slicing. Attempting to slice it too soon can cause it to crumble.
- What can I use instead of Arnott’s Marie biscuits? Any type of sweet, plain tea biscuit will work. In Australia, Nice, Scotch Finger, Arrowroot or plain (not chocolate coated) Teddy Bear biscuits can be used. Elsewhere, Digestives or Graham Crackers are a great alternative.
- Please note that the nutrition information is based on the slice being divided into 18 pieces, with one piece being one serve. The nutritional information is an estimate only and does not take into account any additional toppings or sides served with the slice.
- This recipe is made using Australian cups and spoon measurements. Any reference to cups or spoons in this recipe is in Australian metric. Due to cup sizes varying from country to country, I advise adjusting if necessary.
Nutrition
Are you following us on Facebook, Instagram and Pinterest?
Update Notes: This recipe was originally published in August 2020, but was re-published with new information, helpful tips and photos in December 2022.


Leave a Reply