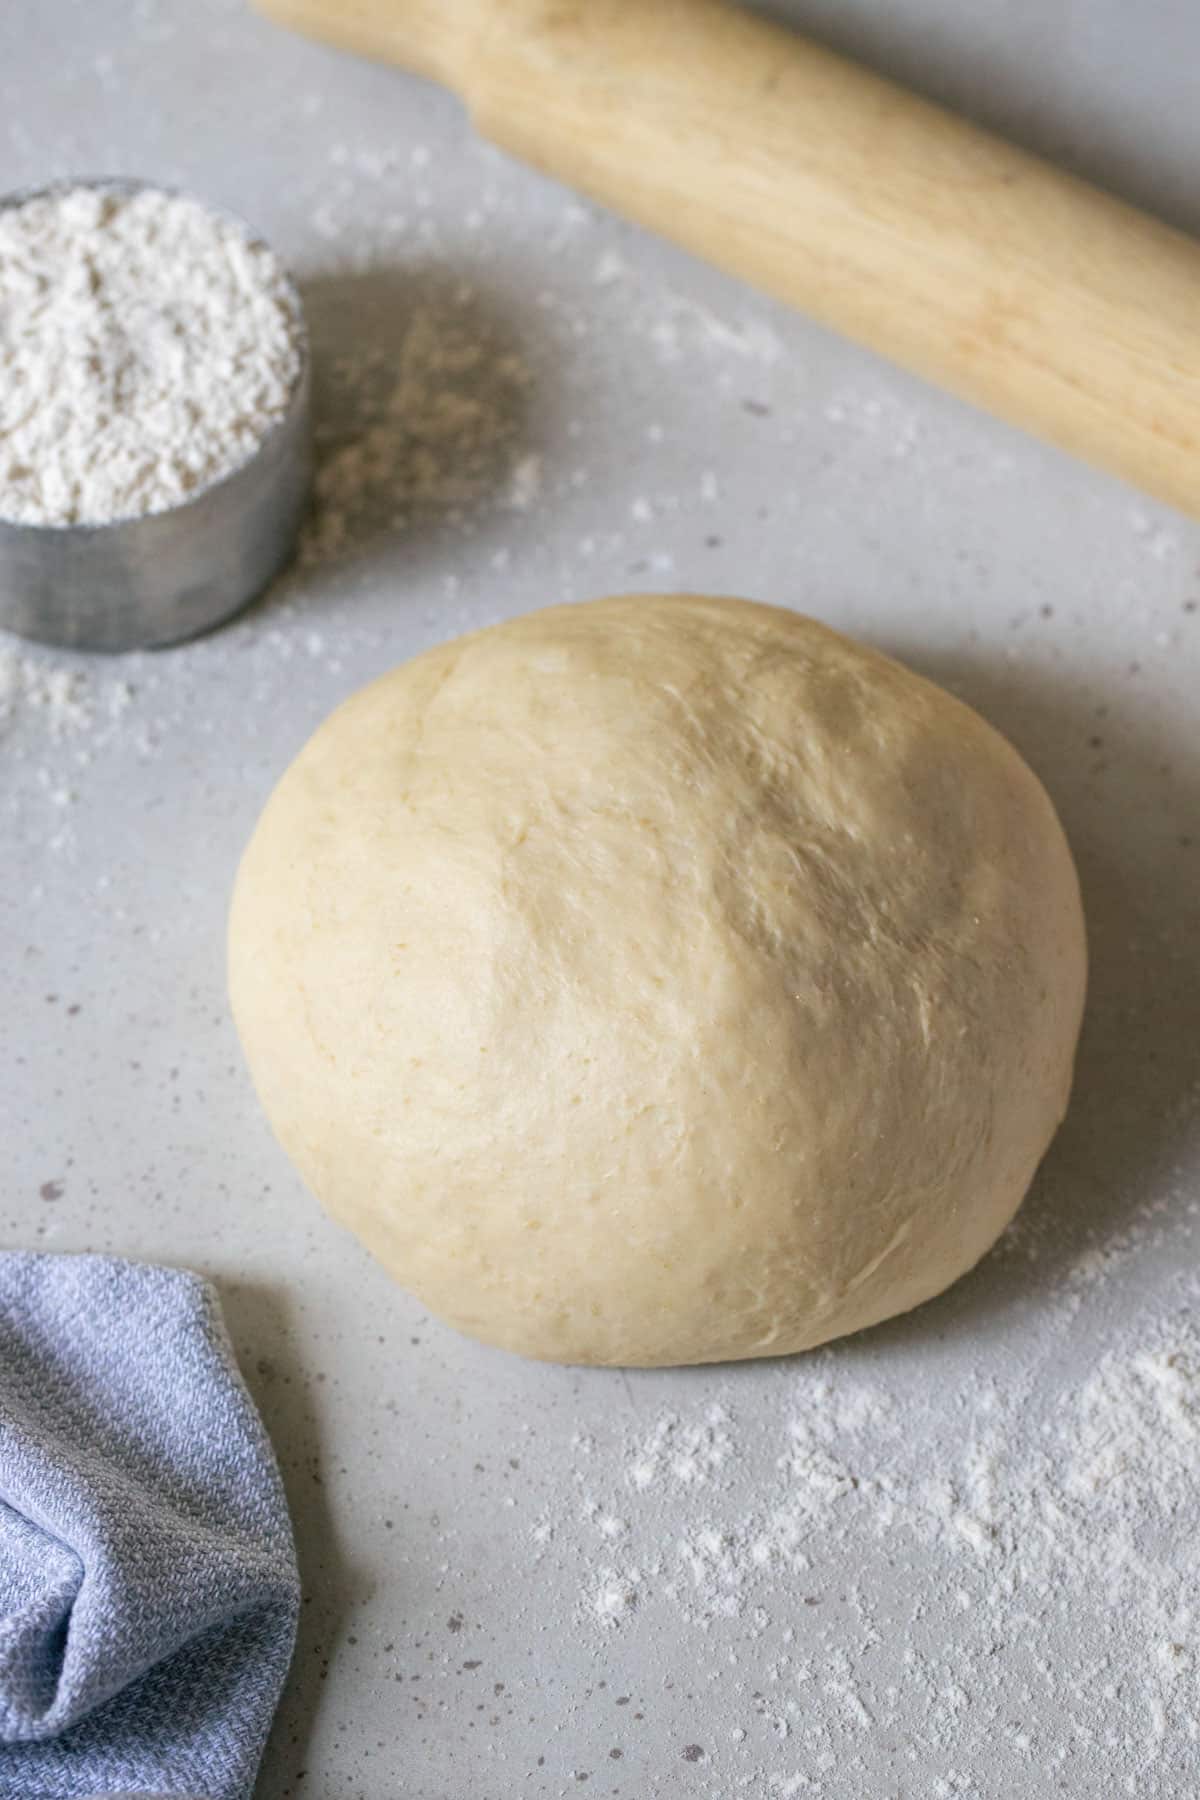
This easy pizza dough is all you need for the best homemade pizzas! I’ll show you how to make pizza dough from scratch, with just 5 simple ingredients (and only 15 minutes of hands-on prep). Full of flavour with a crisp, chewy crust, you’ll never want to use store-bought bases again!
Why you’ll love this recipe
- So easy – this recipe requires only 5 simple pantry ingredients and 15 minutes to mix and knead. The rest is hands-off time as the dough rises.
- Make ahead – make it on the day you want to eat it, or leave it to rise in the fridge for up to 3 days. The longer you leave it, the more flavourful it will be.
- Versatile – make it by hand or in a stand mixer, shape it into a thick or thin crust and add your favourite dried herbs. This dough is perfect for making traditional pizza, but it can also be used for dessert pizzas, garlic bread, pizza pockets and pizza scrolls.
- Freezer friendly – this recipe makes two large pizzas. It can be easily multiplied and freezes beautifully, for delicious pizzas any time.
Ingredients you will need
** This post contains tips and instructions to achieve the best possible results. This photo is a great guide for when you are in the supermarket, but for full ingredient quantities and methods, please scroll down to the detailed recipe card below!
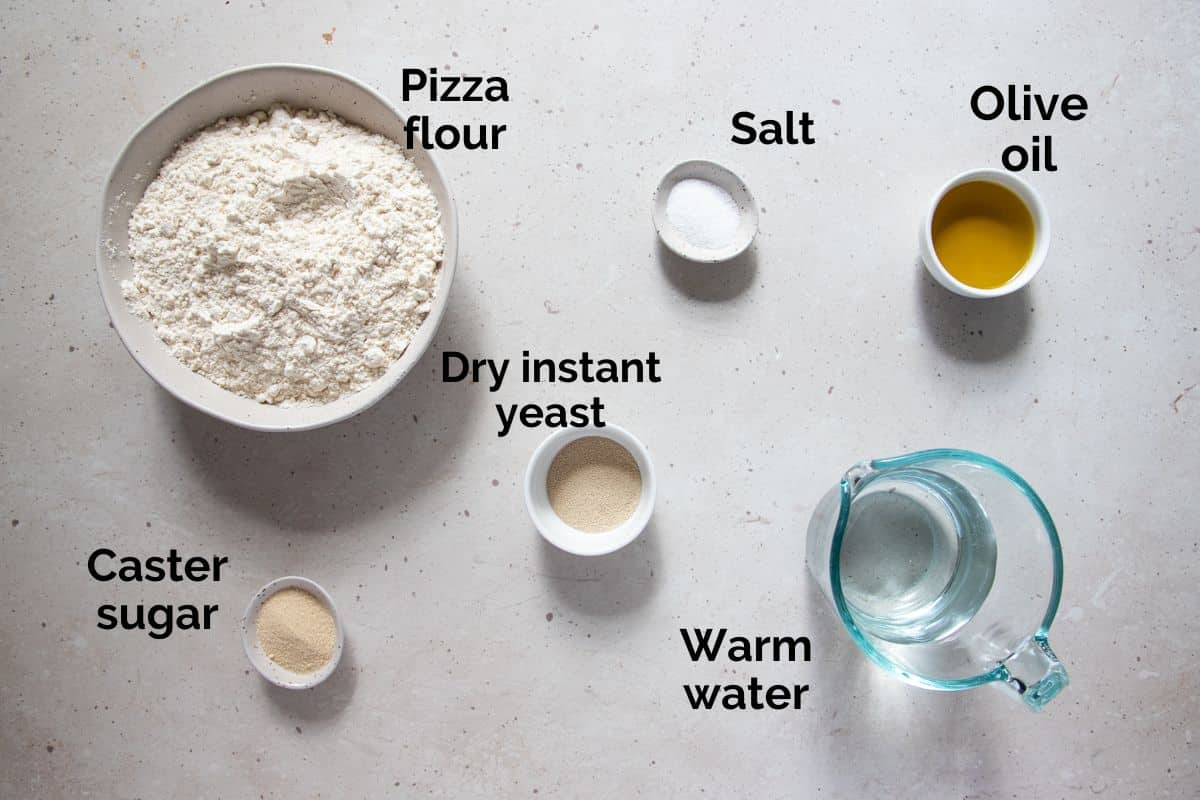
- Flour – flour is the base ingredient in pizza dough and the type of flour you use can affect the end result. Plain, all-purpose flour works well for a crisp and thin crust. However, for a thicker crust, chewier crumb and better structure, I recommend using higher protein ‘00’ pizza flour or bread flour.
- Instant yeast – yeast makes the dough rise. I use instant yeast (also called quick-rise, fast-rise or rapid-rise yeast). Instant yeast is a dry yeast that comes in small granules. It absorbs liquid more quickly than active dry yeast and can be directly mixed into dry ingredients without rehydrating or proofing. Active dry yeast can be used, but it will need to be rehydrated in liquid before use, and the rise time will be longer. Yeast is a living organism, so check the expiry date and make sure it is still active before use.
- Sugar – an essential ingredient, sugar feeds the yeast and is converted into carbon dioxide and alcohol. This process produces air bubbles, tenderising the dough and enhancing the flavour. I use raw caster sugar, but white sugar and caster sugar will work too.
- Warm water – always use warm water with a temperature of 36-38 C (97-100 F). Never add hot water, or the heat will kill the yeast and the dough won’t rise.
- Olive oil – tenderises the dough, enhances the flavour and helps it to crisp in the oven. Use a good quality extra virgin olive oil, for best flavour.
- Salt – salt is necessary for flavour. Salt can kill yeast, so make sure the salt and yeast are not added to the flour at the same time.
Step by step instructions
Full ingredient notes and quantities can be found in the detailed recipe card below. But here is a brief overview of what you can expect;
You can either knead by hand or use a stand mixer, depending on preference.
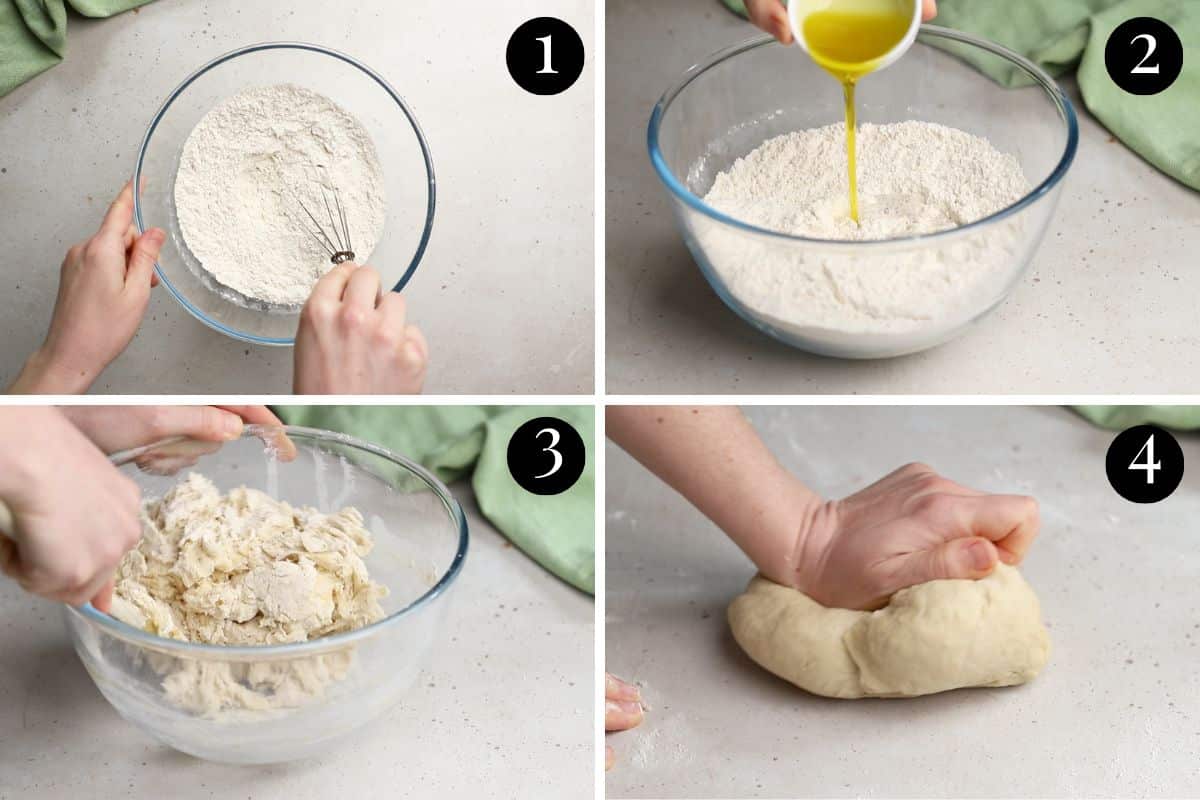
- Add the dry ingredients to a mixing bowl or stand mixer (making sure the salt doesn’t touch the yeast) and mix to combine. Make a well in the centre.
- Mix in the water and olive oil. Use a wooden spoon (or dough hook mixer attachment) and mix until a rough dough forms.
- Knead – use your hands to knead the dough on a lightly floured surface for 5 minutes or until it becomes smooth and bounces back when gently pressed. If using a stand mixer, mix with a dough hook for around 3 minutes.
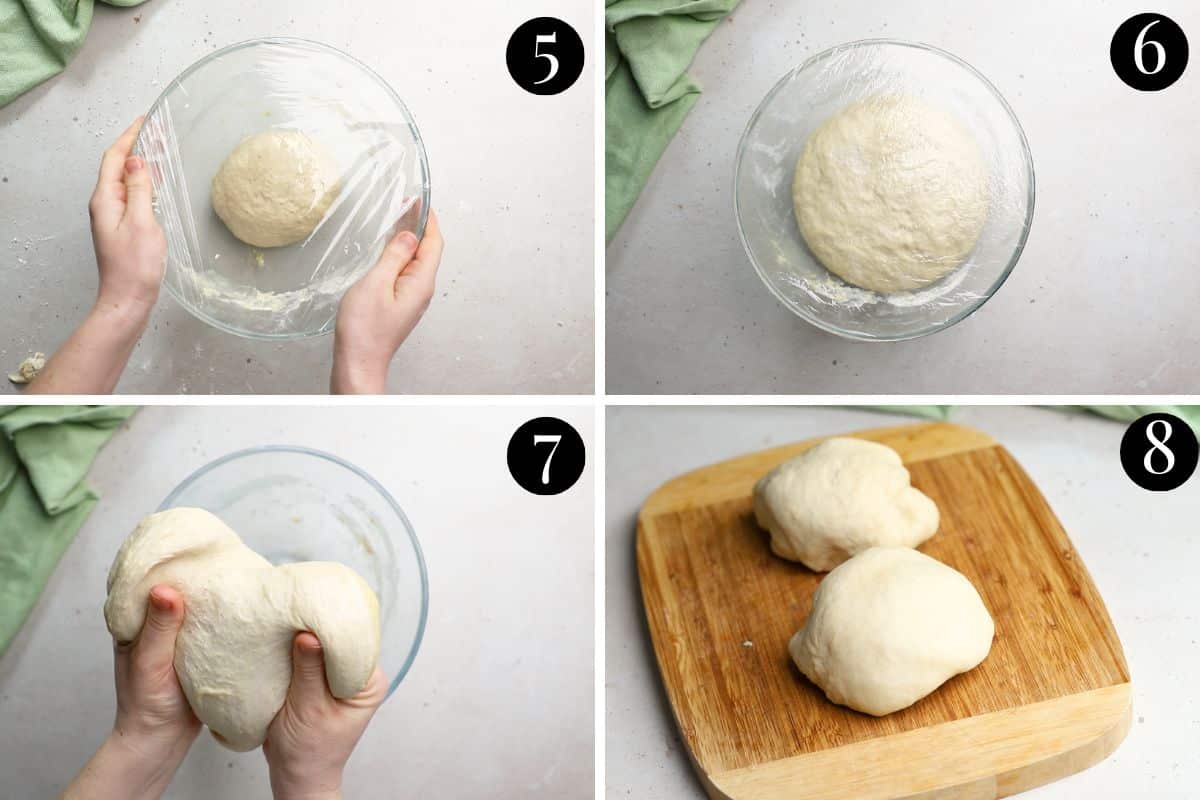
- Transfer the dough to a lightly oiled bowl and cover with plastic wrap or a large tea towel.
- Rest in a warm spot to rise for 1-2 hours, until the dough has doubled in size. (See image 5 and 6).
- Deflate – after the dough has doubled in size, punch it down to deflate the air bubbles. This process relaxes the gluten and makes the dough easier to shape.
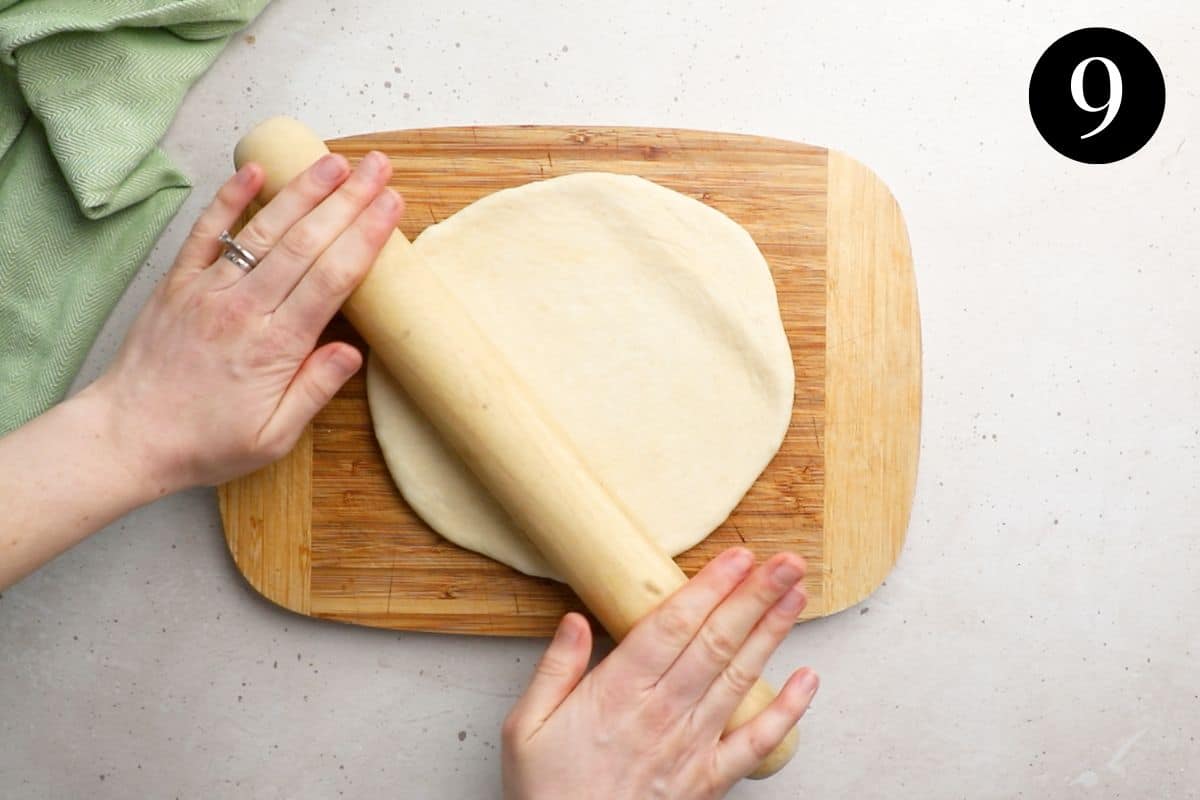
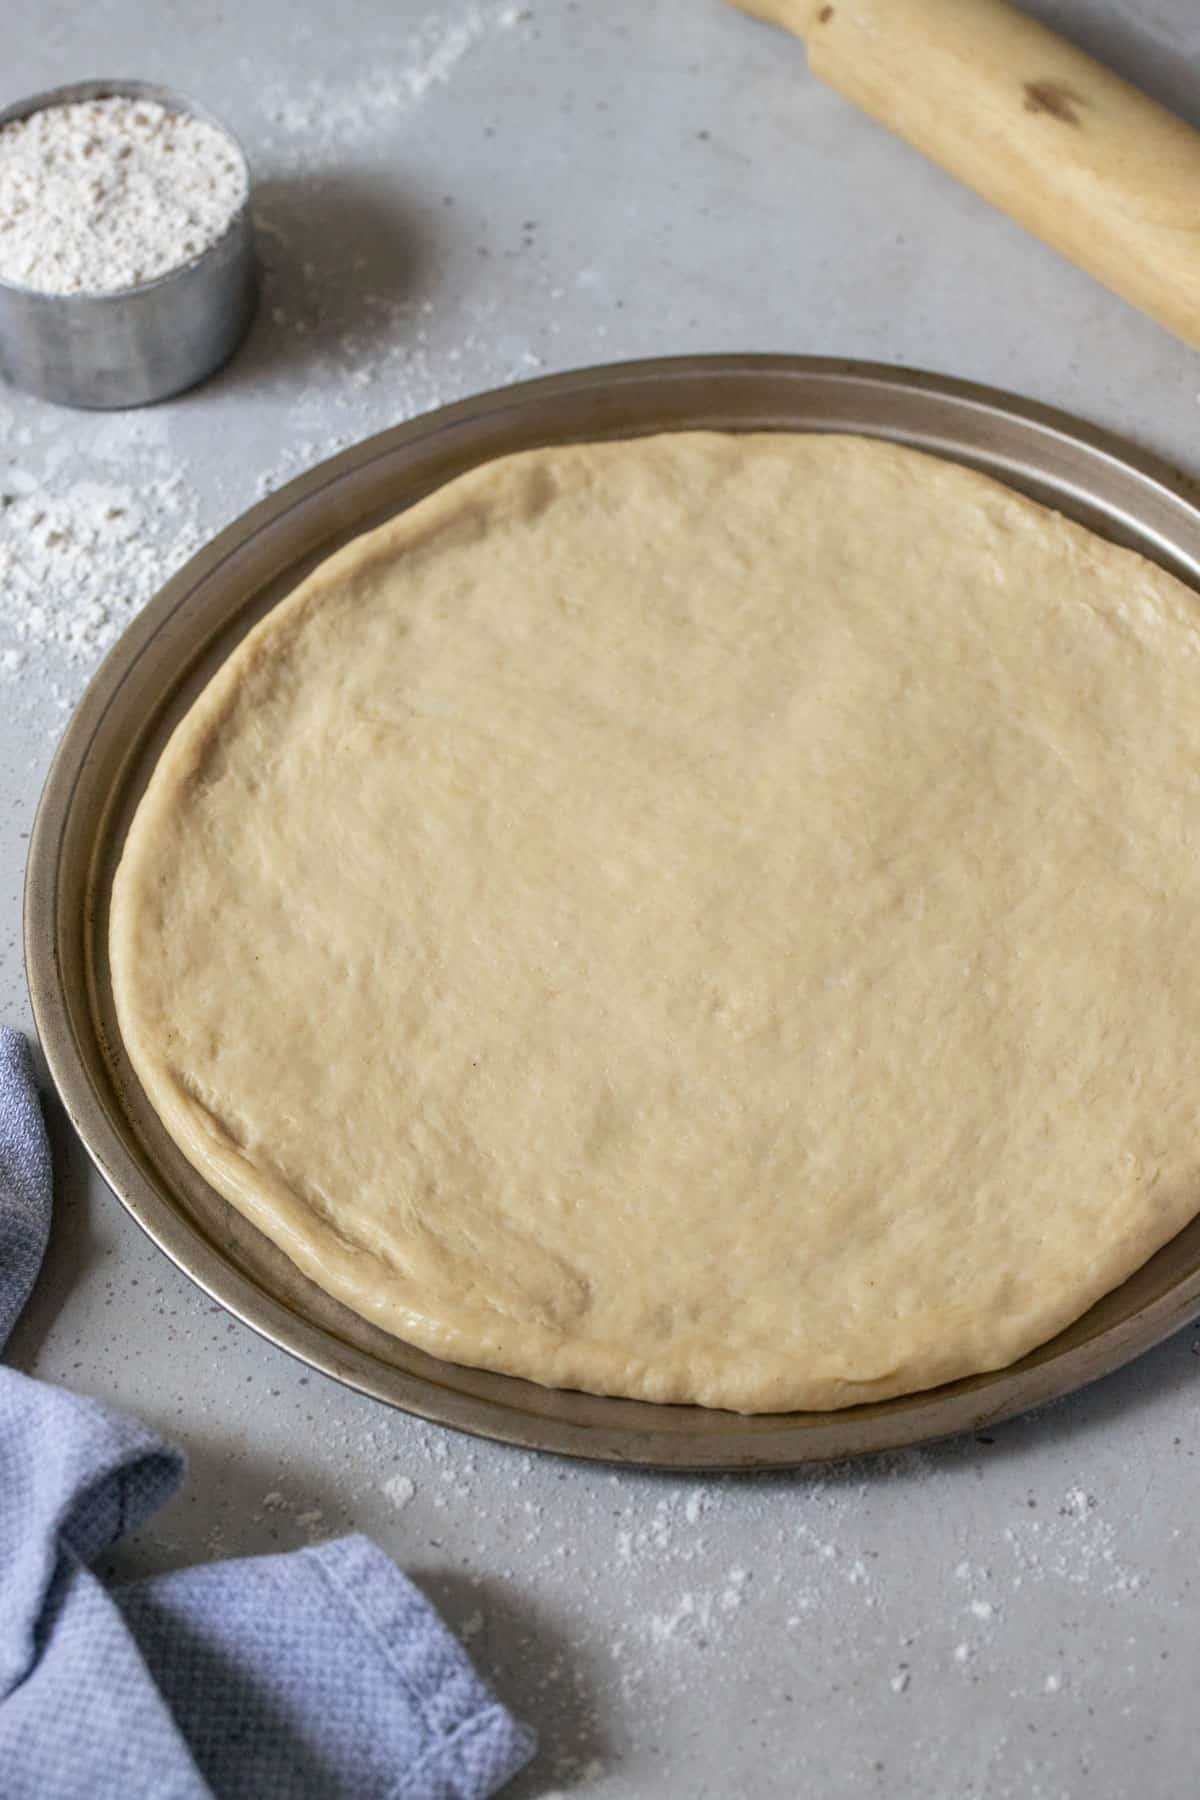
- Cut the dough into 2 pieces and shape into balls. Gently shape the balls into discs and then use a rolling pin to roll them to fit your pizza or oven trays. Make the bases thick or thin, depending on preference. Cover and allow the dough to rest on the trays while you prepare your toppings.
- Top with pizza sauce, shredded cheese and your desired pizza toppings and bake according to the instructions in the recipe card below.
Find a warm place for the dough to rest. Over the warmer months, any warm, sunny spot in your house will work to help the dough rise. But in the colder months, it can be a little harder to find somewhere warm. And cold dough takes longer to rise!
Placing the covered bowl at a safe distance in front of a fireplace or heater will work. Alternatively, run a shallow sink of warm water and stand the bowl in the water. If all else fails, pre-heat your oven on the lowest heat setting (under 40 C) to create a warm environment. Turn the oven off before adding the bowl.
How to knead dough;
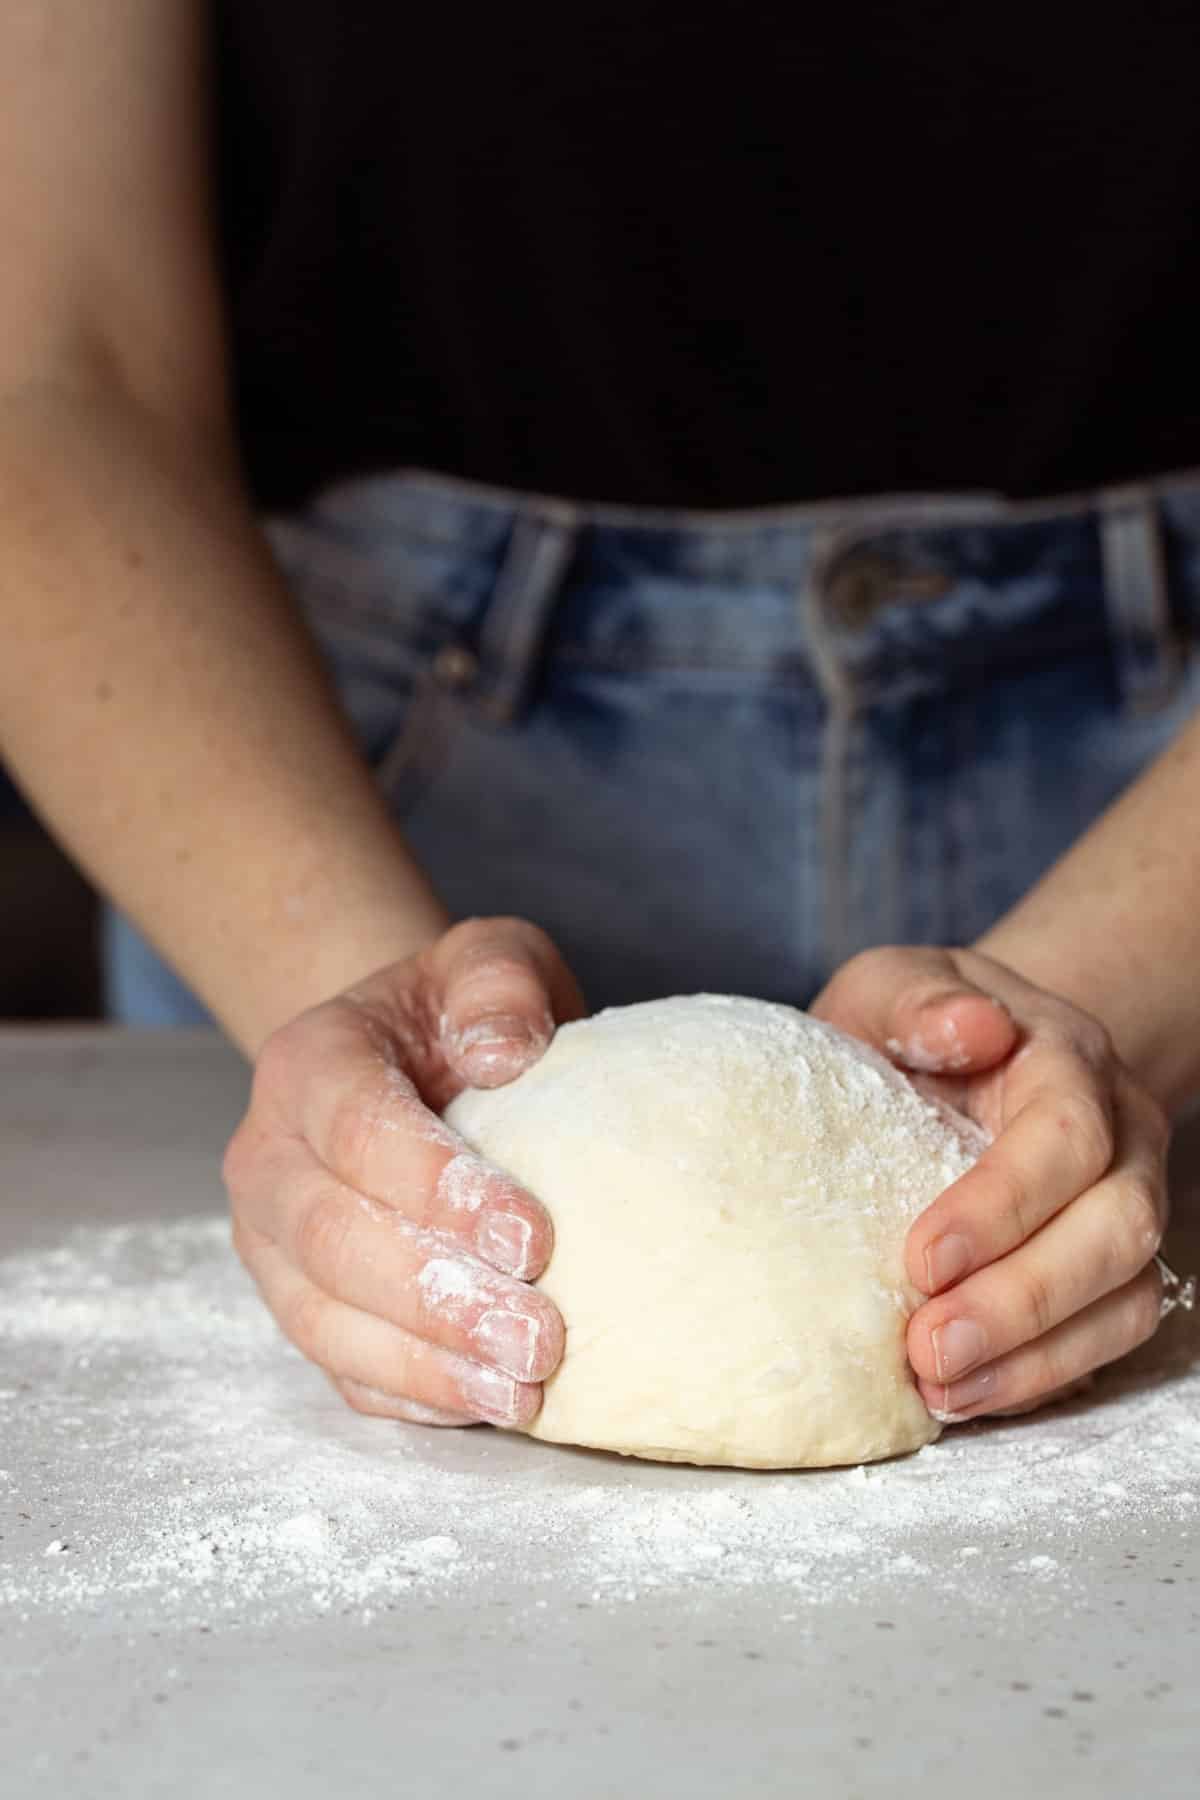
Knead the dough by using the palms of your hands to push it down, and then stretch the dough outward, away from your body. Fold it in half and then repeat this process. Over time, the dough will soften and become stretchy.
How to tell when the dough is ready;
The dough is ready when it is smooth and can hold its shape. It should spring back when gently pressed. If it doesn’t spring back, continue kneading for another 1-2 minutes.
Expert tips
- Measure the flour by weight. Flour can be easily compressed, which means using a measuring cup alone can result in too much flour being added. Kitchen scales are the most accurate way of measuring flour. Using a kitchen scale means that even if your flour is compacted, you will still end up with the correct amount. If you don’t have scales, you can sift the flour into a measuring cup and level it with a knife.
- Add extra flavour by adding your favourite dried herbs before kneading.
- Be sure to use warm water with a temperature of 36-38 C (97-100 F). If the water is too hot, it will kill the yeast and the dough won’t rise.
- This recipe can be multiplied if you’d like to store some for later or make some pizza scrolls.
- For a crunchy base, sprinkle some polenta or semolina onto the tin before adding the dough.
- Got time to make it ahead? Storing the dough in the refrigerator after forming it will improve its flavour. It has more time to develop and tastes even better after 1-3 days in the refrigerator. So, if you have time, make it ahead and keep it tightly covered in the fridge. When you are ready to use it, take it out of the fridge and allow it to come back to room temperature before stretching and baking.
- Use a good quality pizza stone or tray for best results. Pizza stones hold lots of heat, giving a crisper crust and more spring. If using a peel or pizza stone, sprinkle polenta over the base before adding the dough, to prevent sticking.
- Stuff the crust – place a little parmesan cheese or mozzarella around the edge of the pizza bases, fold over and seal before baking.
- When measured accurately, you shouldn’t need to add any additional flour or water. However, if your dough is too dry, add a little more water, a few drops at a time, until it comes together. If it is too sticky, sprinkle more flour and knead until smooth.
FAQs
Pizza dough can be used immediately after proofing, or it can be kneaded and left to rise in the fridge for up to 3 days before use. Prepare the dough and place it into a bowl lightly greased with olive oil. Cover and let it rise in the fridge for up to 3 days. When ready to use, remove it from the fridge and allow it to return to room temperature before punching it down and shaping.
Unbaked pizza dough can be frozen for up to 3 months. Allow the dough to fully rise before freezing and then divide it into balls portioned for individual pizzas. Lightly oil the surface of the balls, wrap them in freezer-safe bags, push out any air and seal. Thaw in the fridge overnight and bring back to room temperature for 30-60 minutes before punching down and shaping as desired.
Gluten makes the dough stretchy and elastic and needs time to develop. If your pizza dough is shrinking back when you try to stretch it, this may mean that the gluten hasn’t had time to develop. Proof the dough for longer to relax the gluten strands. Alternatively, the dough could be too cold. Bring it back to room temperature (gluten is tighter when cold and this will cause the dough to spring back).

Related recipes
Tried this recipe? Please leave a star ⭐⭐⭐⭐⭐ rating or leave a review below and let me know how you went!
Hungry for more? Subscribe to my newsletter and follow along on Facebook, Instagram and Pinterest for the latest recipes and news.
Easy Pizza Dough
Ingredients
- 450 grams pizza flour (3 cups) '00' flour for pizza and pasta is recommended. Otherwise, plain flour is fine.
- 10 grams dried, instant yeast (2 teaspoons)
- 2 teaspoons caster sugar
- 1 teaspoon salt table salt
- 1 cup warm water 250 ml. Make sure it is warm, around 36-38 C. Not too hot!
- 4 tablespoons olive oil extra virgin
Plus
- extra flour for dusting/kneading
Instructions
- Place the flour, yeast and sugar into a large mixing bowl (or a stand mixer bowl) and stir or whisk to combine. Add the salt and stir.
- Make a well in the centre of the flour mixture and add the warm water and the olive oil (make sure the water isn't too hot or it will kill the yeast and the dough won’t rise). Using a wooden spoon, mix until a rough dough forms.
- Place the dough on a floured work surface and use your hands to knead the dough for 5 minutes (or use a stand mixer with a dough hook on medium-low speed for 3 minutes) or until the dough is smooth, soft and bounces back when gently pressed. Shape the dough into a ball.
- Lightly grease the mixing bowl with a little olive oil and return the dough to the bowl. Cover the bowl with plastic wrap or a clean, damp tea towel and place in a warm spot. Allow the dough to rest at room temperature for 1-2 hours (or until the dough doubles in size).
- Once the dough has risen, it can be used right away or kept well covered in the refrigerator for up to 3 days. (See notes).
- Remove the dough from the bowl and place on a surface that has been lightly dusted with flour. Gently punch the dough down to remove any air bubbles.
- When ready to cook, pre-heat the oven to 220°C/428 F and coat 2 pizza trays with a little oil spray.
- Divide the dough in half, making two evenly sized balls. Using floured hands, gently shape the balls into two discs. Use a rolling pin to flatten the discs to fit your pizza trays.
- Place the dough onto the pizza trays. Cover and rest while you prepare your pizza toppings.
- Prepare your pizzas by spreading the bases with pizza sauce. Add shredded cheese and your favourite toppings. Bake for around 15 minutes, or until the crust is lightly golden the cheese is bubbly and golden and the dough is cooked through. Remove from the oven, slice and serve immediately. Enjoy!
Video
Notes
- Measure the flour by weight, for best results. Flour can be easily compressed, which means using a measuring cup alone can be inaccurate. Kitchen scales are the most accurate way of measuring flour. Using a kitchen scale means that even if your flour is compacted, you will still use the correct amount. If you don’t have scales, you can sift the flour into a measuring cup and level it with a knife.
- Flavour the dough by adding your favourite dried herbs before kneading.
- Be sure to use warm water with a temperature of 36-38 C (97-100 F). If the water is too hot, it will kill the yeast and the dough won’t rise.
- This recipe can be multiplied if you’d like to store some for later or make some pizza scrolls.
- For a crunchy base, sprinkle some polenta or semolina onto the tin before adding the dough.
- Got time to make it ahead? Storing the dough in the refrigerator after forming it will improve its flavour. The dough has more time to develop and tastes even better after 1-3 days in the refrigerator. So, if you have time, make it ahead and keep it tightly covered in the fridge. When you are ready to use it, take it out of the fridge and allow it to come back to room temperature before stretching and baking.
- Use a good quality pizza stone or tray for best results. Pizza stones hold lots of heat, giving a crisper crust and more spring. If using a peel or pizza stone, sprinkle polenta over the base before adding the dough, to prevent sticking.
- Stuff the crust – place a little parmesan cheese or mozzarella around the edge of the pizza bases, fold over and seal before baking.
- When measured accurately, you shouldn’t need to add any additional flour or water. However, if your dough is too dry, add a little more water, a few drops at a time, until it comes together. If the dough is too sticky, sprinkle more flour and knead until smooth.
- Storage; Pizza dough can be used immediately after proofing, or the dough can be kneaded and left to rise in the fridge for up to 3 days before use. Prepare the dough and place it into a bowl lightly greased with olive oil. Cover and let it rise in the fridge for up to 3 days. When ready to use, remove the dough from the fridge and allow it to return to room temperature before punching it down and shaping.
- Freezing; unbaked pizza dough can be frozen for up to 3 months. Allow the dough to fully rise before freezing and then divide it into balls portioned for individual pizzas. Lightly oil the surface of the balls, wrap them in freezer-safe bags, push out any air and seal. Thaw in the fridge overnight and bring back to room temperature for 30-60 minutes before punching down and shaping as desired.
- The nutrition information is based on the recipe being made into 2 pizzas, with one pizza being one serve. The nutritional information is an estimate only and does not take into account any additional toppings or sides served with the pizza dough.
- This recipe is made using Australian metric cups and spoon measurements. Due to cup sizes varying from country to country, I advise adjusting if necessary.
Nutrition
Are you following us on Facebook, Instagram and Pinterest?
Update Notes: This recipe was originally published in April 2019, but was re-published with new information and photos in September 2023.




Sylvie says
The perfect pizza dough recipe! Thanks for all the great tips, will be trying your recipe very soon 🙂
TheCookingCollective says
Thank you Sylvie! I hope you enjoy pizza night at home!
Jaimie says
I’m always too lazy to make my own pizza dough, but this looks like it has come up just beautifully. Thanks for sharing, I’m definitely going to give this a go next pizza night, and pair it with your amazing sauce recipe too!
TheCookingCollective says
Give it a try Jaimie! You’ll be surprised how easy it is, and while the dough is resting, you can prepare the pizza toppings, so it really doesn’t take much more time to prepare. Enjoy!