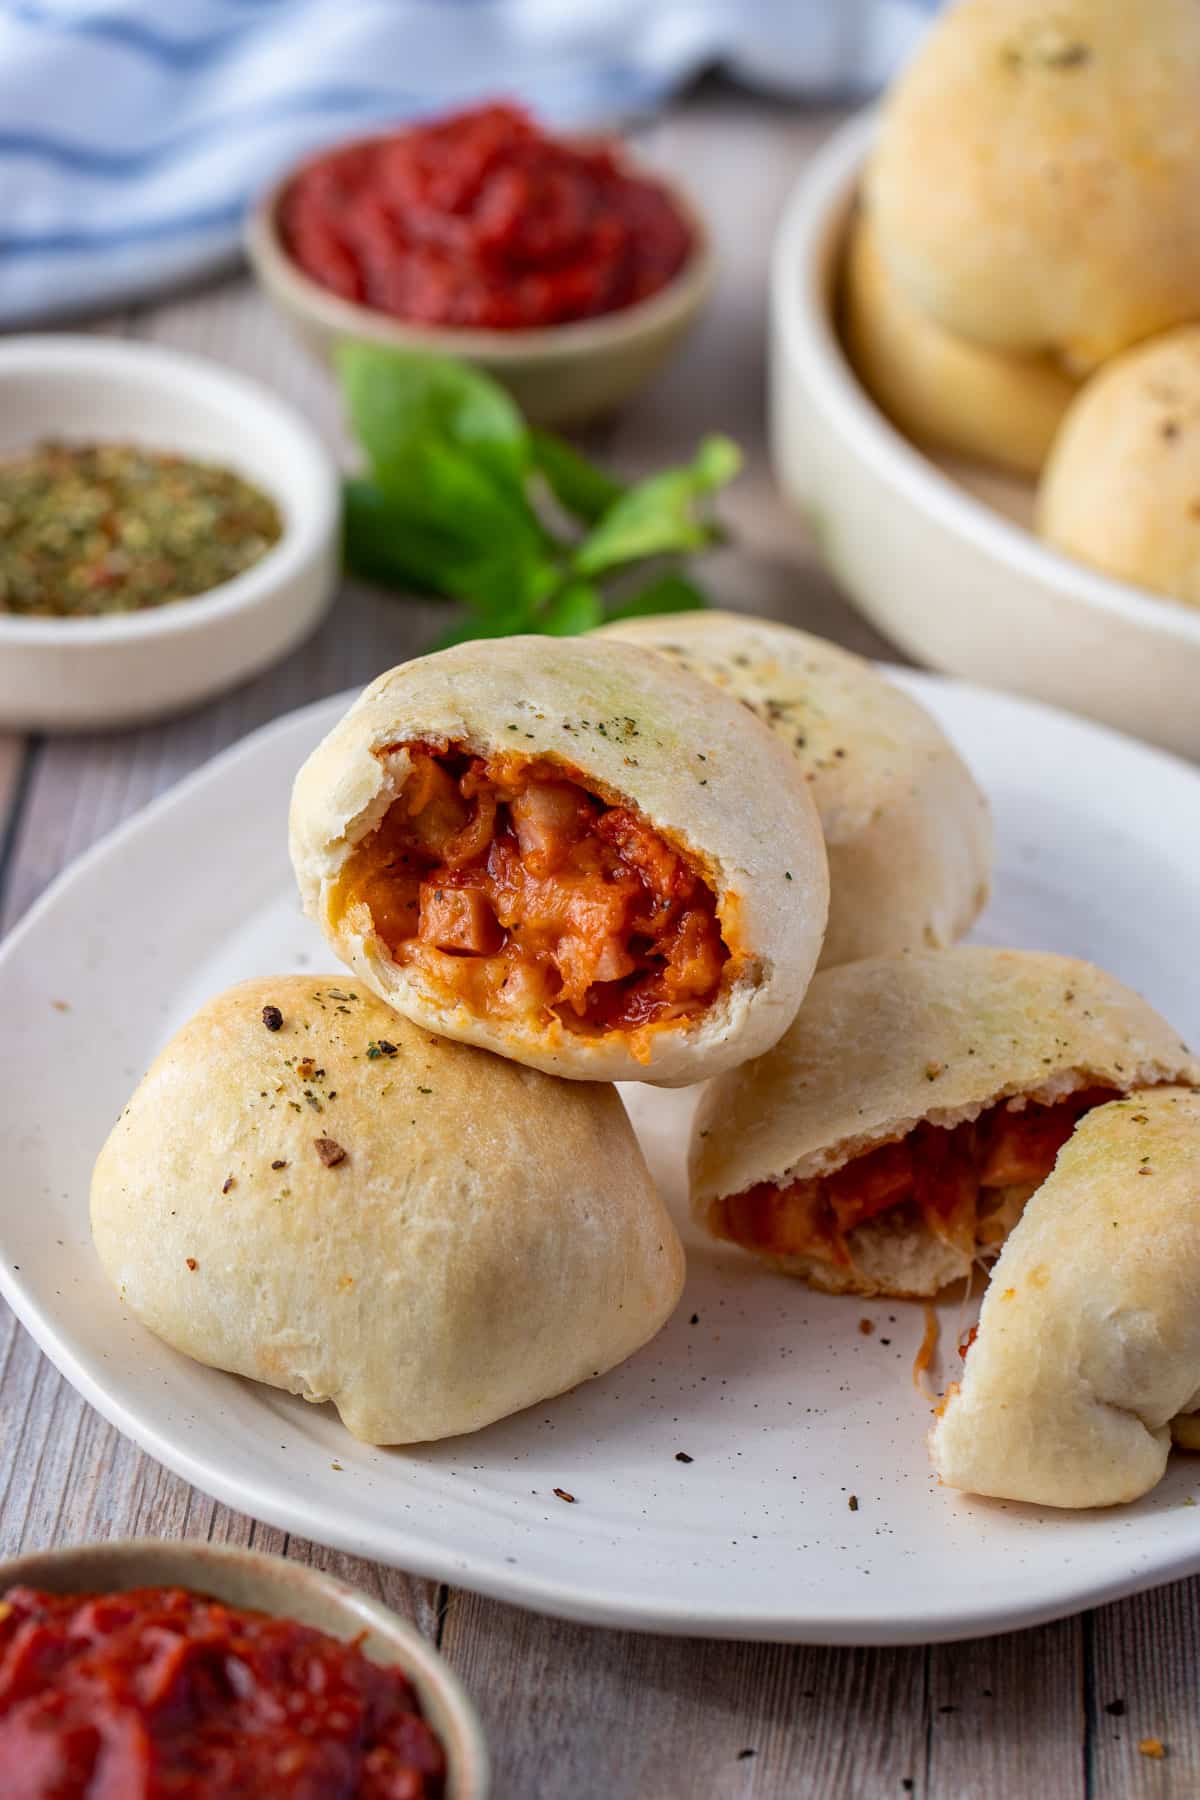
These homemade pizza pockets are so easy to make in your air fryer or oven and are totally delicious! Fluffy homemade pizza dough is stuffed with rich pizza sauce, oozy mozzarella and your favourite pizza toppings, then baked until golden brown. They make the perfect party or game day snack. And, they can be frozen to enjoy any time. Everyone loves them!
Why you’ll love this recipe
- So easy to make – homemade pizza dough is super easy to make from scratch (and can be made ahead to save time). Simply stuff, roll and bake!
- Customisable – customise them to suit your own personal tastes! Fill them with pizza sauce, pesto, cheese and any of your favourite pizza toppings. They can be made vegetarian or adapted to suit your needs.
- Freezer-friendly – they freeze perfectly and are delicious reheated in the air fryer, oven or microwave. So, make a double batch for parties or easy snacking any time.
- Save time by using store-bought pizza crust or sauce.
- Easy to eat – pocket pizzas are easy to hold in one hand and the filling is all contained in the middle of the dough, making them a great, portable snack.
- Affordable – pizza dough can be made ahead and kept in the fridge or freezer to use any time. And it is so cheap to make. And you can use any combination of toppings or veggies from the fridge to stuff them.
Ingredients you will need
** This post contains tips and instructions to achieve the best possible results. The photo above is a great guide for when you are in the supermarket, but for full ingredient quantities and methods, please scroll down to the detailed recipe card below!
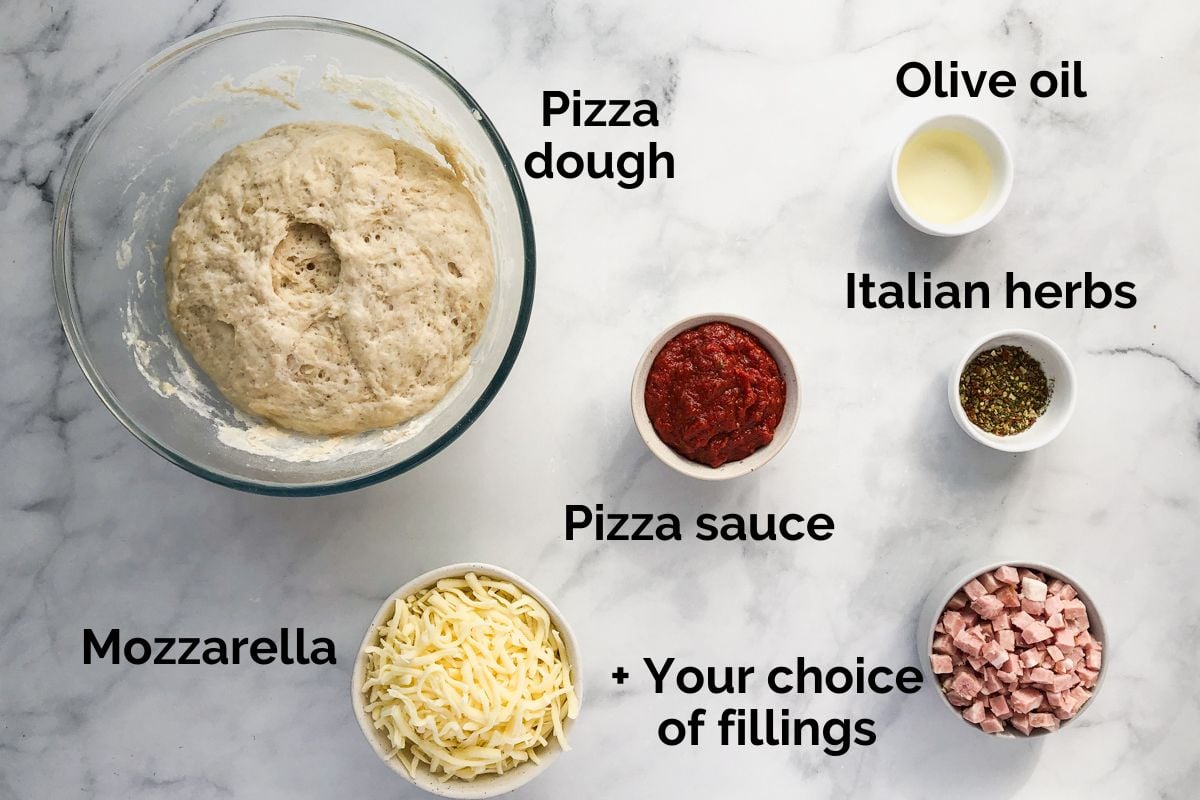
- Pizza dough – you’ll need a batch of soft, fluffy homemade pizza dough made with yeast for this recipe. It’s really simple and can even be made ahead and refrigerated for up to 3 days before use. And doing this enhances the flavour! If you do make it ahead of time, let it come back to room temperature before using. Making your own dough is cheaper, but you can use store-bought pizza dough to save time. Pre-made pizza dough can be found in balls in most supermarkets.
- Pizza sauce – whip up a batch of homemade pizza sauce, or use store-bought pizza sauce, depending on preference.
- Mozzarella cheese – use mozzarella or a pizza cheese blend for the best stretchy melt and flavour.
- Olive oil – a little oil is used in the dough to add depth and flavour. And I recommend brushing some on the top before cooking to make the dough lovely and crisp on the outside. Choose a light or extra virgin olive oil, depending on how strong you like the flavour to be.
- Toppings – I opt for pepperoni, shredded ham and cheese, but you can use any of your favourite pizza toppings like capsicum, bacon, leftover chicken, spinach or fresh herbs. Just make sure that they are finely diced, for even cooking.
Step by step instructions
**Full ingredient list and detailed step-by-step instructions can be found in the recipe card below.
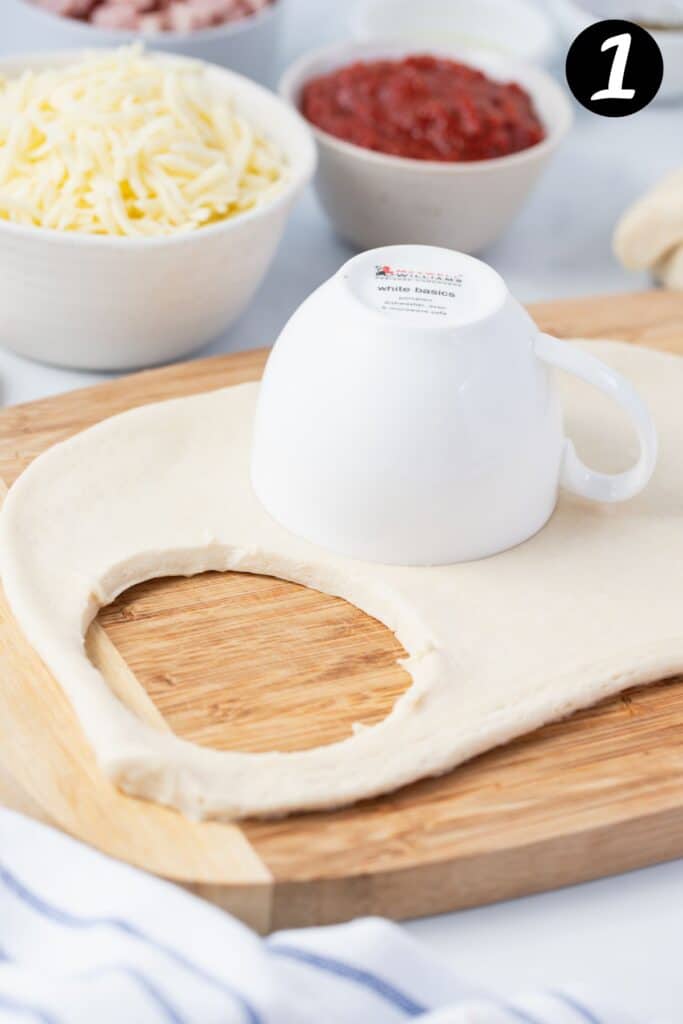
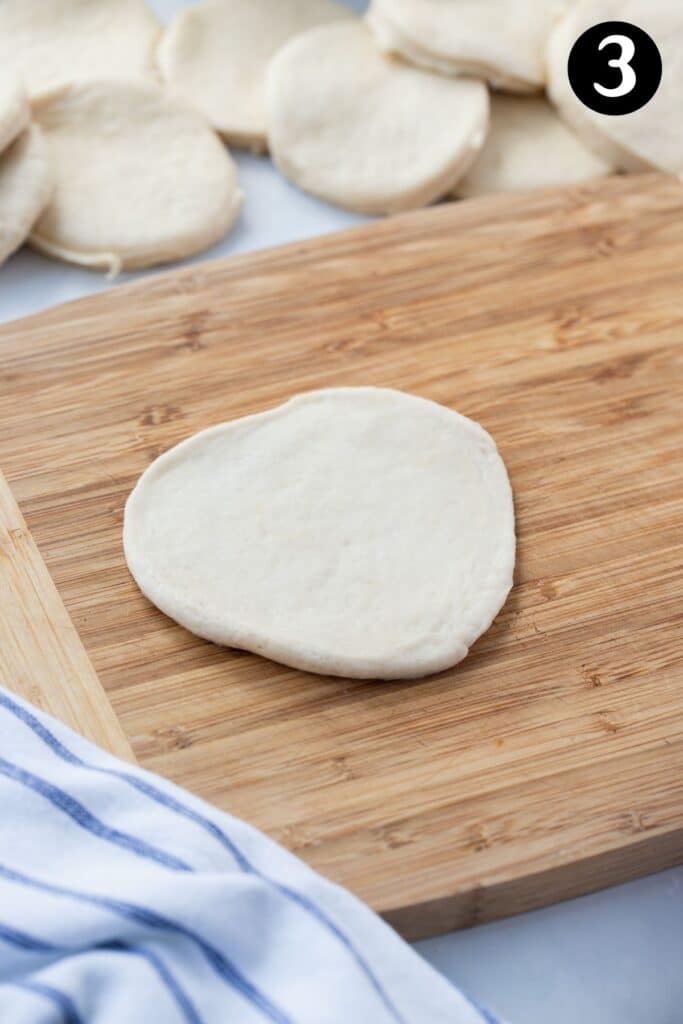
Step 1. Prepare the pizza dough;
Roll your prepared pizza dough or store-bought pizza dough on a cutting board, to about ½ cm thickness.
* For more information about how to make it, you can read more tips and recipe notes here.
** Tip: If you make your dough early, wrap it and keep it in the fridge for 24 hours, or freeze it and thaw it when ready to use. Remove the dough from the fridge at least an hour before use, to bring it back to room temperature.
Using a 9cm cutter or cup as a guide, cut the rolled dough into about 15 circles.
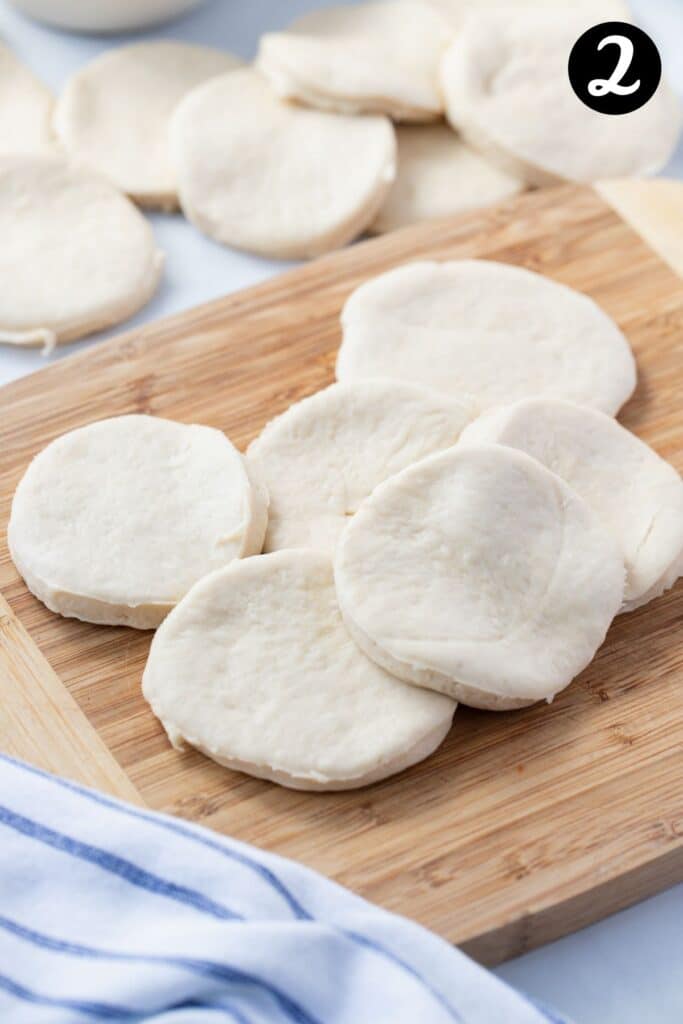
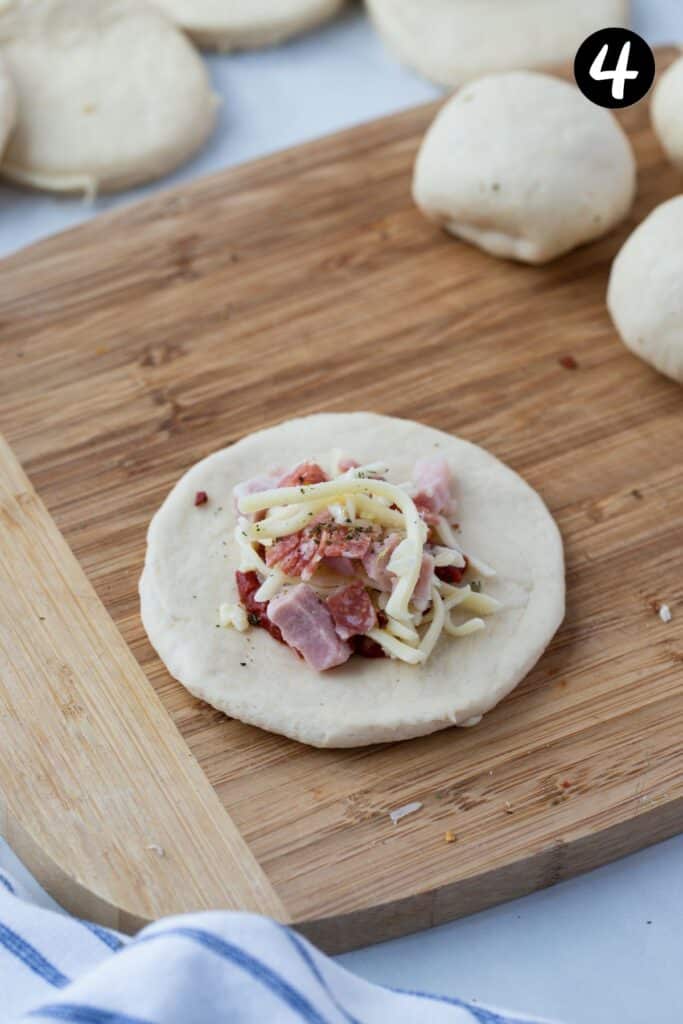
Step 2. Add the fillings;
Roll the dough cut-outs a little more to flatten them further. Add a small amount of pizza sauce, shredded cheese and your choice of fillings to the centre.
* Don’t overfill, or the pockets won’t be able to close properly.
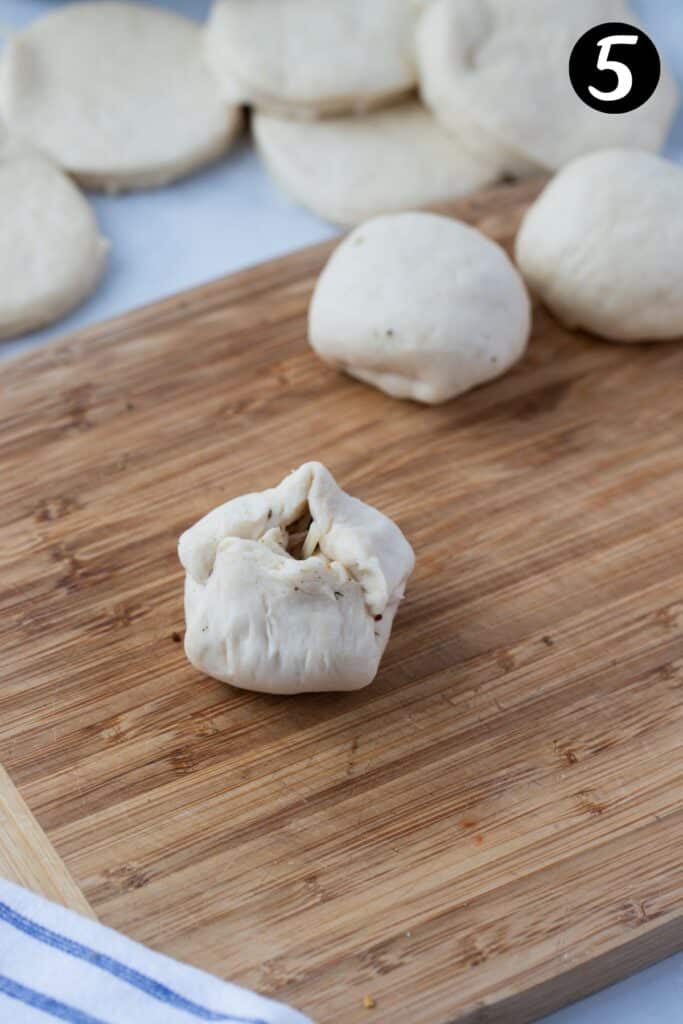
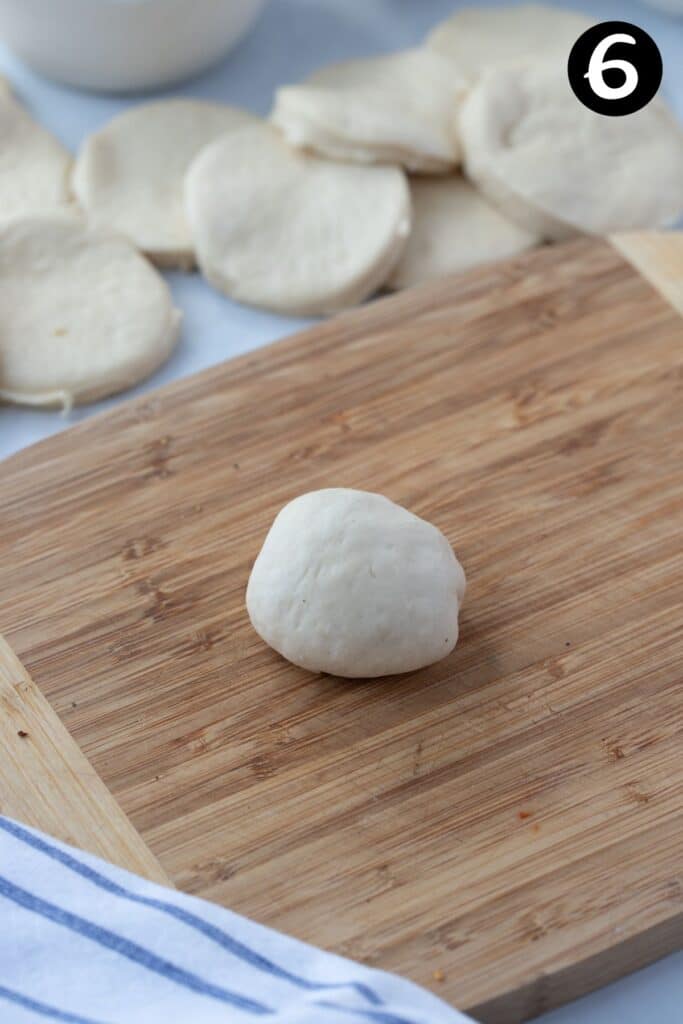
Step 3. Shape the pizza pockets;
Gently lift the sides of the dough over the toppings and pinch the edges together, forming a seal. Make sure they are fully sealed, to prevent the filling oozing out in the oven.
Place the balls of dough seam-side down to rest while you fill and shape the others.
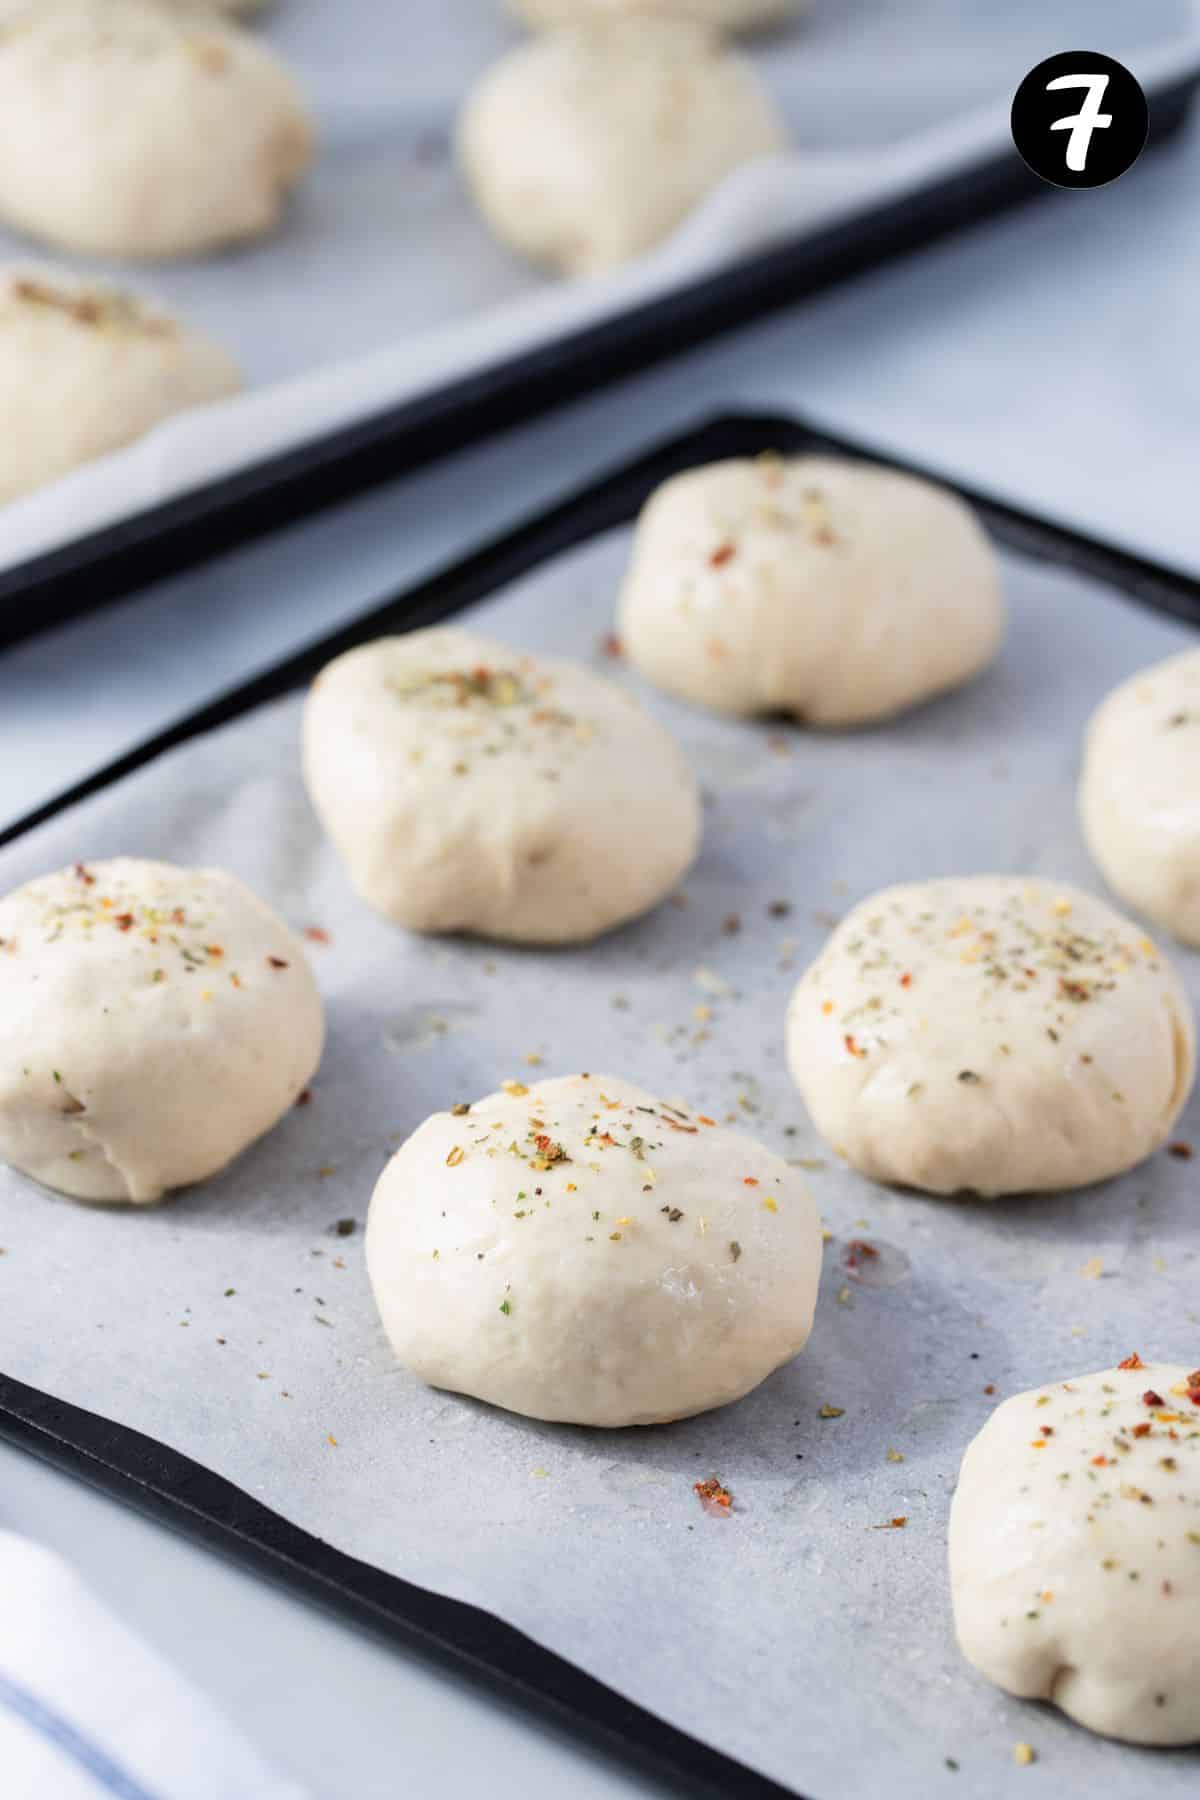
Step 4. Bake;
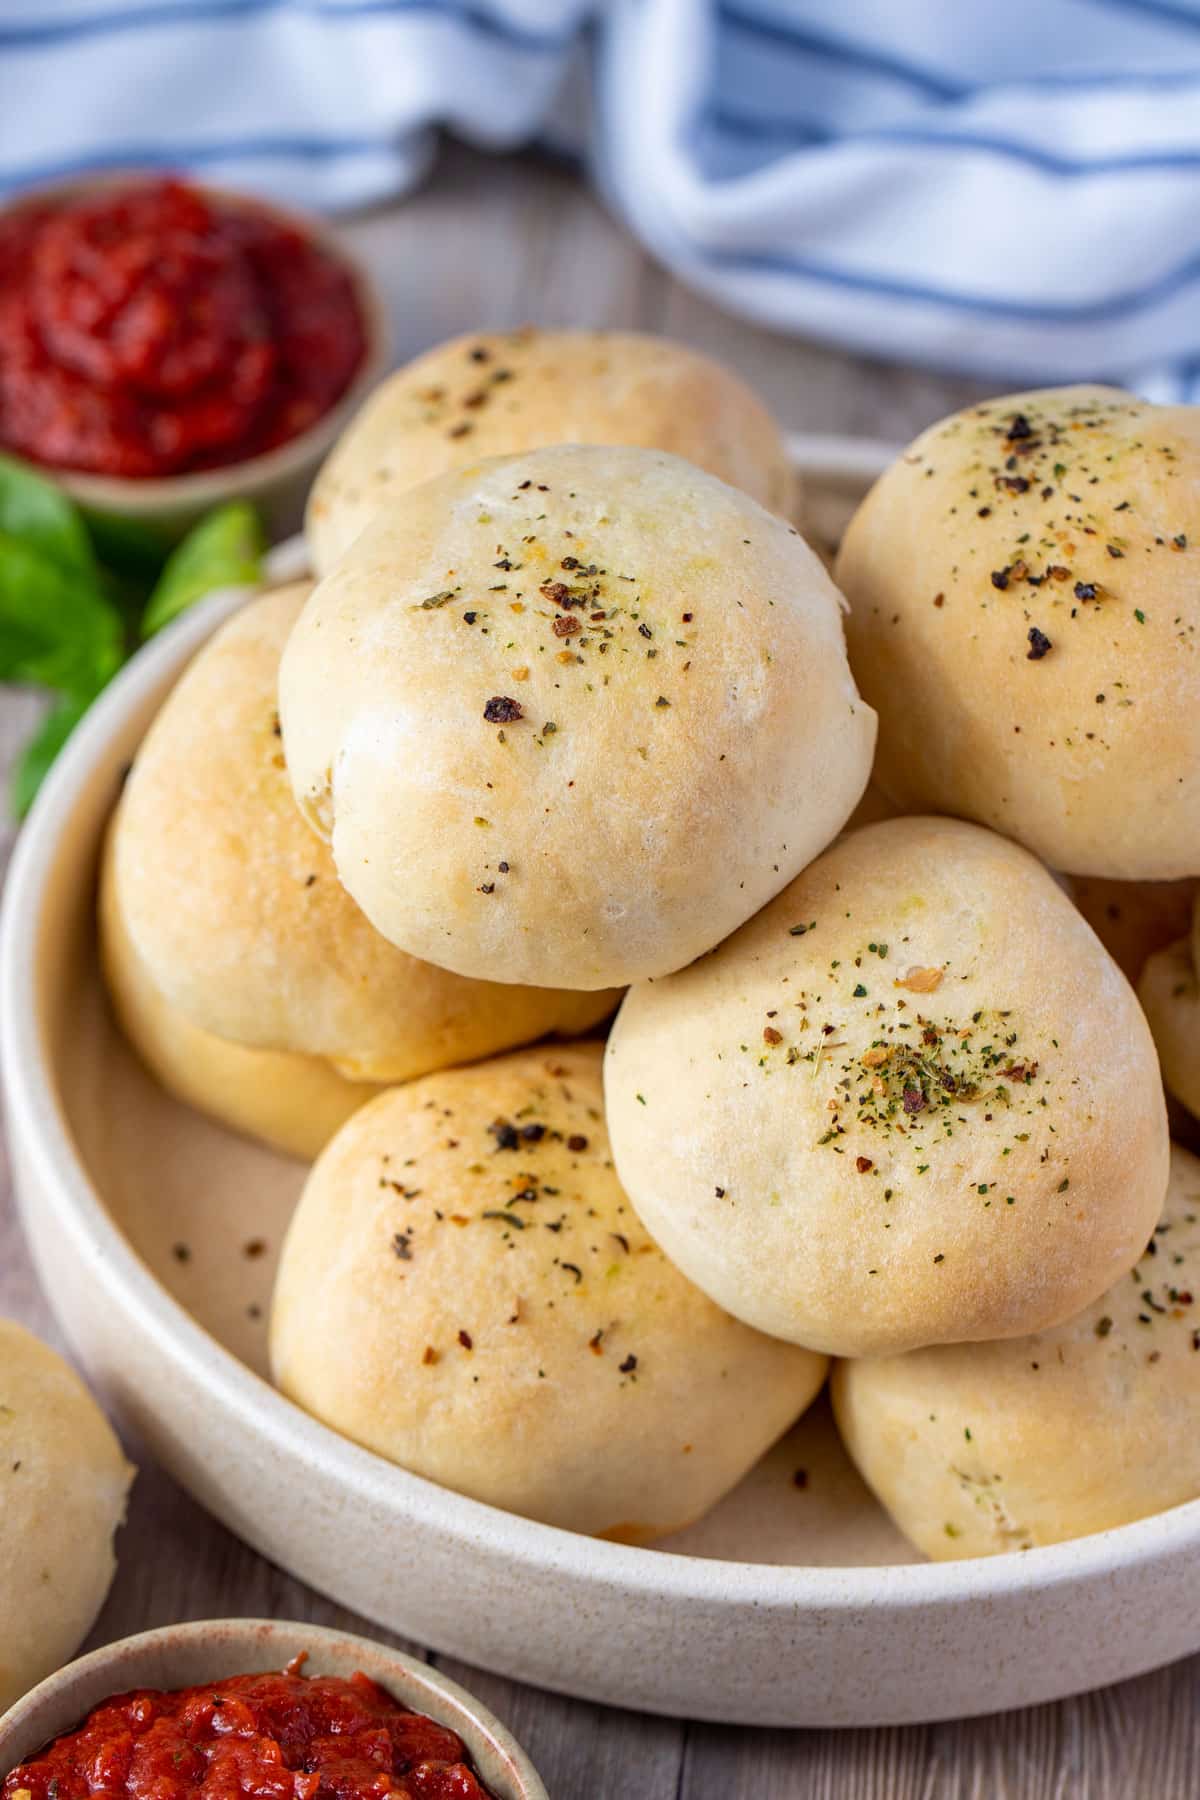
Arrange the pizza pockets on a baking tray (seam-side down) and spray or brush with a little olive oil. Bake until the balls of dough are crisp and golden. (Full baking times and oven temperature below).
Serve them warm with extra pizza sauce for dipping!
Expert tips
- To save time, make the dough ahead and store it in the fridge for up to 3 days. Bring it to room temperature for at least 1 hour first before adding the filling, to make sure it turns out nice and fluffy.
- Chop the fillings finely so that they cook through.
- If using wetter vegetables or ingredients like zucchini or mushroom, I recommend lightly sautéing them first. Cooking the vegetables will release some of their liquid, so that the filling won’t make the dough soggy. You only need to do this for wet ingredients.
- For wet ingredients like pineapple or tomato, press them onto a paper towel to remove any excess liquid before adding them to the filling.
- You can easily make these vegetarian by leaving out any meat and filling them with your favourite veggies and cheese.
- For best results, don’t overfill the rolls and make sure that the edges are firmly pressed shut so that they don’t burst open while cooking. You will need less filling than you think!
- Be sure to allow the pizza rolls to cool for a few minutes before eating, as the filling will be hot!
- The pizza sauce can also be prepared ahead and stored in the fridge, or you can easily swap it for store bought pizza sauce.
- Try popping some pizza pockets into lunchboxes, for a great sandwich substitution! They can be eaten hot, or cold.
- This recipe makes 15 rolls. The recipe can be easily multiplied to feed a hungry crowd.
- Serve with some extra pizza sauce for dipping, or any complimentary sauces of your choice.
FAQs
Place them in an airtight container and refrigerate for up to 3 days. Reheat in the microwave, oven or air fryer before eating.
To freeze, place the cooked and cooled rolls into re-usable freezer bags or an airtight, freezer-safe container, separating any layers with baking paper. They will freeze for up to 3 months. You can either cook them from frozen (add a few extra minutes to the cooking time) or defrost them at room temperature for 30 minutes before heating.
They cook beautifully in the air fryer! Depending on the size and type of your air fryer, cooking times may vary. Aim for 8-10 minutes at 180 C/356F and cook in batches, in a single layer with a little space between each roll to allow for expansion.
If you add some veggies, you can serve them on their own with some extra pizza sauce on the side for dipping. Otherwise, try adding a simple green salad or some pumpkin and goats cheese salad. You can also eat pizza rolls with soup, pasta or steamed veggies. They also make a great lunchbox addition with chopped veggies and fruit.
Pizza pockets can be reheated in the microwave, oven or air fryer. To reheat in the microwave, place them in a single layer on a plate lined with a paper towel. Microwave for around 45 seconds-1 minute, or until the filling is steaming hot. To reheat in the air fryer, place them in a single layer in the air fryer basket and cook at 160C/320 F for around 5 minutes, or until crisp and steaming hot in the middle. For the oven, heat at 160C for around 5-8 minutes, or until steaming hot.

Related recipes


Tried this recipe? Please leave a star ⭐⭐⭐⭐⭐ rating or leave a review below and let you know how you went!
Hungry for more? Subscribe to my newsletter and follow along on Facebook, Instagram and Pinterest for the latest recipes and news.

Homemade Pizza Pockets
Ingredients
Instructions
Oven method.
- Pre-heat the oven to 180 °C (356 F). Line a large baking tray with baking paper.
- On a lightly floured surface, roll the pizza dough until it is about ½ cm (5mm) thick. Use a 9cm cutter or a 9cm cup to cut circles in the dough until you have about 15 pieces.
- Roll the dough circles a little more, to spread them out.
- Add a little pizza sauce, cheese and your chosen toppings to the middle of each circle of dough, leaving space around the edges for the dough to close around the filing. Be careful not to overfill, or the edges will be difficult to seal.
- Gently lift the sides of the dough over the toppings (see images in the post above for how to fold) and pinch the edges together, forming a seal.
- Place the pizza pockets onto the prepared baking tray (seam-side down) and top them with a spray (or brush) of olive oil.
- Bake in the oven until crisp, golden and all of the fillings have cooked through (around 15 minutes). Serve hot, with additional pizza sauce for dipping, if desired.
Notes
- Pizza dough – you’ll need a batch of soft, fluffy pizza dough for this recipe. You can make your own homemade dough using this recipe here. Or you can opt for store-bought dough. Homemade dough is really simple and can be made ahead and refrigerated for up to 3 days before use. If you do make it ahead of time, let it come back to room temperature before using. Pre-made pizza dough can be found in balls in most supermarkets.
- Pizza sauce – whip up a batch of homemade pizza sauce, or use store-bought pizza sauce, depending on preference.
- Chop the fillings finely so that they cook through.
- If using wetter vegetables or ingredients like zucchini or mushroom, I recommend lightly sautéing them first. Cooking the vegetables will release some of their liquid, so that the filling won’t make the dough soggy. You only need to do this for wet ingredients.
- For wet ingredients like pineapple or tomato, press them onto a paper towel to remove any excess liquid before adding them to the filling.
- You can easily make these vegetarian by leaving out any meat and filling them with your favourite veggies and cheese.
- For best results, don’t overfill the rolls and make sure that the edges are firmly pressed shut so that they don’t burst open while cooking. You will need less filling than you think!
- Be sure to allow the pizza rolls to cool for a few minutes before eating, as the filling will be hot!
- The pizza sauce can also be prepared ahead and stored in the fridge, or you can easily swap it for store bought pizza sauce.
- Try popping some pizza pockets into lunchboxes, for a great sandwich substitution! They can be eaten hot, or cold.
- This recipe makes 15 rolls. The recipe can be easily multiplied to feed a hungry crowd.
- Serve with some extra pizza sauce for dipping, or any complimentary sauces of your choice.
- Storage; Place them in an airtight container and refrigerate for up to 3 days. Reheat in the microwave, oven or air fryer before eating.
- Freezing; place the cooked and cooled rolls into re-usable freezer bags or a container, separating any layers with baking paper. They will freeze for up to 3 months. You can either cook them from frozen (add a few extra minutes to the cooking time) or defrost them at room temperature for 30 minutes before heating.
- Air fryer instructions; Depending on the size and type of your air fryer, cooking times may vary. Aim for 8-10 minutes at 180 C/356F and cook in batches, in a single layer with a little space between each roll to allow for expansion.
- Please note that the nutrition information is based on the ingredients being divided into 15 pizza pockets, with one pocket being one serve. The nutritional information is an estimate only and does not take into account any additional toppings served with the pockets. Nutrition info will also vary depending on the brand and types of fillings you choose to add to the pizza pockets.
- This recipe is made using Australian cups and spoon measurements. Due to cup sizes varying from country to country, I advise adjusting if necessary.
Nutrition
Are you following us on Facebook, Instagram and Pinterest?
Update Notes: This recipe was originally published in August 2020, but was re-published with new information and photos in July 2022.


SB says
Hi, if I want to freeze these to reheat on a later do, do I bake them all first (then cool & freeze)? Thank you in advance
Andrea Geddes says
Hi! I have added some notes in the post about freezing – I recommend cooking them first and then freezing – place the cooked and cooled rolls into re-usable freezer bags or a container, separating any layers with baking paper. They will freeze for up to 3 months. You can either cook them from frozen (add a few extra minutes to the cooking time) or defrost them at room temperature for 30 minutes before heating. Hope that helps!
Bharti says
wht are my pizza pockets tearing?
Andrea Geddes says
Hi Bharti, the dough may be too thin when rolled out, which can cause tearing. It can also tear if the gluten in the dough has not been stretched enough while kneading. I recommend kneading it until soft and rolling it a little thicker before assembling your rolls. I hope that helps! Andrea.