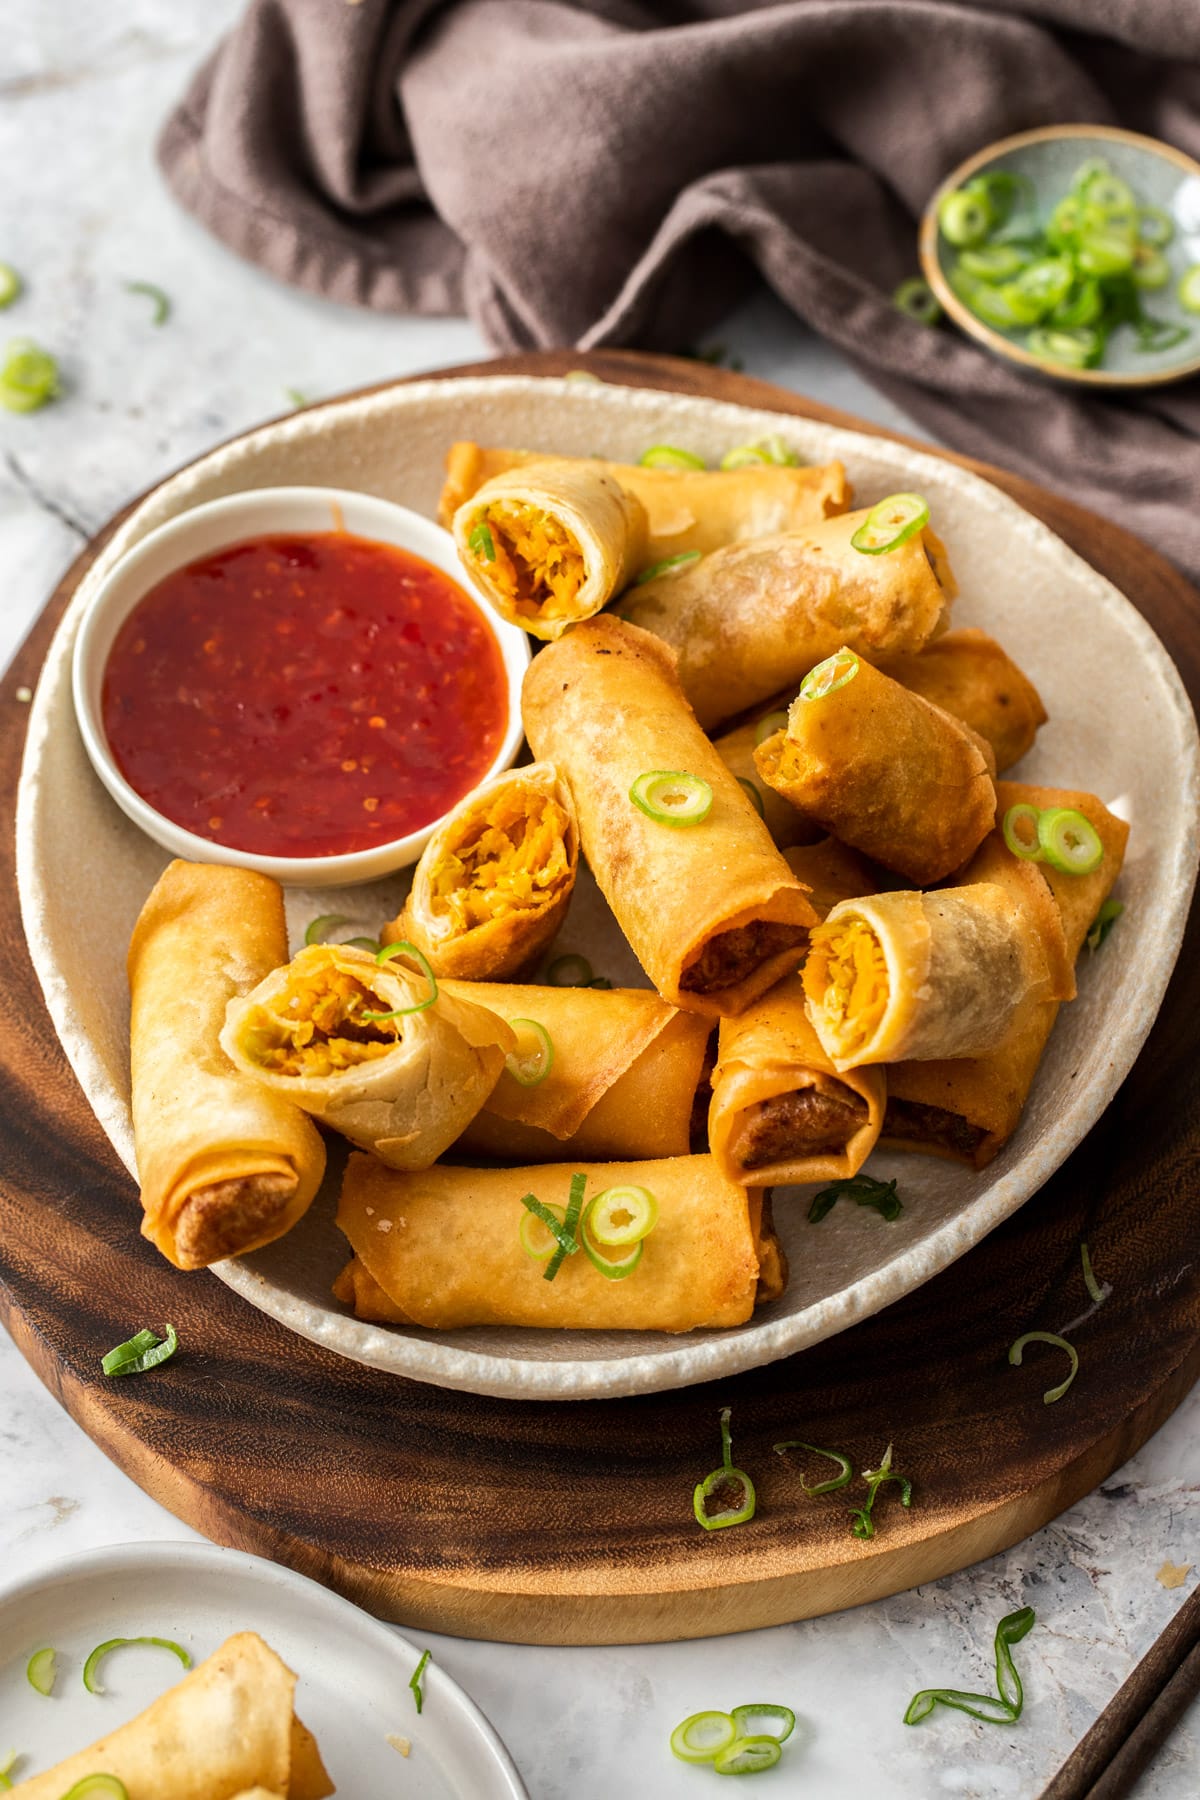
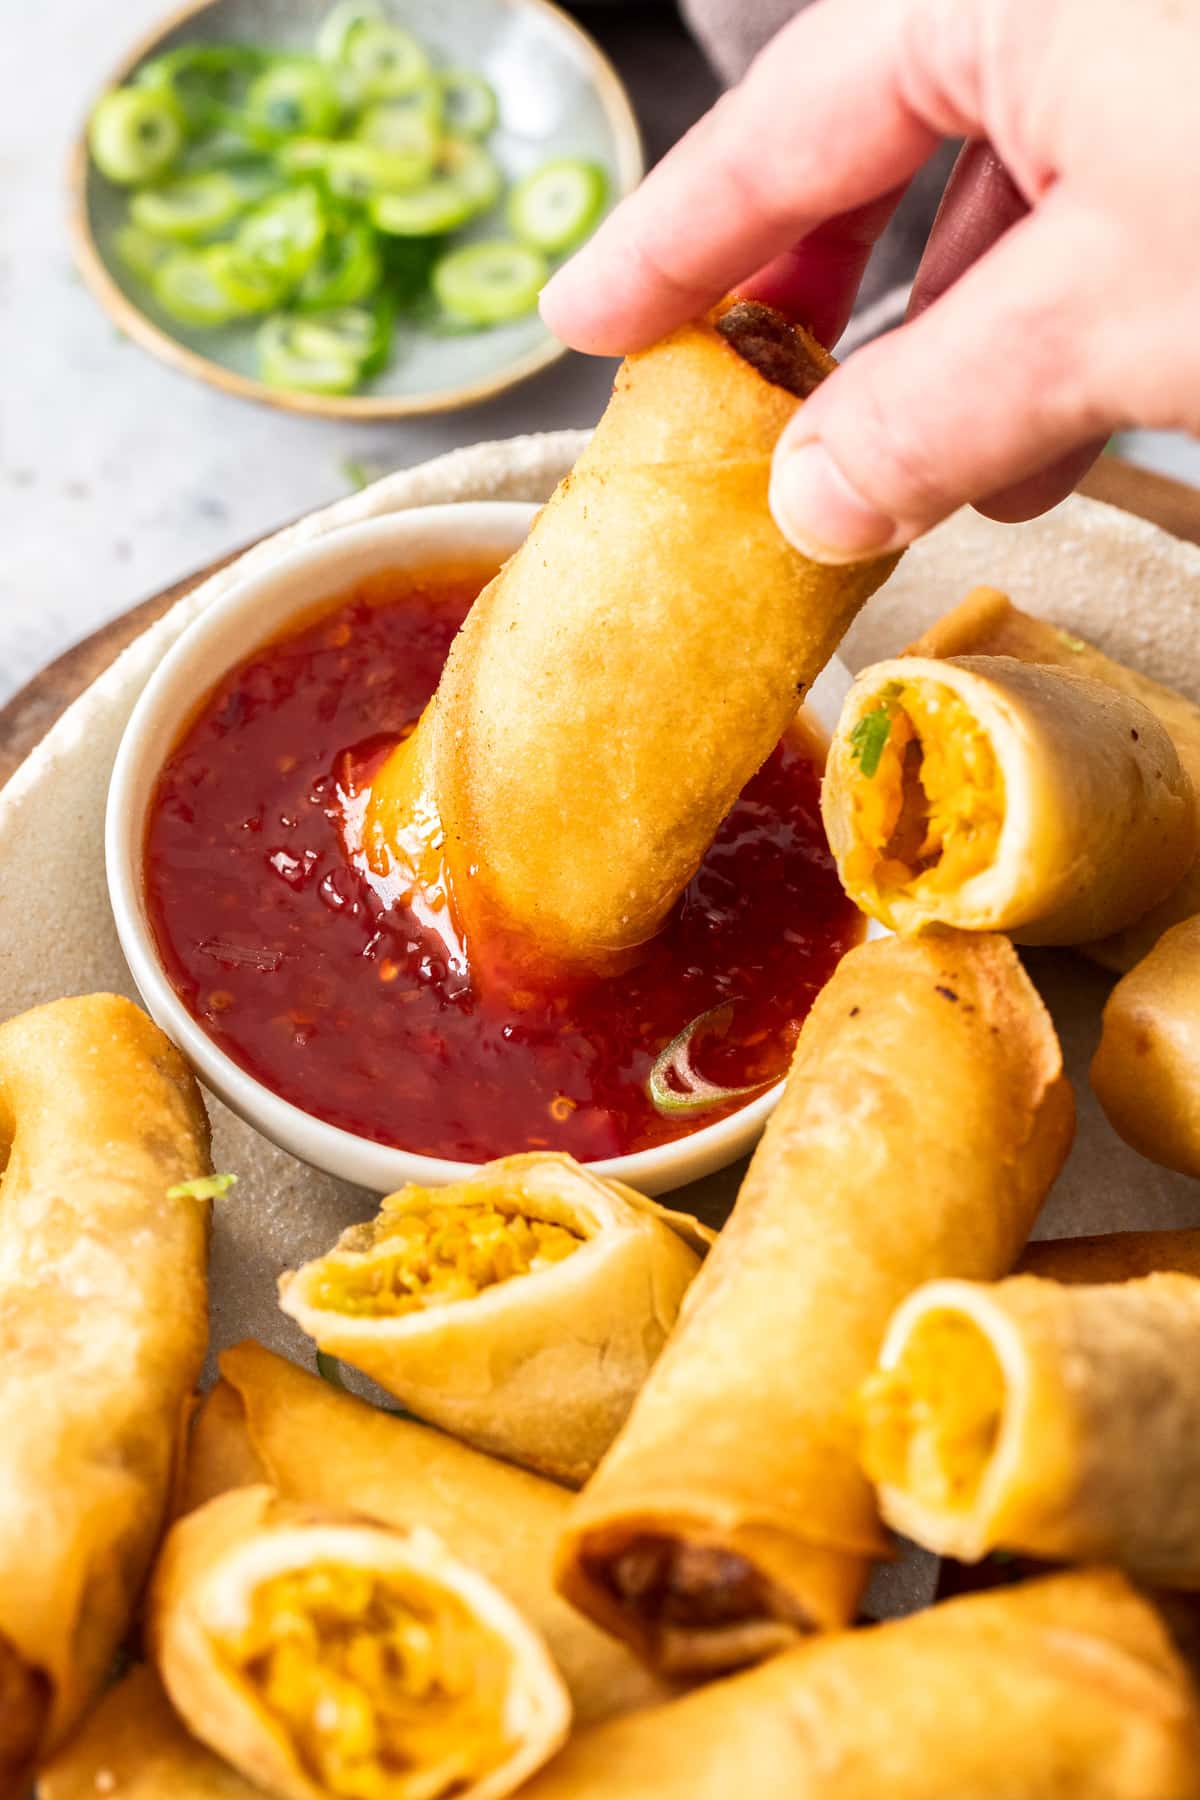
These crispy, golden and flaky vegetable spring rolls are packed full of flavour! Filled to the brim with perfectly seasoned veggies, they are super easy to make on the stovetop or in your air fryer. Serve them with sweet chilli sauce or your favourite dipping sauce for a crunchy dinner accompaniment or appetiser that everyone will love!
Why you’ll love this recipe
- Full of flavour – beautifully seasoned mixed vegetables encased in an irresistibly crunchy wrapper and dipped into your favourite dipping sauce – heaven!
- Affordable – Cheaper than store-bought or takeaway spring rolls. And they taste even better!
- Freezer friendly – both the filling and the prepared spring rolls can be frozen, ready to use later. Make them in bulk and freeze them for the perfect weeknight snack or appetiser!
- Customisable – add your favourite vegetables or use up any old veggies that need clearing out of the fridge.
- Versatile – perfect for dinners and entertaining. Or enjoy them as part of a larger Chinese-inspired feast with pork spring rolls, prawn gyoza, cashew chicken or chicken and corn soup.
- The recipe can be adapted to make them vegetarian – see ingredient notes below.
- Air fry or deep fry – fry them in oil for the ultimate crunch, or air fry them for a healthier but similarly crunchy option (methods for both are included below).
Ingredients you will need
** This post contains tips and instructions to achieve the best possible results. The photo above is a great guide for when you are in the supermarket, but for full ingredient quantities and methods, please scroll down to the detailed recipe card below!
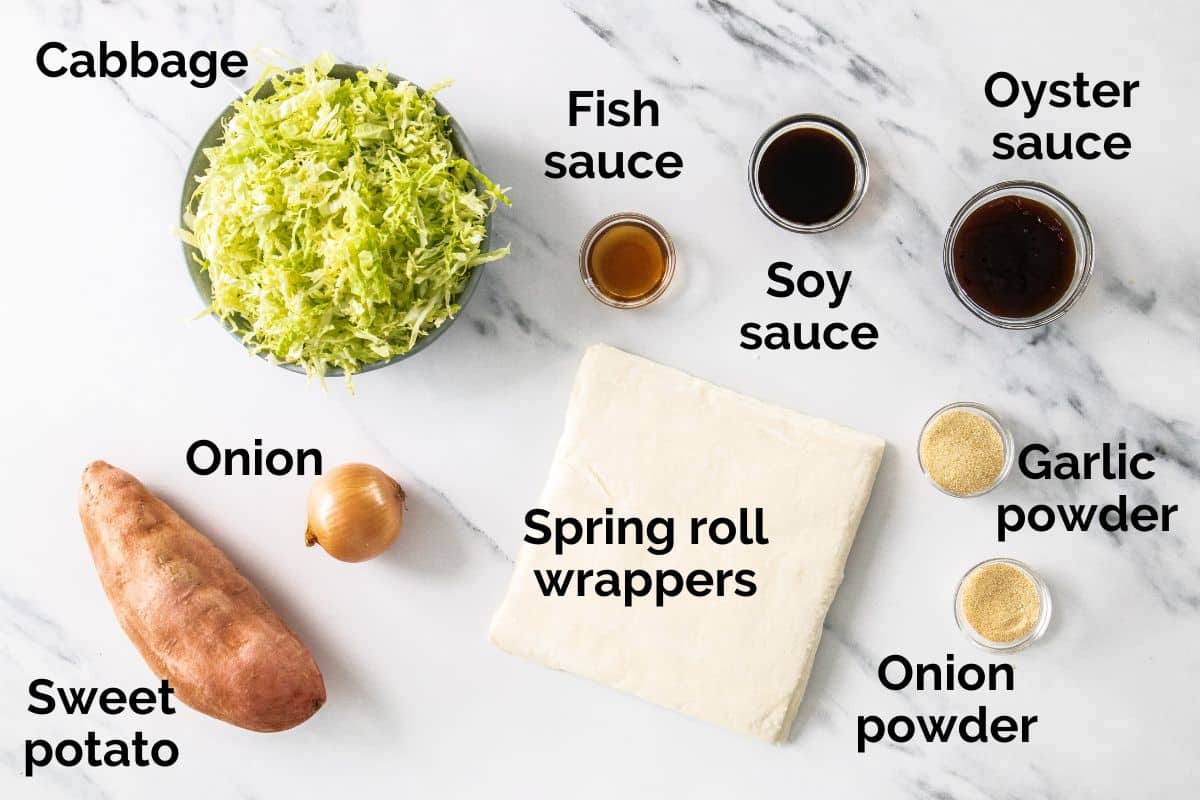
- Mixed vegetables – this recipe uses grated sweet potato, shredded cabbage and onion. You could also add some shiitake mushrooms, shredded bamboo shoots, or clean the fridge out and use some finely grated broccoli, shredded carrots or spring onions.
- Oyster sauce – adds a lovely umami/salty flavour to the filling. For vegetarian spring rolls, swap for equal quantities of vegetarian oyster sauce. Vegetarian oyster sauce can be purchased from most supermarkets, specialty food stores or online, or you can make your own version.
- Fish sauce – adds saltiness and depth of flavour. For vegetarian spring rolls, leave the fish sauce out or swap for a vegetarian version.
- Soy sauce – also used as the flavour base of the vegetable filling. Use light soy sauce and add more or less, to taste.
- Spring roll wrappers. Made with wheat flour, spring roll wrappers can be found in the frozen and/or refrigerated of most supermarkets and Asian grocers. While they come stuck together, once thawed they are quite stretchy, pliable and easy to handle. Use store-bought wrappers to save time, or you can try making your own! It is easiest to separate all of the wrappers first, before starting to fill them. Keep a damp paper towel (or a clean and damp tea towel) over the pile of remaining wrappers as you roll, to prevent them from drying out and tearing. And make sure they are fully thawed before trying to pull them apart, or they can tear.
- Oil – for frying. Spring rolls are traditionally fried, which creates irresistibly crispy, golden wrappers and a lovely rich flavour. Use an oil with a neutral flavour and a high smoke point, like canola, vegetable oil or peanut oil. Alternatively, the spring rolls can be cooked in the air fryer with a light coating of oil spray.
Step by step instructions
**Full ingredient list and detailed step-by-step instructions can be found in the recipe card below.
Step 1 – Make the spring roll filling;
Cook the vegetables and oil in a hot wok or frying pan over medium-high heat, until soft.
Add the sauces, garlic powder and onion powder and continue to cook until soft. The filling should reduce and be thick and moist, but not wet. (Wet filling makes a soggy spring roll!).
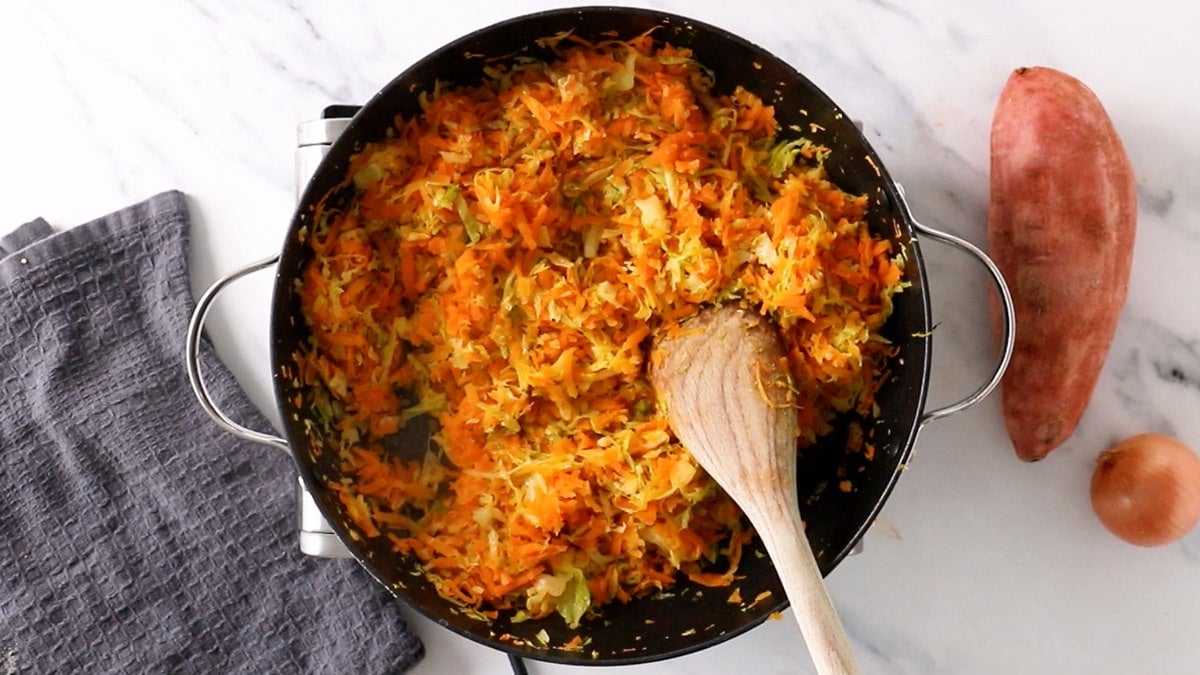
Allow the filling to cool for around 5 minutes. **A hot filling will make the ends of the spring rolls split and the filling will burst out in the hot oil.
Step 2 – Roll the spring rolls;
Have the spring roll wrappers thawed and separated, ready to use. Keep them covered with a damp paper towel to prevent drying.
Use one wrapper at a time and keep the others covered with the damp paper towel as you work.
Place one wrapper smooth side down. Spoon some filling into the bottom corner of the wrapper and roll to the middle.
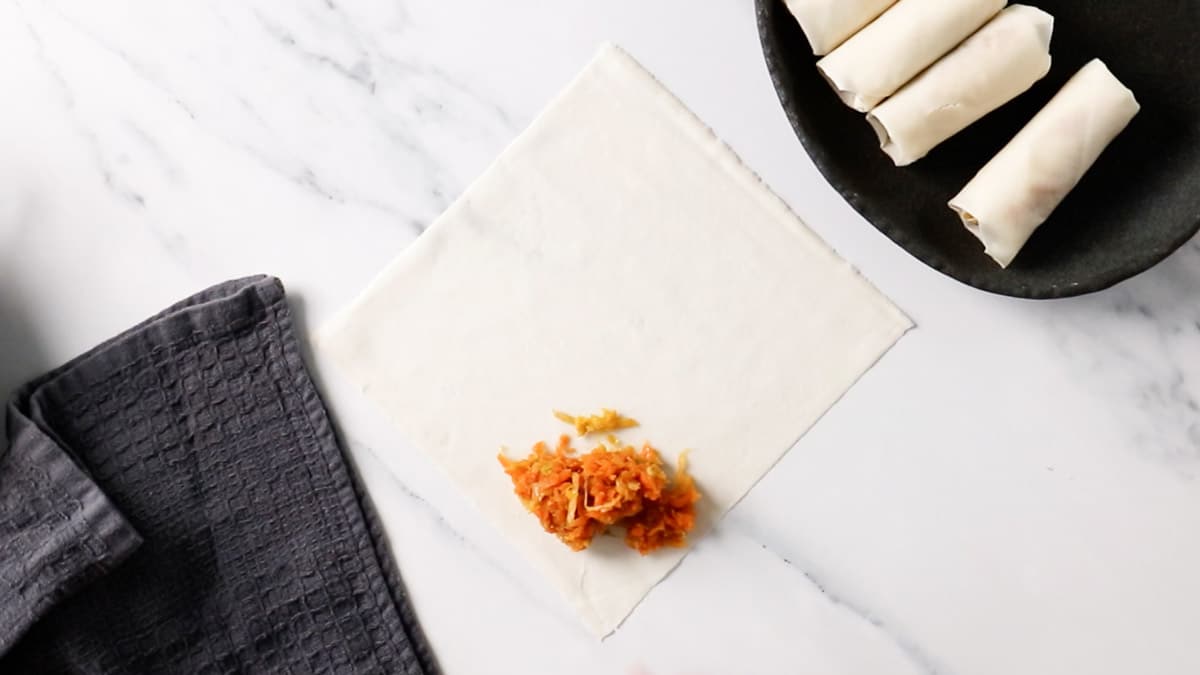
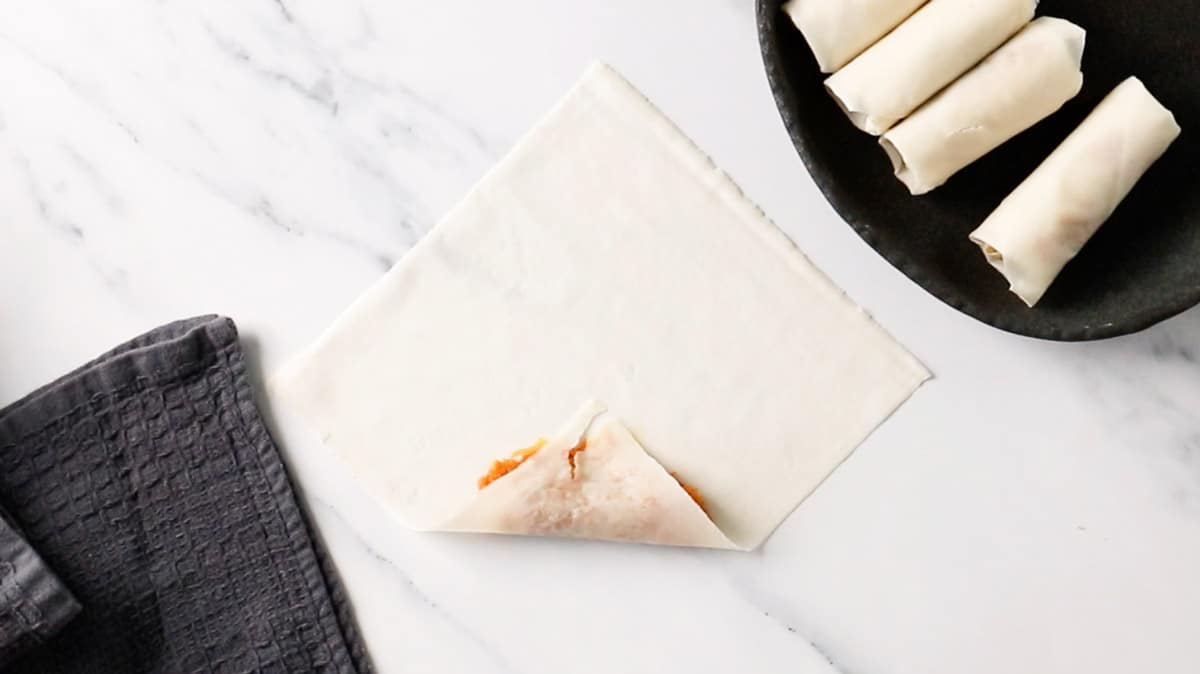
Then, tuck in the sides and then finish rolling all the way to the end. Use a little water (or a slurry of cornflour and water) to seal the edges.
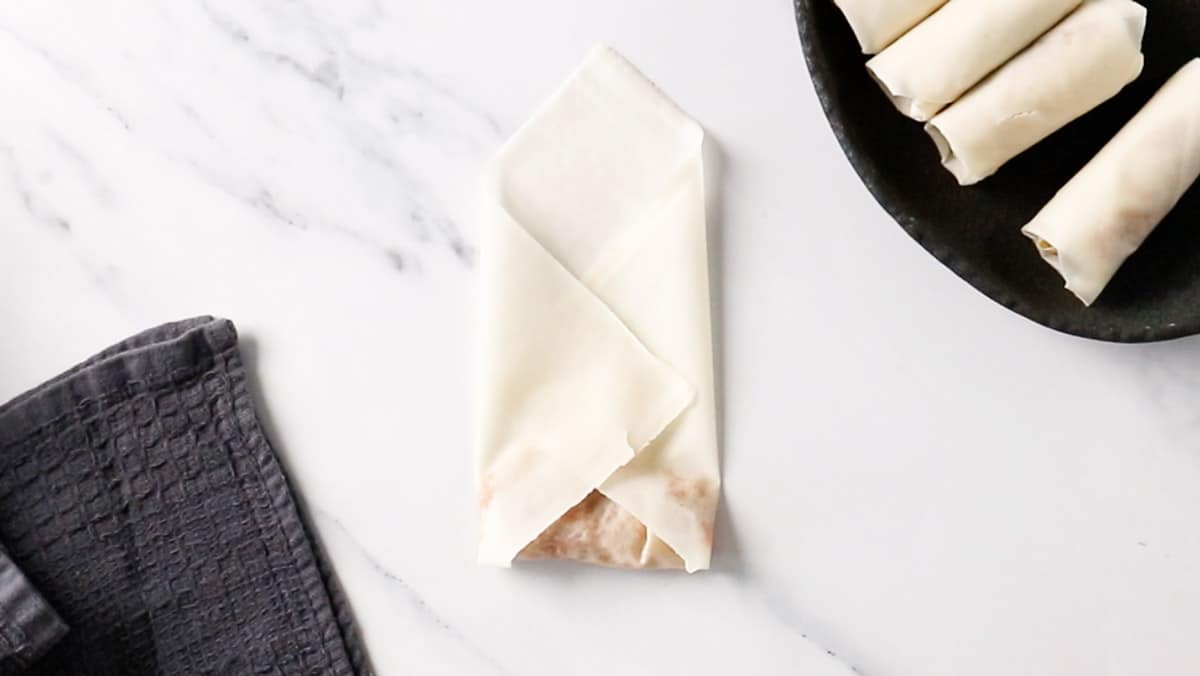
Step 3 – Fry;
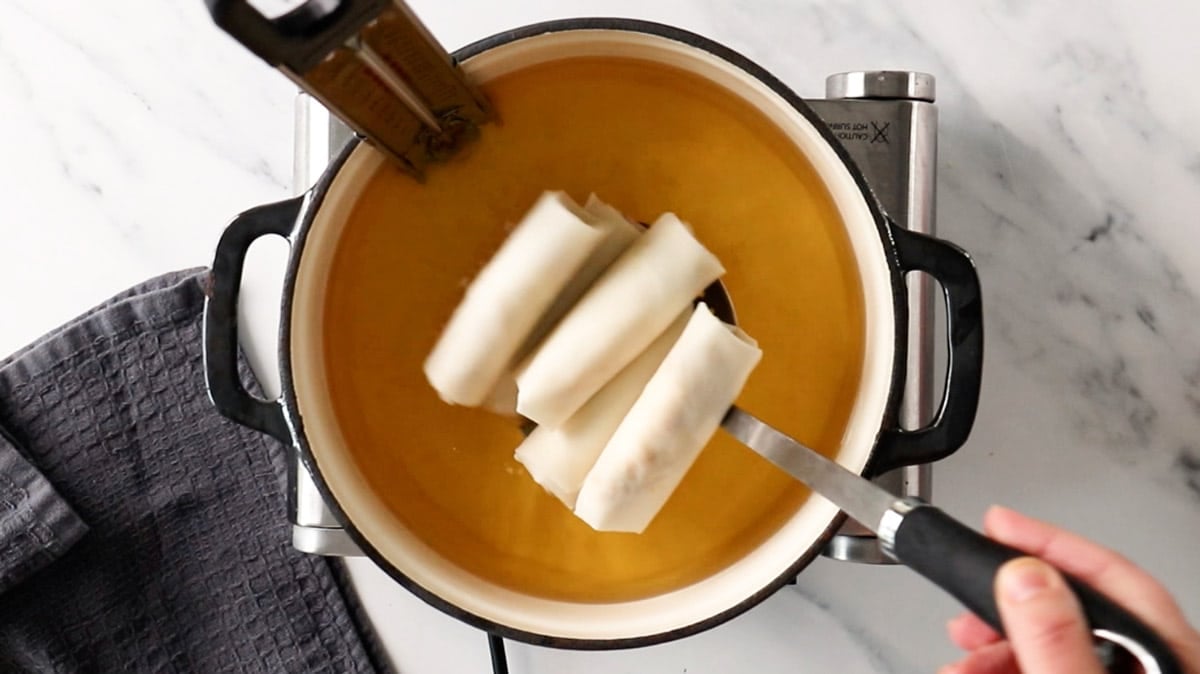
Heat the oil in a large frying pan or deep fryer until the oil reaches 180°C/356 F.
Cooking in batches, gently slide the rolls into the oil. Fry them in a single layer (don’t crowd) until the rolls are golden brown and crispy on the outside. Flip a few times to ensure they brown evenly.
Once cooked, transfer to a plate lined with paper towel to absorb any excess oil.
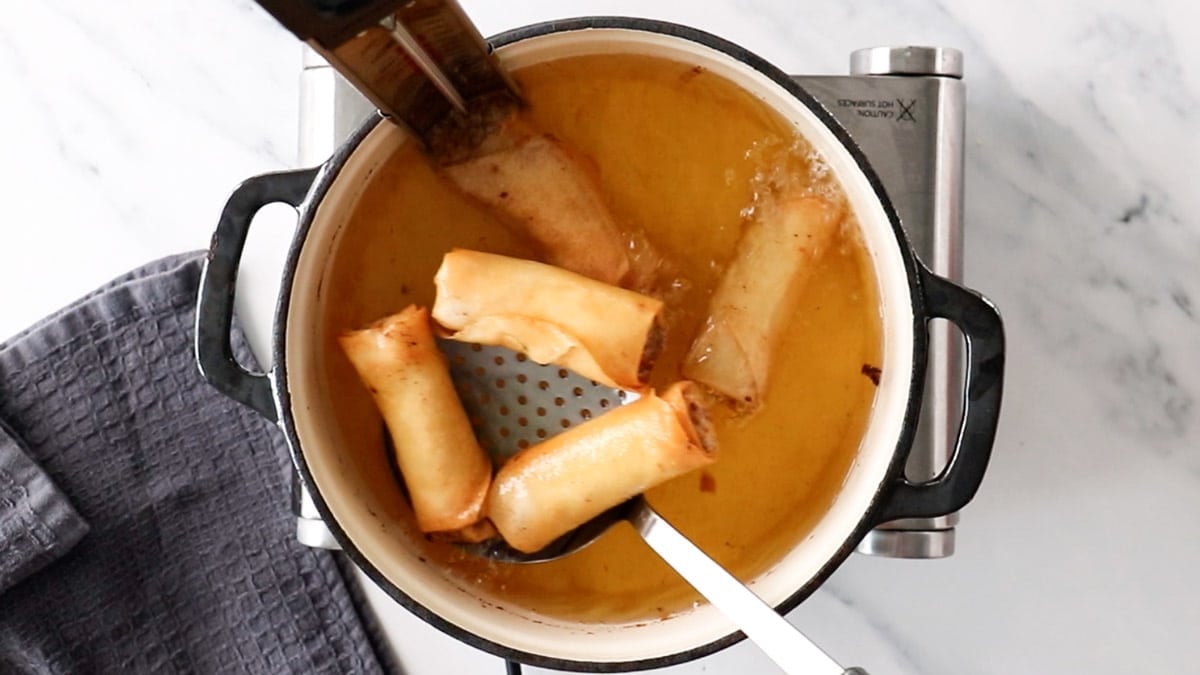
Or air fry;
Place the spring rolls into the pre-heated air fryer basket and coat with oil spray. Fry until crispy on the outside and cooked through in the middle, flipping once or twice.
Expert tips
- Many store-bought spring roll wrappers come frozen. They need to be thawed before using, so sit them in their packet on your countertop at room temperature for 30-60 minutes, or until they are soft and pliable.
- Although there is no meat found in this recipe, regular oyster sauce and fish sauce are not suitable for vegetarians. To make them vegetarian, substitute these ingredients for vegetarian oyster sauce and vegetarian fish sauce.
- Allow the filling to cool slightly before adding it to the wrappers. Hot filling will cause the ends to split and filling to spill out while cooking.
- Deep fry when the oil reaches the right temperature. If too low, the rolls will soak up too much oil. If the oil is too hot, the outer layer will brown too quickly and may burn.
- Cover the remaining wrappers with a clean and damp tea towel or damp paper towel while wrapping, or they will dry out and split. Split wrappers will leak filling while cooking (or take in oil if you are deep frying).
- Deep frying vs. air frying – deep frying spring rolls results in flaky, crispy and golden pastry, but they will soak in more oil when cooking. If you want to reduce oil usage, air fry them with a coating of oil spray instead. The outer layer will still become nice and crispy in the air fryer, but the inner layers of pastry will be softer than the deep-fried ones. Deep fried spring rolls are crispy and quite golden in colour, where air fried spring rolls will be more pale.
- If using an air fryer, cooking times may vary slightly depending on the size and brand of your air fryer.
FAQs
The filling for spring rolls can be made ahead and stored in the fridge for up to 3 days, or frozen for up to 2 months, ready to add to the wrappers. Spring rolls can also be wrapped and stored (cooked or un-cooked) in the freezer for up to 2 months. When ready to eat, just place them into the air fryer or deep fry, straight from frozen.
Spring rolls freeze and reheat beautifully and when stored correctly, will last in the freezer for up to 2 months. There are 2 options for freezing; 1. freeze them rolled but uncooked, or 2. cook them first, let them cool and then freeze. Prepare the spring rolls as normal and then place them into a freezer bag or airtight container in a single layer and freeze until ready to enjoy. When you are ready to cook, the frozen spring rolls can go directly from the freezer to fryer, no thawing necessary. If cooking them from frozen, add a couple of extra minutes to the cooking time.
To reheat frozen spring rolls, place them into the air fryer at 200°C/392 F for 10-12 minutes, or until crisp and heated through. Or deep fry in oil at 180°C/356 F for around 5 minutes, or until re-crisped and steaming hot all the way through.
While the vegetable filling and spring roll wrappers themselves are healthy, it is the cooking method that will determine whether spring rolls are “healthy” or not. The process of deep-frying spring rolls will cause them to retain some of the oil they are cooked in. Air frying is a much healthier option, as minimal oil is used in the cooking process. But either is fine in moderation!
Related recipes
Tried this recipe? Please leave a star ⭐⭐⭐⭐⭐ rating or leave a review below and let you know how you went!
Hungry for more? Subscribe to my newsletter and follow along on Facebook, Instagram and Pinterest for the latest recipes and news.

Vegetable Spring Rolls
Ingredients
- 600 grams sweet potato peeled and coarsely grated
- ¼ green cabbage about 300 grams, finely sliced
- 1 brown onion finely chopped
- ¼ cup oyster sauce use vegetarian oyster sauce, if required
- 2 tablespoons light soy sauce
- 3-4 teaspoons fish sauce use vegetarian fish sauce, if required
- 1 tablespoon garlic powder
- 1 tablespoon onion powder
- 20 spring roll wrappers
- canola or vegetable oil for frying
To serve
- sweet chilli sauce or your preferred dipping sauce
Instructions
- In a large frying pan over medium-high heat, cook the sweet potato, cabbage and onion with 2 tablespoons of oil, until soft.
- Add the sauces, garlic powder and onion powder and cook for a further 2-3 minutes, or until the sauce has heated through and the mixture reduces slightly. The filling should not be watery. Set aside to cool for at least 5 minutes.
- Place the spring roll wrappers on a clean bench, keeping them covered with a damp paper towel when not in use, to prevent drying.
- Place one wrapper at a time onto the bench and spoon the filling (roughly one heaped tablespoon) along one corner. Fold the corner of the wrapper over the filling.
- Continue to roll the spring roll to halfway. Fold/tuck in the middle corners over the top and then continue rolling until the end. Use a small amount of water to seal the ends.
- Repeat until all of the filling and wrappers are gone (20 total).
To fry;
- Heat the oil to 180°C/356 F in a large frying pan or deep fryer over medium-high heat. Reduce the heat to medium.
- Carefully fry the spring rolls in batches, until they are crispy and golden on the outside. Remove them from the hot oil and rest on paper towel to absorb any excess oil. Continue until all of the spring rolls are cooked.
- Sprinkle with a little salt and serve with sweet chilli sauce or your favourite dipping sauce.
To air fry;
- Pre-heat your air fryer to 200°C/392 F.
- Place the spring rolls into the air fryer basket in a single layer (don't crowd them). You may need to cook in batches, depending on the size of your fryer.
- Coat the spring rolls with oil spray and cook for around 8-10 minutes, or until golden, crisp and steaming hot in the middle.
- Sprinkle with a little salt and serve with sweet chilli sauce or your favourite dipping sauce.
Video
Notes
- Many store-bought spring roll wrappers come frozen. They need to be thawed before using, so sit them in their packet on your countertop at room temperature for 30-60 minutes, or until they are soft and pliable.
- Although there is no meat found in this recipe, regular oyster sauce and fish sauce are not suitable for vegetarians. To make them vegetarian, substitute these ingredients for vegetarian oyster sauce and vegetarian fish sauce.
- Allow the filling to cool slightly before adding it to the wrappers. Hot filling will cause the ends to split and filling to spill out while cooking.
- Deep fry when the oil reaches the right temperature. If too low, the rolls will soak up too much oil. If the oil is too hot, the outer layer will brown too quickly and may burn.
- Cover the remaining wrappers with a clean and damp tea towel or damp paper towel while wrapping, or they will dry out and split. Split wrappers will leak filling while cooking (or take in oil if you are deep frying).
- Deep frying vs. air frying – deep frying spring rolls results in flaky, crispy and golden pastry but they will soak in more oil when cooking. If you want to reduce oil usage, air fry them with a coating of oil spray instead. The outer layer will still become nice and crispy in the air fryer, but the inner layers of pastry will be softer than the deep-fried ones. Deep fried spring rolls will be crispy and quite golden in colour, where air fried spring rolls will be more pale.
- If using an air fryer, cooking times may vary slightly depending on the size and brand of your air fryer.
- Make ahead; The filling for spring rolls can be made ahead and stored in the fridge for up to 3 days, or frozen for up to 2 months, ready to add to the wrappers. Spring rolls can also be wrapped and stored (cooked or un-cooked) in the freezer for up to 2 months. When ready to eat, just place them into the air fryer or deep fry, straight from frozen.
- Freezing; When stored correctly, spring rolls will last in the freezer for up to 2 months. There are 2 options for freezing; 1. freeze them rolled but uncooked, or 2. cook them first, let them cool and then freeze. Prepare the spring rolls as normal and then place them into a freezer bag or airtight container in a single layer and freeze until ready to enjoy. When you are ready to cook, the frozen spring rolls can go directly from the freezer to fryer, no thawing necessary. If cooking them from frozen, add a couple of extra minutes to the cooking time.
- Reheating; To reheat frozen spring rolls, place them into the air fryer at 200°C/392 F for 10-12 minutes, or until crisp and heated through. Or deep fry in oil at 180°C/356 F for around 5 minutes, or until re-crisped and steaming hot all the way through.
- Please note that the nutrition information is based on the filling and 20 spring roll wrappers being made into 20 spring rolls, with one roll being one serve. The nutritional information is an estimate only and does not take into account any additional toppings or sides served with the spring rolls. It is difficult to estimate the amount of oil absorbed by the spring rolls when deep frying. I have accounted for ¼ cup of oil being absorbed.
- This recipe is made using Australian cups and spoon measurements. Due to cup sizes varying from country to country, I advise adjusting if necessary.
Nutrition
Are you following us on Facebook, Instagram and Pinterest?
Update Notes: This recipe was originally published in March 2019, but was re-published with new information, helpful tips and photos in August 2022.




Leave a Reply