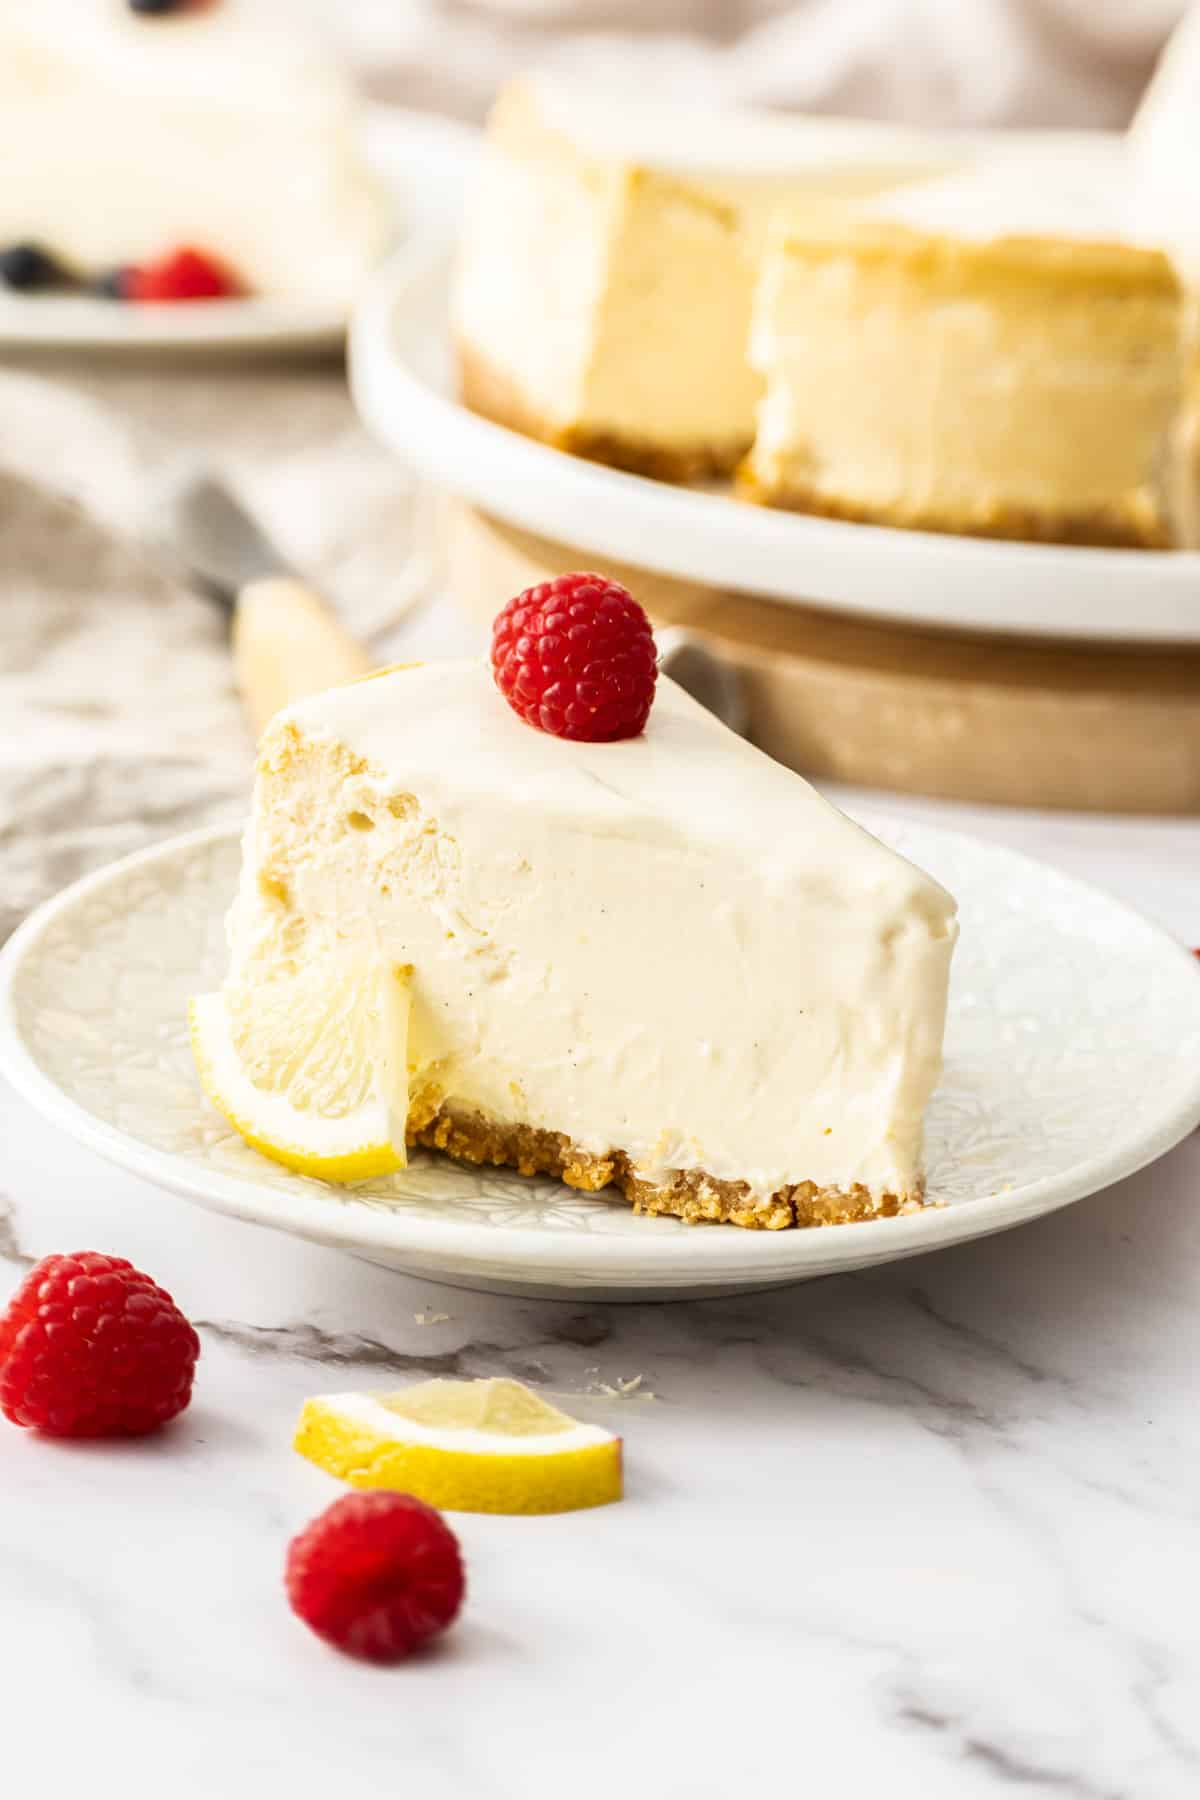
Smooth, creamy and indulgent, this New York baked cheesecake is a truly special dessert. It features an ultra-creamy cheesecake filling, sandwiched between a buttery biscuit base and a tangy lemon and sour cream topping. And the best part? No water bath needed!
Why you will love this recipe
- Perfect for any occasion – New York cheesecake is my husband’s favourite dessert. And this is the one that he requests for his birthday every year, without fail! It’s perfect for birthdays, holidays, special occasions and celebrations. While it’s lovely served on its own, it can also be dressed up with piles of fresh berries for a total showstopping dessert.
- No water bath – this cheesecake is not baked in a water bath. Instead, it’s baked at a high temperature to start and then finished low and slow, to ensure a gorgeously soft and creamy filling.
- Make ahead – make this cheesecake the day before you want to serve it. It needs time to bake, cool and set in the fridge before slicing. Perfect for prepping for a party or entertaining. Then just slice, and serve!
- Smooth and creamy – it has a velvety smooth and creamy filling that is not overly heavy or dense, with a hint of fresh lemon. For a baked cheesecake, it has a lovely light texture.
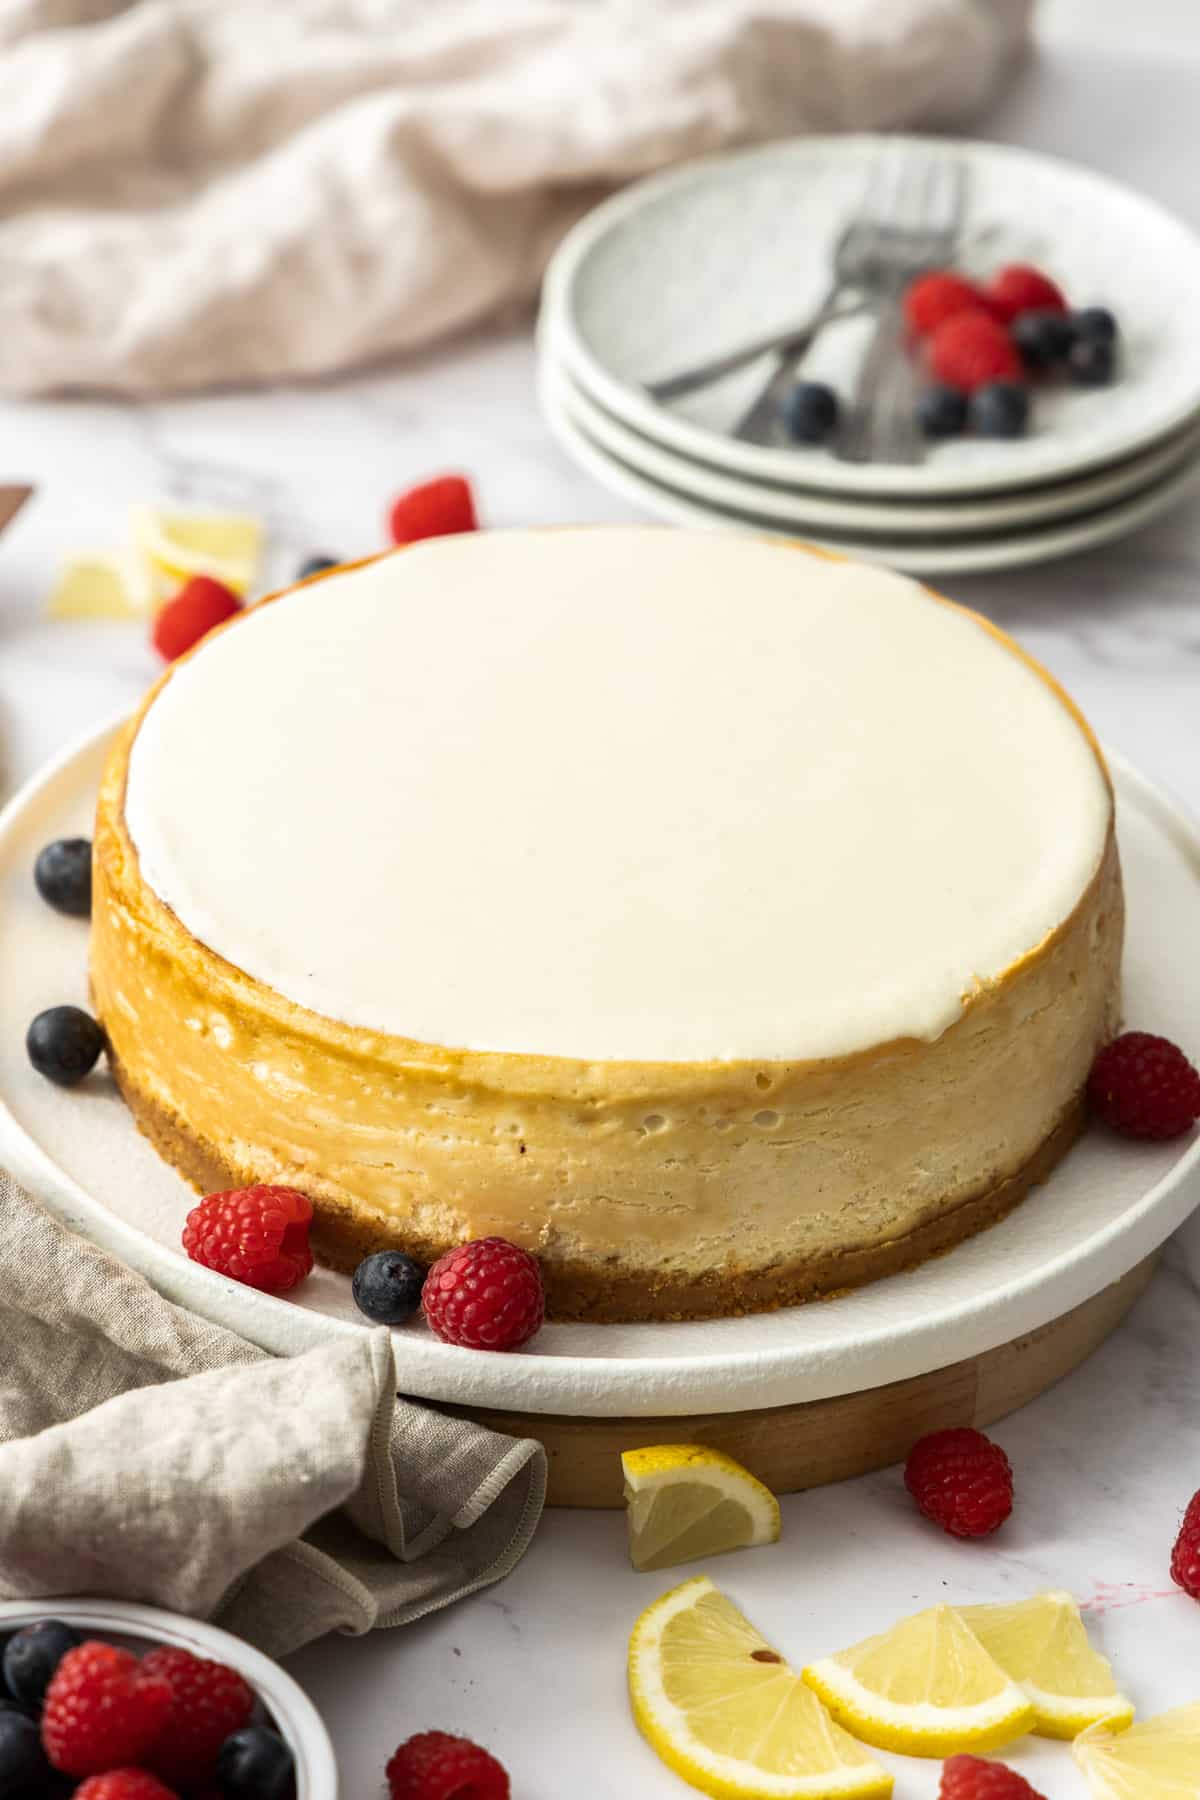
- Top layer – just when you thought it couldn’t get any more gorgeous, it’s smothered with a dreamy, creamy sour cream topping that adds extra freshness and brightness.
Need some more delicious dessert ideas? Try this chocolate ripple cake, no-bake jelly slice or banoffee pie.
Ingredients you will need
** This post contains tips and instructions to achieve the best possible results. This photo is a great guide for when you are in the supermarket, but for full ingredient quantities and methods, please scroll down to the detailed recipe card below!
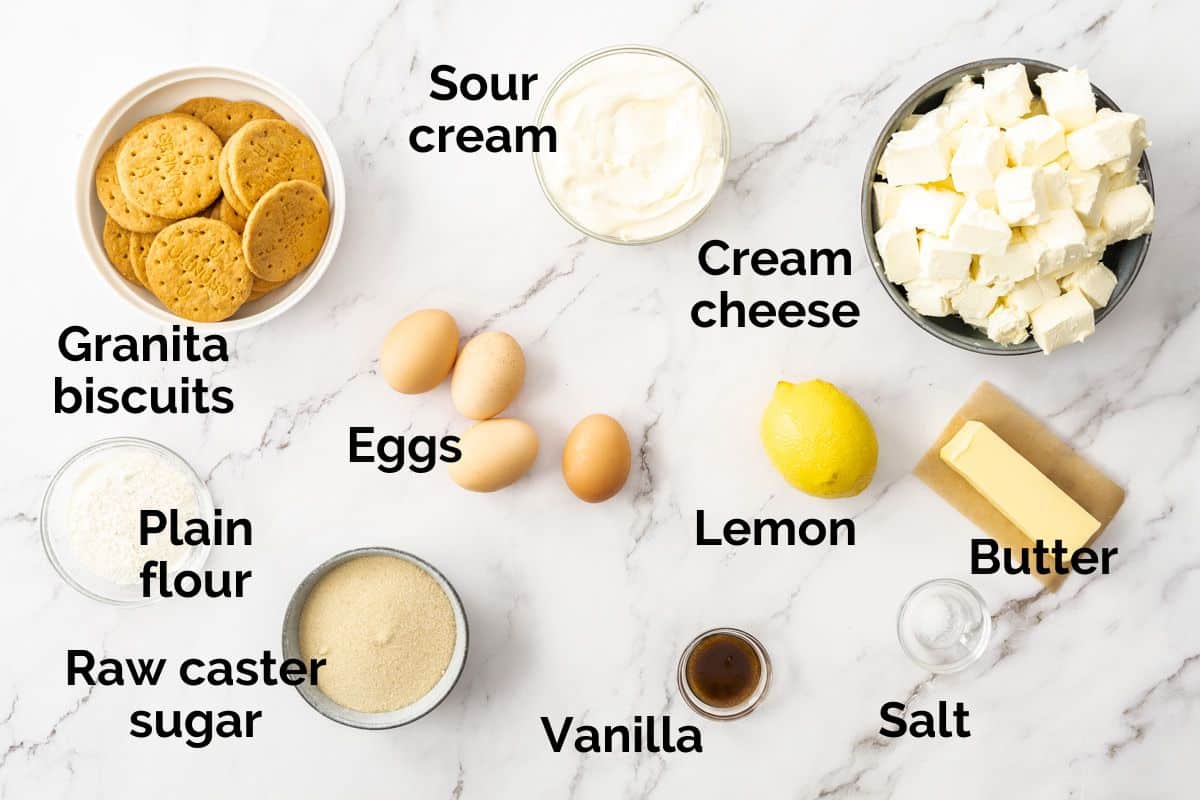
- Cream cheese – the key ingredient. For best flavour, I recommend a good quality brand like Philadelphia. Use regular, full-fat cream cheese, not spreadable or low-fat. And make sure it’s at room temperature before beating. Cold cream cheese will make a lumpy batter, which can lead to overmixing and cracks. Cut it into cubes, cover and leave it out on the bench for 60 minutes before mixing, to make sure it’s completely soft.
- Butter – helps to bind the biscuit base and hold the crust together. Use real, unsalted butter for best results.
- Granita biscuits – in Australia, I recommend Arnott’s Granita biscuits for the base of the cheesecake. Digestives or Graham Crackers can also be used.
- Raw caster sugar – raw caster sugar (also called golden caster sugar) is similar to regular caster sugar, but it has a light amber colour and a more complex flavour with mild caramel notes. It provides sweetness to the cheesecake, while its superfine grains allow it to dissolve into the batter more easily. Regular caster sugar can also be used.
- Eggs –for a smooth and rich texture. 4 x large (52 gram) eggs are required. Make sure they’re at room temperature and beat them in last (one at a time on low speed) until they are just incorporated into the mixture. Don’t overmix the cheesecake batter once the eggs have been added. This will whip excess air into the batter, which can cause the cheesecake to crack or deflate.
- Sour cream – adding sour cream makes the cheesecake soft, moist and creamy. It also adds a lovely tangy flavour. Use full-fat sour cream for best flavour.
- Plain flour –a little flour provides structure and helps to prevent the top of the cheesecake from cracking. It also makes the filling fluffier. Weigh the flour, for accuracy and sift, to avoid lumps. Don’t use self-raising flour, we don’t want the cheesecake to lift.
- Lemon – lemon juice and zest is added to both the cheesecake filling and the sour cream topping. Use fresh lemons, where possible and remove the zest before juicing.
- Vanilla – use vanilla bean paste or extract rather than vanilla essence, for best flavour.
Step by step instructions
Full ingredient notes and quantities can be found in the detailed recipe card below. But here is a brief overview of what you can expect;
To begin, grease a 20cm springform baking tin and line the bottom with baking paper. Make sure the sides are well greased.
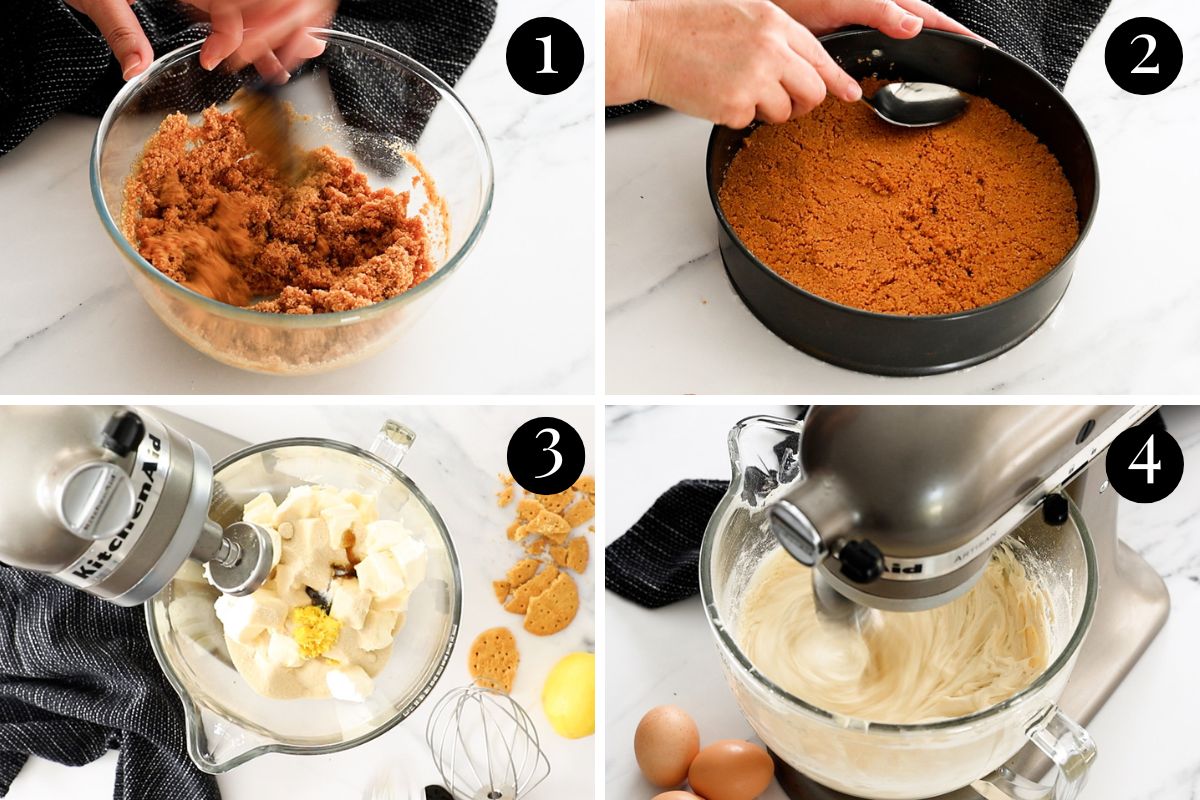
Step 1 – Make the biscuit base;
Crush the Granita biscuits in a food processor (or with a rolling pin) to fine crumbs.
Add the biscuit crumbs to a bowl, along with the caster sugar and salt. Stir through the melted butter and mix to combine.
Press the biscuit mixture into the prepared baking tin and use the back of a spoon to firmly press it down, until even.
Chill in the fridge for at least 30 minutes, to set the base.
If required, the base can be prepared a day ahead and stored in the fridge.
Step 2 – Make the cheesecake filling;
In a stand mixer or using handheld beaters, beat the softened cream cheese, caster sugar, vanilla, salt, lemon zest and lemon juice together until smooth and well combined. Scrape down the sides of the bowl occasionally, when needed.
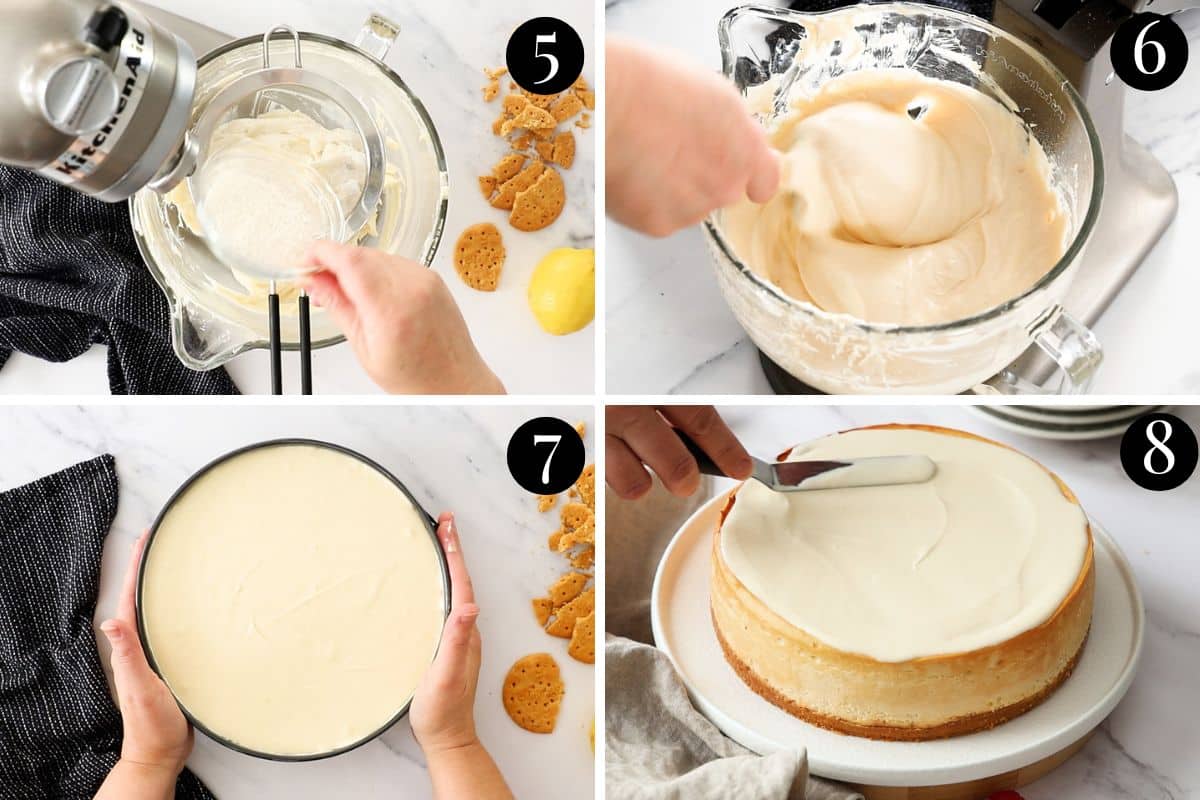
Sift in the plain flour and mix until combined.
Working slowly on very low speed, beat in the eggs one at a time, until combined. Don’t overmix, or the batter will take in too much air.
Fold in the sour cream until combined and smooth. Don’t overbeat.
Step 3 – Bake;
Pour the filling into the chilled biscuit base. Use a spatula to smooth the top of the cheesecake.
Bake for 10 minutes on high heat (220°C/200°C fan-forced) then immediately reduce the heat to low (110°C/90°C fan-forced) and continue to bake for a further 50 minutes. At this time, the edges of the cheesecake should be set and the middle should have a slight wobble. It will also be lightly golden on top.
Turn the oven off and leave the cheesecake inside the oven to cool for 2-3 hours*.
*At this time, you have two options; for a soft and creamy centre, open the oven door slightly as the cheesecake cools (only a crack of about 1cm). For a drier and fluffier texture, leave the oven door completely closed as it cools.
Step 4 – Make the sour cream topping;
Once the cheesecake has finished cooling in the oven, mix the sour cream, caster sugar and lemon juice until combined. Gently remove the cheesecake from the oven and spread the sour cream mixture evenly over the top, before refrigerating. The sour cream layer will firm up in the fridge as the cheesecake cools.
Chill the cheesecake in the fridge overnight, to finish setting. It’s important to let the cheesecake fully set before slicing.
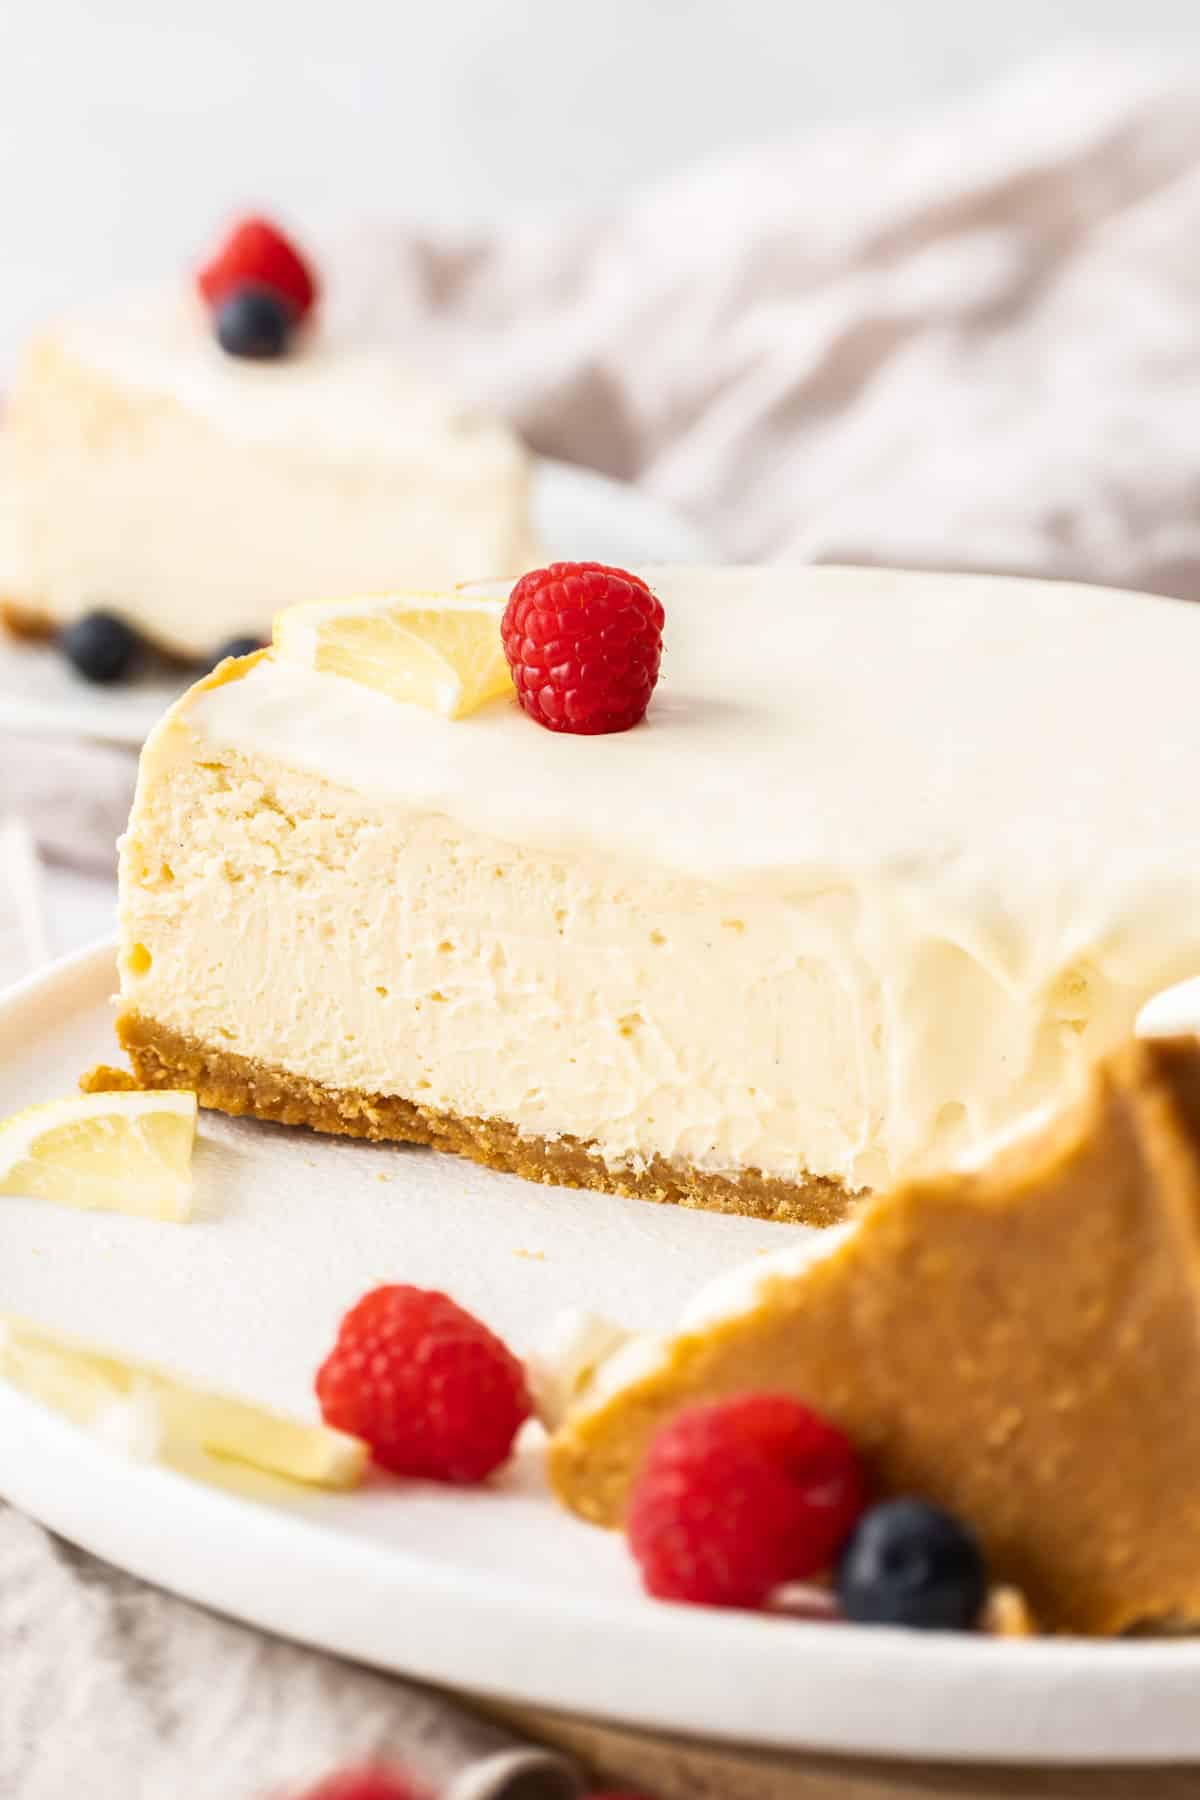
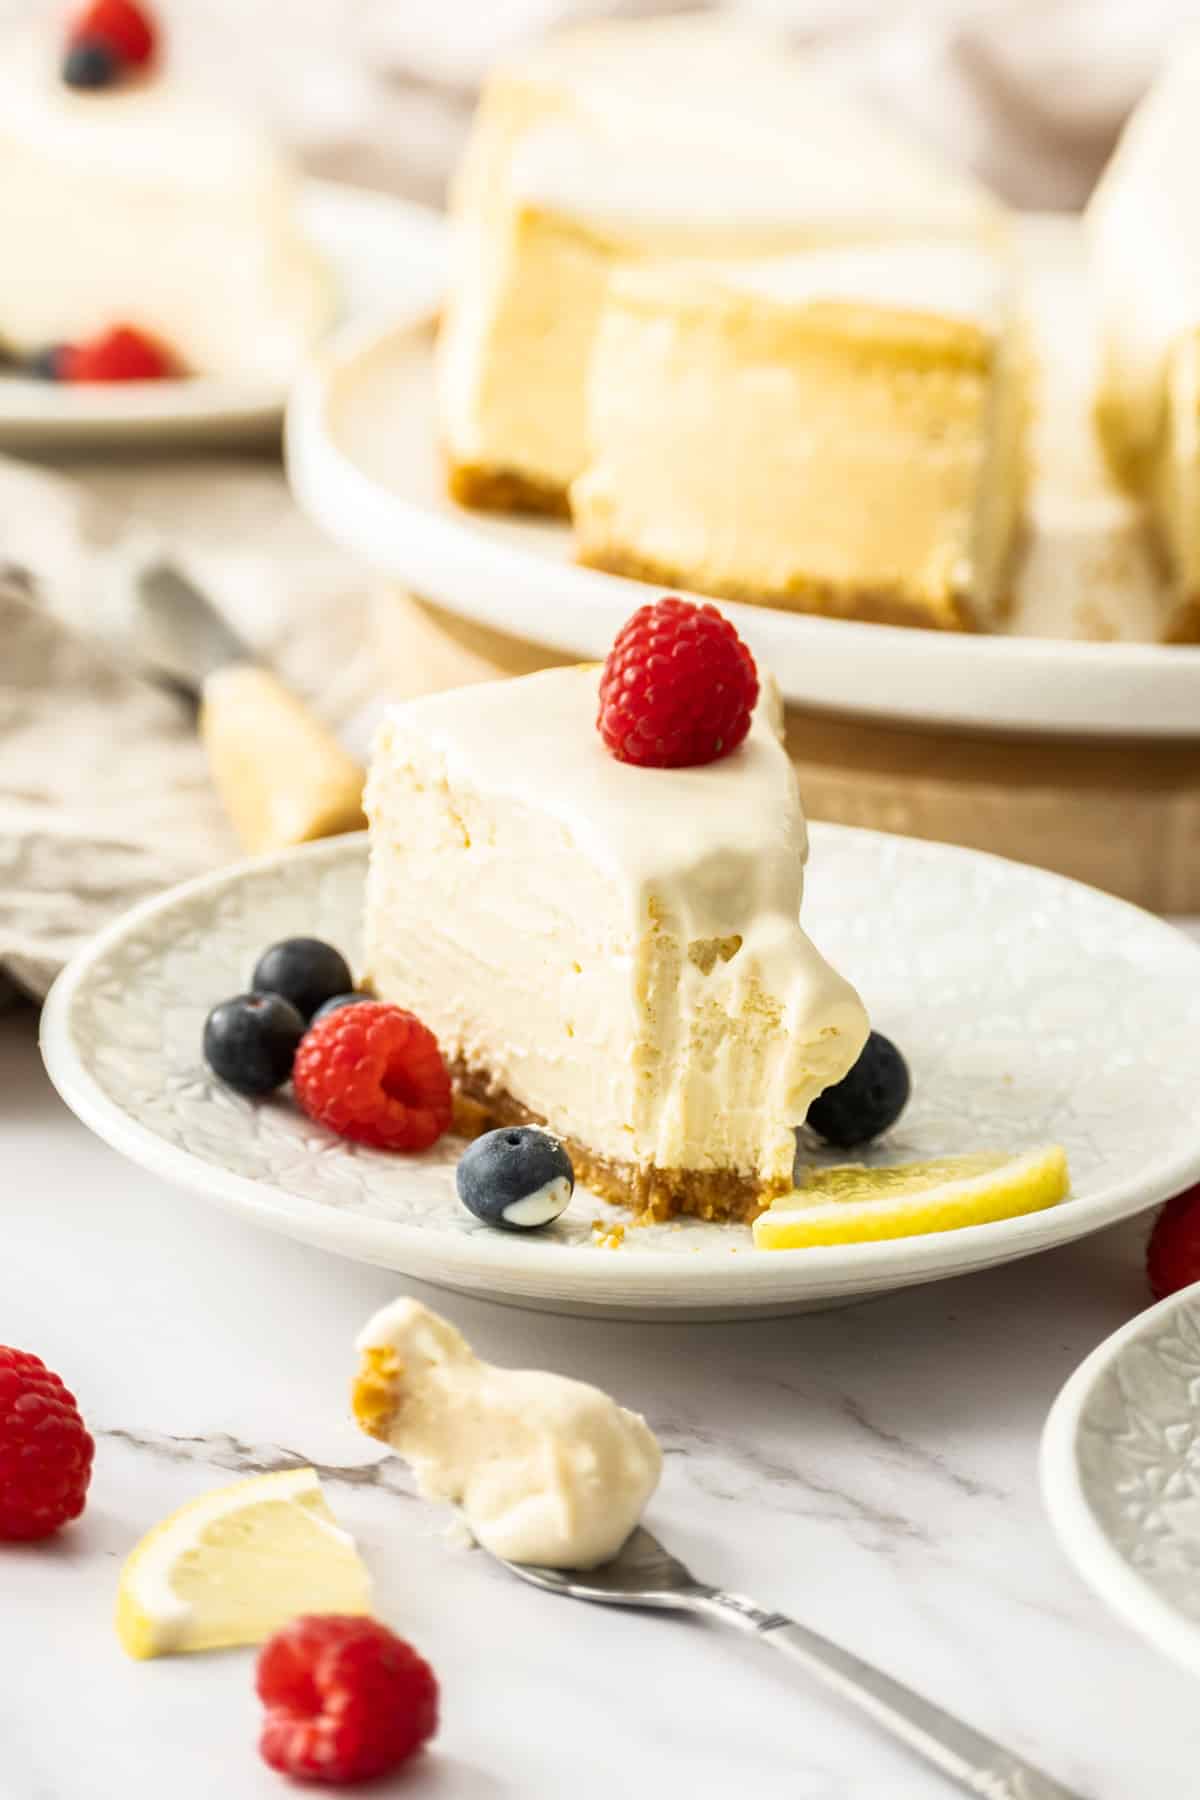
Once chilled, remove the cheesecake from the tin and place onto a serving plate. You may need to gently run a knife along the sides of the tin, to loosen. Slice and serve with your favourite fresh berries.
How to prevent cheesecake cracks
There are a few things that you can do to prevent a cheesecake from cracking that don’t involve using a water bath. Follow these helpful tips for a smooth and crack-free surface;
- Use room temperature ingredients. Ensuring your cold ingredients are warmed to room temperature means they will easily come together, without overmixing.
- Don’t overmix the cheesecake batter. Once the eggs have been added, only mix at low speed and only until the ingredients are combined. Overmixing adds air to the batter, which can cause the cheesecake to rise and fall, creating cracks.
- Add flour to help stabilise the mixture.
- Bake at a low heat. This cheesecake starts baking at a high temperature for a short time, before being turned down to a very low temperature (110C/90C fan) to finish.
- Handheld beaters will help you control the speed that the batter is mixed. But a stand mixer will also work. Just be sure to keep it at the lowest possible speed setting when adding the eggs. You can also use a paddle attachment to beat the cream cheese mixture.
- Don’t open the oven while the cheesecake is baking! A sudden change in temperature can cause the cheesecake to deflate or crack. Keep the door closed at all times.
- Allow the cheesecake to cool inside the oven. When the cheesecake is done, turn the oven off and leave the cheesecake inside to cool for 2-3 hours. You can crack the oven door slightly for a softer, creamier filling, or leave it completely closed for a fluffier and more solid filling. A sudden change in temperature can cause the cheesecake to contract and crack on the surface, so leaving it in the oven to slowly cool before removing is essential.
- Double check your oven temperature. Ovens can vary vastly and can lose accuracy over time. I recommend getting an oven thermometer to ensure your oven isn’t running too hot or under temperature. Underbaking will lead to a soft, undercooked filling that is difficult to slice and cracks can also form if the cheesecake is baked at an incorrect temperature.
If your cheesecake ends up with a slightly cracked surface, the sour cream topping will help to cover any imperfections. You can also top it with some fresh berries. It will still taste amazing!
Expert tips
- Use room temperature ingredients. Remove the cold ingredients from the fridge 60 minutes before you start. Room temperature ingredients will blend more easily, preventing a lumpy batter. It also ensures the batter doesn’t need to be overmixed to bring everything together, as overmixing can lead to the cheesecake cracking.
- Place a baking tray underneath the cheesecake, to catch any drips of butter from the biscuit base. It can be placed directly underneath the tin, or on the shelf below.
- Don’t overmix the batter. Try not to overbeat the cheesecake mixture once you have added the eggs. The filling needs to be smooth and combined, without incorporating too much air. Aerating the batter can cause bubbles, which will make the cheesecake rise too quickly and then collapse as it cools, leading to a cracked surface.
- Scrape the sides of the bowl several times while mixing, to ensure the mixture is even and lump-free.
- Use a 20cm springform tin, where possible. Larger tins give more room for the cheesecake to contract.
- Let the cheesecake cool slowly. It needs to gradually cool in the oven before being transferred to the fridge. Cooling too quickly can also cause cracks.
- Don’t skip the chilling time. Allow plenty of time for it to chill in the fridge, so that it sets properly and you can easily slice it. Overnight is best, but it needs at least 6 hours chilling time.
- Wipe the knife in between slices, to make the slices as clean and sharp as possible.
- The cheesecake surface shouldn’t crack, but if it does, just cover with the sour cream layer and when set, hide it with loads of fresh berries!
- For a softer, creamier filling, crack open the oven door slightly while the cheesecake cools in the oven. For a drier and fluffier filling, leave the door closed completely to cool.
FAQs
This cheesecake is best eaten on the day after it is made, but will last for around 4 days in the fridge, stored in an airtight container.
New York cheesecake freezes beautifully. Either the entire cheesecake can be frozen whole, or it can be sliced and frozen in individual serves. Wrap the cheesecake well in plastic wrap, before transferring it to a freezer-safe container. When well wrapped and covered, it will last for 2 months in the freezer, but is best eaten in the first month. Thaw overnight in the fridge before eating.
Related recipes
Tried this recipe? Please leave a star ⭐⭐⭐⭐⭐ rating or leave a review below and let me know how you went!
Hungry for more? Subscribe to my newsletter and follow along on Facebook, Instagram and Pinterest for the latest recipes and news.
New York Baked Cheesecake
Equipment
- 1 x 20 cm springform baking tin
- beaters (handheld or stand mixer)
Ingredients
For the biscuit base
- 200 grams Arnott's Granita biscuits or Digestives, or Graham Crackers
- 2 tablespoons raw caster sugar
- ⅛ teaspoon salt table salt
- 90 grams unsalted butter melted
For the filling
- 850 grams cream cheese full fat, softened completely at room temperature
- 215 grams raw caster sugar (1 cup)
- 2 teaspoons vanilla bean paste
- 1 pinch salt
- 2 teaspoons lemon zest finely zested
- 1 tablespoon lemon juice fresh
- 30 grams plain flour 3 tablespoons, sifted
- 4 large eggs room temperature
- 1 cup sour cream (250ml) room temperature
For the sour cream topping
- ⅔ cup sour cream
- 2 tablespoons raw caster sugar
- 2 teaspoons lemon juice fresh
Instructions
For the biscuit base
- Grease a 20cm springform baking tin and line the bottom of the tin with baking paper. Make sure the sides are well greased.
- Crush the Granita biscuits in a food processor to fine crumbs.
- In a mixing bowl, mix the biscuit crumbs, sugar, salt and melted butter together until completely combined.
- Use the back of a spoon to firmly press the mixture into the prepared baking tray, until level. Chill the base in the refrigerator for at least 30 minutes, to set.
For the filling
- Pre-heat oven to 220°C/200°C fan (428F). Position an oven shelf in the middle of the oven.
- Using handheld beaters or a stand mixer, beat the softened cream cheese, caster sugar, vanilla, salt, lemon zest and juice together until well combined and creamy (around 1 minute). Scrape down the sides of the bowl occasionally, when needed.
- Sift in the flour and mix until just combined.
- On the lowest speed, mix in the eggs one at a time, until just combined. Scrape down the sides of the bowl.*Don't overmix or the batter will become too aerated, which can cause cracks.
- Use a spatula to gently fold in the sour cream until the mixture is smooth and light. Don't overmix.
- Pour the filling into the chilled biscuit base and use a spatula to smooth and level the top.
Bake
- Place the cheesecake on a baking tray to catch any drips of butter (or place a tray on the shelf below). Place the cheesecake on the middle rack in the oven.
- Bake at 220°C/200°C fan-forced for 10 minutes. Then, leaving the oven door closed, turn the temperature down to 110°C/90°C fan-forced and continue to bake for a further 50 minutes. *Don't open the oven door during the baking time, or the surface may crack.
- After 50 minutes of baking at 110°C/90°C fan-forced, check the cheesecake consistency. A slight, gentle jiggle of the tin (while still in the oven) should tell you if it's ready or needs more time. It should be lightly golden on top, with set edges and should have a slight wobble in the middle but not liquid. If it seems very liquidy at this point, give it a further 5-10 minutes. When checking, don't leave the oven open too long.
- Once the cheesecake is fairly firm but with a slight wobble, turn the oven off and leave the cheesecake inside for 2-3 hours, to cool down. Resist the urge to open the oven door during this time. The cheesecake needs to cool slowly as the oven cools. Cooling slowly will prevent cracking. One of the most common causes of cracking is a drastic temperature change from hot to cold.*As it cools, you can crack open the oven door slightly (only 1-2cm) for a cheesecake that is soft and creamy in the centre, or leave the oven door completely closed for a more set and fluffy texture.
For the sour cream topping
- Once the cheesecake has cooled in the oven for 2-3 hours, gently remove it from the oven.
- Mix the sour cream, sugar and lemon juice together until combined. Spread the sour cream mixture over the top of the cheesecake, right to the edges.
- Place the cheesecake (still in the tin) into an airtight container and refrigerate overnight to finish setting.
To serve
- Loosen the edges of the tin before releasing the sides. You can gently run a knife along the edges, if needed. Gently pry the bottom of the tin away from the cheesecake base and remove the baking paper before placing onto a serving plate.
- Cut into slices of your desired size and serve on its own, or with fresh berries.
Video
Notes
- Use room temperature ingredients. Remove the cold ingredients from the fridge 60 minutes before you start. Room temperature ingredients will blend more easily, preventing a lumpy batter. It also ensures the batter doesn’t need to be overmixed to bring everything together, as overmixing can lead to the cheesecake cracking.
- Place a baking tray underneath the cheesecake, to catch any drips of butter from the biscuit base. It can be placed directly underneath the tin, or on the shelf below.
- Don’t overmix the batter. Try not to overbeat the cheesecake mixture once you have added the eggs. The filling needs to be smooth and combined, without incorporating too much air. Aerating the batter can cause bubbles, which will make the cheesecake rise too quickly and then collapse as it cools, leading to a cracked surface.
- Scrape the sides of the bowl several times while mixing, to ensure the mixture is even and lump-free.
- Use a 20cm springform tin, where possible. Larger tins give more room for the cheesecake to contract.
- Let the cheesecake cool slowly. It needs to gradually cool in the oven before being transferred to the fridge. Cooling too quickly can also cause cracks.
- Don’t skip the chilling time. Allow plenty of time for it to chill in the fridge, so that it sets properly and you can easily slice it. Overnight is best, but it needs at least 6 hours chilling time.
- Wipe the knife in between slices, to make the slices as clean and sharp as possible.
- The cheesecake surface shouldn’t crack, but if it does, just cover with the sour cream layer and when set, hide it with loads of fresh berries!
- For a softer, creamier filling, crack open the oven door slightly while the cheesecake cools in the oven. For a drier and fluffier filling, leave the door closed completely to cool.
- Storage; the cheesecake is best eaten on the day after it is made, but will last for around 4 days in the fridge, stored in an airtight container.
- Freezing; either the entire cheesecake can be frozen whole, or it can be sliced and frozen in individual serves. Wrap the cheesecake well in plastic wrap, before transferring it to a freezer-safe container. When well wrapped and covered, it will last for 2 months in the freezer, but is best eaten in the first month. Thaw overnight in the fridge before eating.
- Please note that the nutrition information is based on the cheesecake being divided into 10 slices, with one slice being one serve. The nutritional information is an estimate only and does not take into account any additional toppings or sides served with the cheesecake.
- This recipe is made using Australian cups and spoon measurements. Any reference to cups or spoons in this recipe is in Australian metric. Due to cup sizes varying from country to country, I advise adjusting if necessary.



Marie says
This is the perfect baked cheesecake recipe. So creamy and luscious. The whole family devoured it.
Andrea Geddes says
Thanks so much Marie! I’m so happy to hear that you enjoyed the cheesecake. It’s one of our favourite desserts! Thanks for taking the time to let me know. Andrea 🙂