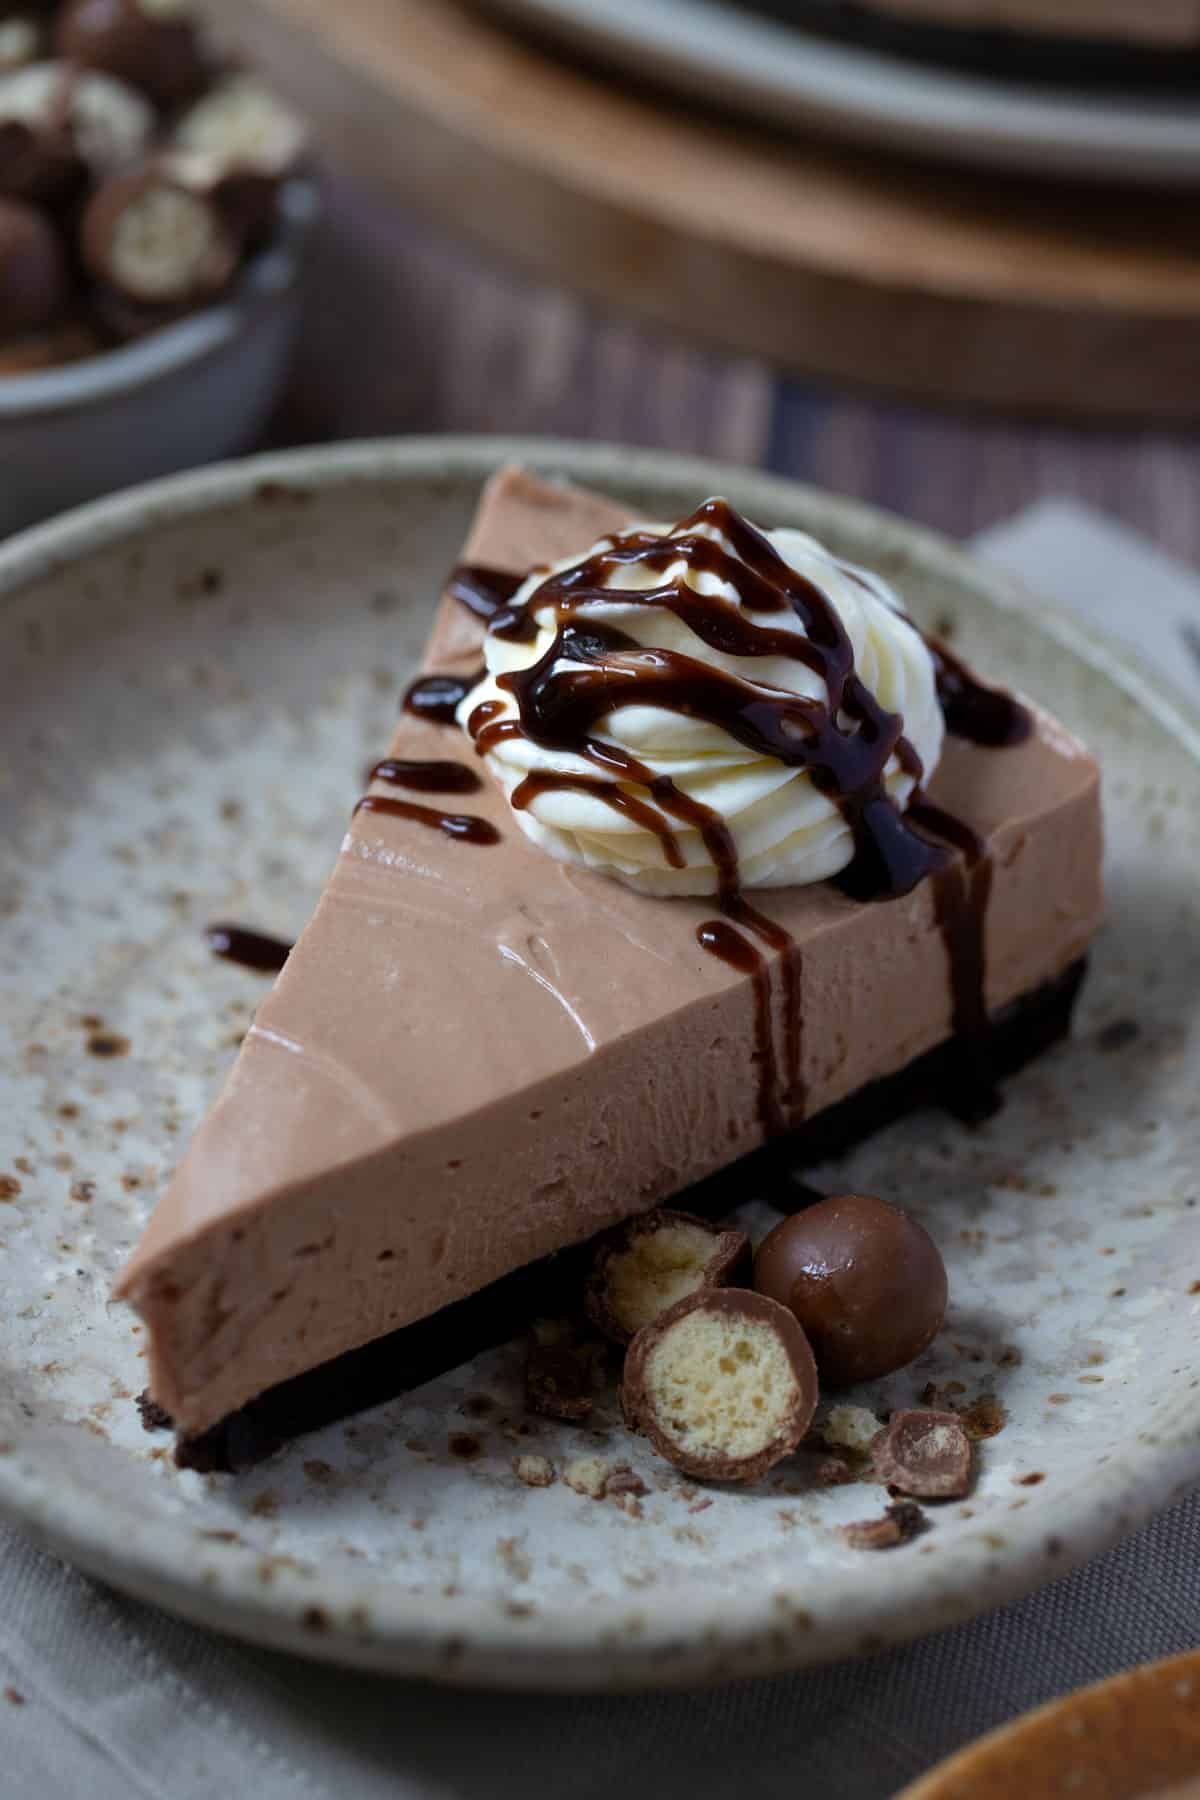
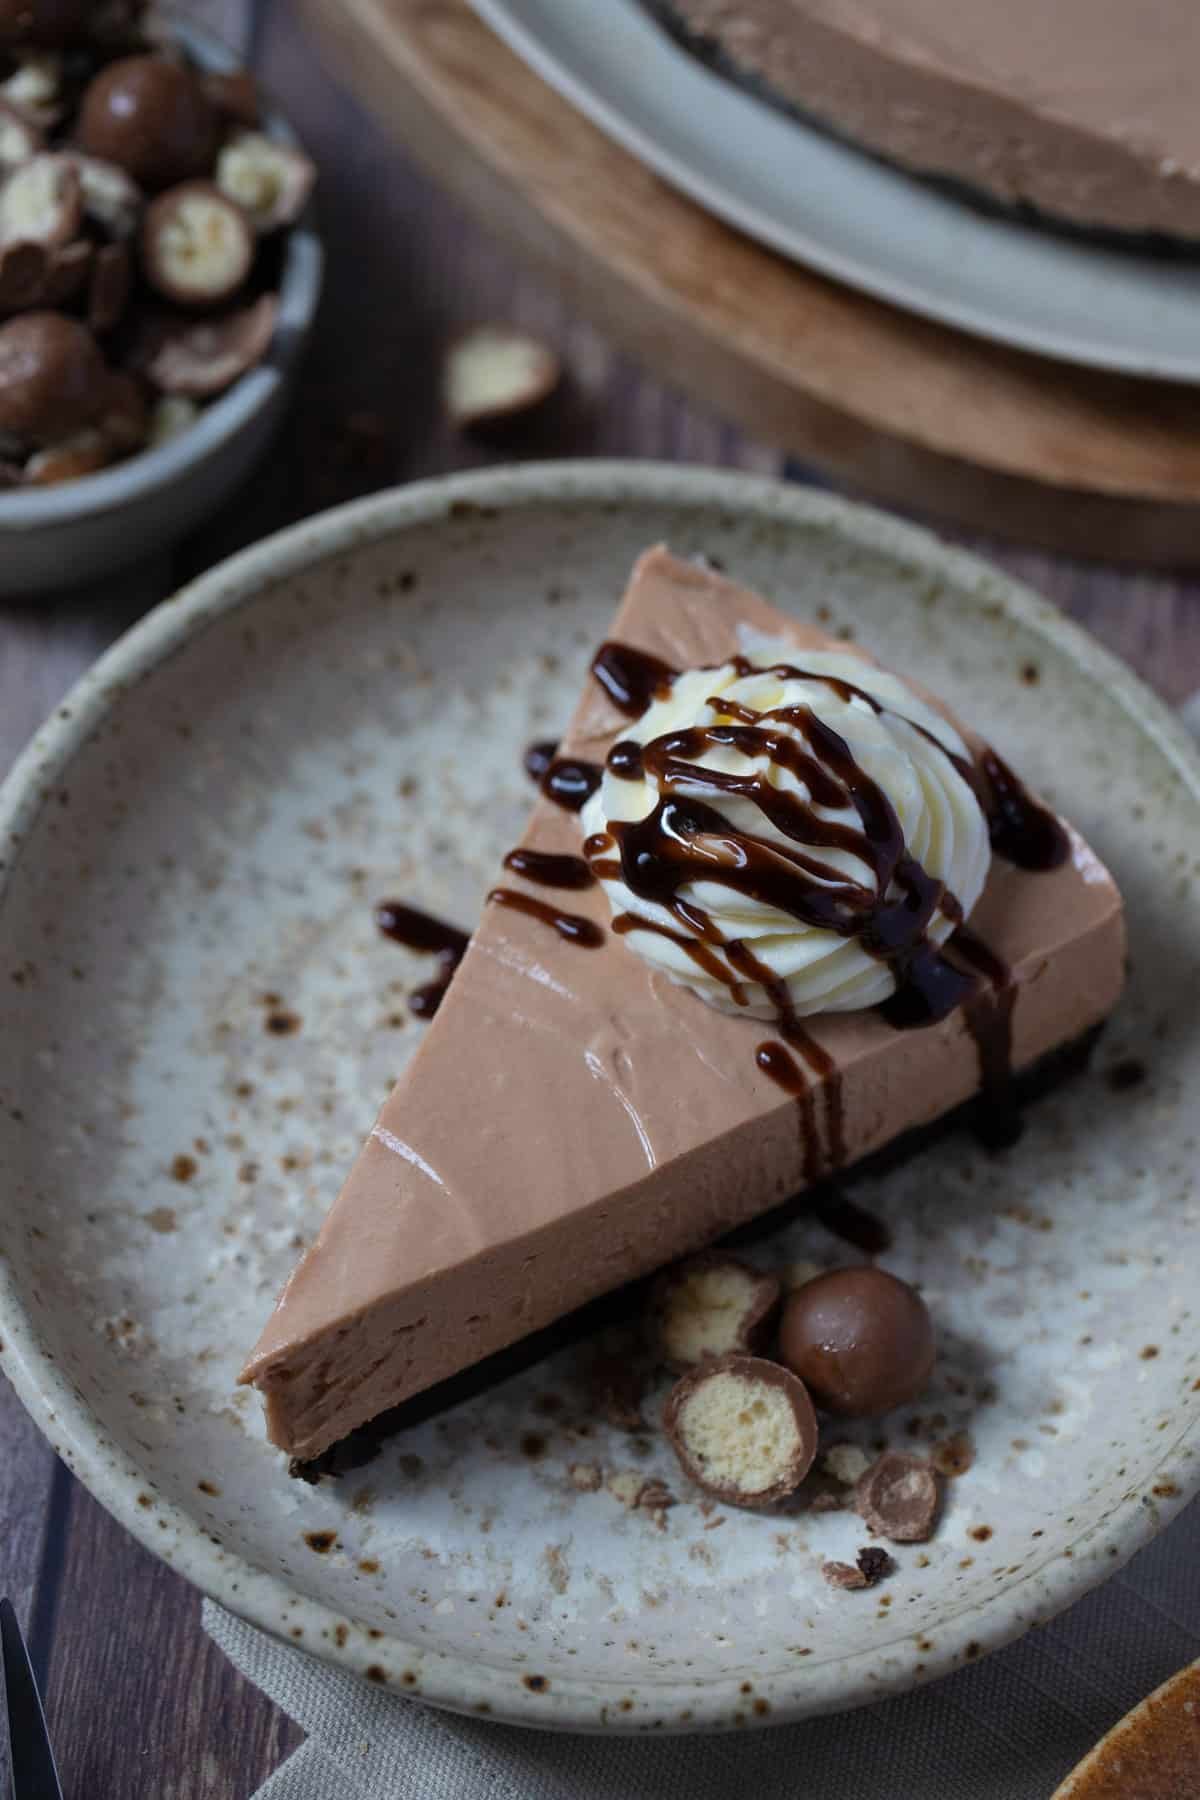
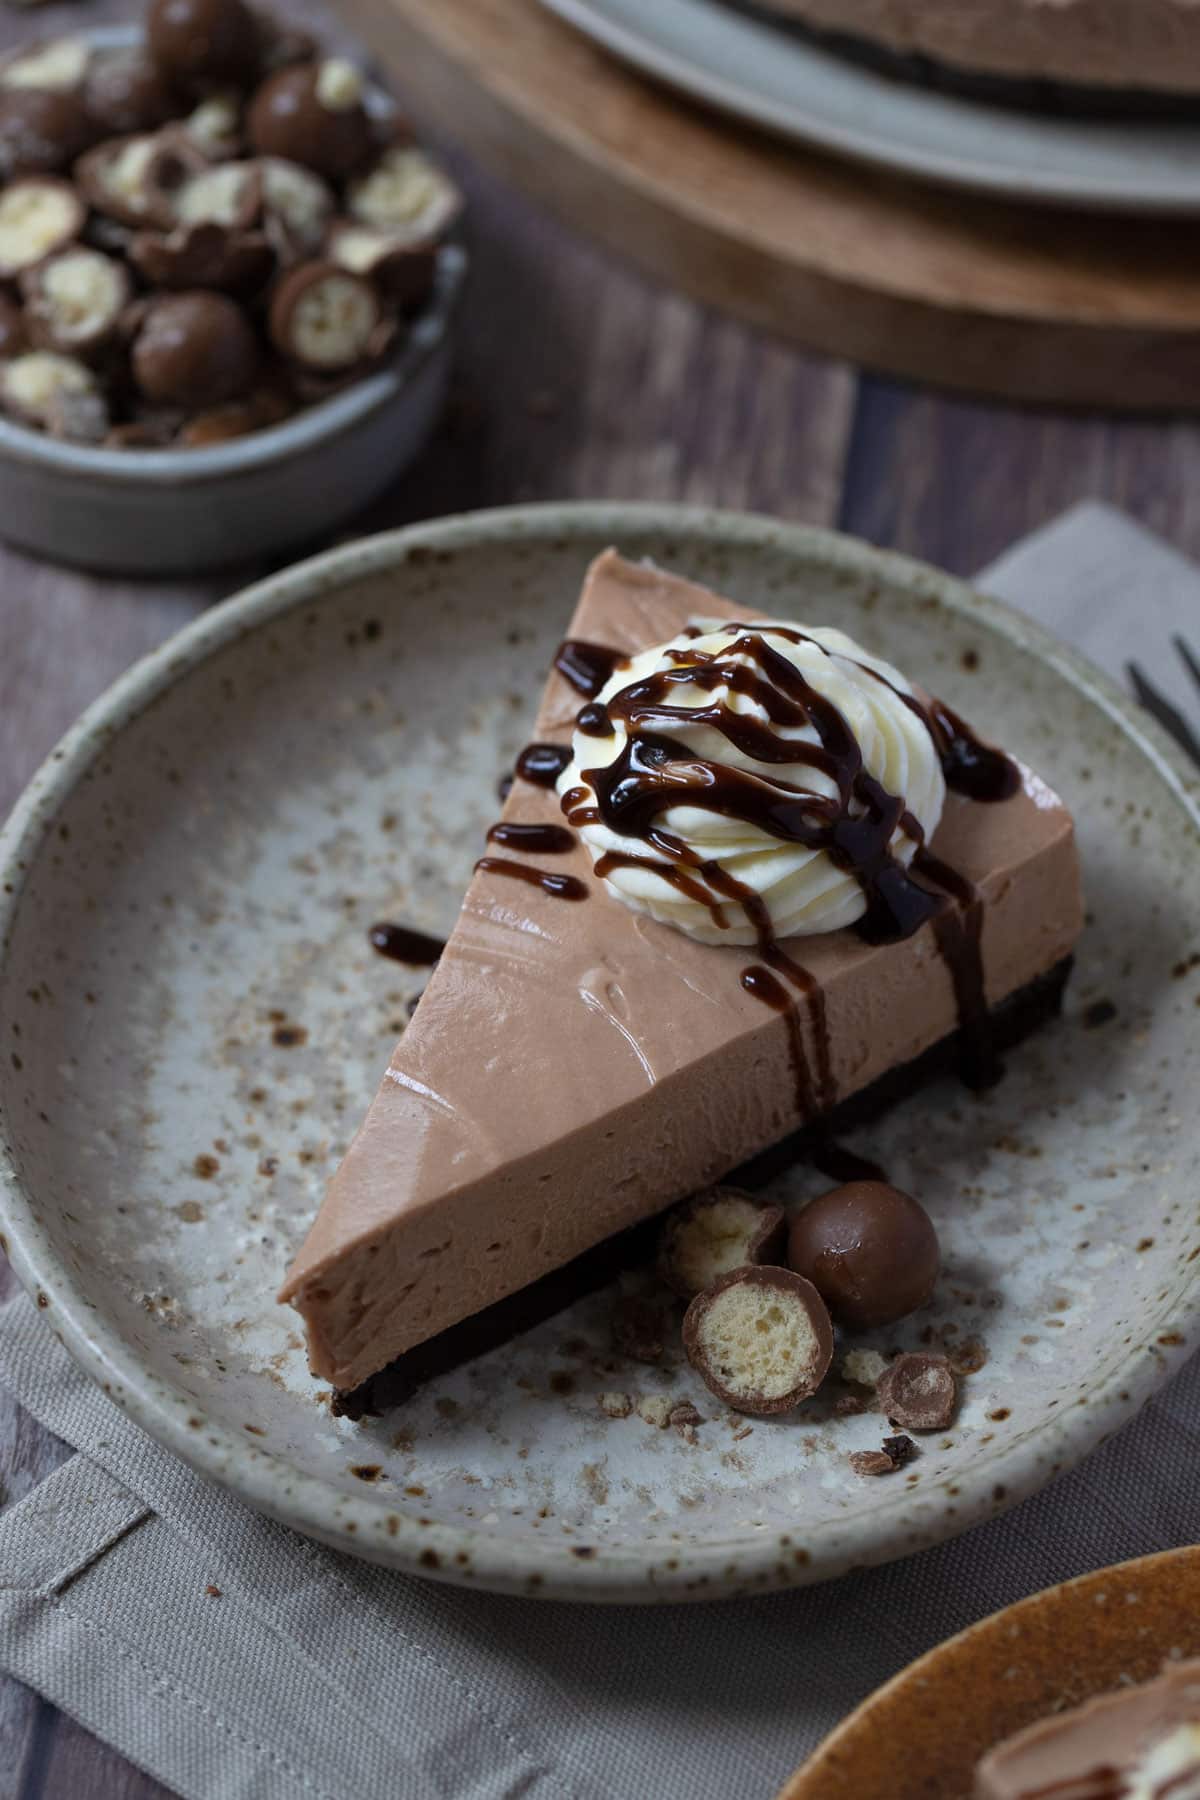
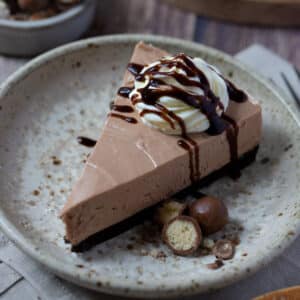
You will love this luscious no-bake chocolate cheesecake! It is light, smooth and airy, complete with a buttery Oreo base and creamy milk chocolate filling. It’s so easy to prepare; no tricky steps and no water bath. You don’t even need to turn on the oven!
Why you’ll love this recipe
- Quick and easy – it’s so simple and effortless. The entire cheesecake can be whipped up in no time and then left to set in the fridge.
- Completely no bake – not an oven in sight. It’s completely no bake and prepared in just a few minutes. No eggs, no water baths needed.
- Perfect for any occasion – great for an Easter party, Christmas celebrations, birthdays and more.
- Make ahead – it has to set in the fridge, it’s perfect for making a day in advance and sliced when you are ready to serve.
- So smooth and creamy – unlike regular cheesecake, this one isn’t overly heavy. The super-light and airy filling tastes just like chocolate cheesecake mousse!
- The ultimate no bake dessert – serve it with whipped cream and berries, mini-Easter eggs or your favourite crushed chocolates.
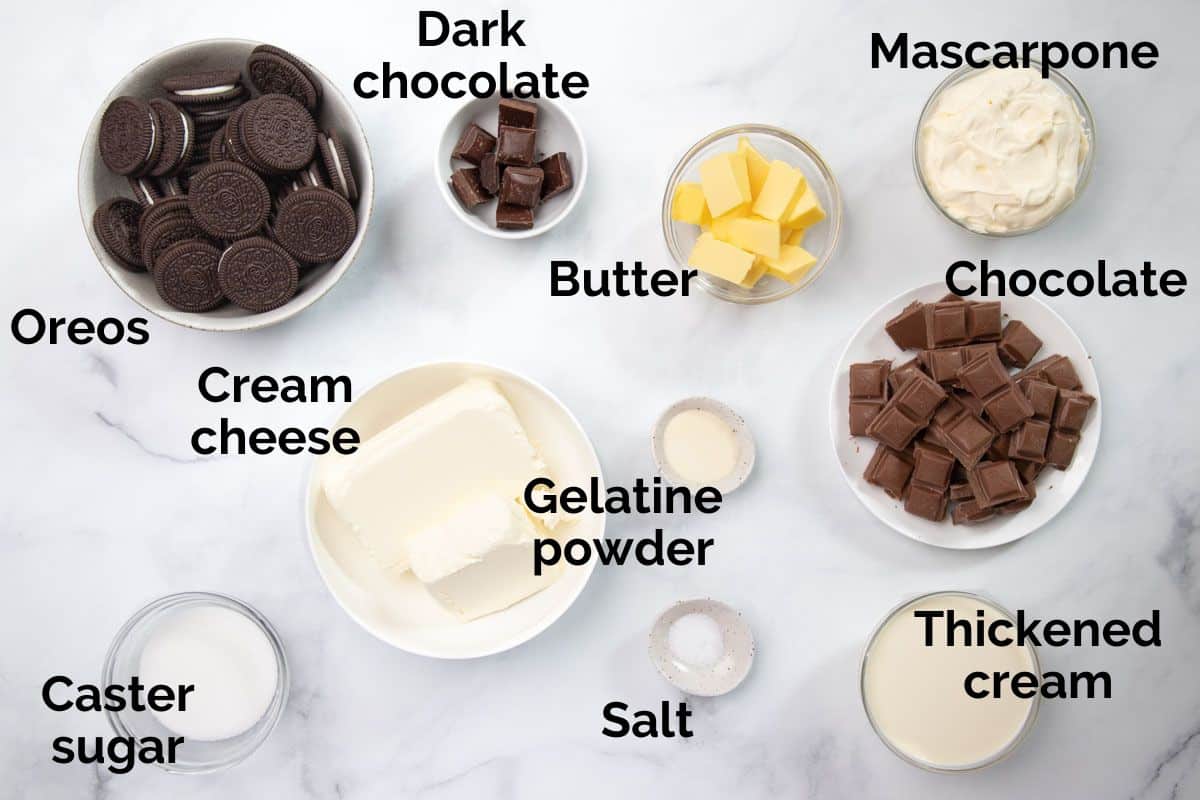
Ingredients you’ll need
** This post contains tips and instructions to achieve the best possible results. This photo is a great guide for when you are in the supermarket, but for full ingredient quantities and methods, please scroll down to the detailed recipe card below!
Ingredient notes
- Cream cheese – adds creaminess and tang to the cheesecake filling. Use blocks of real cream cheese, not cream cheese spread. Make sure it’s completely softened at room temperature to avoid any lumps. I use Philadelphia cream cheese as it’s lovely and creamy, but any will work. Light cream cheese may not set properly, so make sure it’s regular, full-fat cream cheese.
- Mascarpone – an indulgent addition to the cheesecake filling, mascarpone (also called Italian cream cheese) is a rich and silky cheese made with heavy cream and citric or tartaric acid. It can be found in the cheese/dairy aisle in supermarkets. The addition of mascarpone gives the filling a creamier, richer texture.
- Caster sugar – superfine caster sugar helps to break down the cream cheese and adds sweetness.
- Oreos – for the biscuit base. They need to be crushed into superfine crumbs in a food processor (or with a rolling pin). There’s no need to remove the white filling first. Alternatively, Chocolate Ripple biscuits or any other sweet chocolate tea-biscuit can be used.
- Butter – used to bind the Oreo biscuit base together. It helps to set the base and gives a rich, buttery flavour. Use real butter, for best results.
- Salt – salt is used in the biscuit base to balance the sweetness and enhance the chocolate flavour. I don’t recommend skipping it! You can even add a little more, to taste.
- Thickened cream – cream is whipped and folded into the filling, making it light and airy. I used full-fat thickened cream which has a fat content of 35%. It’s important to whip the cream into semi-stiff peaks before incorporating into the mixture, or it won’t set as nicely.
- Gelatine powder – gelatine is used instead of eggs to give the cheesecake structure, while keeping it light and creamy. It is flavourless, so you won’t taste it in the final result. However, it is not vegetarian. If you require the cheesecake to be vegetarian, swap for a vegetarian gelatine. Ratios may vary, so check the label first.
- Chocolate – use a creamy, good quality chocolate that you know and love to eat. Milk chocolate adds sweetness to the filling, as well as helping it to set in the fridge. Don’t use chocolate chips or baking chocolate, or the filling may become grainy. I recommend milk chocolate for best results. But you could also add white chocolate.
Step by step instructions
** This post contains tips and instructions to achieve the best possible results. This photo is a great guide for when you are in the supermarket, but for full ingredient quantities and methods, please scroll down to the detailed recipe card below!
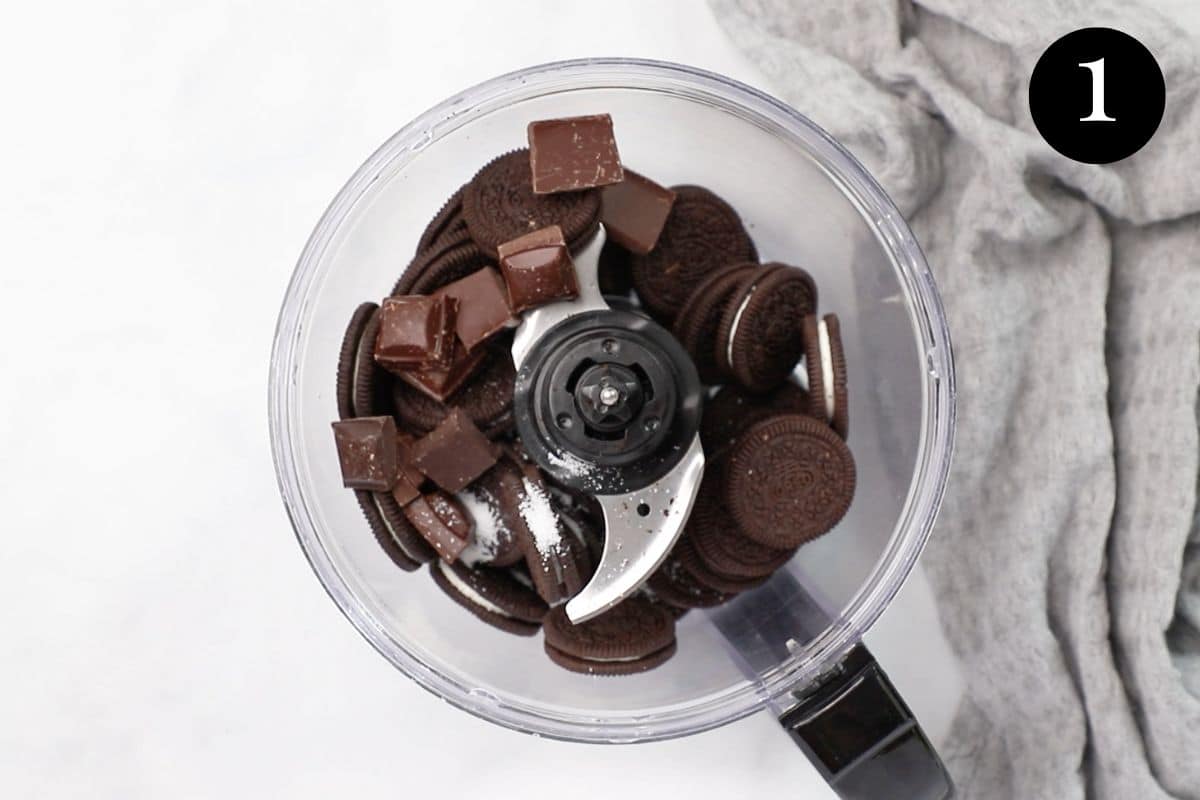
1. Add the Oreos, dark chocolate and salt to a food processor and pulse until you have fine crumbs. Transfer to a mixing bowl.
If you don’t have a food processor, place the ingredients in a large bag and smash with a rolling pin before transferring to a bowl. The chocolate will need to be very finely chopped or grated first if you are using this method.
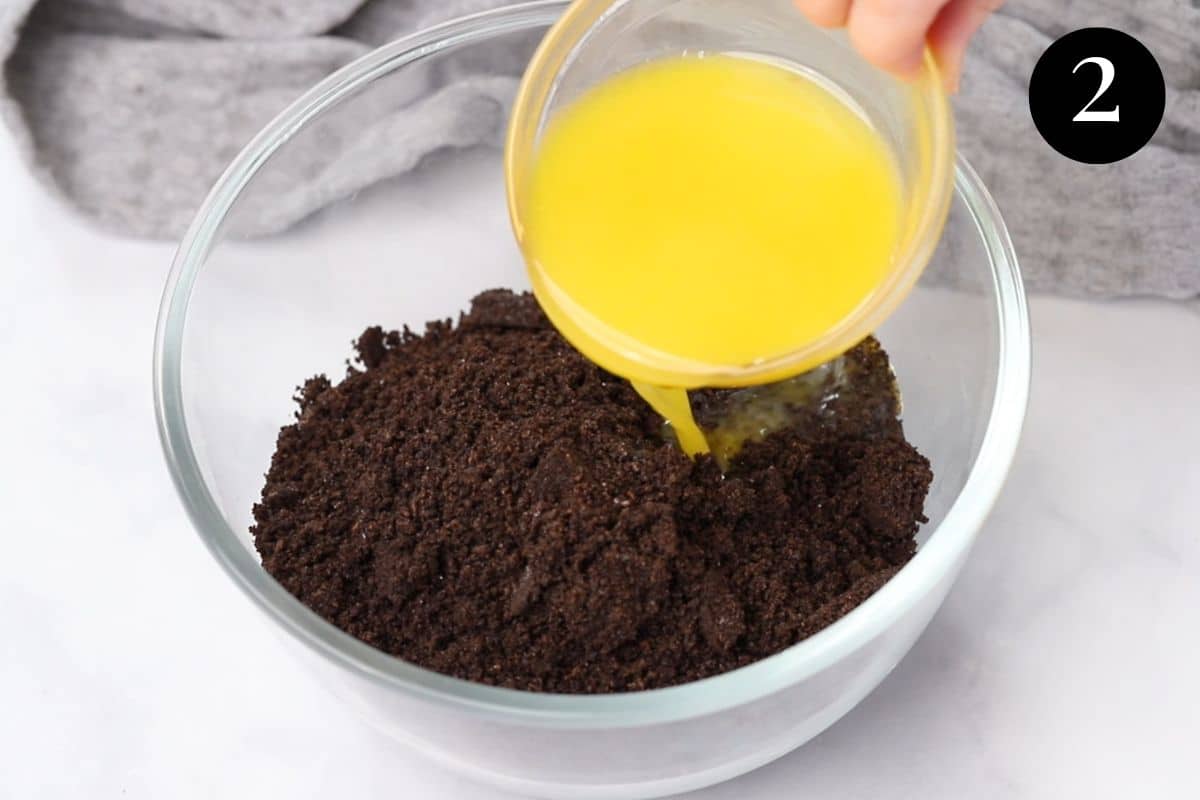
2. Add the melted butter and stir until completely combined.
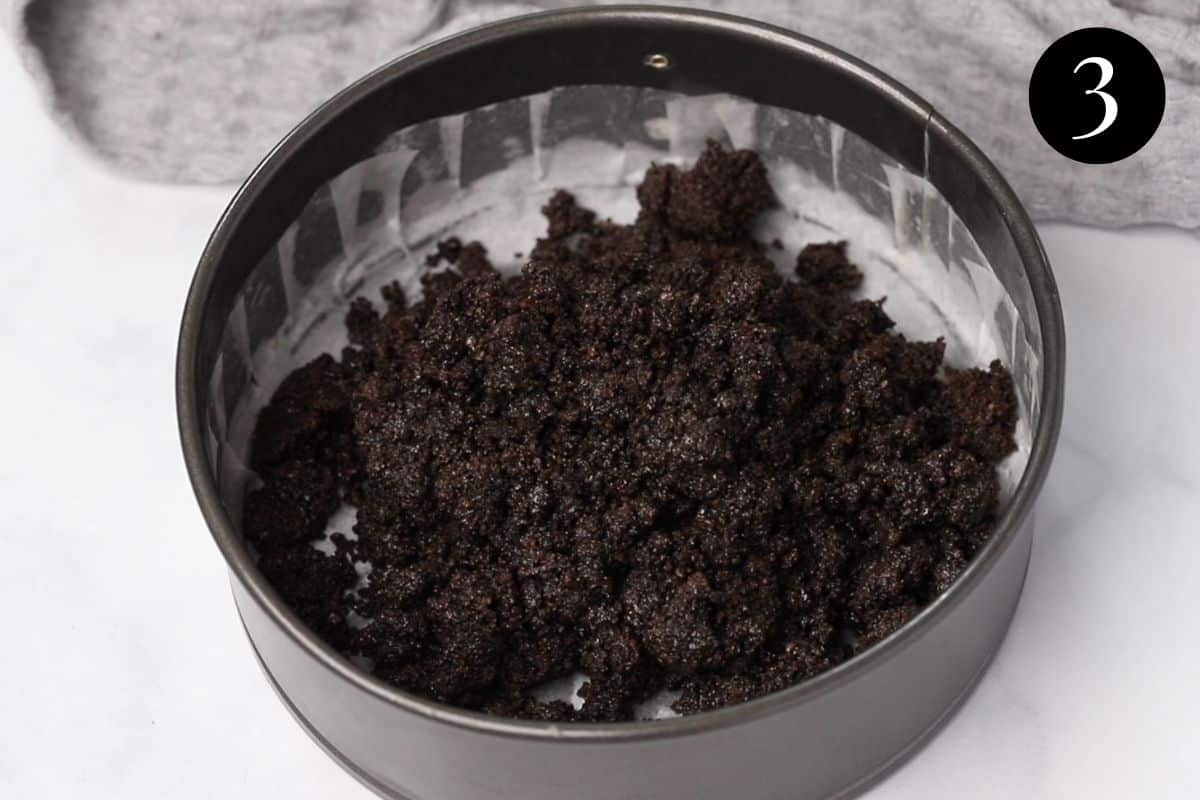
3. Transfer the base mixture to a lined springform tin. Firmly press the mixture into the tin with the back of a metal spoon or the bottom of a glass, until compact.
Refrigerate or place in the freezer to set while you prepare the cheesecake filling.
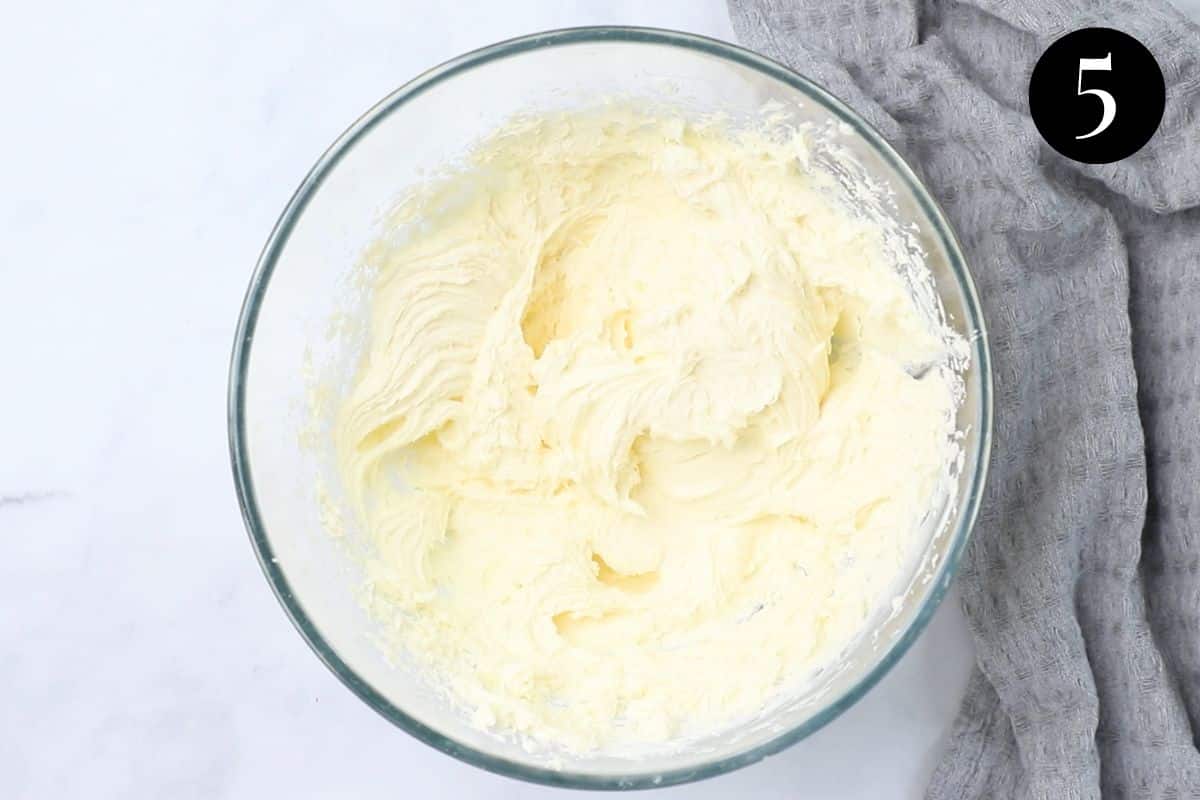
4. Add the cream cheese, mascarpone and sugar to a bowl and beat with electric beaters (handheld or stand) until well combined and smooth. Make sure you scrape down the sides of the bowl to avoid lumps later.
5. Add the gelatine, dissolved in a little boiling water and beat to combine.
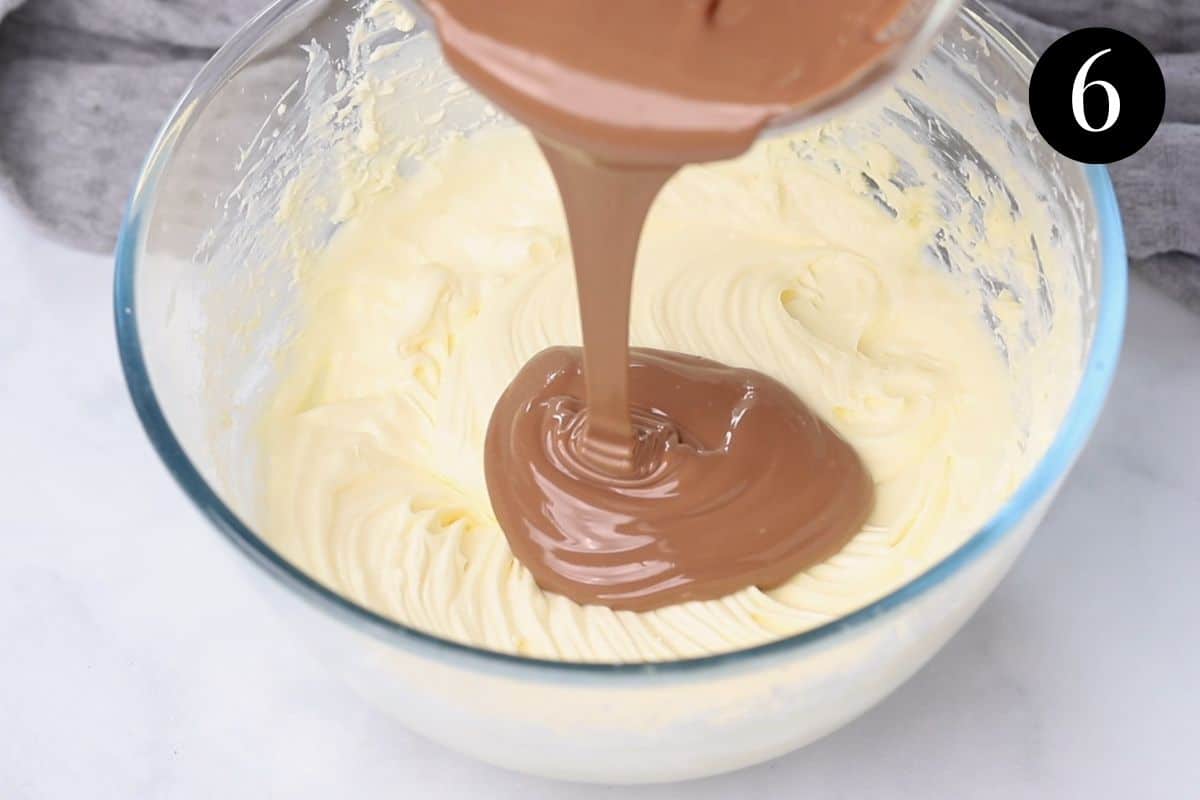
6. Melt the chocolate and set it aside to cool slightly (but not set).
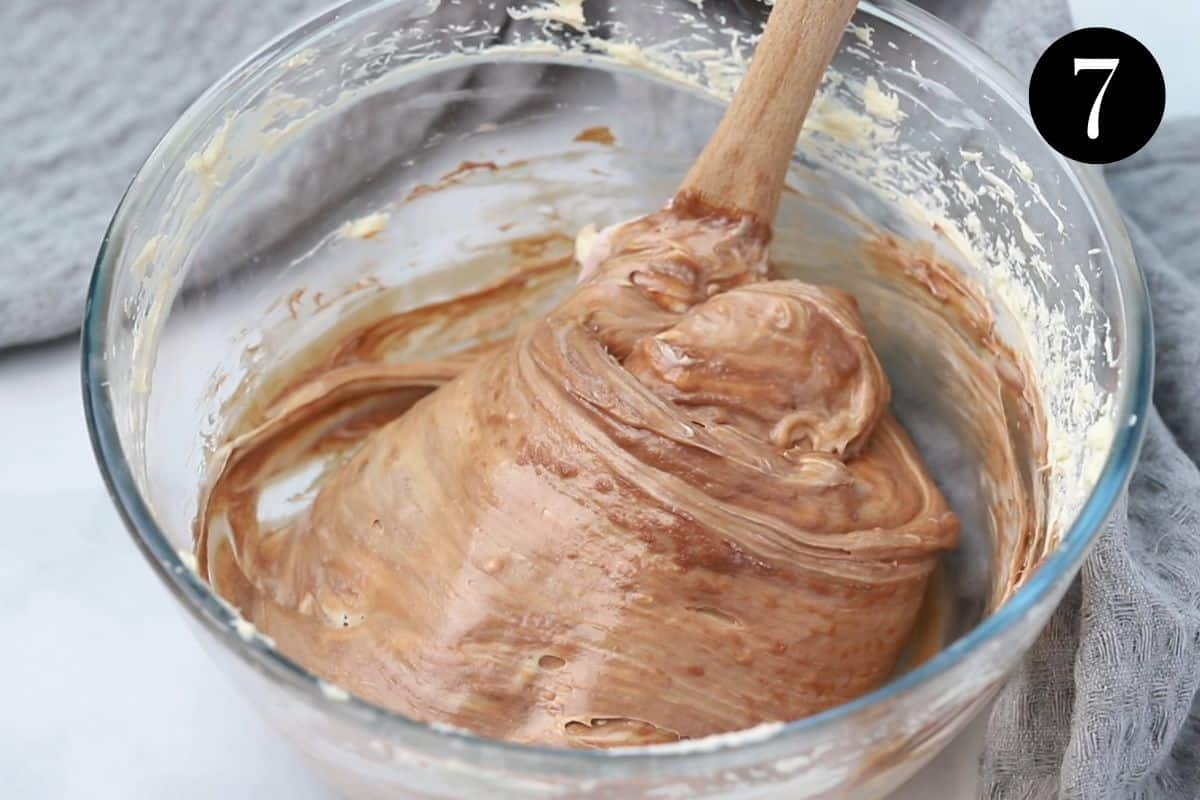
7. Fold the chocolate into the cream cheese mixture until almost combined. It’s ok if the mixture is a little streaky at this point.
Don’t use mixers to beat the chocolate into the filling. Over-beating can make the mixture grainy. Fold with a spatula until just combined.
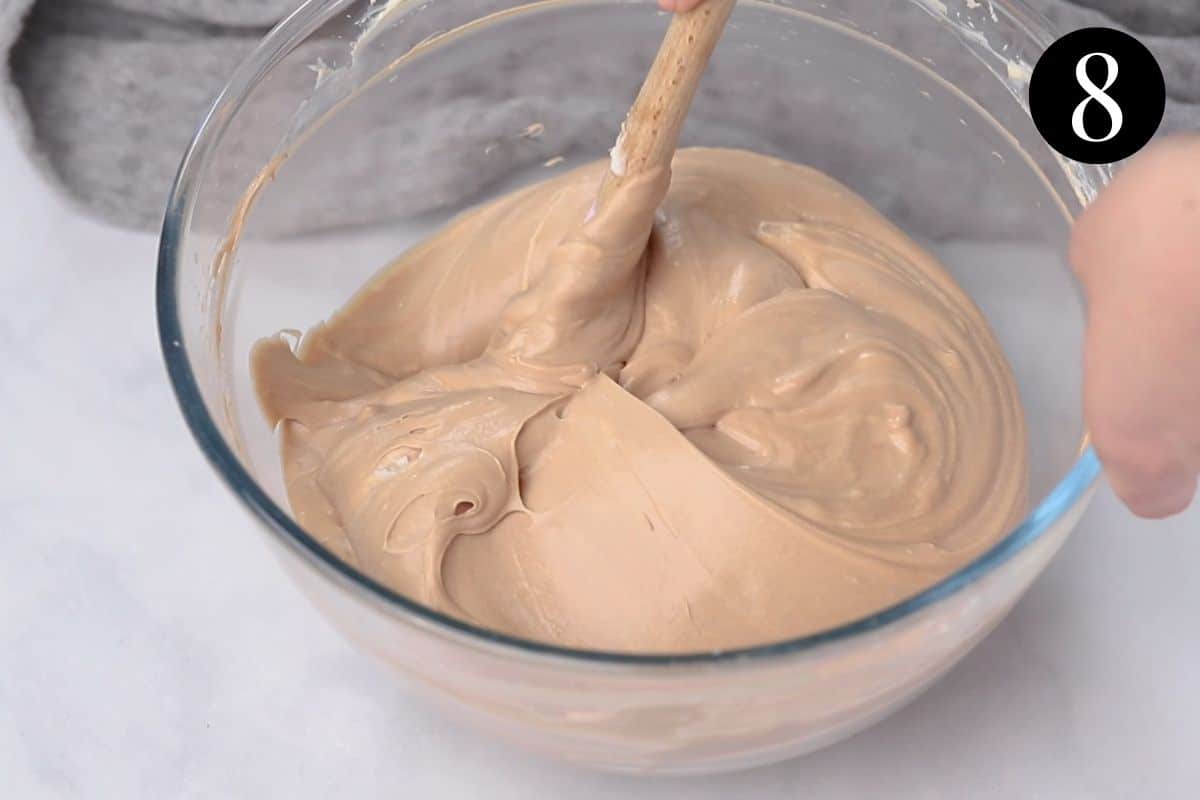
8. Whip the cream in a separate bowl until it forms stiff peaks. Fold it into the cheesecake filling until just combined. Don’t overmix.
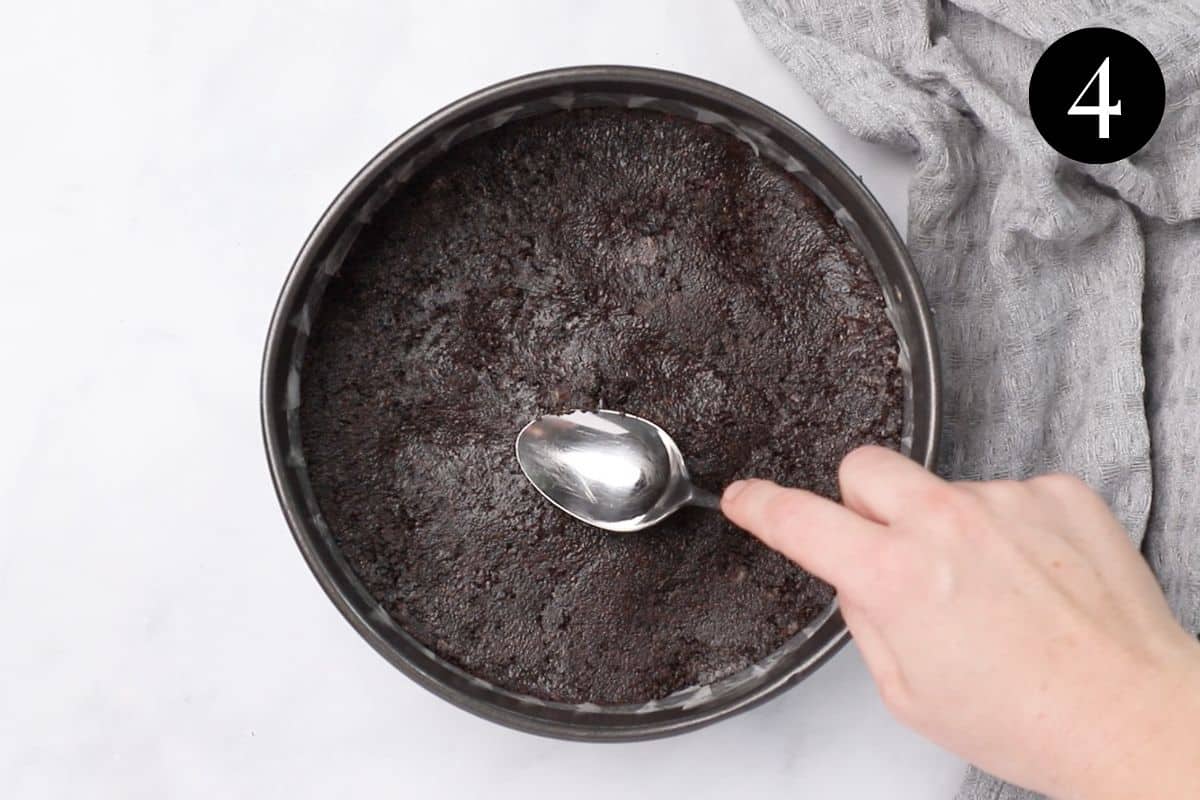
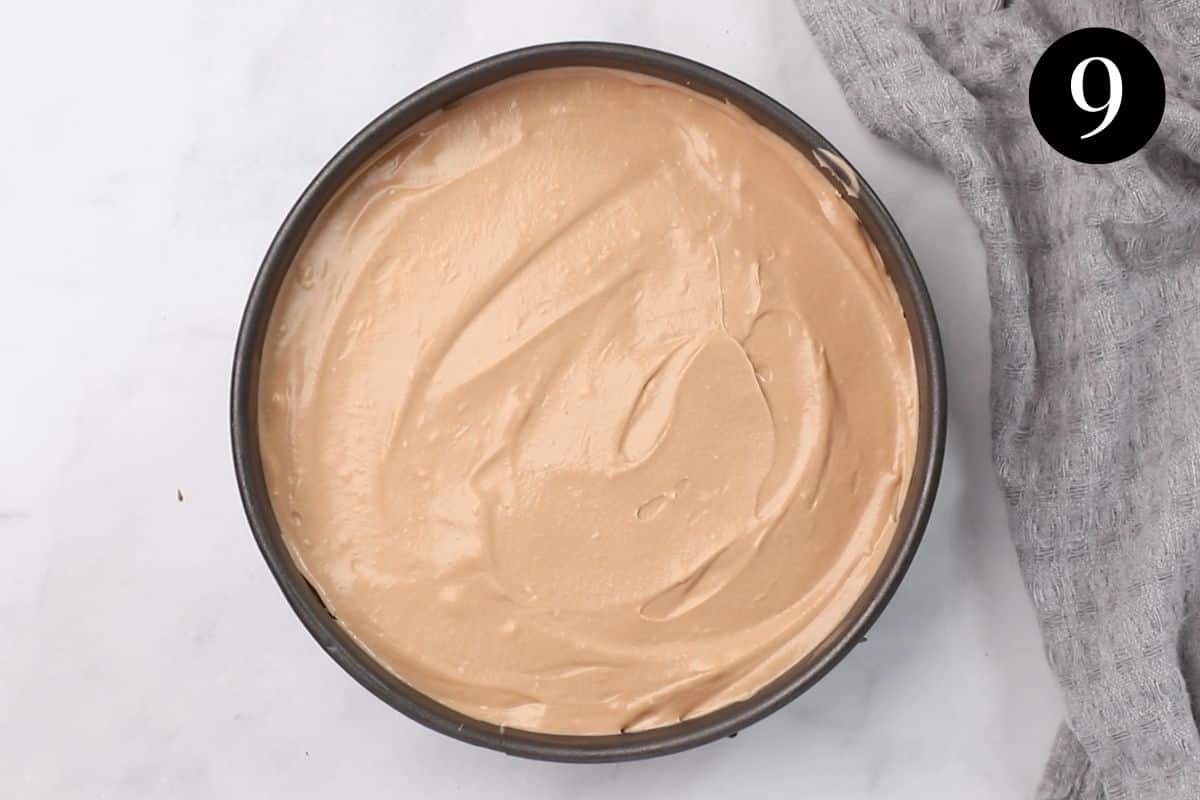
9. Transfer the filling to the prepared biscuit base. Smooth with a spatula and chill to set.
Expert tips
- Make sure your ingredients are at room temperature before mixing. This is especially important for the cream cheese and mascarpone. If the cream cheese is cold, it will make the mixture lumpy and can make the filling grainy.
- If you are in a rush, the cream cheese can be cut into small chunks to soften faster at room temperature, or microwaved in short bursts at 50% power.
- Line the bottom of the springform tin with baking paper, for easy removal of the cheesecake once it has set.
- Firmly press the biscuit base into the tin so that it holds together nicely when sliced. Use the back of a metal spoon or the bottom of a glass for best results.
- The fastest way to crush the Oreo cookies is in a food processor (the whole cookies are added, including the filling). Pulse until they are crushed into very fine crumbs. Alternatively, they can be placed into a bowl or plastic bag and crushed with a rolling pin.
- I used a 24cm springform tin, but a 23cm tin can also be used. The base will just be a little thicker. Springform tins with a removable bottom are best, for easiest removal of the cheesecake.
- Don’t overwhip the cream, or the filling will be grainy.
- Be careful not to overbeat the filling. Fold the melted chocolate until mostly combined but still a little streaky, and then gently fold in the whipped cream so that you don’t push out the air. The air gives the filling a gorgeous mousse-like consistency.
- Don’t skip the chilling time! The cheesecake should be refrigerated for at least 6 hours, but overnight is best. This makes it the perfect make-ahead dessert.
- Don’t place the cheesecake in the freezer to set. The filling will lose its creamy and rich texture. However, it can be frozen once it has been fully set in the fridge (see notes below).
- The cheesecake can be decorated with anything you like. Fresh berries, raspberry coulis, a drizzle of chocolate sauce, whipped cream or mini Easter eggs are great additions.
FAQs
The cheesecake can set in 6 hours, but it’s best to leave it in the fridge overnight for perfect, firm slices. I recommend making it the night before you want to serve it.
No-bake cheesecakes don’t contain any eggs and require several elements to set, since the filling does not firm up in the oven. The gelatine, melted chocolate and whipped cream all help the cheesecake to set in the fridge, so be sure to measure these ingredients accurately. The cream needs to be beaten to stiff peaks, or the filling may not set. It should stiff, with thick peaks that hold their shape, but not so whipped that it curdles. And make sure you chill the cheesecake for at least 6 hours to make sure it completely sets. It can still be runny if chilled for less time.
This cheesecake will keep well in the fridge for up to 3 days.
No bake cheesecake can be frozen, but don’t freeze it before it has set properly in the fridge or it will lose its creamy texture. It should only be frozen after being fully set in the fridge first.
To freeze, wrap the cheesecake (whole or in slices) in plastic wrap and then freeze in airtight containers for up to 2 months. Thaw in the fridge overnight and serve the next day. Single slices can be thawed at room temperature for about an hour.
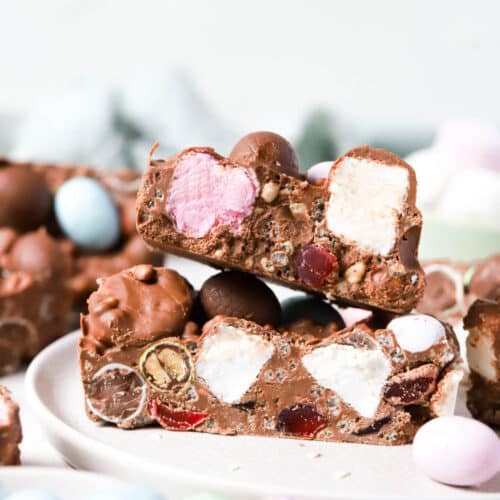
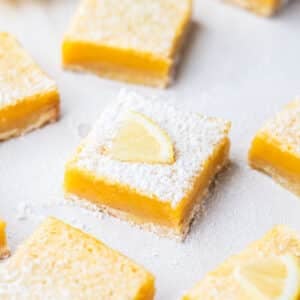
Related recipes
Tried this recipe? Please leave a star ⭐⭐⭐⭐⭐ rating or leave a review below and let me know how you went!
Hungry for more? Subscribe to my newsletter and follow along on Facebook, Instagram and Pinterest for the latest recipes and news.
No Bake Chocolate Cheesecake
Ingredients
For the biscuit base
- 300 grams Oreo cookies approximately 32 cookies
- 60 grams dark chocolate cut into small pieces
- ¼ teaspoon salt
- 95 grams butter melted
For the cheesecake layers
- 400 grams cream cheese completely softened at room temperature.
- 200 grams mascarpone cheese
- ¼ cup caster sugar
- 2 teaspoons gelatine powder
- ¼ cup boiling water
- 260 grams milk chocolate broken into pieces.
- ¾ cup thickened cream whipped into stiff peaks (makes a total of 1 cup when whipped).
For decorating (choose your favourite)
- whipped cream
- Leftover Easter eggs or your favourite chocolate pieces, crushed and whole.
- berry coulis
- fresh berries
Instructions
For the biscuit base
- Grease and line a 24cm (9.5 ") round tin with a removable bottom (springform tin) with baking paper.
- Place the Oreo biscuits, dark chocolate and salt in a food processor and blitz until the mixture resembles fine crumbs. Add the melted butter and stir until combined.
- Using the back of a metal spoon or the bottom of a glass, very firmly press the biscuit mix into the bottom of the prepared tin. Place into the refrigerator or freezer to set while you prepare the filling.
For the cheesecake filling
- Beat the softened cream cheese, mascarpone and sugar together with a electric beaters until smooth and combined. Scrape down the sides of the bowl to avoid lumps.
- In a small bowl or cup, combine the gelatine and boiling water and stir until dissolved. Add it to the cream cheese mixture and beat to combine.
- Melt the milk chocolate by placing the broken pieces in a microwave-safe bowl. Microwave at 50% power in 30 second bursts, stirring in between, until smooth. Allow to cool slightly, but not set.
- Use a spatula to fold the milk chocolate into the cream cheese mixture (don't beat). Don't overbeat; it's ok if the mixture is still a little streaky.
- In a separate bowl, whip the thickened cream into stiff peaks (don't overbeat).
- Gently fold the whipped cream into the cheesecake mixture until just combined. Don't overbeat.
- Pour the cheesecake filling into the prepared base and smooth the top with a spatula.
- Place in the fridge to set, overnight if possible, but at least 6 hours to set.
- When ready to serve, top with broken and whole Easter eggs, berries, whipped cream or your choice of toppings. Enjoy!
Video
Notes
-
- Make sure your ingredients are at room temperature before mixing. This is especially important for the cream cheese and mascarpone. If the cream cheese is cold, it will make the mixture lumpy and can make the filling grainy.
- If you are in a rush, the cream cheese can be cut into small chunks to soften faster, or microwaved in short bursts at 50% power.
- Line the bottom of the springform tin with baking paper, for easy removal of the cheesecake once it has set.
- Firmly press the biscuit base into the tin so that it holds together nicely when sliced. Use the back of a metal spoon or the bottom of a glass for best results.
- The fastest way to crush the Oreo cookies is in a food processor (including the filling). Pulse until they are crushed into very fine crumbs. Alternatively, they can be placed into a bowl or plastic bag and crushed with a rolling pin.
- I used a 24cm springform tin, but a 23cm tin can also be used. The base will just be a little thicker. Springform tins with a removable bottom are best, for easiest removal of the cheesecake.
- Don’t overwhip the cream, or the filling will be grainy.
- Be careful not to overbeat the filling, or it will become grainy. Fold the melted chocolate until mostly combined, and then gently fold in the whipped cream so that you don’t push out the air. The air gives the filling a gorgeous mousse-like consistency.
- Don’t skip the chilling time! The cheesecake should be refrigerated for at least 6 hours, but overnight is best. This makes it the perfect make-ahead dessert.
- Don’t place the cheesecake in the freezer to set. The filling will lose its creamy and rich texture. However, it can be frozen after being fully set in the fridge.
- The cheesecake can be decorated with anything you like. Fresh berries, raspberry coulis, a drizzle of chocolate sauce, whipped cream or mini Easter eggs are great additions.
- Storage; This cheesecake will keep well in the fridge for up to 3 days.
- Freezing; No bake cheesecake can be frozen, but don’t freeze it before it has set properly in the fridge or it will lose its creamy texture. It should only be frozen after being fully set in the fridge first. To freeze, wrap the cheesecake (whole or in slices) in plastic wrap and then freeze in airtight containers for up to 2 months. Thaw in the fridge overnight and serve the next day. Single slices can be thawed at room temperature for about an hour.
- While it can be sliced into more or less pieces, please note that the nutrition information is based on the cheesecake being sliced into 12 pieces, with one piece being one serve. The nutritional information is an estimate only and does not take into account any additional toppings or sides served with the cheesecake.
- This recipe is made using Australian cups and spoon measurements. Any reference to cups or spoons in this recipe is in Australian metric. Due to cup sizes varying from country to country, I advise adjusting if necessary.
Nutrition
Are you following us on Facebook, Instagram and Pinterest?
Update notes: This recipe was originally published in April 2019, but was re-published with new information and photos in March 2023.


Leave a Reply