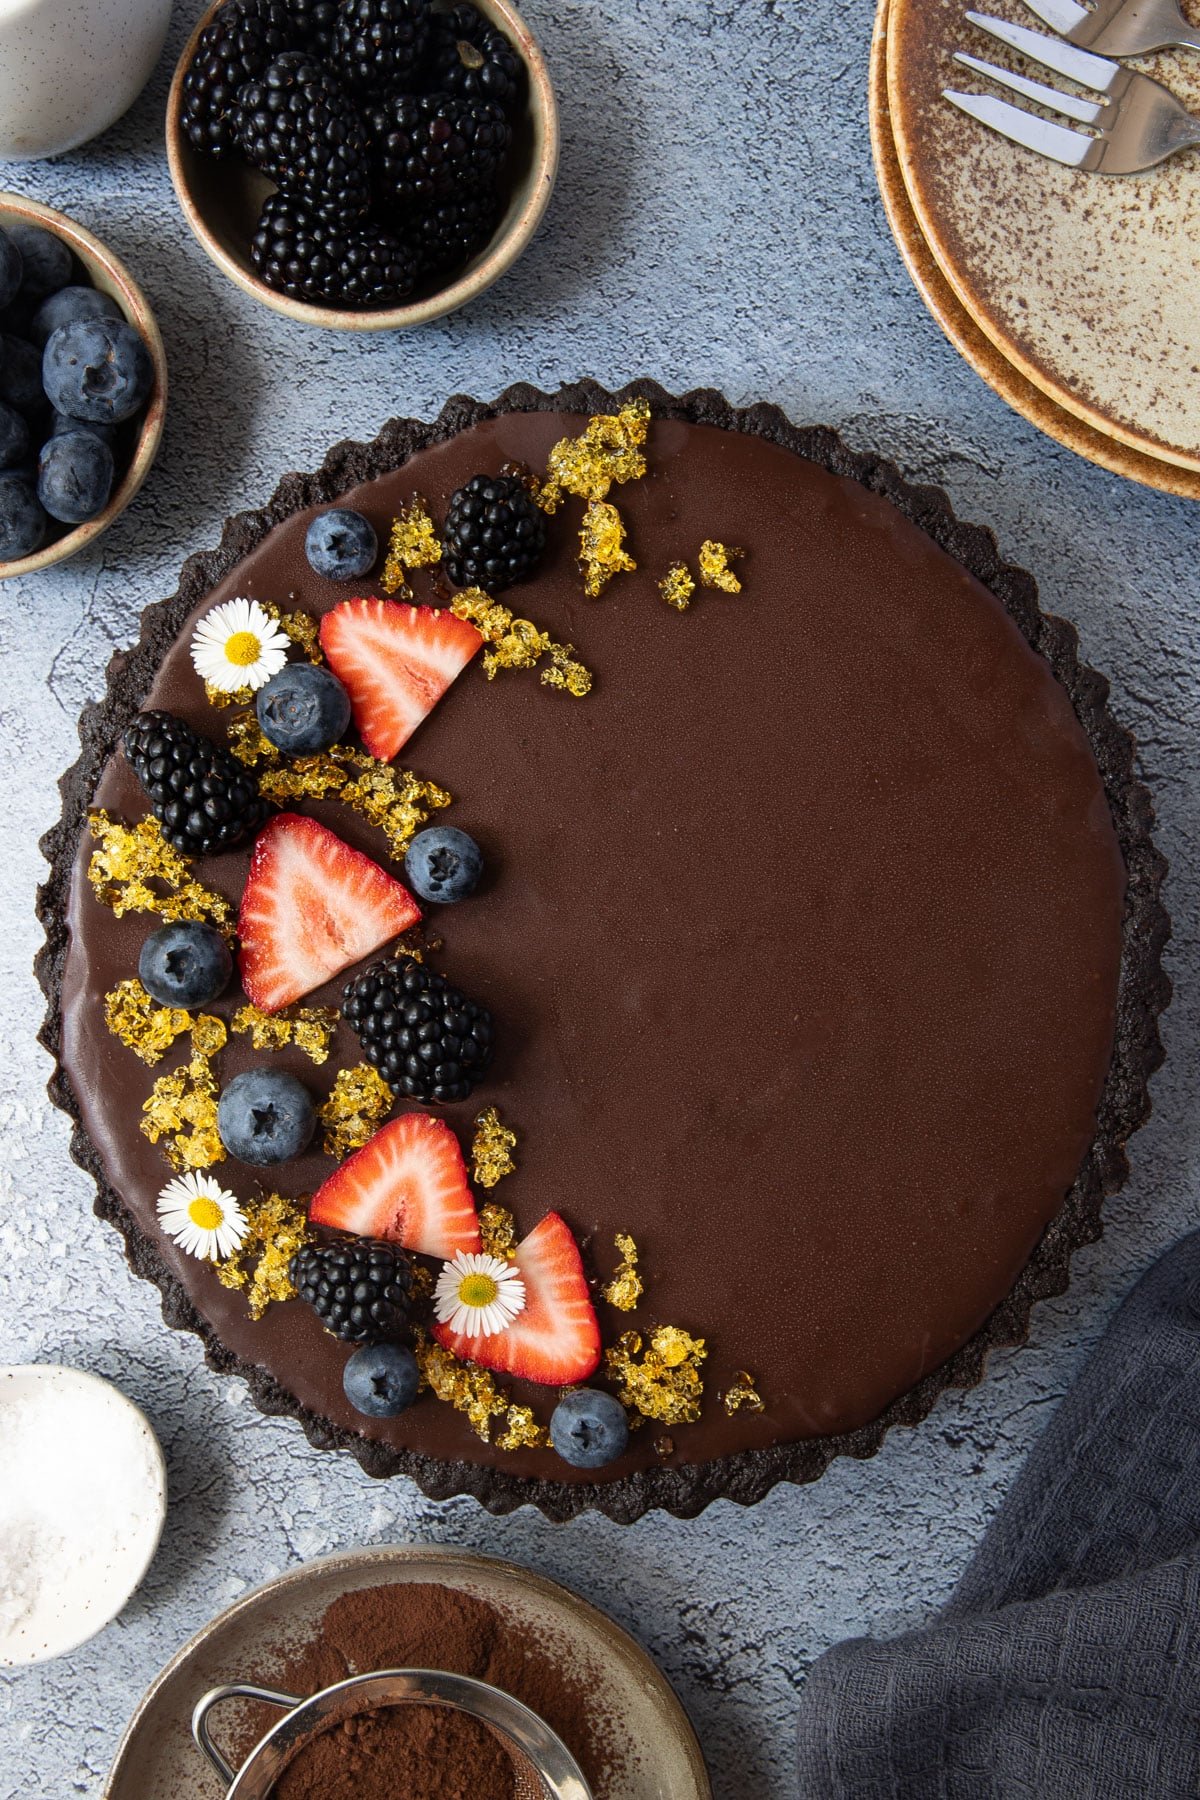
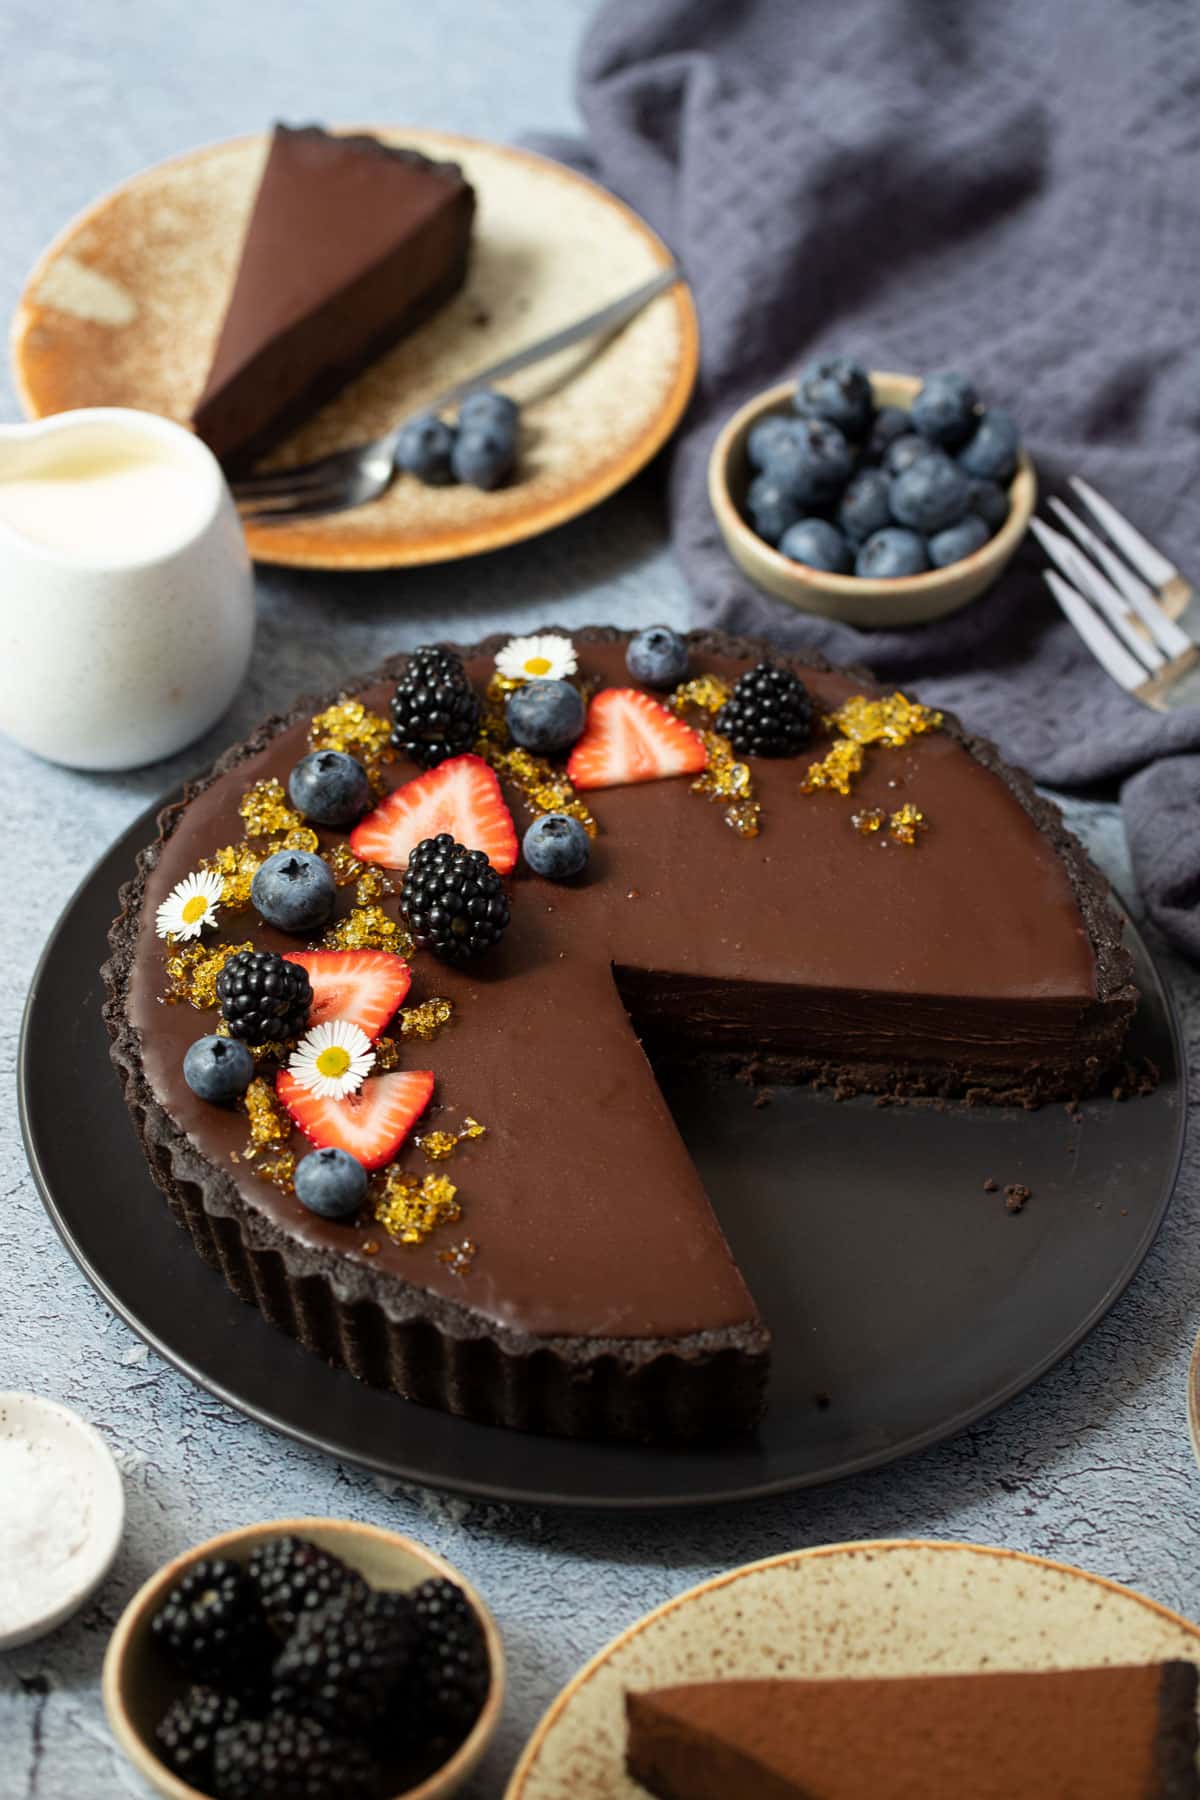
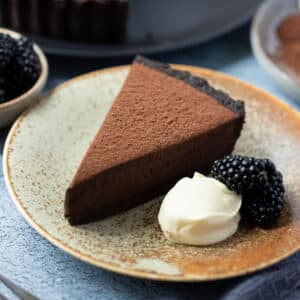
This irresistible chocolate ganache tart is the perfect no-bake dessert. With a buttery Oreo crust and a creamy dark chocolate ganache filling, it is perfect for dinner parties, holiday celebrations and special occasions. And it’s simpler than it looks!
Why you’ll love this recipe
- Easy to make – just 15 minutes to prep and 2 hours in the refrigerator and this gorgeous tart is all yours!
- Rich and creamy – a mouth-wateringly delicious Oreo base with a silky ganache filling that is enhanced with a sprinkle of sea salt. Serve it on its own, or top it with fresh berries and double cream for extra indulgence.
- Make ahead – make it ahead of time and keep it chilled for 3-4 days, until ready to decorate and serve. Perfect for parties and entertaining when you will be short on time.
- Perfect for any occasion – a show-stopping centrepiece that is perfect for Christmas, family gatherings, special occasions or whenever you need a fancy dessert with minimal effort.
- No bake – an easy biscuit crust forms the base of this pie, instead of fiddly pastry or blind baking. Just a little heating and mixing and then the fridge does all the work.
Ingredients you will need
** This post contains tips and instructions to achieve the best possible results. The photo above is a great guide for when you are in the supermarket, but for full ingredient quantities and methods, please scroll down to the detailed recipe card below!
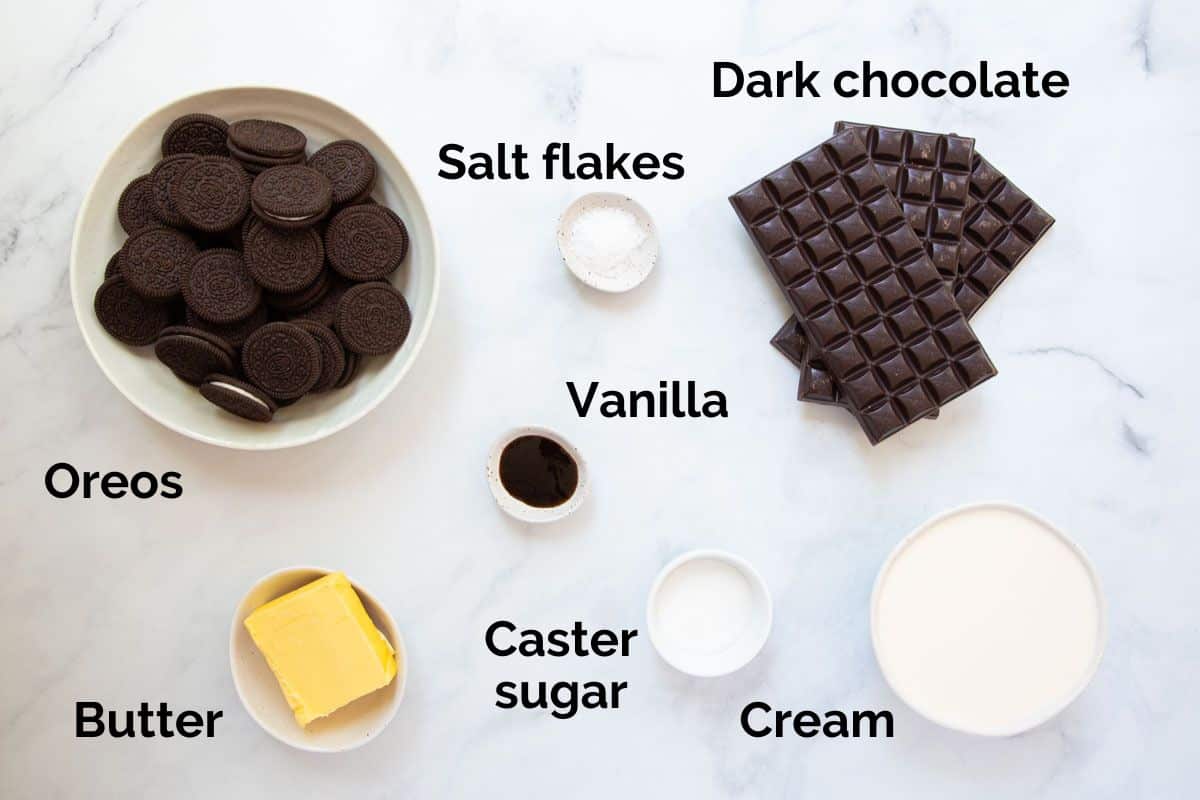
- Oreos – crushed Oreos form the cookie/biscuit base of the tart. Don’t remove the Oreo filling, throw the entire biscuits into a food processor or crush them with a rolling pin. Oreos can be swapped for equal quantities of any other biscuit like Graham Crackers, Digestives, Chocolate Ripple, Granita or any type of plain, sweet biscuit. If using plain biscuits, leave the extra chocolate out of the base.
- Heavy cream – thickened cream or heavy whipping cream is used to make the ganache filling for the tart. Don’t use light/low-fat cream, milk or any other cream alternative, or the ganache won’t set properly and will be difficult to slice.
- Dark chocolate – when making homemade ganache, you need a 1:1 ratio of cream to chocolate. For the filling, I recommend using dark chocolate, semi-sweet or high-quality bittersweet (couverture) chocolate. Use a dark chocolate with 45%-70% cocoa and choose the best quality you can find, since it’s the key flavour in this dessert. Don’t use baking chocolate or chocolate chips, because they will not melt into the best ganache consistency.
- Butter – butter is used to both bind the biscuit base and to help set the ganache. And it also gives the ganache a beautiful glossy shine. Use unsalted butter, so that you can more easily control the salt content with salt flakes.
- Caster sugar – just 2 tablespoons, to add a little sweetness and balance the richness of the chocolate.
- Vanilla – vanilla extract or vanilla bean paste enhances the chocolate flavour.
- Salt flakes – sea salt flakes enhance the chocolate flavour and balances the bitter and sweet elements of the tart. Use salt flakes, rather than fine table salt.
Step by step instructions
Full recipe quantities and instructions can be found in the detailed recipe card below.
For the Oreo biscuit base;
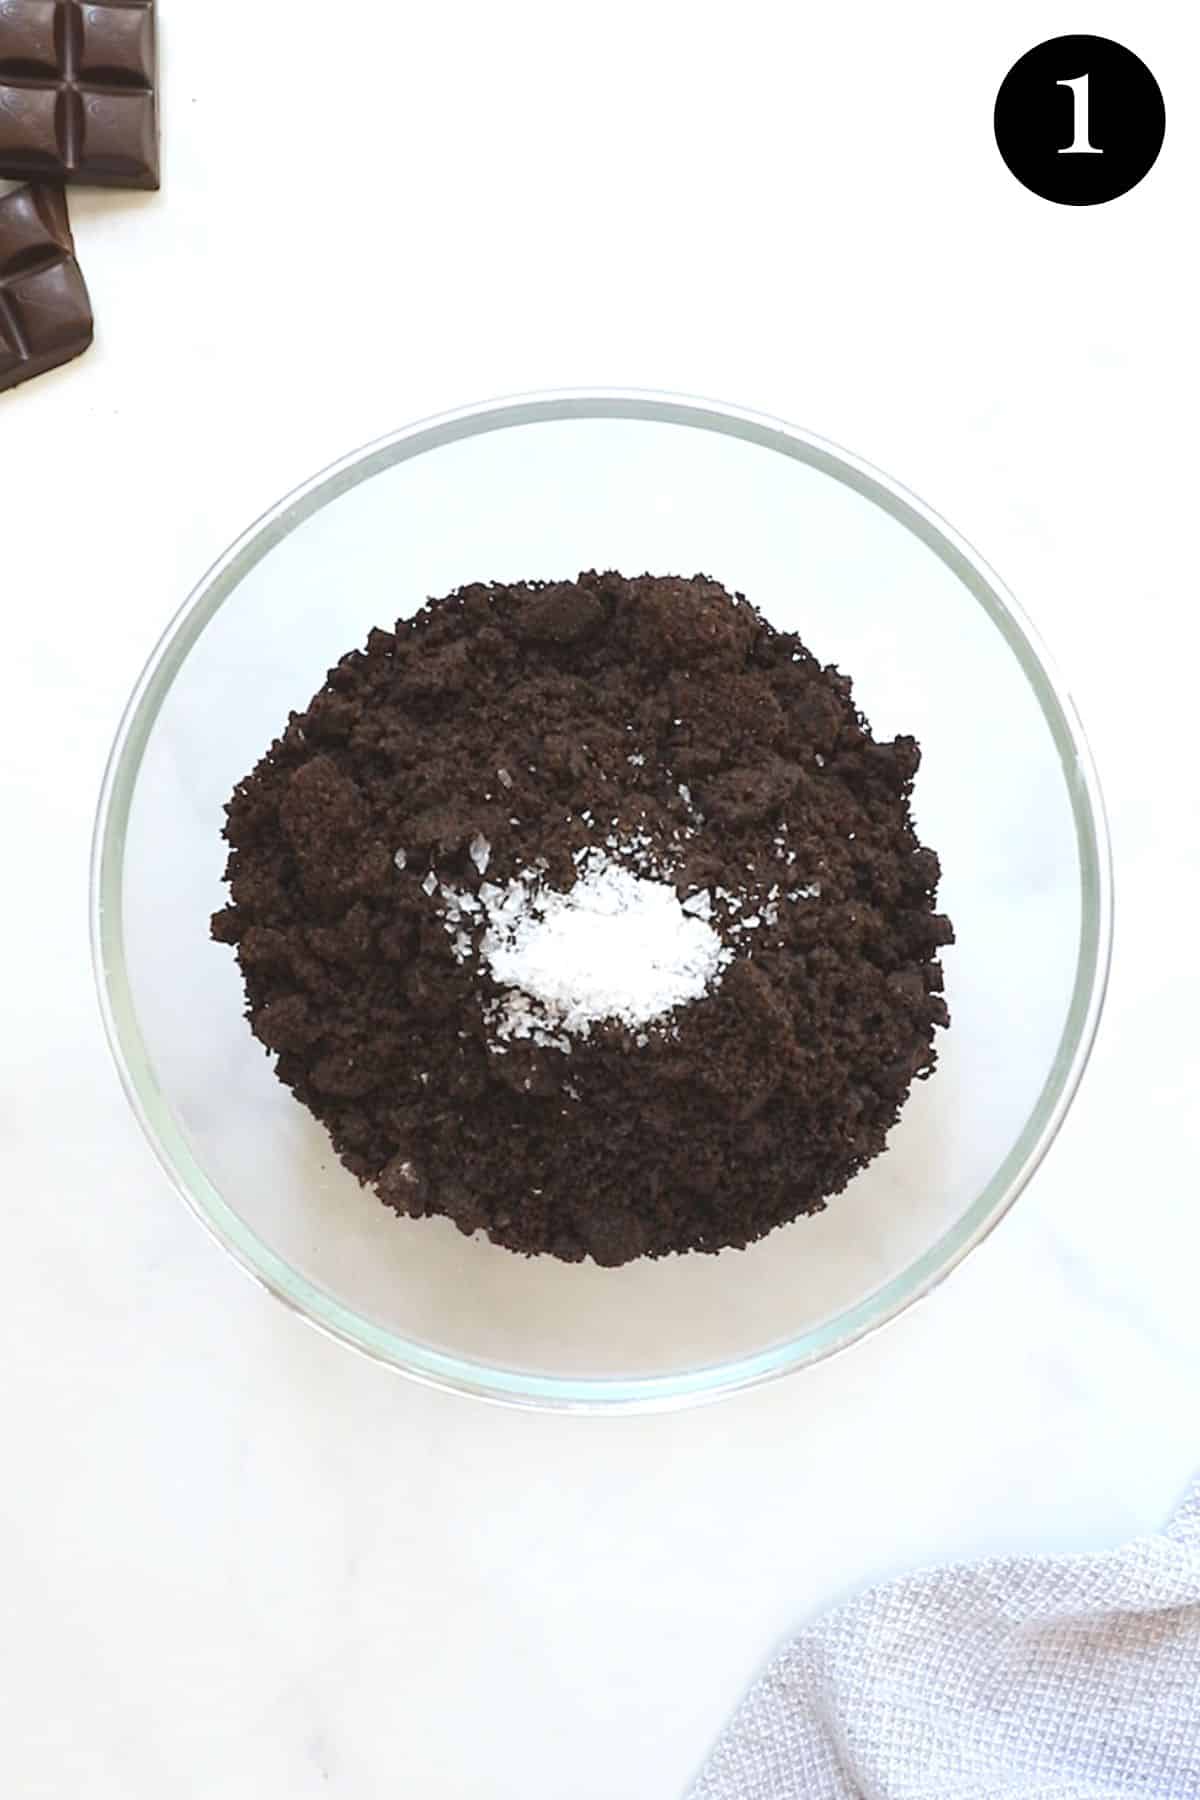
- Crush the biscuits – place the Oreos, chocolate and salt into a food processor and crush until the mixture is fine, like breadcrumbs.
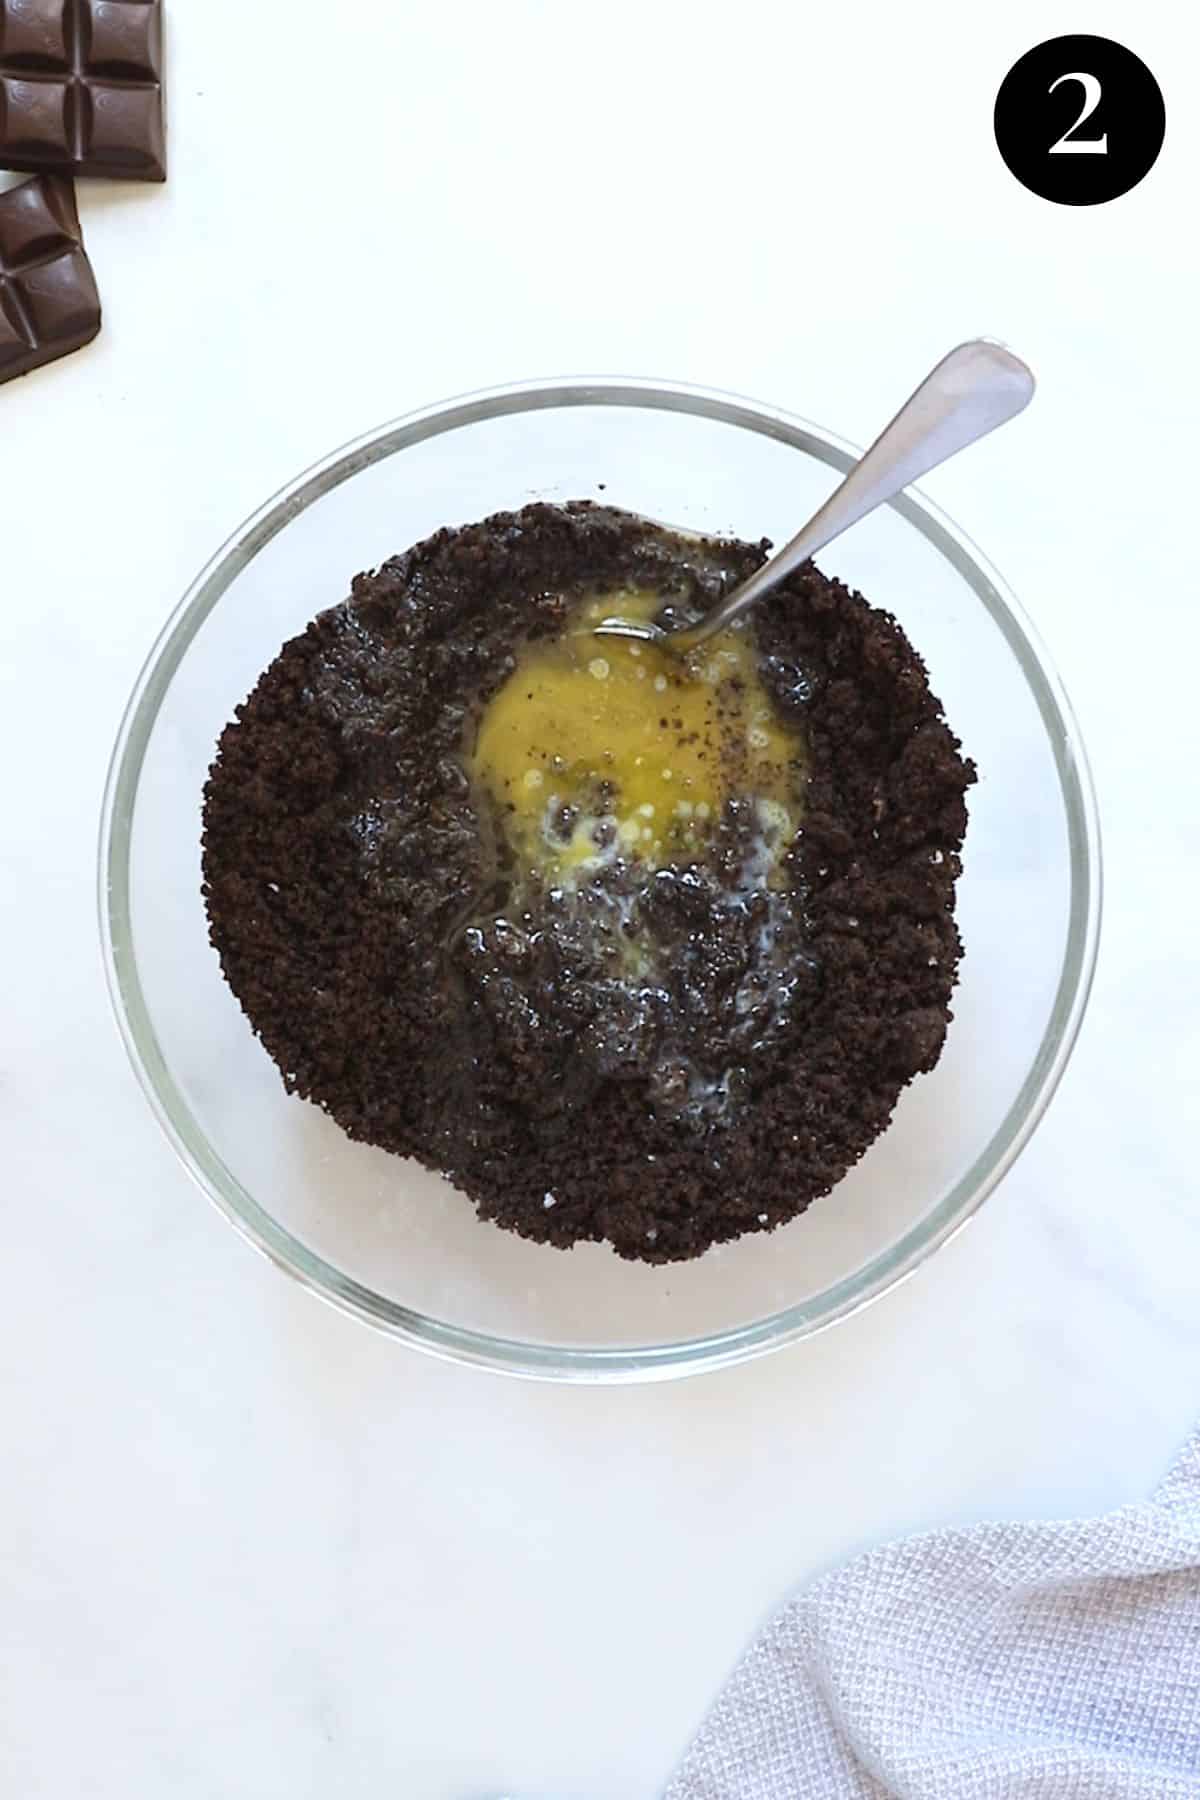
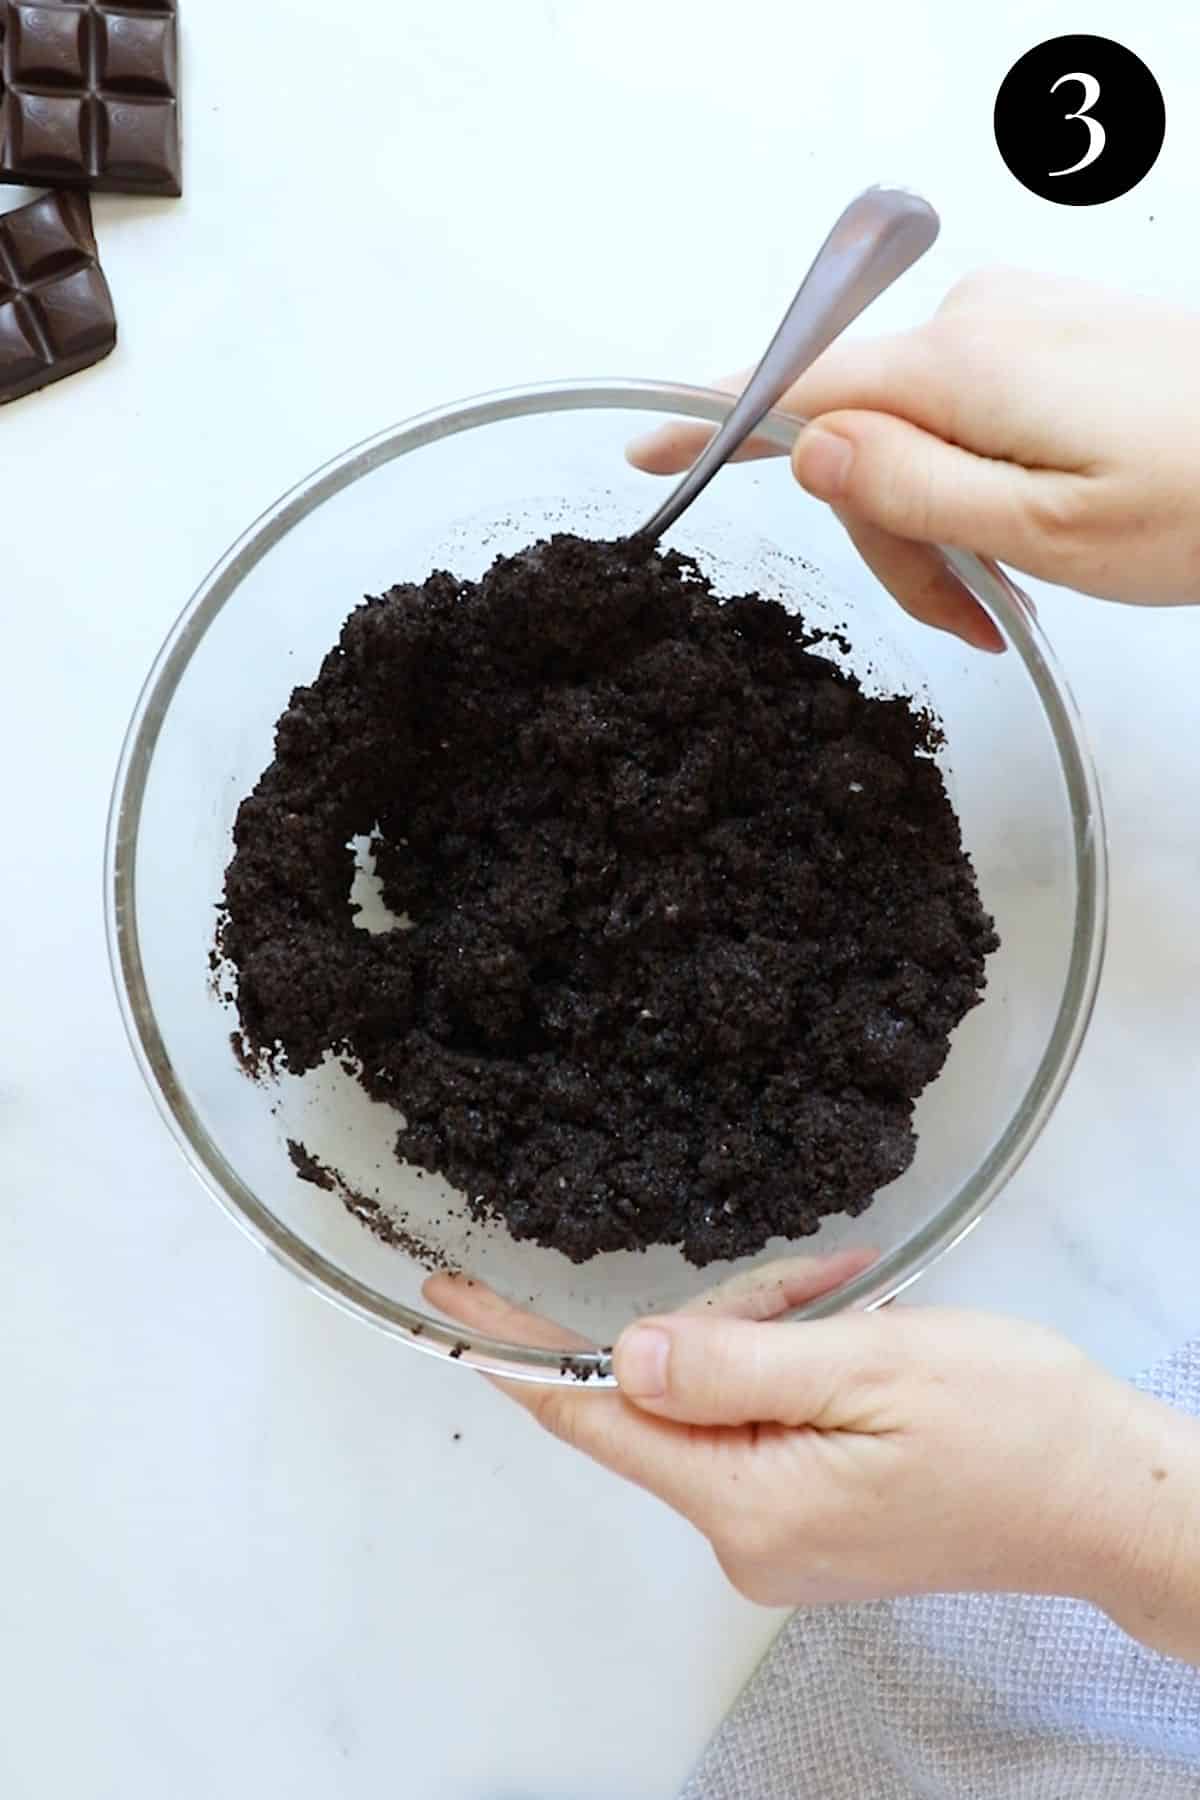
- Add the melted butter and mix. The mixture should have the consistency of wet sand.
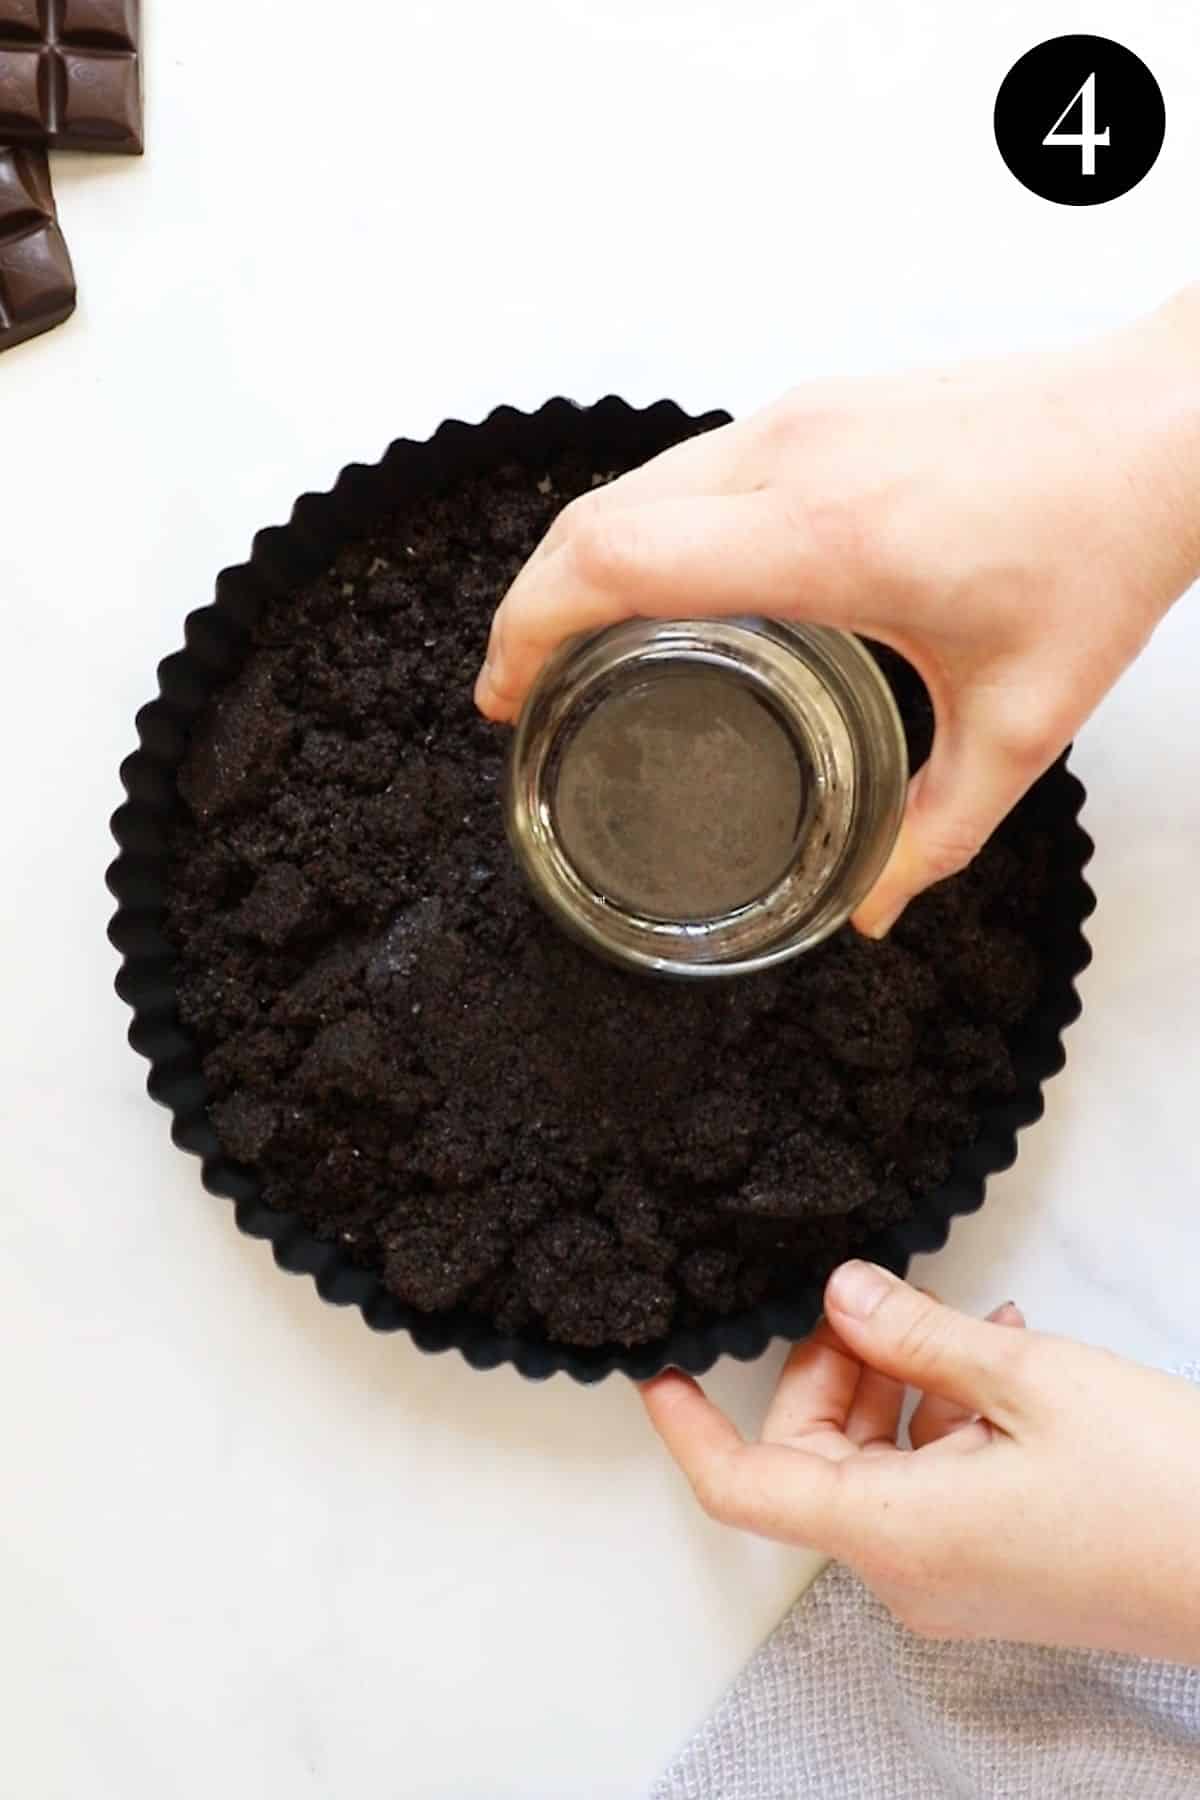
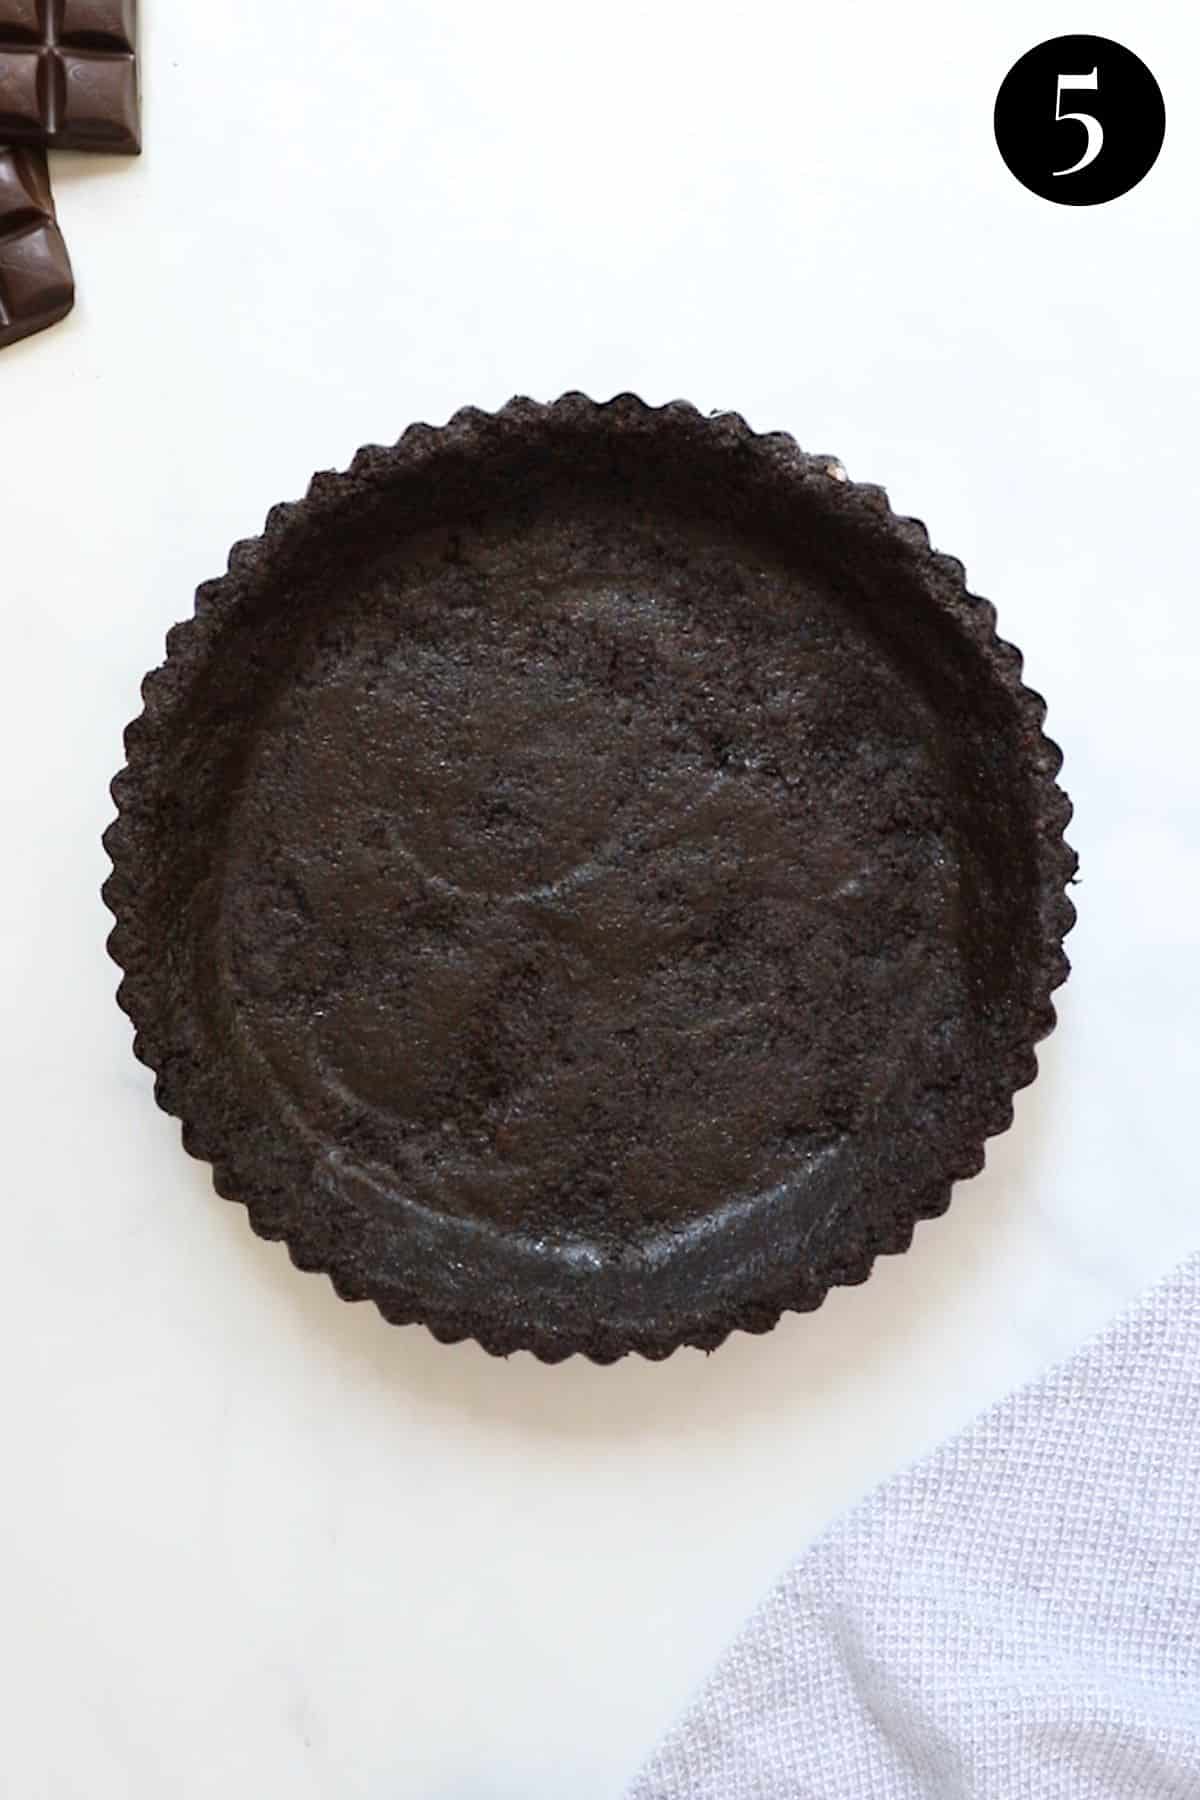
- Press the Oreo mixture into a 23 cm tart tin and refrigerate while you prepare the ganache filling.
For the chocolate ganache;
To make the chocolate ganache, we use a ratio of 1:1 cream to chocolate.
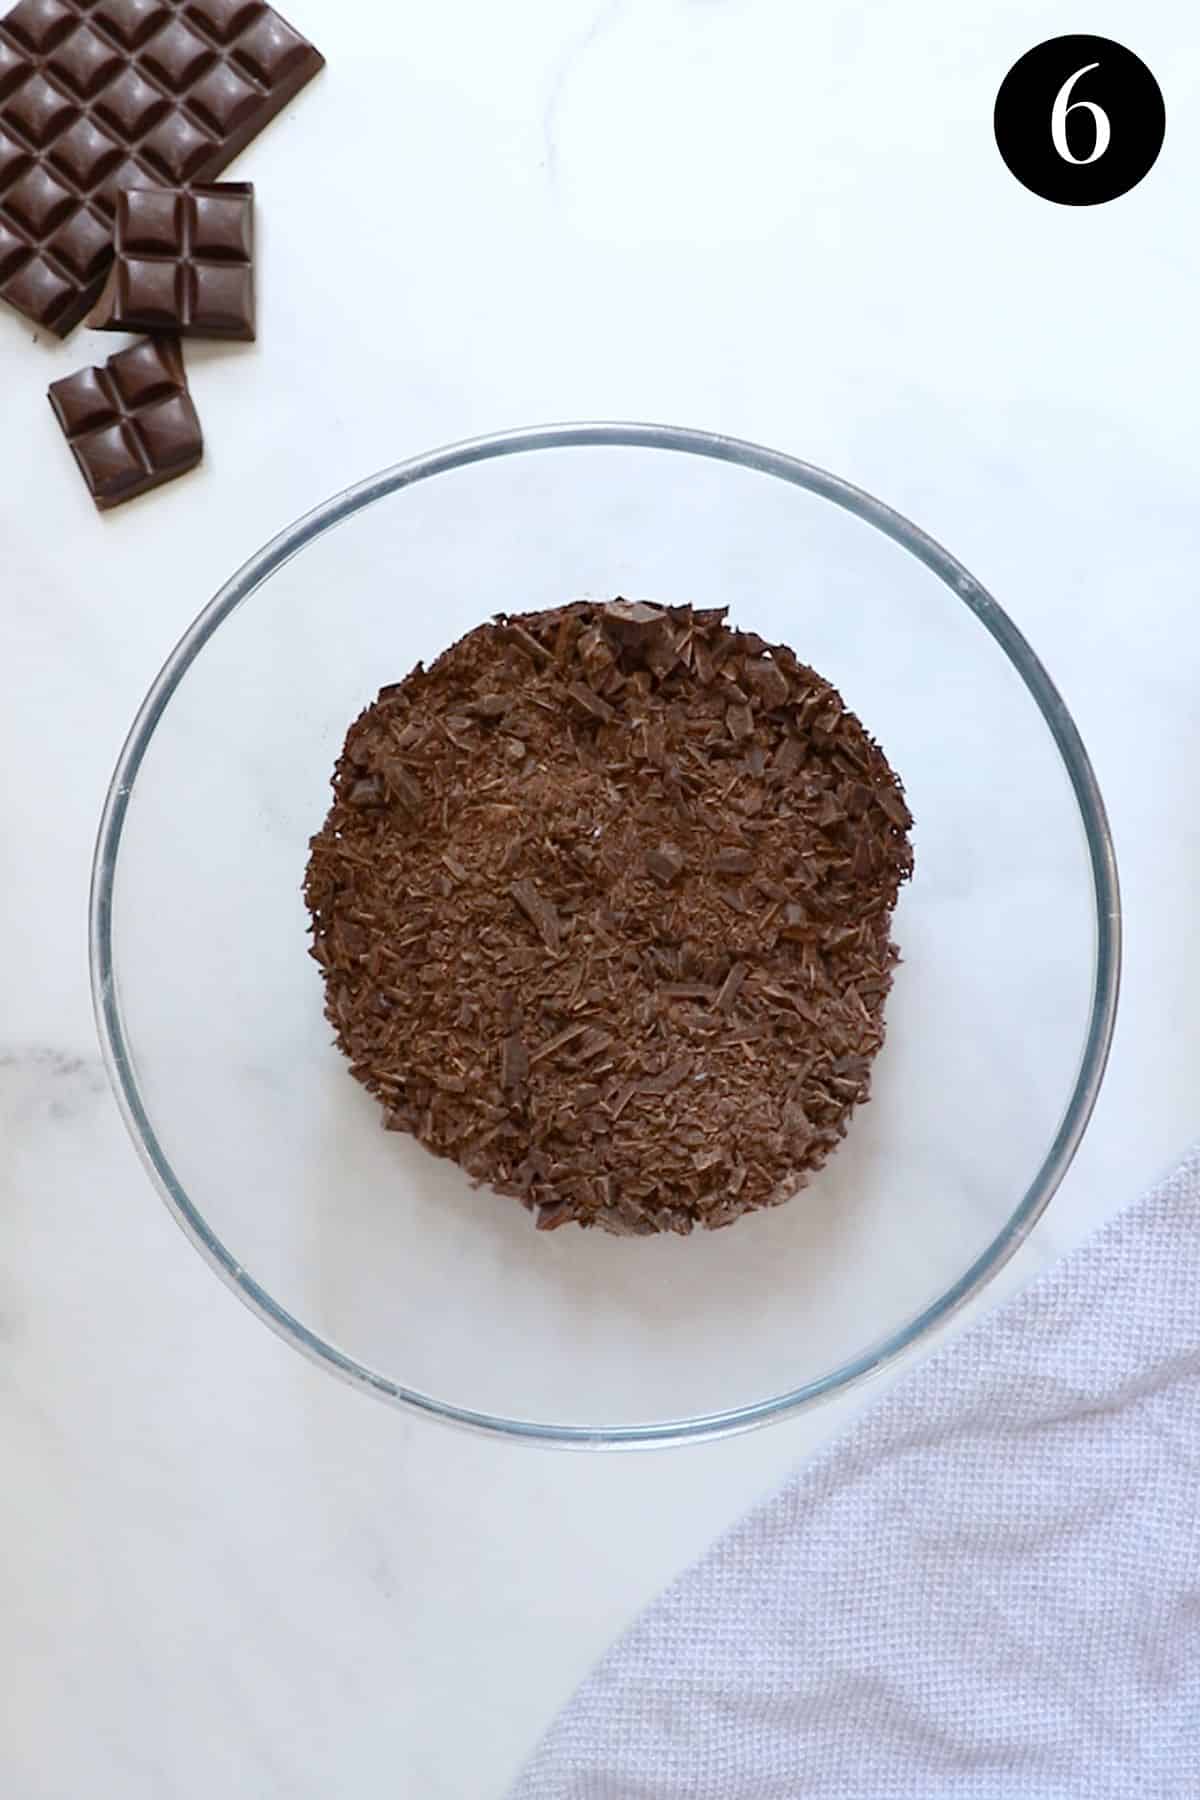
- Finely chop the chocolate and place it into a heat-safe glass or metal bowl.
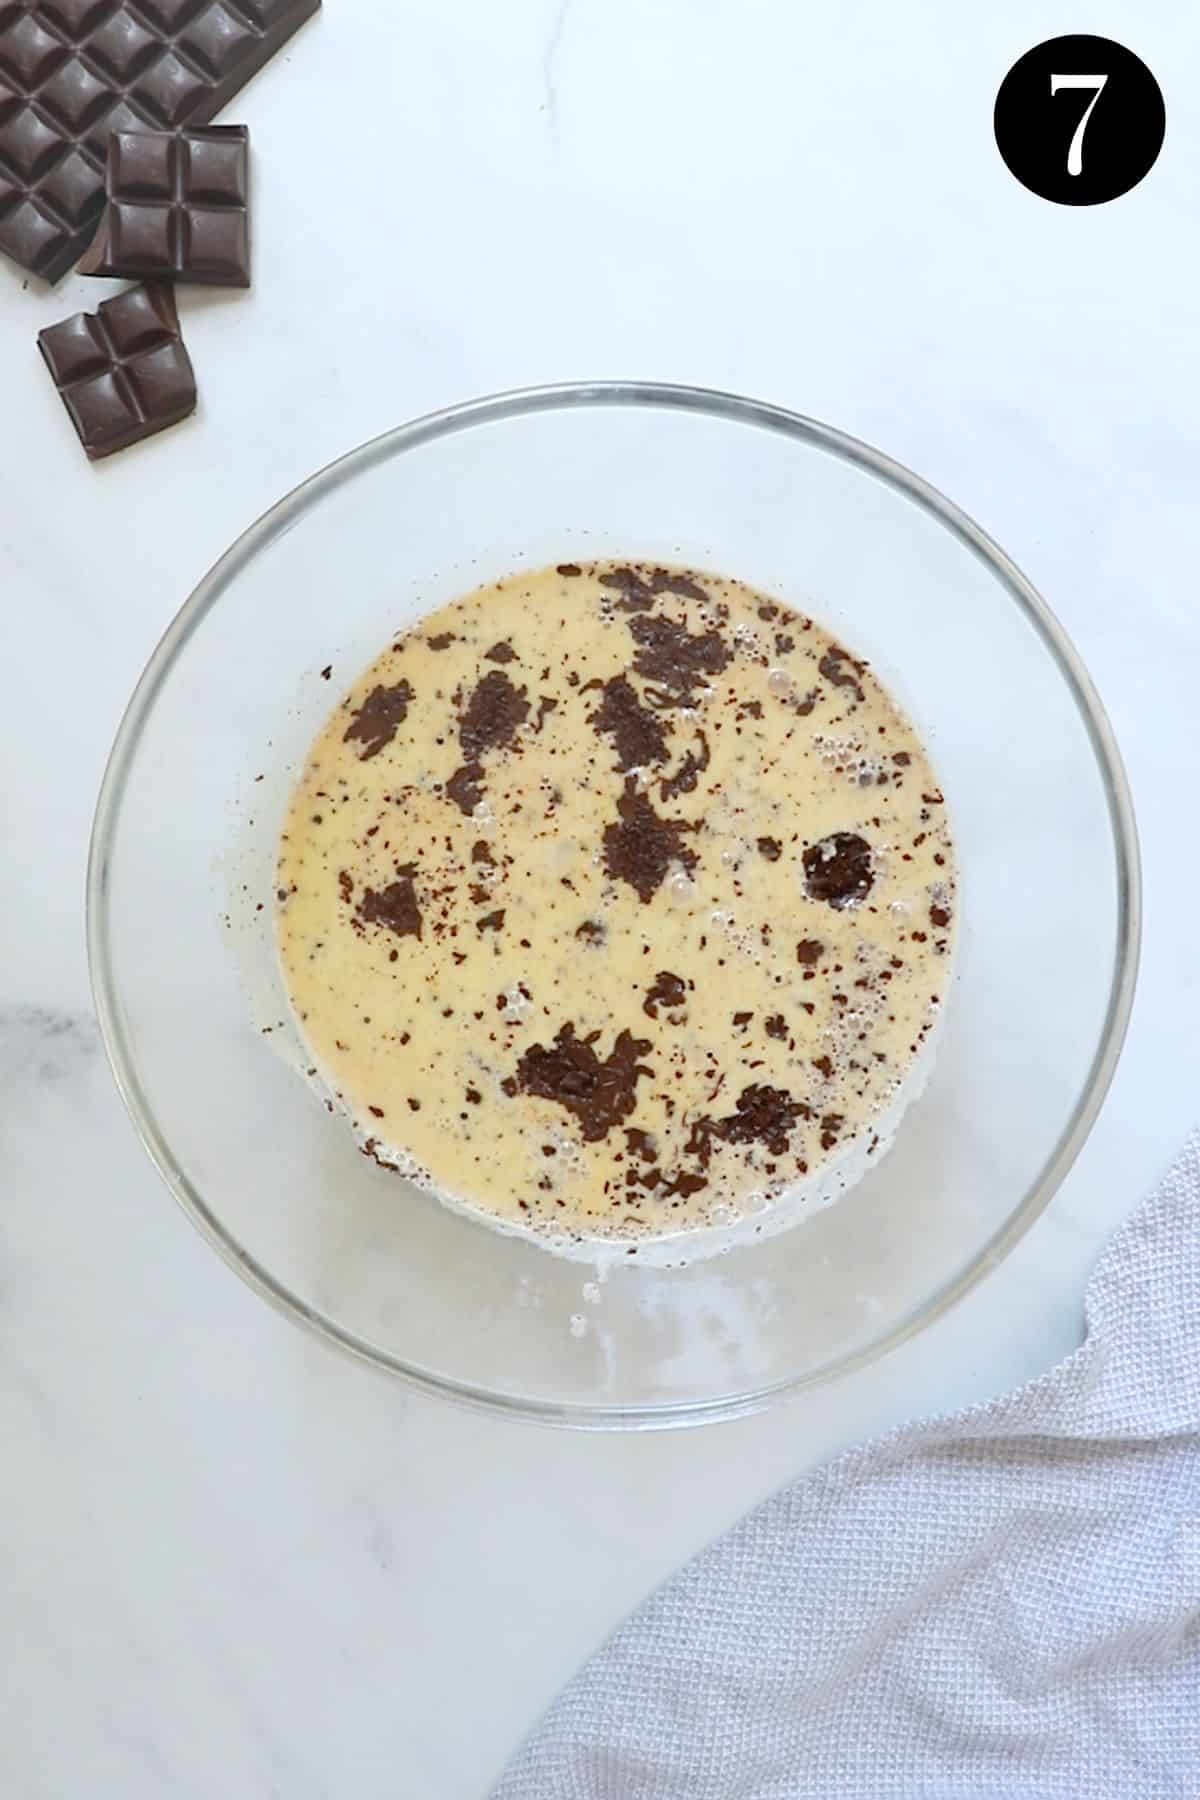
- Heat the cream along with the sugar, vanilla and butter on the stovetop, until just simmering. Don’t boil! If the cream is too hot it can split or become grainy when added to the chocolate. Once it is just bubbling around the edges, remove the cream from the heat and pour over the chocolate.
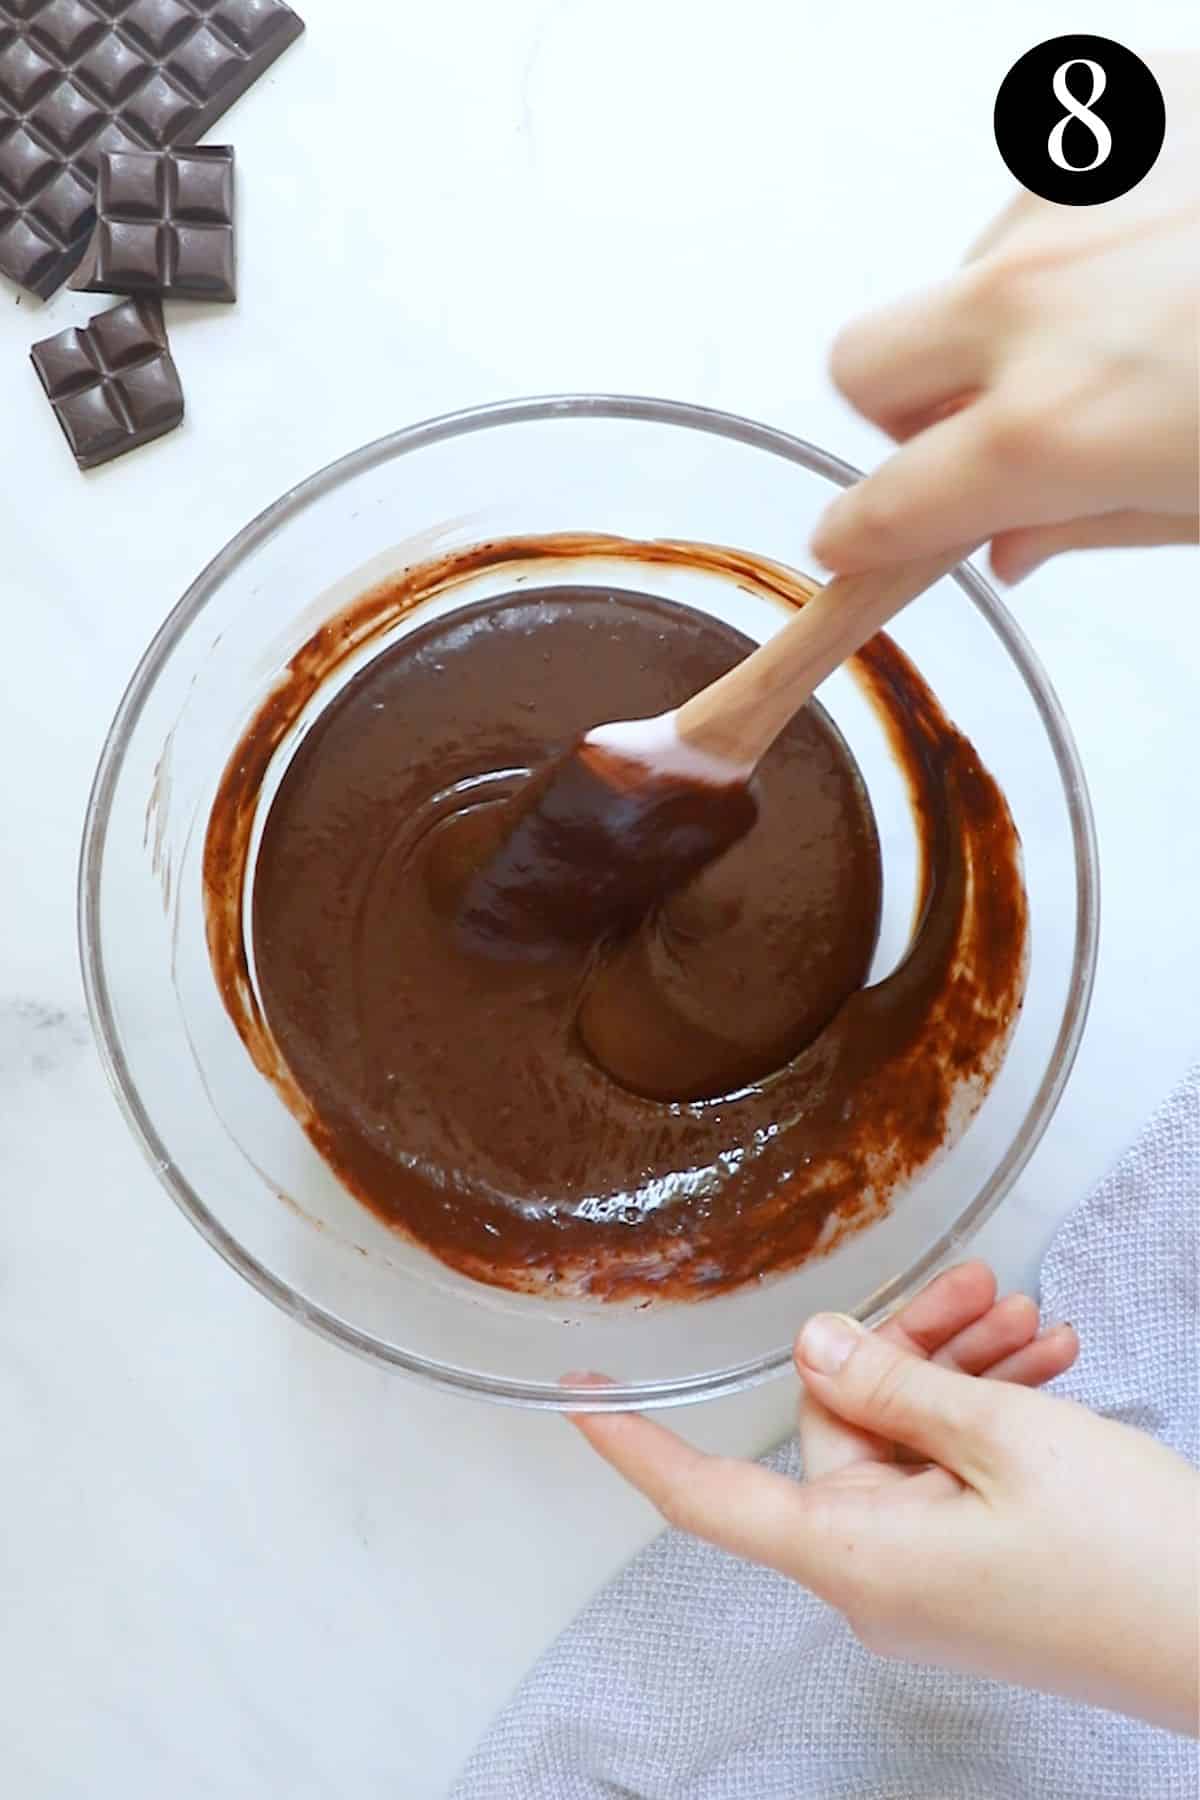
- Let the hot cream and chocolate sit for 2 minutes and then stir the mixture together until silky smooth. Allow to cool slightly.
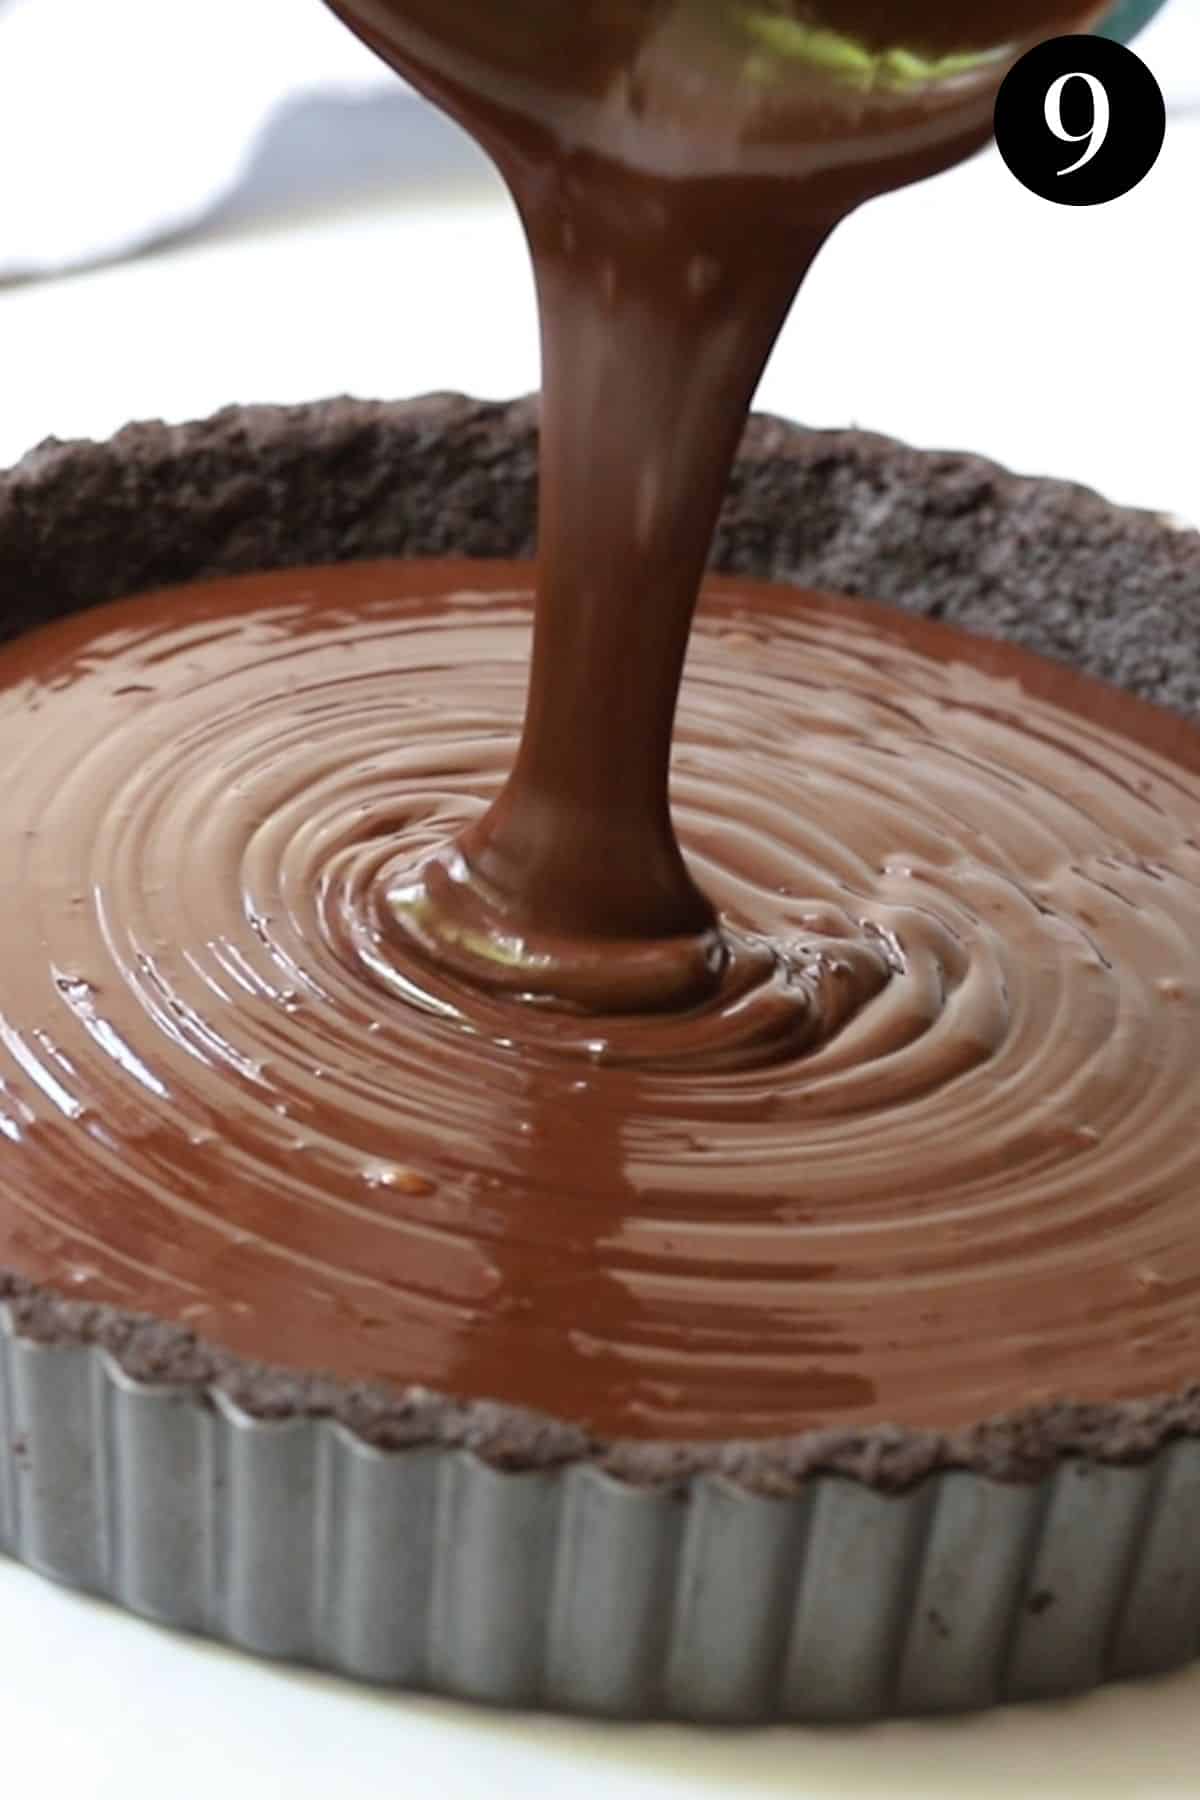
- Pour the ganache inside the biscuit base. Top with salt flakes, to taste.
- Refrigerate until set (around 2 hours).

Expert tips
- Use a good quality chocolate that you love to eat. Chocolate is the key flavour and the quality of the chocolate will affect the flavour of the tart. Choose the best one you can find.
- Chop the chocolate as finely as possible for the ganache. The finer you chop the chocolate, the quicker it melts into the cream. Large chunks of chocolate won’t fully melt.
- Let the cream and chocolate mixture sit for a couple of minutes before stirring. During this time, the chocolate will melt and soften, requiring less stirring.
- Don’t overheat the cream. Heat the cream mixture until it is steaming hot and only just starting to lightly bubble at the sides. Don’t boil. Boiling the cream can make the chocolate filling split or become grainy.
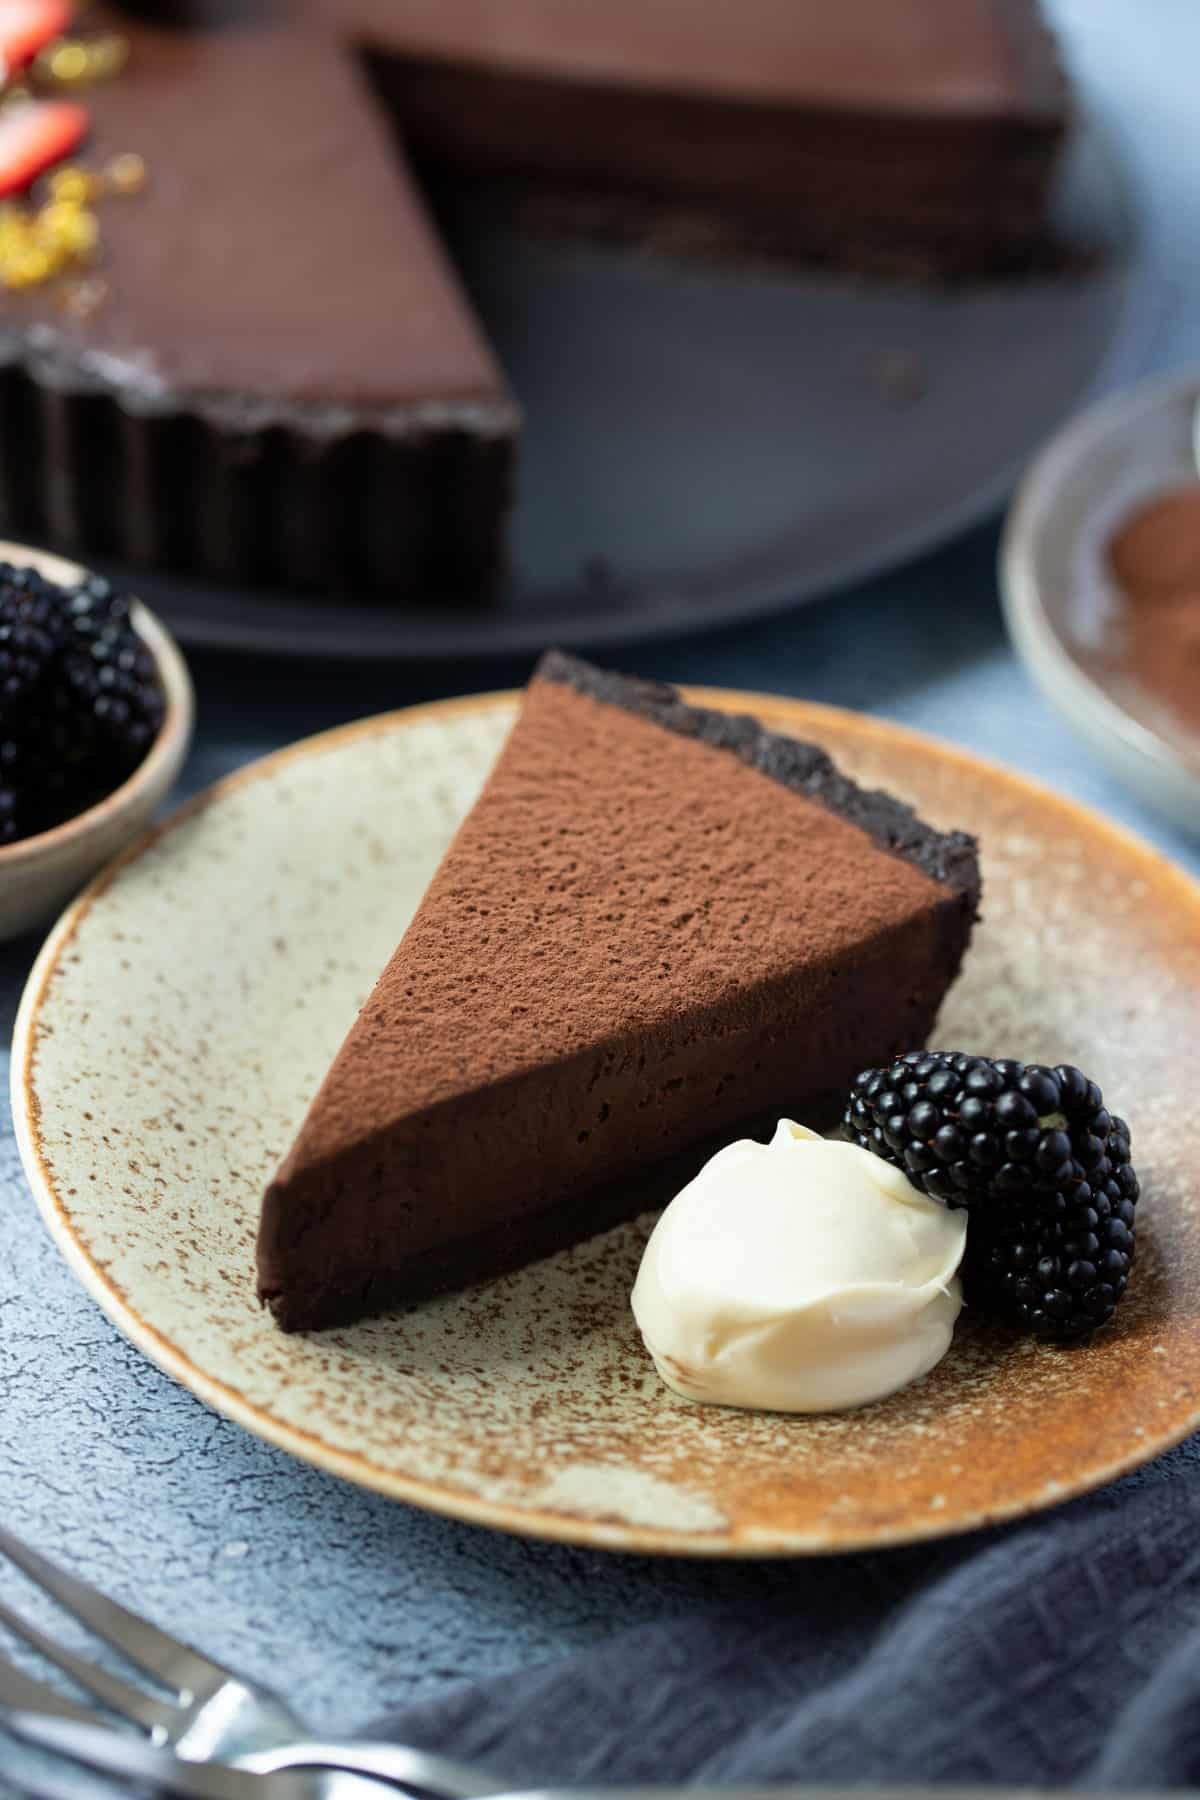
- Slice the tart with a hot, clean knife for best results. Run the knife under a hot tap, dry, then cut. It also helps to let the slice sit at room temperature for 10 minutes before slicing, to soften slightly.
- If you notice any bubbles on the surface of the ganache, pop them with a toothpick before chilling.
- This tart is gorgeously rich! You only need a small slice. I recommend serving it with some double cream and fresh berries to cut though the richness. Or try any of the following; salt flakes, shaved chocolate, a dusting of cocoa, salted caramel sauce, roasted strawberries, praline, crushed peanut brittle, coulis or cream.
- Keep it chilled until ready to serve.
- This tart will keep in the fridge for 3-4 days, covered or in an airtight container.
FAQs
If the chocolate isn’t melting, it wasn’t chopped finely enough or the cream wasn’t hot enough. Chop the chocolate into very fine pieces and heat the cream until it is steaming hot and just simmering around the edges. Once the cream is hot, immediately pour it over the chocolate and let it sit for 2 minutes before stirring, to give the chocolate a chance to soften and melt.
Double boiler: If the chocolate was too chunky and hasn’t melted, place the bowl over a pot of gently simmering water (double boiler). Make sure the water doesn’t touch the bottom of the bowl and stir until smooth.
Seizing is the almost instantaneous transformation of liquid chocolate to a stiff, grainy solid mass of chocolate. Chocolate is prone to seizing when it is overheated or burnt, or when moisture (water) is added to the chocolate. Be sure to use dry equipment and avoid even a drop of water entering the bowl.
This tart freezes well. Once set, wrap the whole tart (or individual slices) and store it in an airtight container in the freezer for up to 1 month. Thaw in the fridge overnight or at room temperature.
Related recipes

Tried this recipe? Please leave a star ⭐⭐⭐⭐⭐ rating or leave a review below and let me know how you went!
Hungry for more? Subscribe to my newsletter and follow along on Facebook, Instagram and Pinterest for the latest recipes and news.
Chocolate Ganache Tart
Ingredients
For the biscuit base
- 370 grams Oreo cookies 39 cookies
- 60 grams dark chocolate finely chopped
- ¾ teaspoon salt flakes
- 115 grams butter melted
For the salted chocolate filling
- 400 grams dark chocolate very finely chopped. Choose a good quality one for best results
- 400 ml thickened cream heavy thickened or whipping cream
- 2 tablespoons caster sugar
- 80 grams unsalted butter
- 1 teaspoon vanilla bean paste
- salt flakes
To serve
- cocoa powder for dusting (optional)
- double cream
- fresh berries
Instructions
For the biscuit base
- Set aside a 23 cm tart tin.
- Using a food processor, blend the Oreo cookies, dark chocolate and salt together until completely broken down and resembling breadcrumbs.
- Add the Oreo mixture to a bowl and add the melted butter. Stir to combine. The mixture should have the consistency of wet sand.
- Firmly press the Oreo mixture into the tart tin (base and sides) using a glass or metal spoon (or your fingers). Chill the base in the fridge or freezer for at least 10 minutes, while you prepare the chocolate ganache.
For the chocolate ganache filling
- Very finely chop the dark chocolate into very small pieces (large chunks won't melt into the mixture as easily). Place the chopped chocolate into a large, heat-safe bowl.
- In a saucepan, heat the cream, caster sugar, butter and vanilla over low heat, until steaming hot (but not boiling). Stir occasionally.
- Carefully pour the hot cream over the chocolate and allow to sit for 1-2 minutes without stirring.
- After 2 minutes, whisk or stir the mixture until the chocolate has melted and the mixture is smooth and glossy.
- Pour the chocolate filling into the biscuit base and sprinkle with some salt flakes, to taste. Chill in the refrigerator for around 2 hours, until set.
- Keep chilled until ready to serve. Slice and decorate with a dusting of cocoa powder (optional), fresh berries and double cream.
Video
Notes
- Use a good quality chocolate that you love to eat. The quality of the chocolate will affect the flavour of the tart, so choose the best one you can find.
- Chop the chocolate as finely as possible for the ganache. The finer you chop the chocolate, the quicker it melts into the cream. Larger chunks of chocolate won’t fully melt.
- Let the cream and chocolate mixture sit for a couple of minutes before stirring. During this time, the chocolate will melt and soften, requiring less stirring.
- Don’t overheat the cream. Heat the cream mixture until it is steaming hot and only just starting to lightly bubble at the sides. Don’t boil. Boiling the cream can make the chocolate filling grainy.
- Slice the tart with a hot, clean knife for best results. Run the knife under a hot tap, dry, then cut. It also helps to let the slice sit at room temperature for 10 minutes before slicing, to soften slightly.
- If you notice any bubbles on the surface of the ganache, pop them with a toothpick before chilling.
- This tart is gorgeously rich! You only need a small slice. I recommend serving it with some double cream and fresh berries to cut though the richness. Or try any of the following; salt flakes, shaved chocolate, a dusting of cocoa, salted caramel sauce, roasted strawberries, praline, crushed peanut brittle, coulis or cream.
- Keep it chilled until ready to serve.
- This tart will keep in the fridge for 3-4 days, covered or in an airtight container.
- This tart freezes well. Once set, wrap the whole tart (or individual slices) and store it in an airtight container in the freezer for up to 1 month.
- Please note that the nutrition information is based on the tart being divided into 16 slices, with one slice being one serve. The nutritional information is an estimate only and does not take into account any additional toppings or sides served with the tart.
- This recipe is made using Australian cups and spoon measurements. Any reference to cups or spoons in this recipe is in Australian metric. Due to cup sizes varying from country to country, I advise adjusting if necessary.
Nutrition
Are you following us on Facebook, Instagram and Pinterest?
Update Notes: This recipe was originally published in January 2019, but was re-published with new information, helpful tips and photos in December 2022.


Leave a Reply