Super easy zucchini slice, made from scratch. Featuring grated zucchini, cheese, bacon and onion in a light egg base, this classic Aussie recipe is versatile, freezer-friendly and made in just one bowl. It’s also great eaten hot or cold, making it perfect for lunchboxes, light lunch, afternoon tea or dinner.

Why you’ll love this recipe
- Quick and easy – simply mix everything together in one bowl, add it to a tin and bake!
- Simple ingredients – you only need a few simple fridge and pantry basics.
- Versatile – it can be served hot or cold and can be easily customised to use up what you have in your fridge. It can also be made vegetarian.
- Freezer-friendly – make a double batch and keep it in the fridge or freezer, ready for an easy lunch, dinner or snack.
- Budget friendly – using affordable ingredients, it’s a great way to use up everything in the fridge.
- Great hot or cold – pack it cold into lunchboxes, take it on a picnic or trip or warm it up for an easy lunch or dinner with a salad on the side.
Ingredients you will need
** This post contains tips and instructions to achieve the best possible results. The photo above is a great guide for when you are in the supermarket, but for full ingredient quantities and methods, please scroll down to the detailed recipe card below!
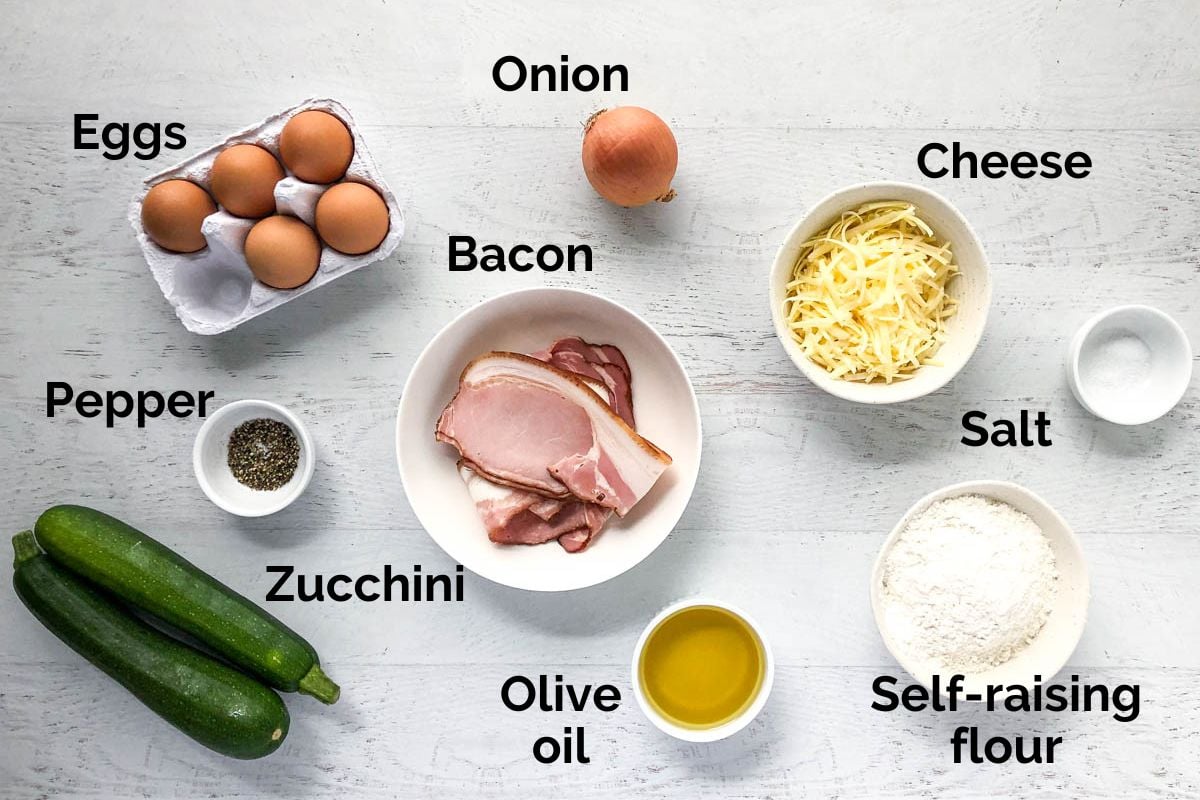
- Zucchini – the star ingredient! Choose firm, dark green zucchinis and be sure to weigh them, as adding too much zucchini will make your slice soggy. There is no need to drain the excess liquid from the grated zucchini, unless they are overly watery. I add a combination of coarsely and finely grated zucchini for added texture, but either will work.
- Bacon – I use middle bacon, but you can also use shortcut or streaky bacon, or even pre-cut bacon pieces. Alternatively, chopped ham or even chorizo can be used instead. For a vegetarian version, add some vegetarian “bacon”, crumbled feta or sun-dried tomatoes instead.
- Eggs – are used to bind the mixture. Use large, free-range eggs at room temperature.
- Self-raising flour – gives structure and a little rise to the slice. Gluten-free flour can be used, if required. If you don’t have self-raising flour, you can make your own by mixing 1 teaspoon of baking powder into every cup of plain flour.
- Cheese – use cheddar (tasty) or any other type of hard cheese, like Colby. A mix of cheddar and parmesan adds a little extra bite. Be sure to grate your own, as it will melt into the slice better than pre-packaged shredded cheese.
- Olive oil – for moisture and flavour. Choose a light, mild-tasting olive oil, or any other mild oil.
Step by step instructions
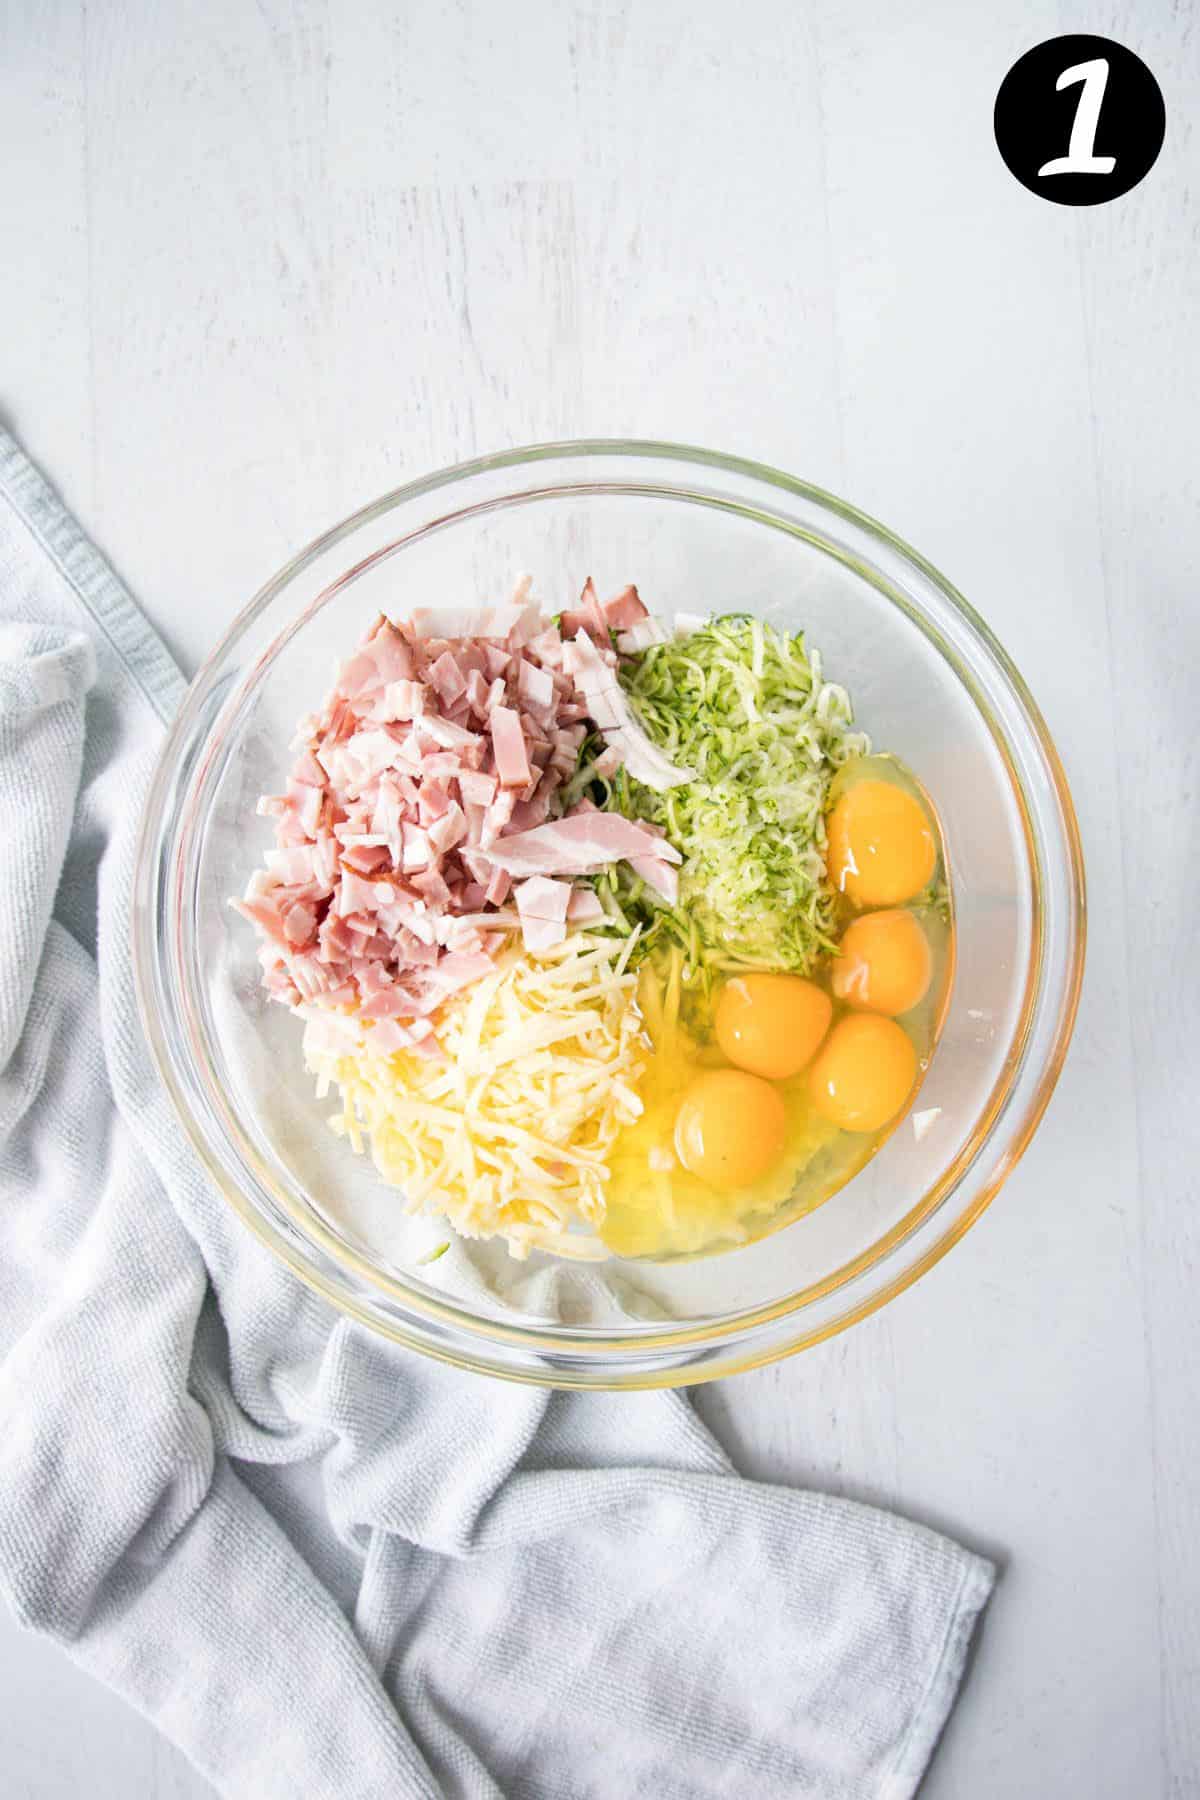
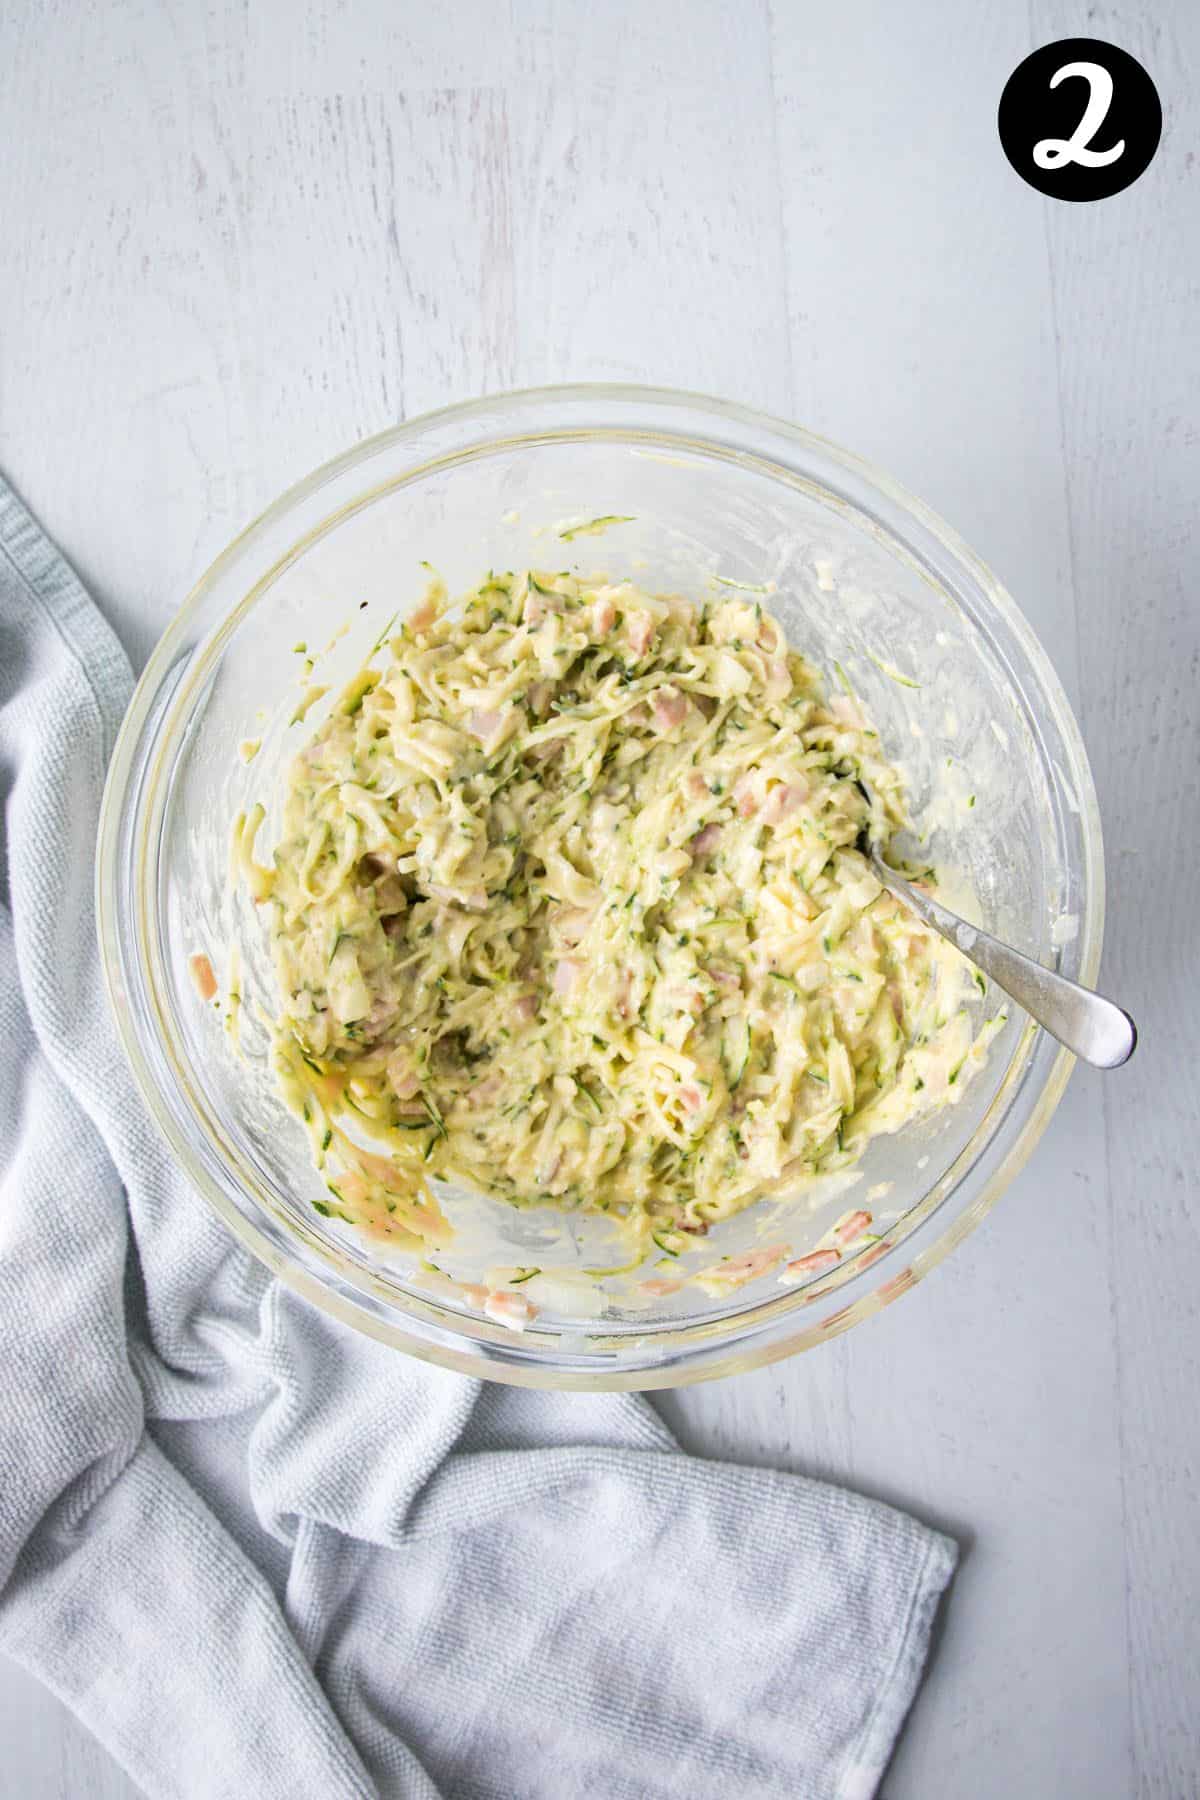
Step 1 – Make the batter;
Place all of the ingredients together in a bowl and stir to combine. ** If frying the bacon and onion, do this first.
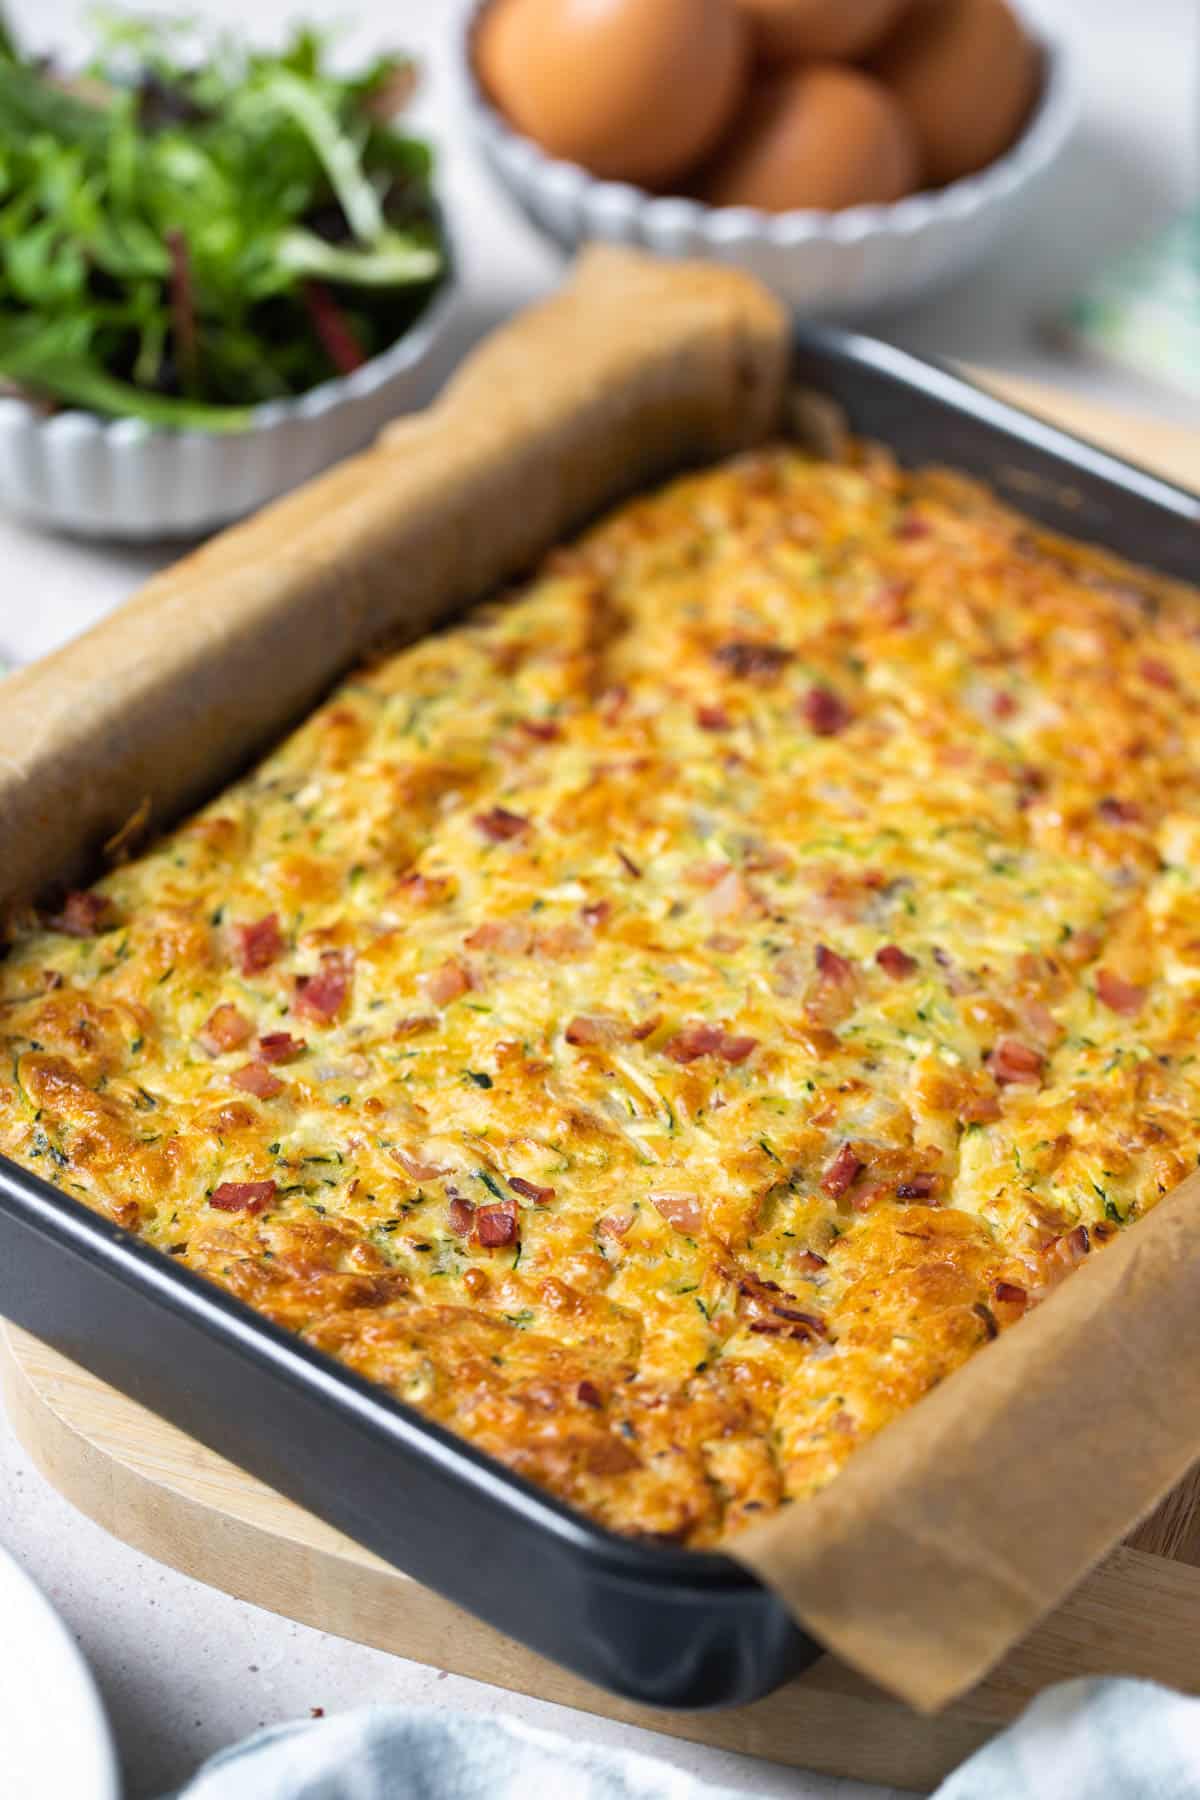
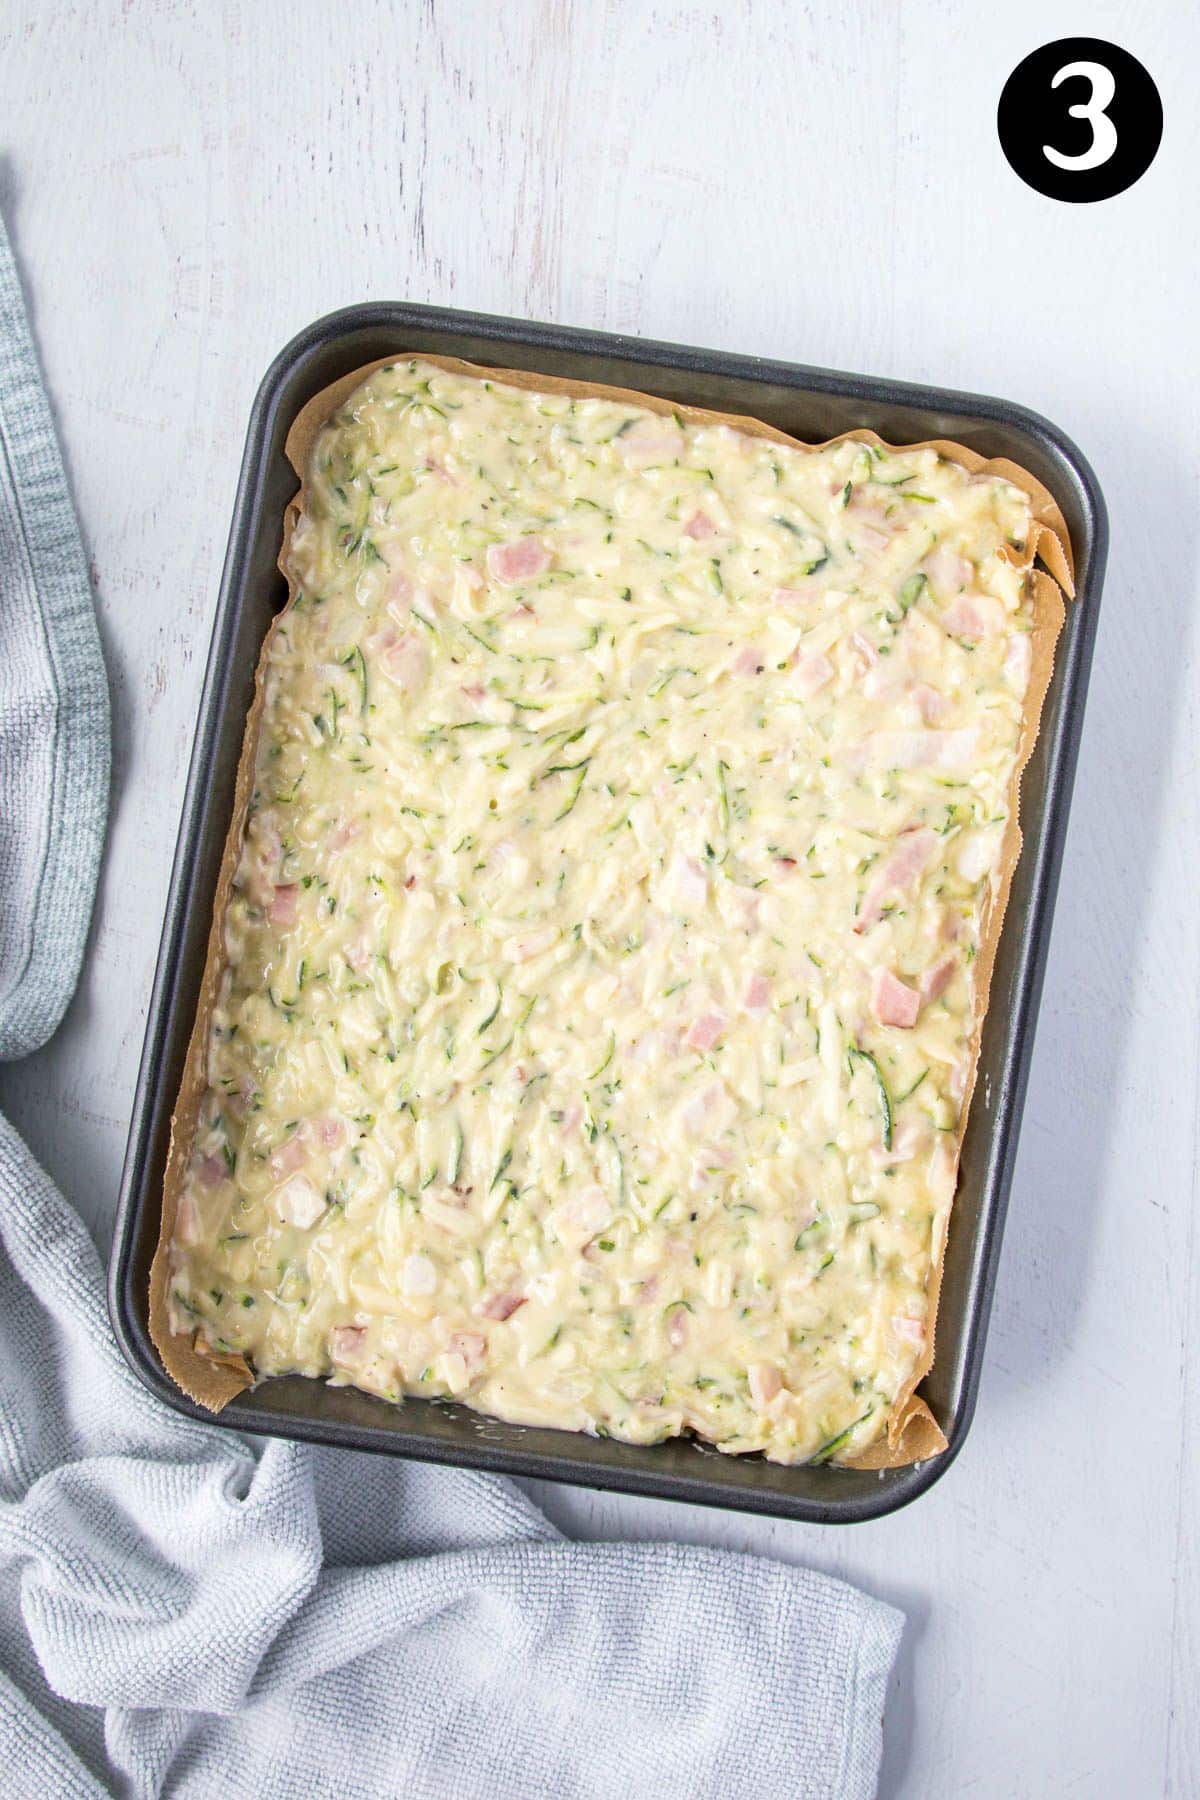
Step 2 – Bake;
Place the batter into a lined, 20 x 27cm baking tin and bake until golden brown on top and completely cooked through.
Expert tips
- In this recipe, the bacon is added directly to the batter, uncooked. Sometimes (if I have time), I will fry the bacon and onion in a pan before adding it to the mixture. Either way tastes great, but the fried bacon does add extra flavour, richness and texture.
- Be sure to accurately weigh and measure the ingredients, to prevent the slice from becoming too mushy.
- Add some additional veggies; grated carrot, corn or sliced spring onions can be added to the mixture before baking.
- Bacon can be swapped for ham, chorizo or even some finely chopped leftover chicken. Or for a vegetarian version, add vegetarian “bacon” or leave the meat out entirely. Tofu, sun-dried tomatoes, goats’ cheese or feta can be used in its place.
- Add a little grated parmesan for extra cheesy flavour.
- Top the slice with some freshly sliced tomato before baking.
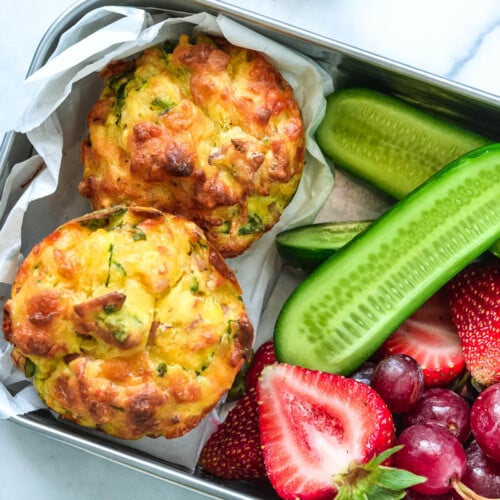
- For zucchini muffins, divide the mixture into muffin trays instead. The cooking times will vary, depending on the size of your muffin tray.
- The slice will be very soft when first removed from the oven, so leave it to cool in the tray for around 20 minutes before attempting to remove it. Otherwise, it may fall apart.
FAQs
Mushy zucchini slice is caused by excess liquid in the mixture, or by too little flour being added. Be sure to measure the ingredients accurately. Due to the high water content of zucchini, the slice can become soggy and mushy if too much grated zucchini is used. I advise weighing the zucchini before grating, for best results. Choosing smaller, firm zucchinis will help, as they hold less water.
Cooked and cooled zucchini slice can be wrapped (individual slices or whole) and kept in an airtight container in the freezer for up to 3 months. Thaw at room temperature or in the fridge overnight before serving hot or cold.
Zucchini slice will last in the fridge in an airtight container for 3-4 days.
Zucchini slice can be enjoyed hot or cold as a quick on-the-go breakfast, brunch, lunch or dinner. It also makes a great lunchbox option or an after-school snack. For lunch or dinner, serve it warm with a side salad, potato salad or with your favourite steamed veggies. You can also top it with your favourite tomato sauce or chutneys!
To reheat zucchini slice, place individual pieces in the microwave for around 1 minute, or until heated through. A whole slice can also be covered and reheated in the oven, until steaming hot. Or pop individual pieces in an air fryer at 160 C for around 5 minutes, or until heated through.
Related recipes

Tried this recipe? Please leave a star ⭐⭐⭐⭐⭐ rating or leave a review below and let you know how you went!
Hungry for more? Subscribe to my newsletter and follow along on Facebook, Instagram and Pinterest for the latest recipes and news.

Easy Zucchini Slice with Bacon
Ingredients
- 400 grams zucchini grated
- 200 grams bacon finely diced
- 1 small brown onion finely diced
- 1 cup cheddar cheese shredded (tasty cheddar cheese or Colby are great options).
- 5 large eggs
- ½ cup light olive oil mild tasting oil
- 1 ¼ cups self-raising flour 200 grams
- ½ teaspoon salt or to taste
- black pepper
Instructions
- Pre heat the oven to 180 °C (356 F). Line a 20 cm x 27 cm slice tray with baking paper.
- Place all of the ingredients into a bowl and stir until combined. *The bacon and onion can be fried in a pan first, but this is not essential.
- Add the mixture to the baking tray and bake for 35-40 minutes, or until golden on top and cooked through. You can test the slice by inserting a wooden skewer into the middle. If it comes out clean, it is ready!
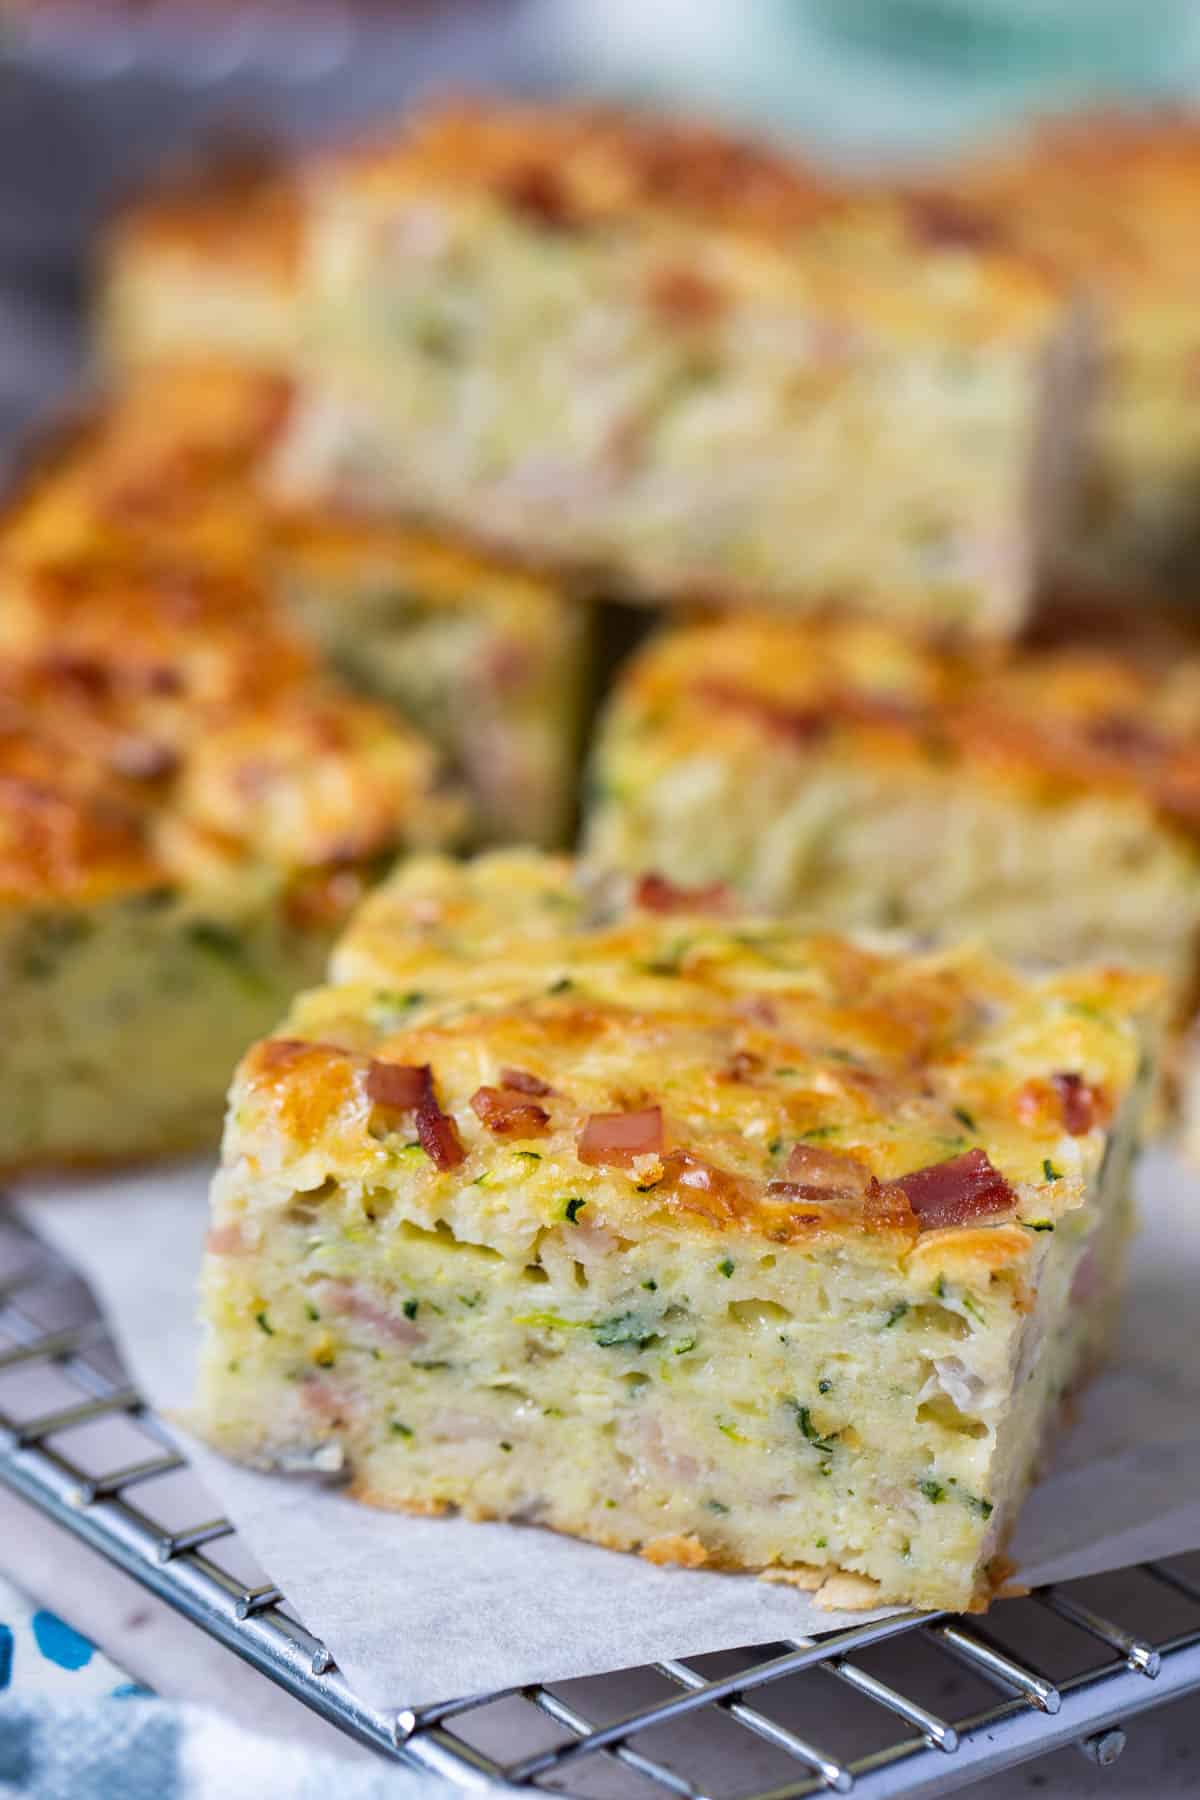
- Remove the slice from the oven and rest in the tray for 15-20 minutes before gently placing the slice on a wire rack to cool.
- The slice can be served warm, or sliced once it has cooled. Store in an airtight container for 3-4 days, or wrap and freeze for up to 3 months in a container.
Video
Notes
- In this recipe, the bacon is added directly to the batter, uncooked. Sometimes (if I have time), I will fry the bacon and onion in a pan before adding it to the mixture. Either way tastes great, but the fried bacon does add extra flavour, richness and texture.
- Add some additional veggies; grated carrot, corn or sliced spring onions can be added to the mixture before baking.
- Bacon can be swapped for ham, chorizo or even some finely chopped leftover chicken. Or for a vegetarian version, add vegetarian “bacon” or leave the meat out entirely. Tofu, sun-dried tomatoes, goats’ cheese or feta can be used in its place.
- Add a little grated parmesan for extra cheesy flavour.
- Top the slice with some freshly sliced tomato before baking.
- For zucchini muffins, divide the mixture into muffin trays instead. The cooking times will vary, depending on the size of your muffin tray.
- The slice will be very soft when first removed from the oven, so leave it to cool in the tray for around 20 minutes before attempting to remove it.
- Freezing; Cooked and cooled zucchini slice can be wrapped (individual slices or whole) and kept in an airtight container in the freezer for up to 3 months. Thaw at room temperature or in the fridge overnight before serving hot or cold.
- Storage; Zucchini slice will last in the fridge in an airtight container for 3-4 days.
- Reheating; To reheat zucchini slice, place individual pieces in the microwave for around 1 minute, or until heated through. A whole slice can also be covered and reheated in the oven, until steaming hot. Or pop individual pieces in an air fryer at 160 C for around 5 minutes, or until heated through.
- Please note that the nutrition information is based on the slice being divided into 8 slices, with one slice being one serve. The nutritional information is an estimate only and does not take into account any additional toppings, sides or sauces served with the slice.
- This recipe is made using Australian cups and spoon measurements. Due to cup sizes varying from country to country, I advise adjusting if necessary.
Nutrition
Are you following us on Facebook, Instagram and Pinterest?
Update Notes: This recipe was originally published in March 2019, but was re-published with new information, helpful tips and photos in June 2022.


J says
very good, have made it multiple times
Andrea Geddes says
Thanks for taking the time to leave a comment and review! I’m so happy that you enjoy the recipe. Andrea 🙂
Belinda Smith says
Very yummy recipe. I added grated carrot as I had some to use up. Definately recommend this recipe
Andrea Geddes says
I’m so happy you enjoyed it! Andrea 🙂
Alec Holloway says
One of the old Australian/ Italian community recipes.
It is a cheap, easy and fridge cleanout recipe that will pass down family to family.
I have never seen a slice disappear so fast. I make double and do the Muffins as well for the school lunch boxes
Well done, I highly recommend this simple but 5 star recipe for any family on a budget.
Andrea Geddes says
Hi Alec! Thank you so much for taking the time to leave a review. I really appreciate it! And I’m so happy to hear you’re enjoying these recipes. Andrea 🙂
Vronnie says
Loved it !!! The texture was amazing! I recommend eating it while still warm.
Andrea Geddes says
I’m so happy to hear that you loved this recipe. It’s one of my favourites, so I’m glad you enjoyed it too. Thank you so much for taking the time to leave a comment and let me know! Andrea 🙂
Jess says
Like mum’s recipe, only better.
Andrea Geddes says
Hi Jess! What a compliment! So happy you enjoyed it. Andrea 🙂
Hannah R says
Wondering if the cal figure is for the whole dish or per serving ?
Andrea Geddes says
Hi Hannah, there are some notes in the recipe card about nutrition. The nutrition information in this recipe is based on the slice being divided into 8 pieces, with one piece being one serve. I hope that helps! Andrea.
Rhonda says
Used Gluten free SR Flour for coeliac and baked perfectly
Fried bacon pieces and onion prior for taste. Best zucchini slice have found.
Andrea Geddes says
I’m so happy you enjoyed the recipe, Rhonda!
Helen says
This zucchini slice sounds delicious!!
Can i just ask whether you squeezed the moisture out of the zucchini?
Thank you
Andrea Geddes says
Hi Helen! You don’t need to squeeze any liquid from the zucchini. Enjoy! Andrea 🙂
Angela says
Extremely easy recipe to put together and it is so full of flavour. Have made this slice several times and it always turns out great. I like that you can add different ingredients to change it up.
Andrea Geddes says
Hi Angela! I’m so happy you enjoyed this slice. It’s one of my favourites! Thanks for letting me know 🙂
Tenille says
A very good base recipe however I found it a little bland so added some garlic and seeded mustard for extra flavour. And a crumbled vegie stock cube. Thanks for this recipe, it takes me back to childhood!
Glenis Thomas says
Easy and delicious! Thanks so much : )
Andrea Geddes says
I’m so glad you enjoyed it, Glenis!
Paddy says
Can gluten free flour be substituted?
Andrea Geddes says
Hi Paddy! I have not tested this recipe with gluten-free flour. In saying that, it should still hold together nicely provided you adjust accordingly using your go-to brand of flour.
Kelly says
Everyone in my household loved this! Easy to make, went golden on top. Delicious!!!!
Andrea Geddes says
Hi Kelly! I’m so happy to hear that you all loved it. Thanks so much for taking the time to leave a comment! Andrea 🙂
Kim says
My slice went brown in the middle what have I done wrong
Andrea Geddes says
Hi Kim! I’m not sure if you mean brown in the middle on the top of the slice, or brown in the actual middle of the slice? It is normal for the slice to brown on top slightly and turn golden. If it is over-browned it may be an issue with oven temperature or over-baking.
Kim says
Hi Andrea it was lovely and golden on the outside but the inside ingredients went brown and mushy
Kim
Andrea Geddes says
Hi Kim! I have made this recipe more times than I can count for the last 20+ years and I’ve never seen it turn brown, so I’m not sure why this has happened to be able to help you troubleshoot (unless the zucchini or mixture was left sitting out before being added to the oven and the air caused oxidation). However, I can offer a few suggestions as to why it was mushy in the middle;
1. It needed a little longer in the oven – different ovens have varying temperatures and cooking times, so it’s worth checking your oven temp to make sure it’s accurate. It’s may have needed a little longer in the oven. The slice is cooked with it is firm to the touch on top without sinking back.
2. Not enough flour – I have made a mushy slice once or twice by not measuring the flour accurately, which makes the filling wetter. Check that the flour has been fluffed with a spoon and levelled (or use kitchen scales) to make sure you have the right amount of flour.
3. Not enough resting time – the slice will be a little soft in the middle when it first comes out of the oven, but will firm up as it cools. I suggest leaving it in the tray for 15-20 minutes before slicing or turning onto a rack to finish cooling. It makes it much easier to handle.
4. Wet zucchini – while I’ve never found that this recipe requires squeezing excess liquid from the grated zucchini, if the zucchini you’re using was overly wet or holding excess water, this could make the mixture too wet. In this case, I’d suggest squeezing some (not all) of the excess liquid first.
I hope this helps and that you were still able to enjoy the slice. It’s such a lovely slice so I hope you give it another try. Have a great day!
Kellie says
Very easy to make and tastes delicious!
Andrea Geddes says
Thanks Kellie! I am so glad that you enjoyed it 🙂