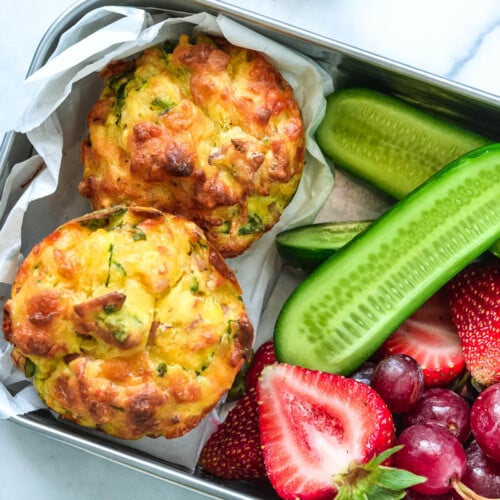
Easy savoury scones, made from scratch in under 30 minutes. They are flaky and crisp on the outside with a tender, buttery interior that will melt in your mouth. Packed full of savoury cheese and bacon flavour, they are perfect for morning breakfast, afternoon tea, lunchbox snacks or a delicious side to your favourite winter soups.

Why you’ll love this recipe
- Easy to make – the scones come together in about 10 minutes and have a short bake time, so you can be enjoying them in less than 30 minutes!
- Make ahead – eat them hot, straight from the oven, or make them ahead of time and warm them up when you are ready to eat.
- Full of savoury flavour – delicate, buttery and oh-so-flaky! They are impossible to resist.
- Quick bread – scones are the perfect alternative to bread or rolls when you are short on time (or out of bread) and need something, fast. There is no yeast and no kneading required. Just mix and bake!
- Basic pantry ingredients – flour, butter, egg and buttermilk make up the base ingredients of these scones and you will most likely have them in your kitchen.
- Versatile – serve them for breakfast or brunch, an easy lunch, afternoon tea or as a side with a nice big bowl of soup.
- Fool-proof recipe – follow my tips and easy step-by-step guide to master them in no time!
Ingredients you will need
** This post contains tips and instructions to achieve the best possible results. The photo above is a great guide for when you are in the supermarket, but for full ingredient quantities and methods, please scroll down to the detailed recipe card below!
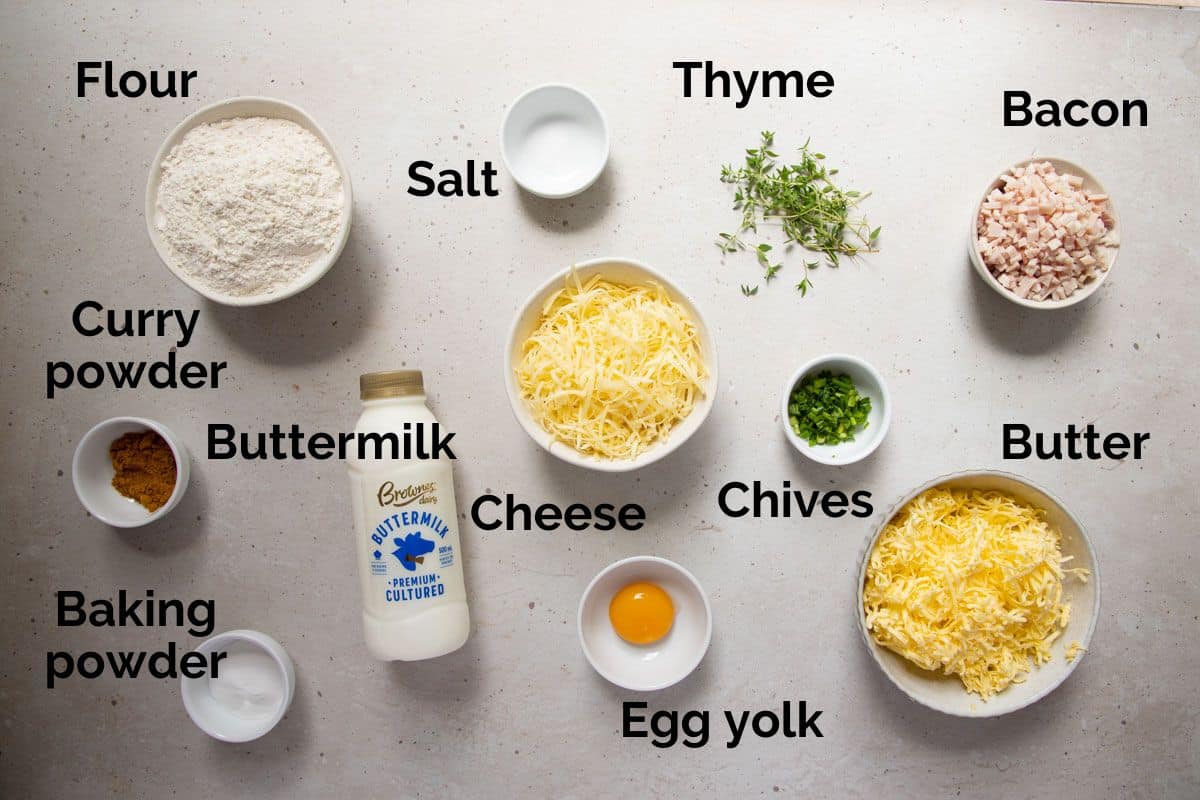
- Self-raising flour – (also called self-rising flour), self-raising flour is plain flour that is ready-mixed with an added leavening agent like baking powder. It is readily available in Australia and commonly used in baking where a rising agent is needed. If you don’t have any self-raising flour, use plain (all-purpose flour) and simply add an additional 3 teaspoons of baking powder when mixing the dry ingredients. Weigh the flour in this recipe for accuracy, or you may end up with dry/hard scones. Keep a little extra flour, to sprinkle over the work surface.
- Baking powder – the extra baking powder helps create a little more lift. Check the expiry on your baking powder and make sure its in date, or it won’t be as effective.
- Butter – to create the flaky layers in the scones, it is important that the butter is chilled until you are ready to mix the dough. Keep it cold by storing it in the fridge until it is required. You can even cut it into small cubes or grate it and then place it in a bowl in the fridge so that it is ready to go. Salted or unsalted butter can be used. It’s important to use real butter, rather than margarine or butter substitutes, for best results.
- Tasty (cheddar cheese) – melts into the mixture to make the most fluffy, cheesy and delicious scones. I recommend grating fresh cheese, rather than using pre-packaged, pre-shredded cheese. In Australia, “tasty” cheese refers to aged or mild cheddar with a little ‘bite’. You could also use Swiss cheese, mature cheddar or a mix of cheddar and parmesan.
- Bacon – is fried and cooled before being added to the mixture. Make sure it is completely cooled before adding it the dough and drain any excess oil. Bacon can be swapped for chopped chorizo, ham or pancetta. For cheese and chive scones or vegetarian scones, leave the meat out entirely.
- Mild curry powder – just a touch, for added savoury flavour that complements the cheese and bacon notes. Add ½ – 1 teaspoon, or leave it out entirely if preferred. I use Keen’s curry powder, which makes them taste so delicious! Any type of curry powder can be used, although the final taste may be slightly different.
- Fresh herbs – I use chives and thyme leaves for a their savoury flavour, but you can use rosemary or mixed herbs if preferred. Dried herbs can be used in place of fresh, if that’s what you have available.
- Buttermilk – for fluffy, soft and beautifully tender scones. Keep it cold until ready for use. If you don’t have buttermilk, you can make your own by adding 1 tablespoon of white vinegar or lemon juice to every 1 cup of whole milk. Mix and allow to sit for 5-10 minutes for instant homemade buttermilk. Use full-fat milk for the higher fat content, which adds more richness to the dough.
- Egg yolk – helps to bind the dough together and increases the richness, fluffiness and flavour of the scones.

Step by step instructions
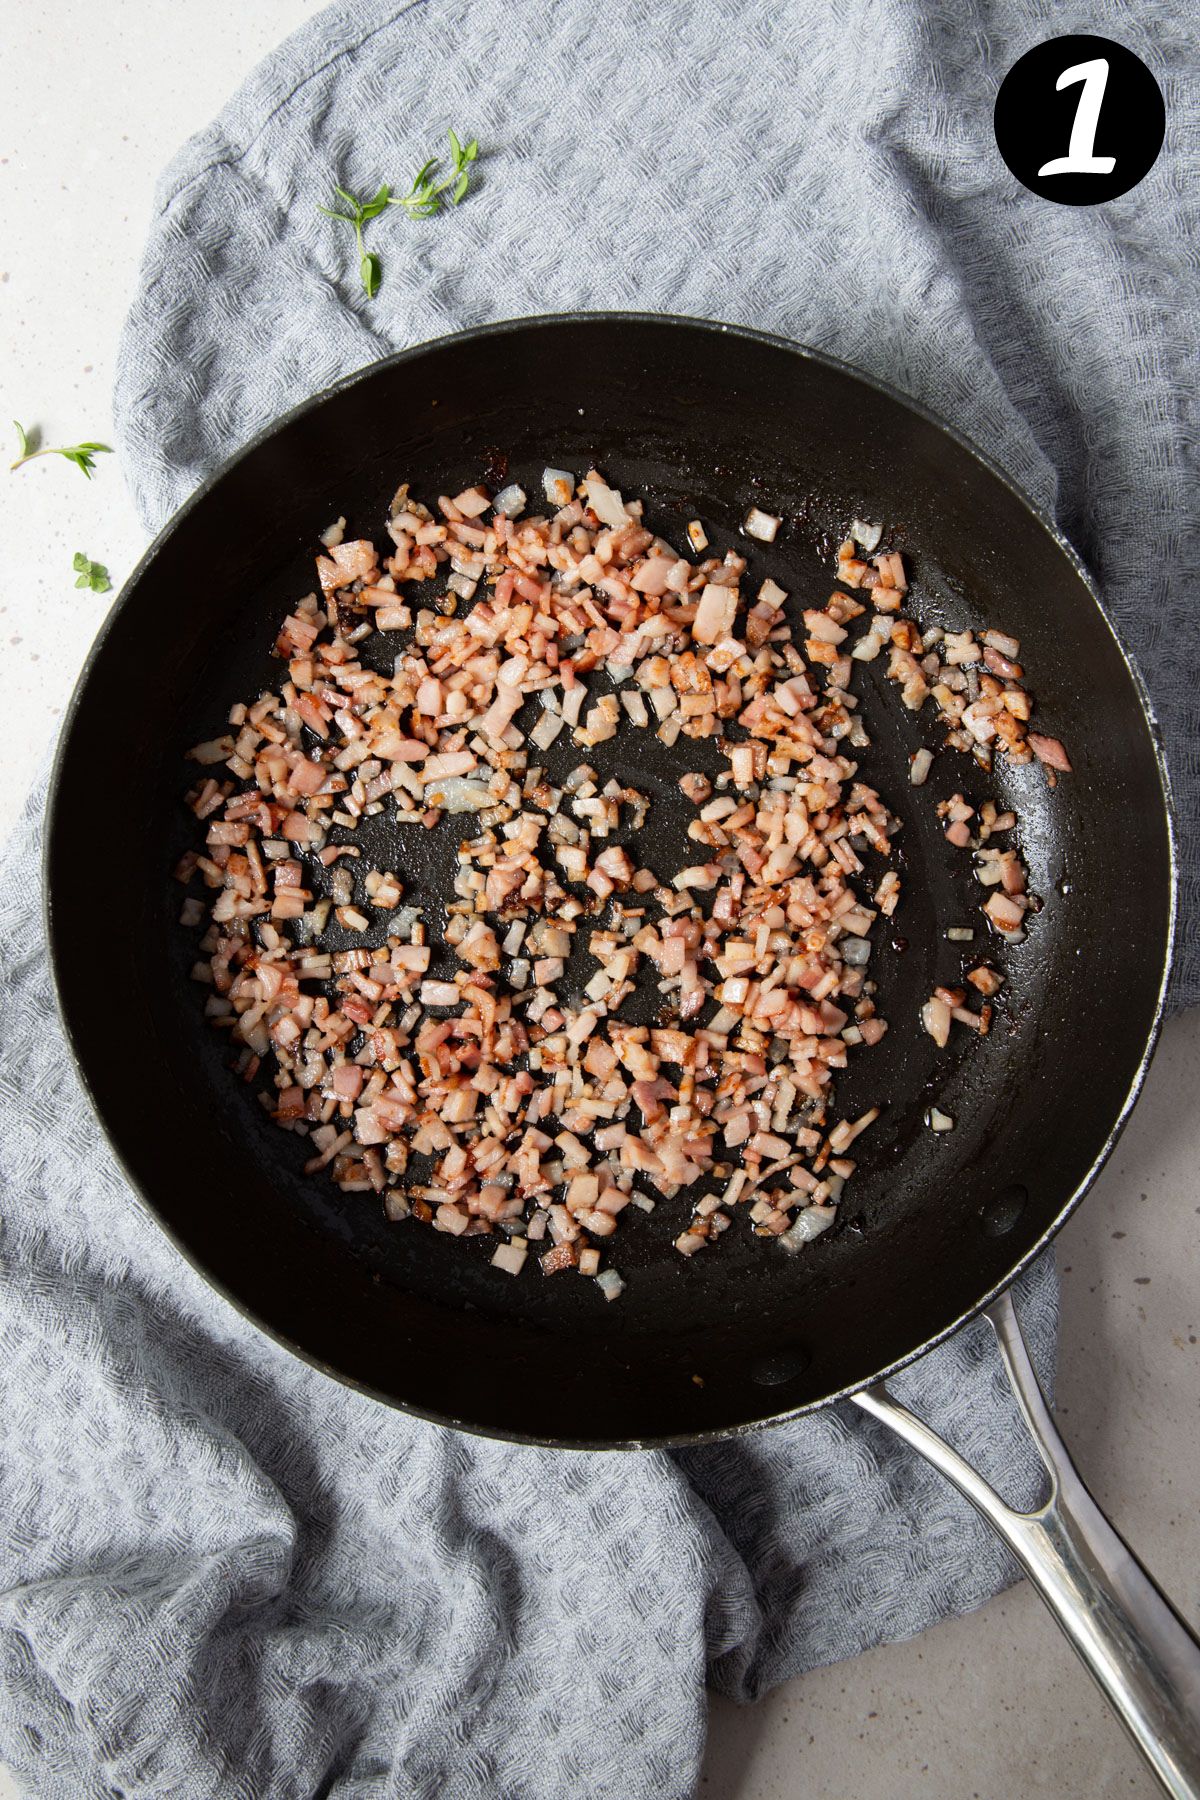
Step 1 – Cook the bacon;
Fry the bacon in a small frying pan, until crisp. Transfer the bacon to a plate to cool and discard any excess oil.
* The bacon needs to be completely cooled before adding it to the scone dough. You can place it in the fridge or freezer for a short time to speed up this process.
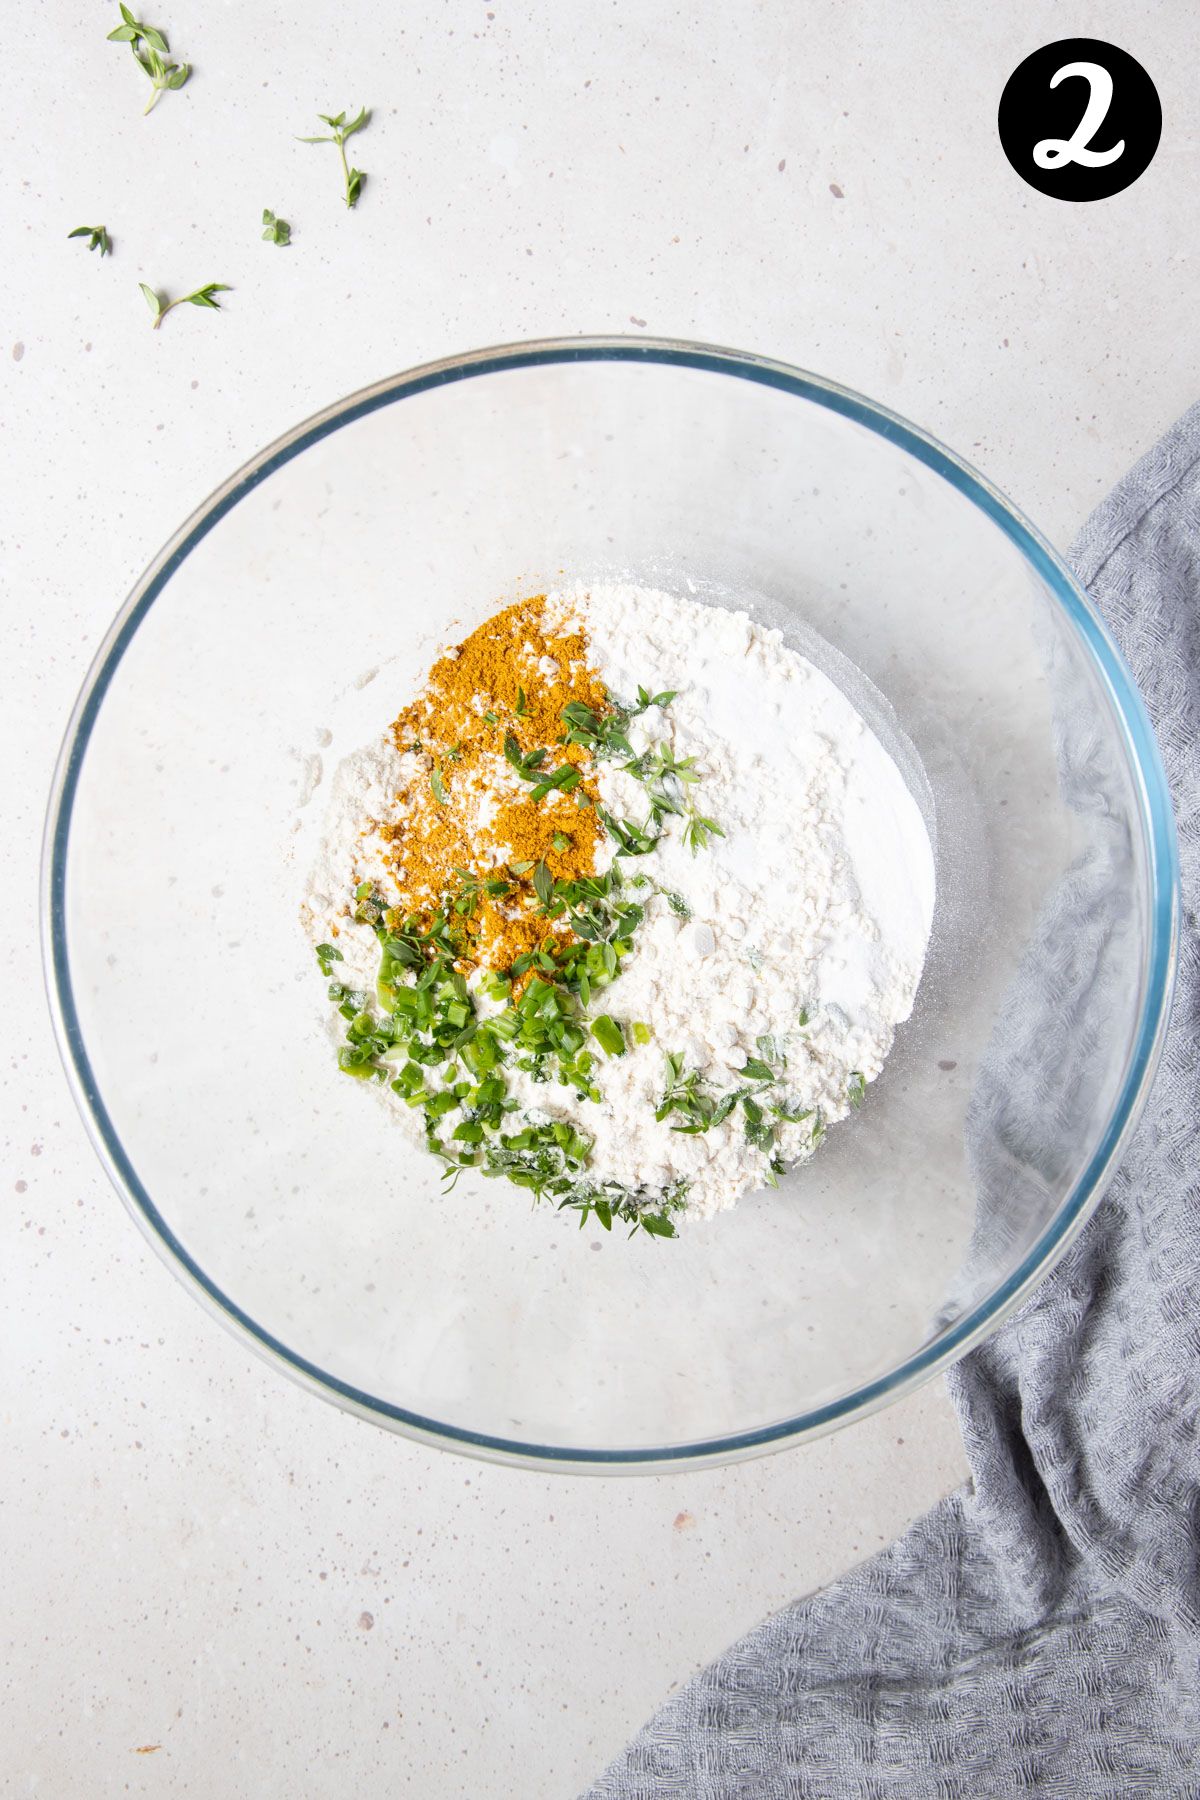
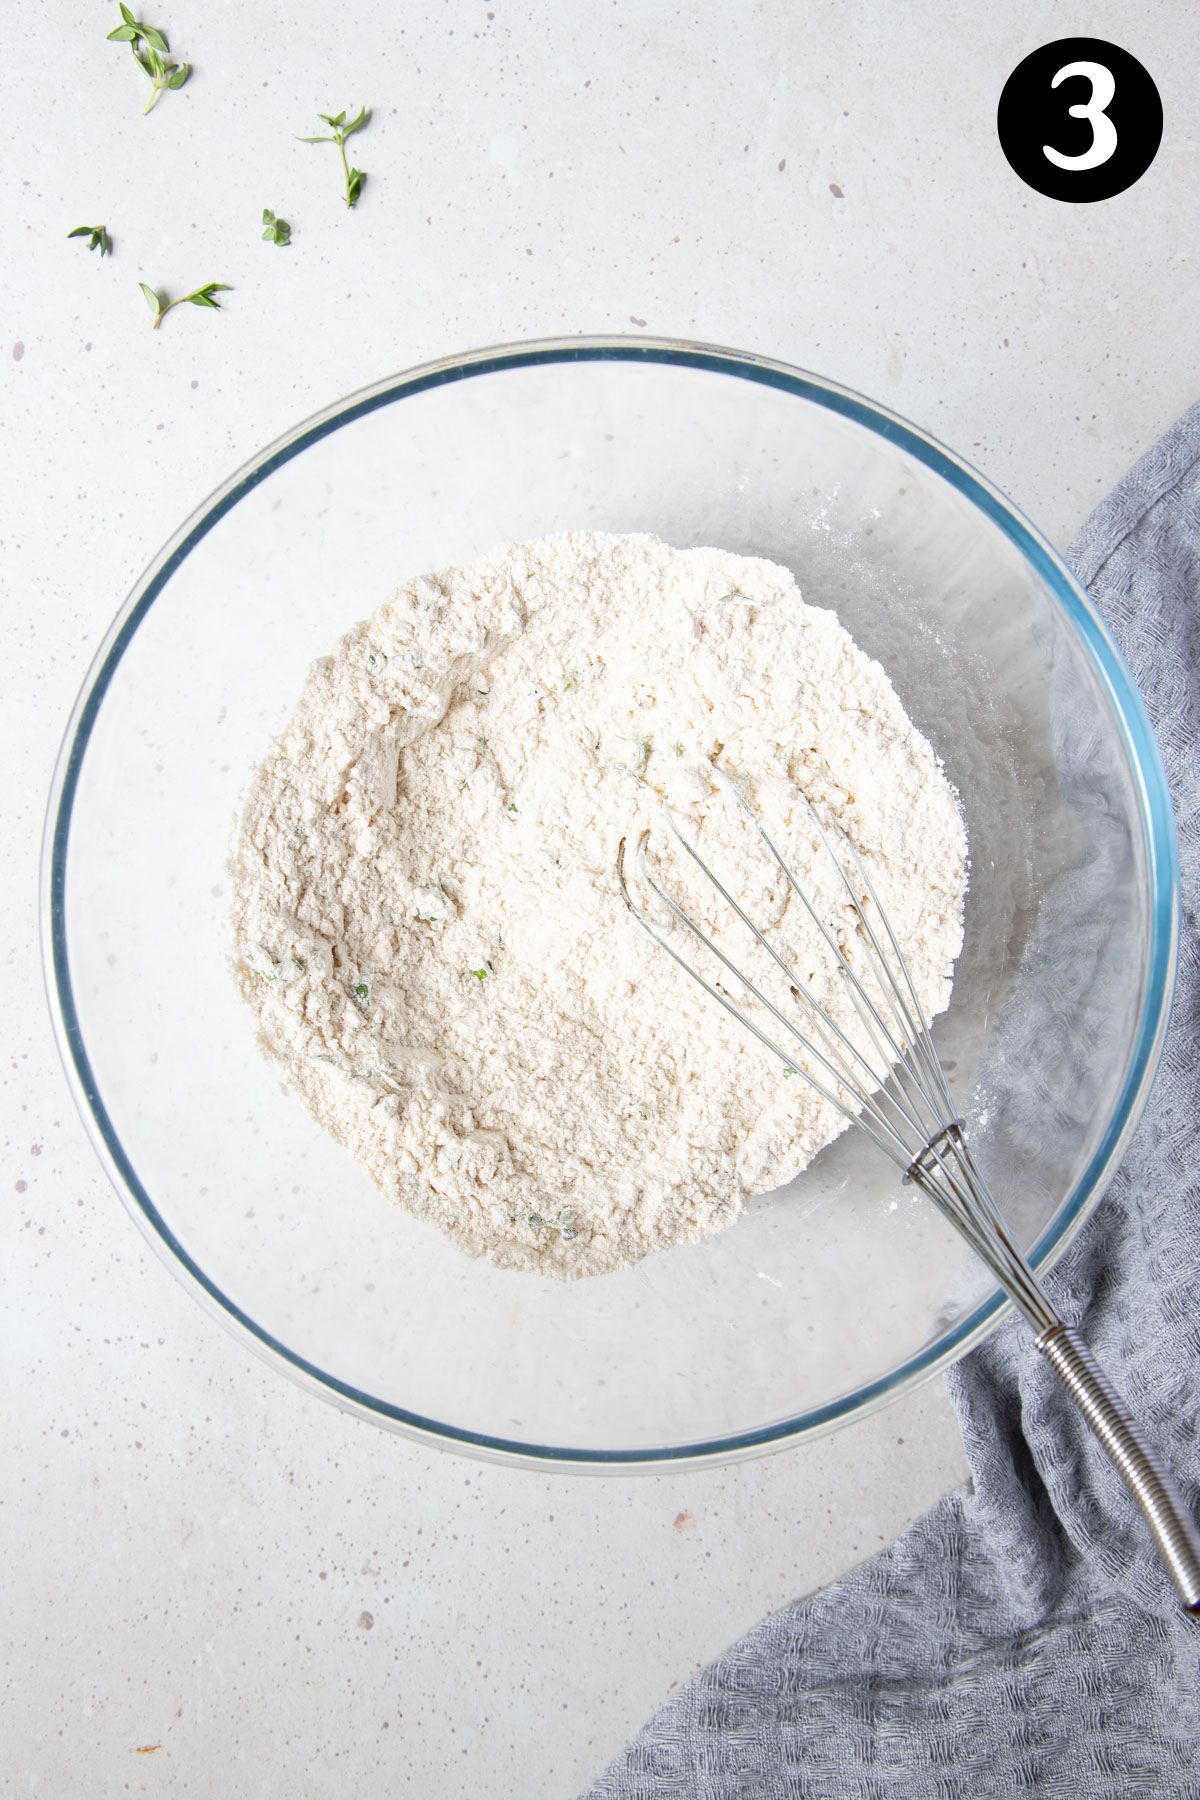
Step 2 – Mix together the dry ingredients;
Into a large mixing bowl, whisk together the dry ingredients; flour, baking powder, salt, curry powder and the chopped chives and thyme. (Image 2 and 3).
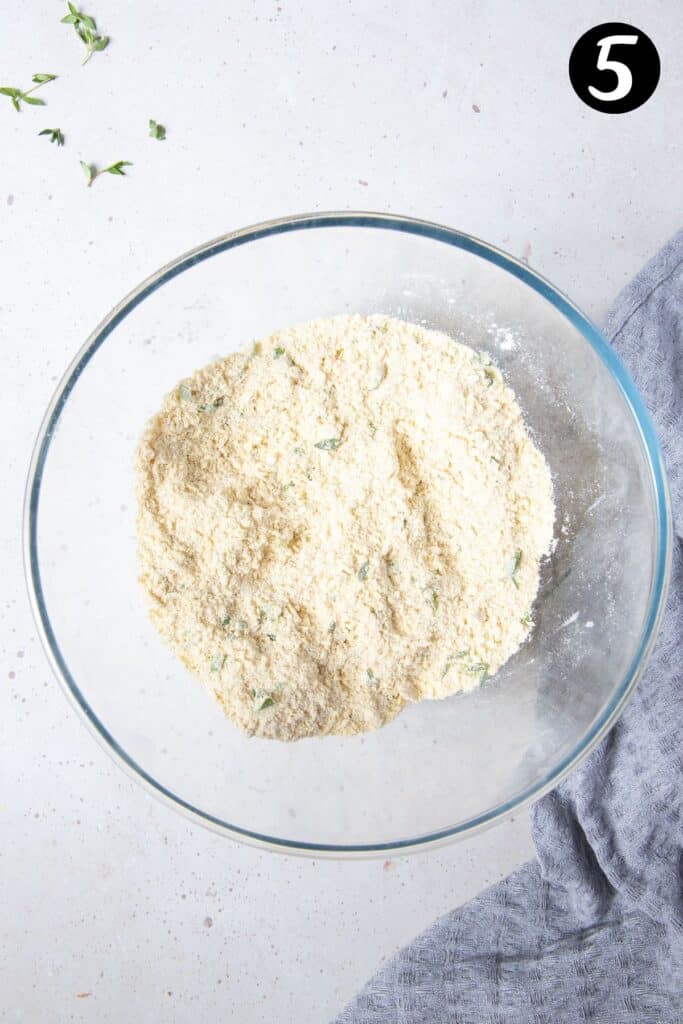
Step 3 – Add butter to flour;
Add the chilled, chopped or grated butter to the dry ingredients and using your fingertips, rub the mixture until the mixture looks like breadcrumbs. (Image 5).
It’s ok if there are still some small lumps of butter. Alternatively, you can use a food processor for this step.
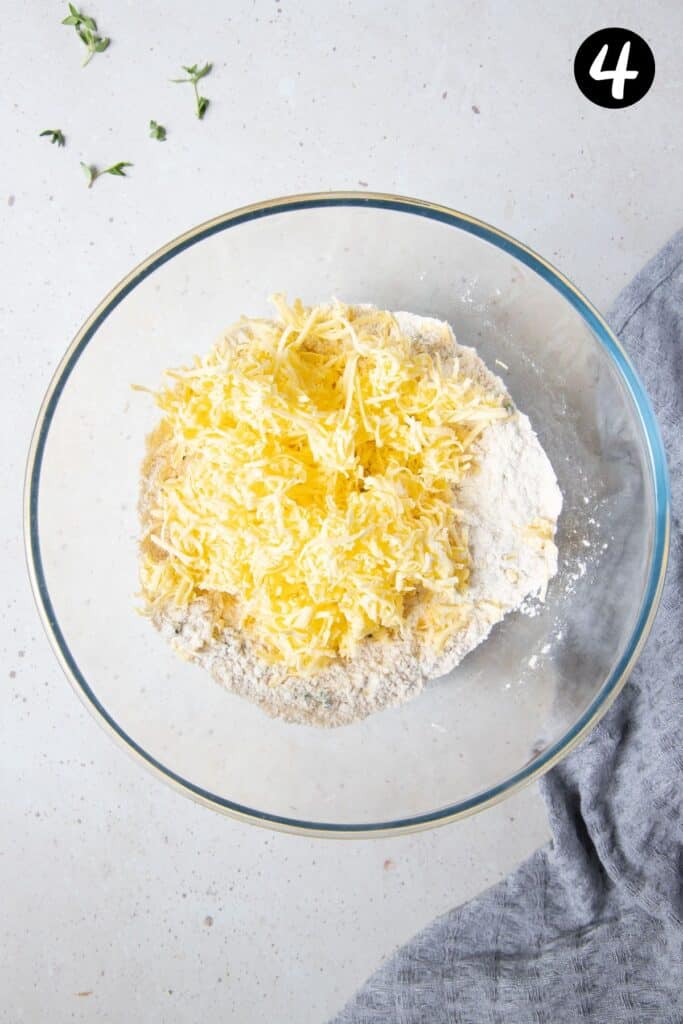
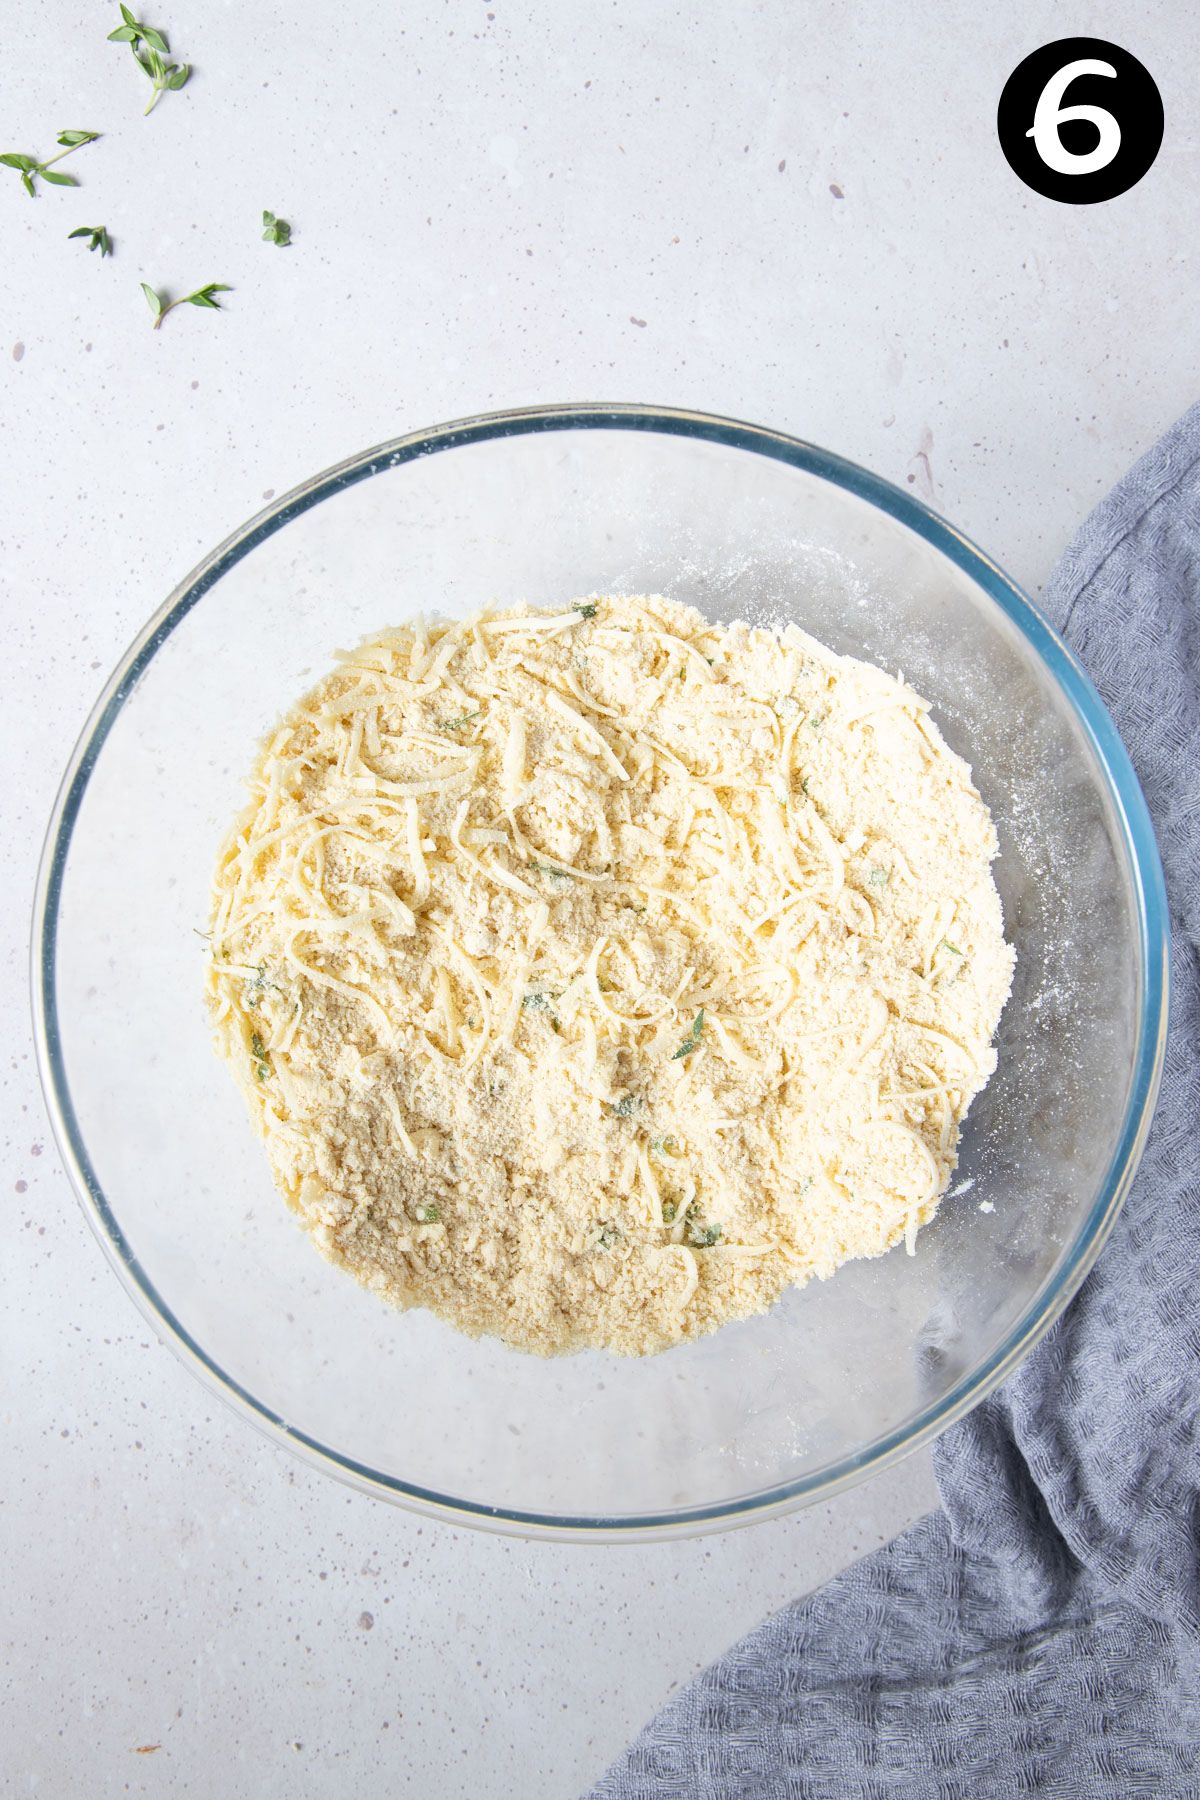
Step 4 – Make the dough;
Add the grated cheese to the flour mixture and stir to combine. Place the flour mixture into the fridge to remain chilled while you prepare the buttermilk.
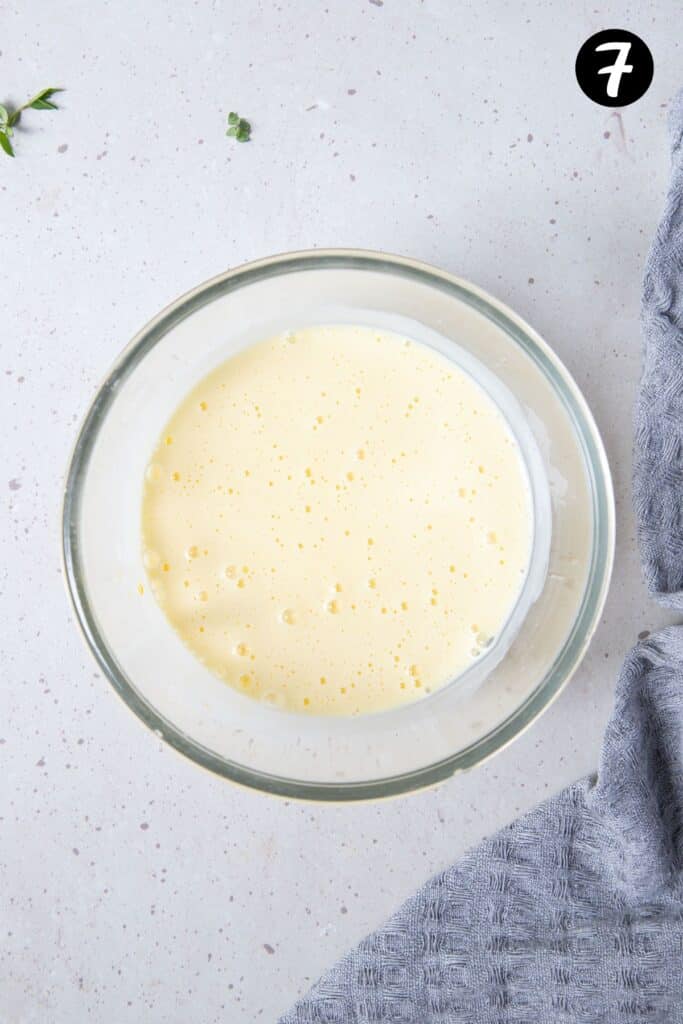
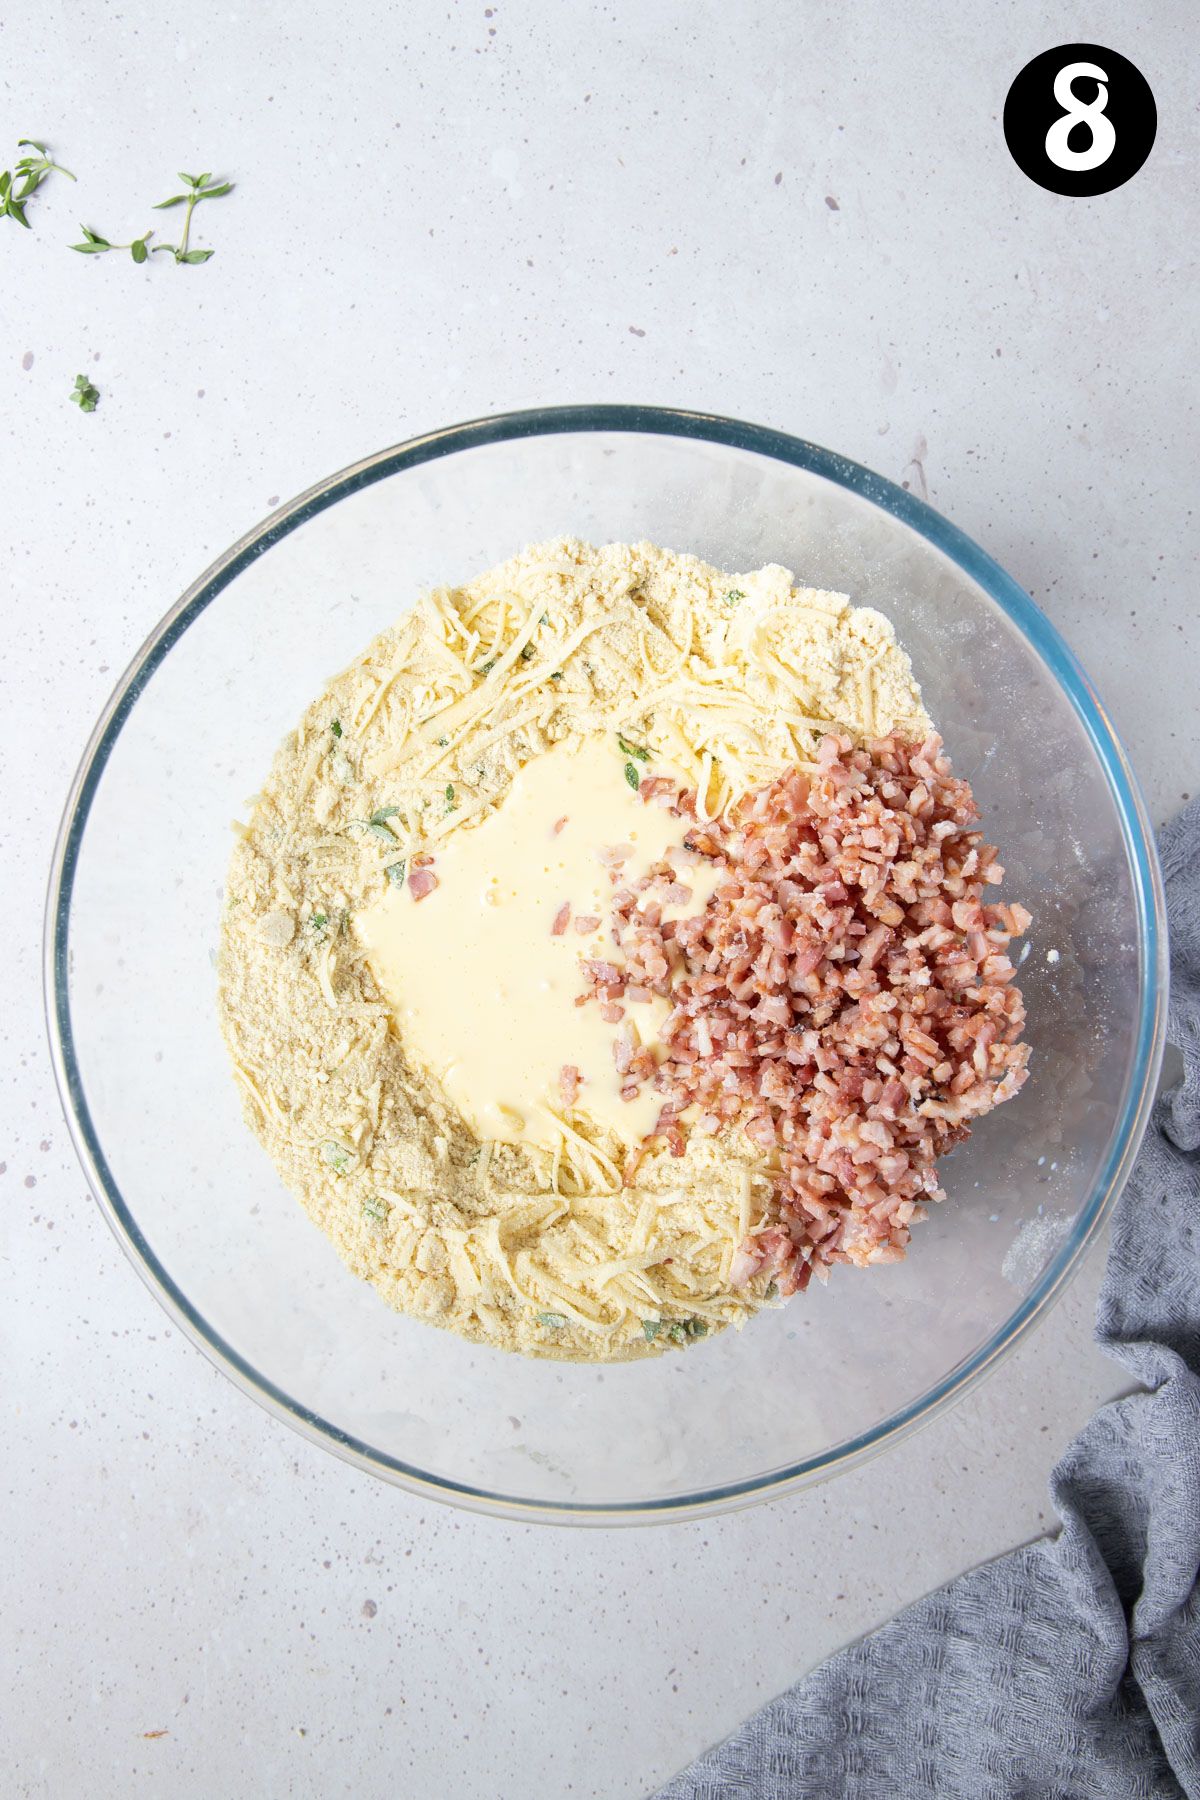
Mix the chilled buttermilk and egg yolk together until combined.
Make a well in the centre of the flour mixture and add the buttermilk mixture, along with the cooled bacon.
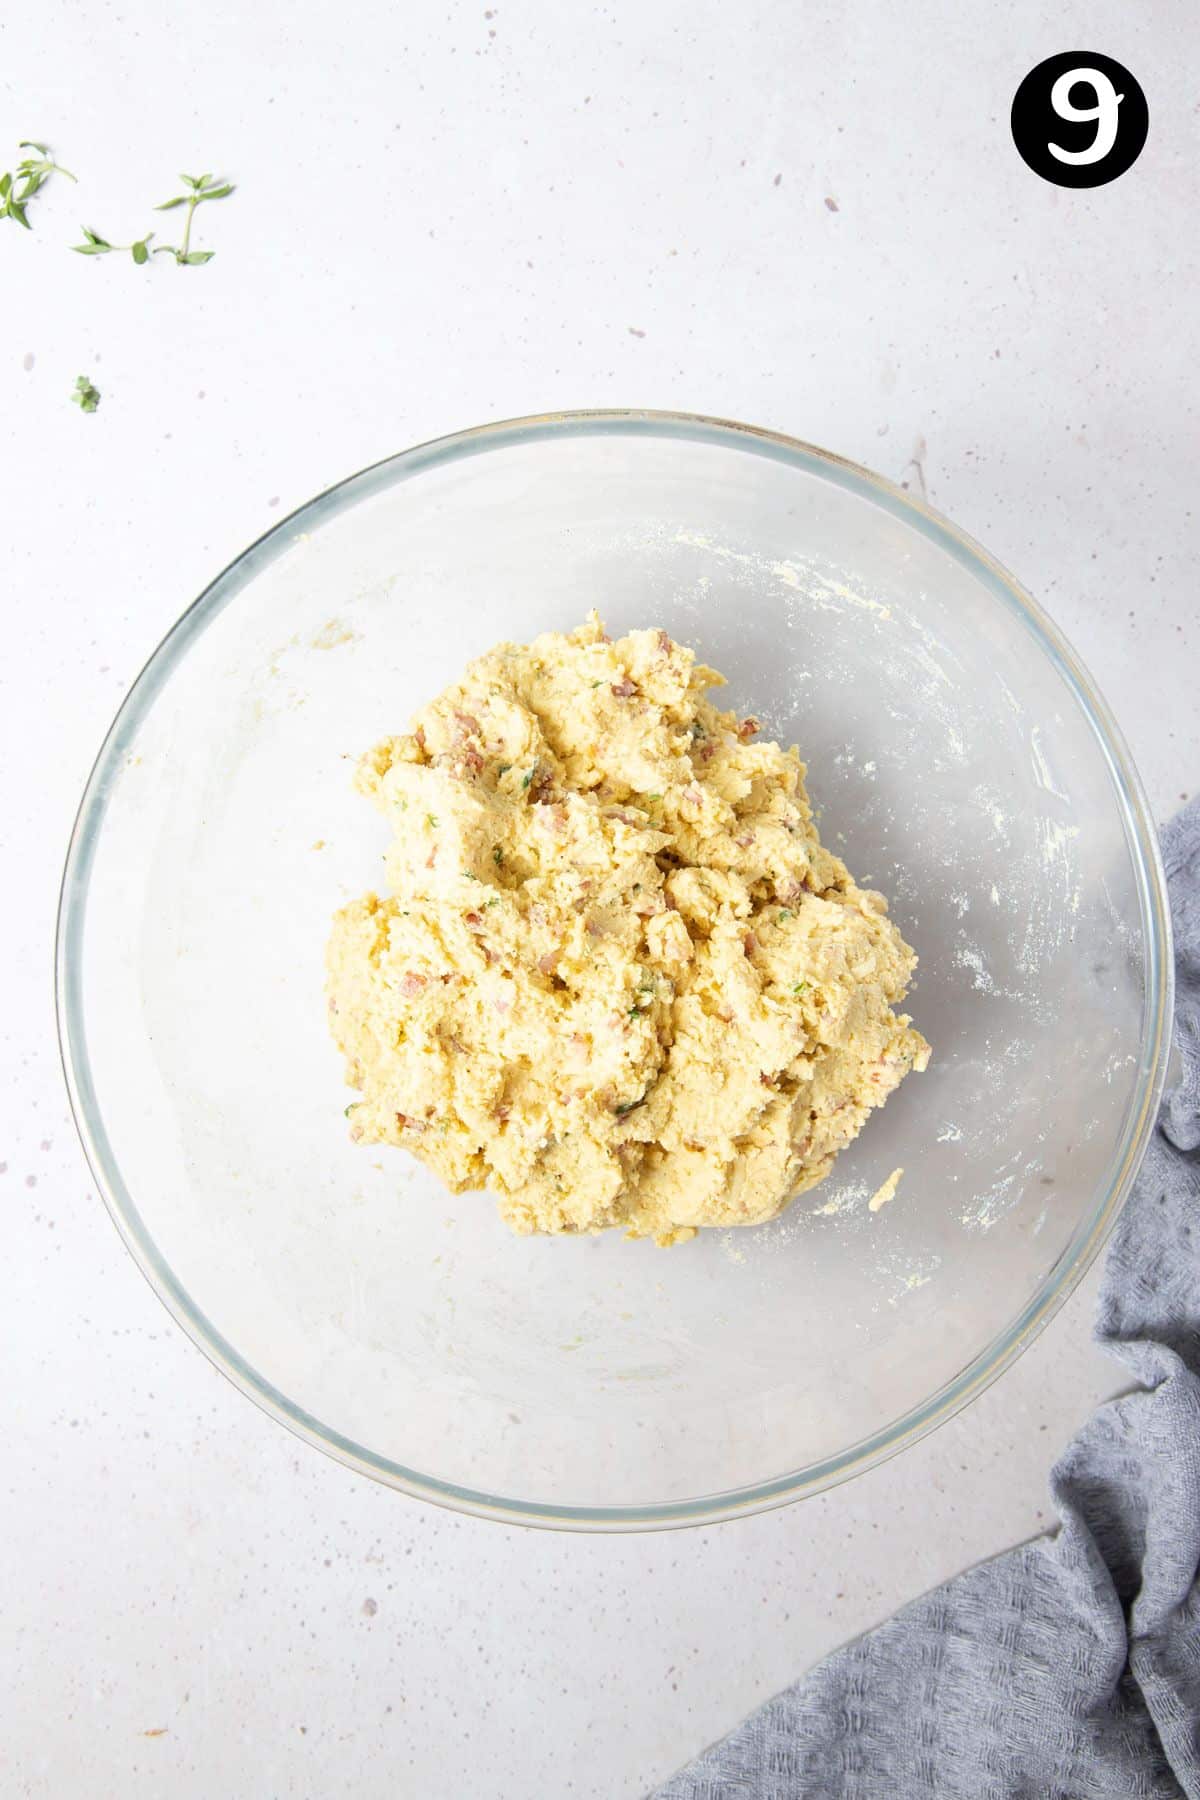
Mix until the dough clumps together.
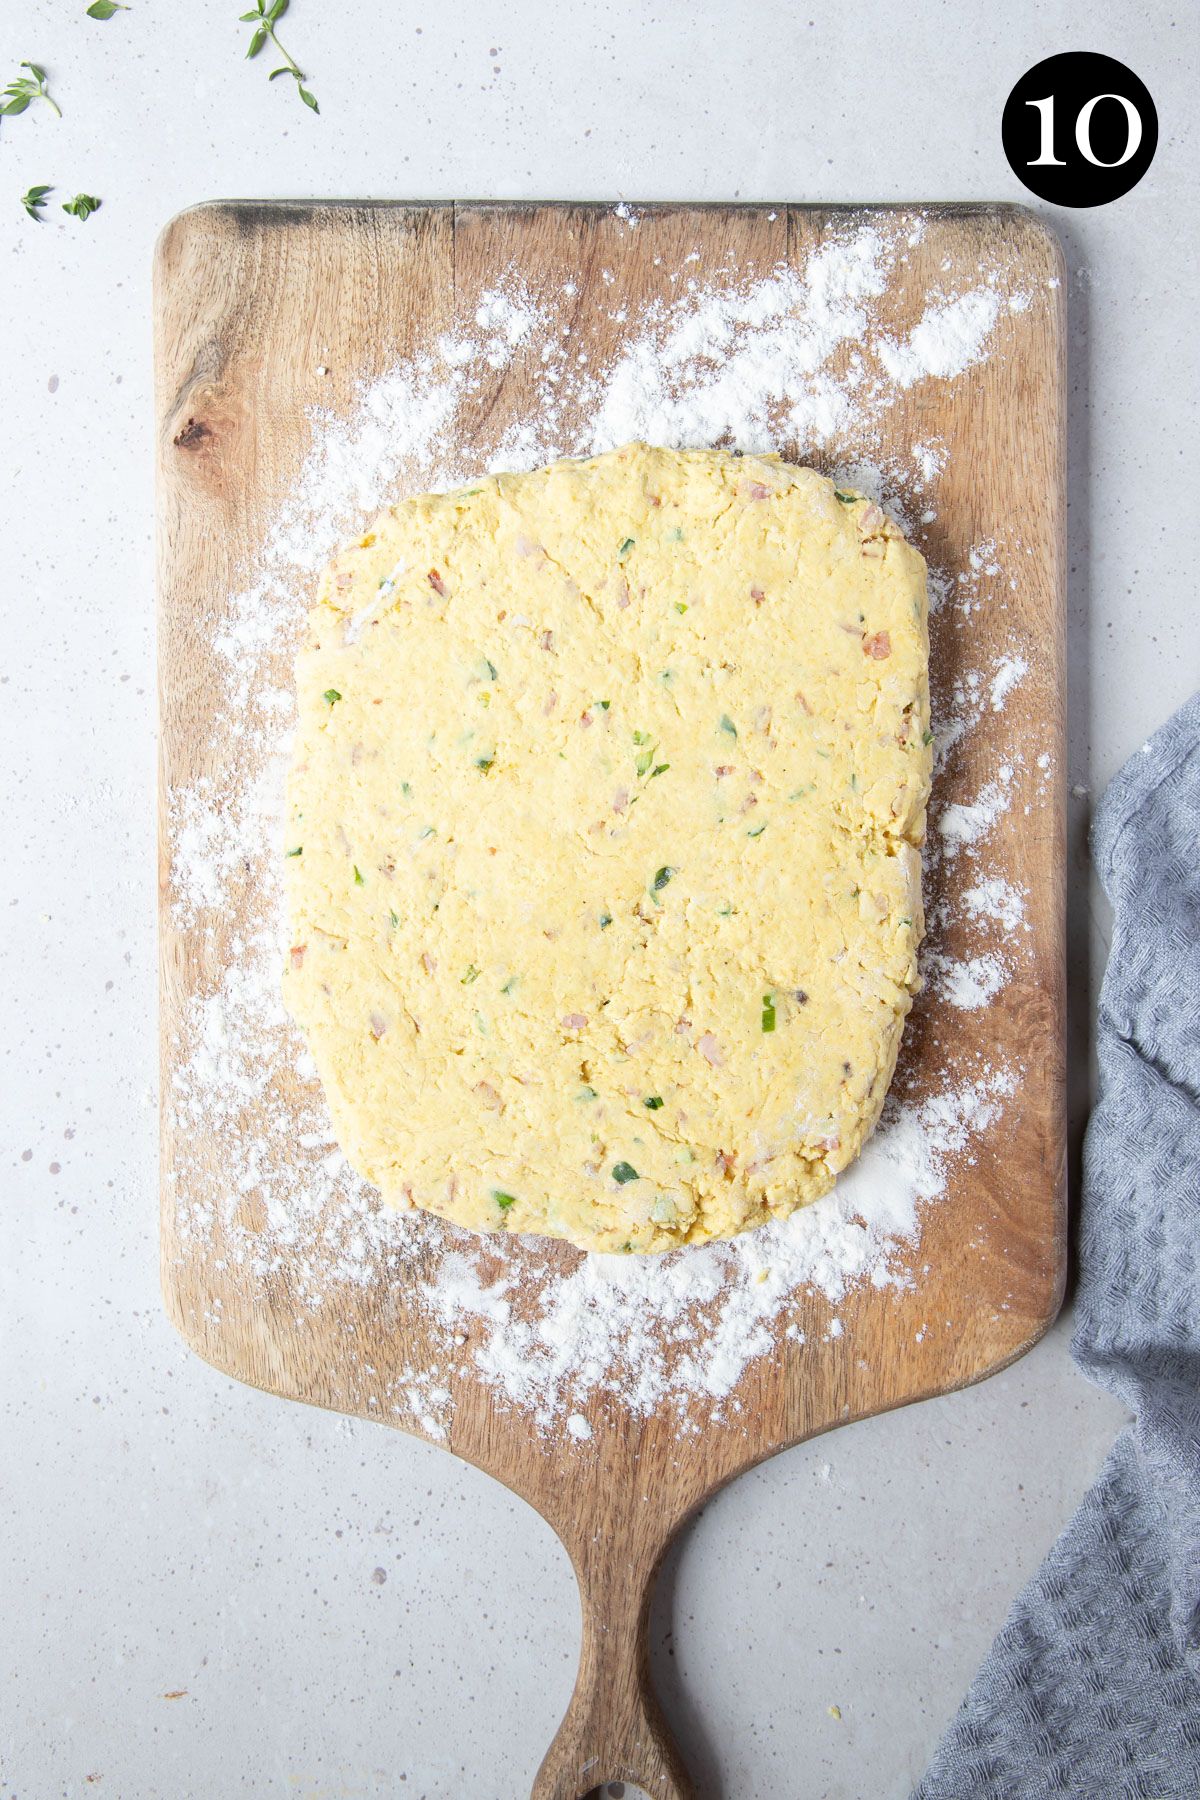
Step 5 – Cut the dough;
Place the dough on a lightly floured surface and gently shape it with your hands. Using a rolling pin, roll the dough to approx. 2cm in thickness.
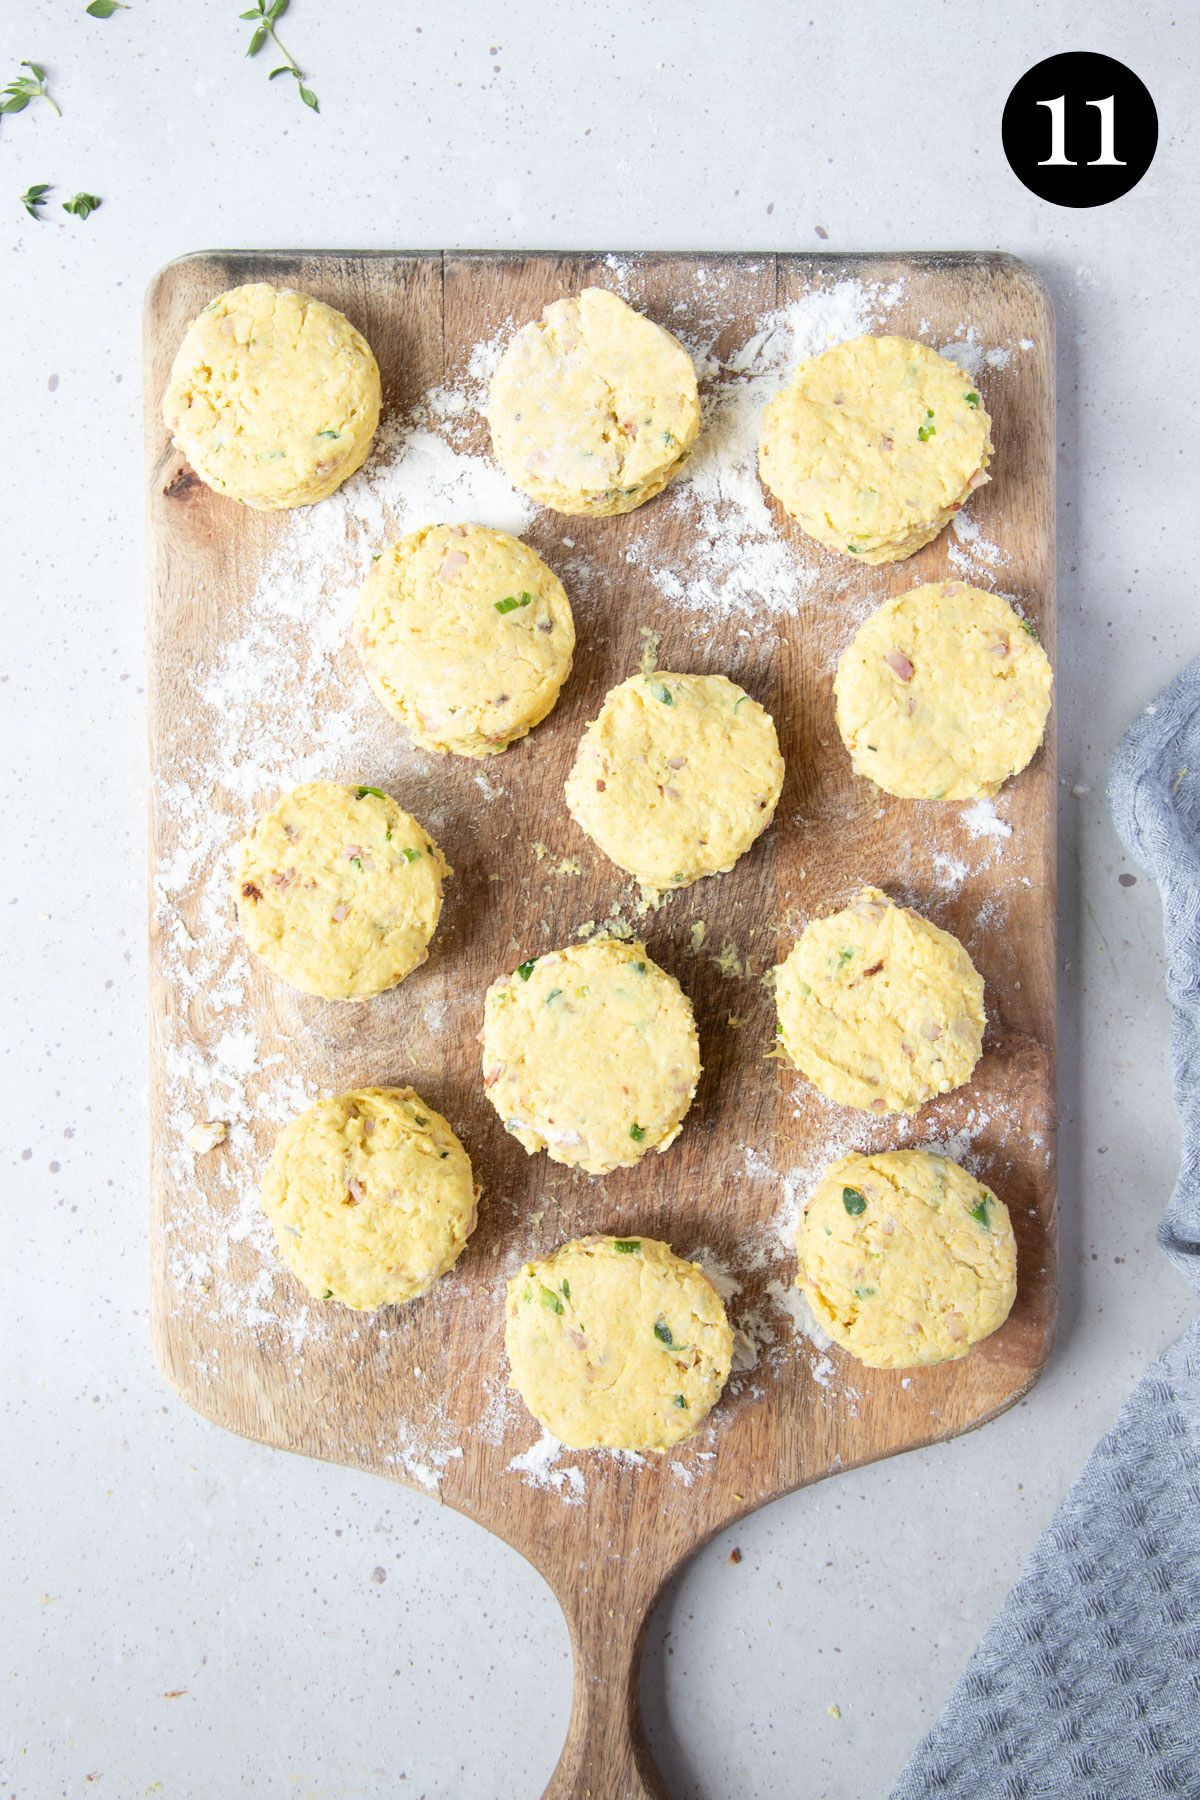
Use a 6cm round pastry/scone cutter to cut the dough into 12 scones (you will need to bring the dough back together and re-roll until the dough is all used up).
A smaller or larger cutter can be used, but the size of the scones and the cooking times will vary.
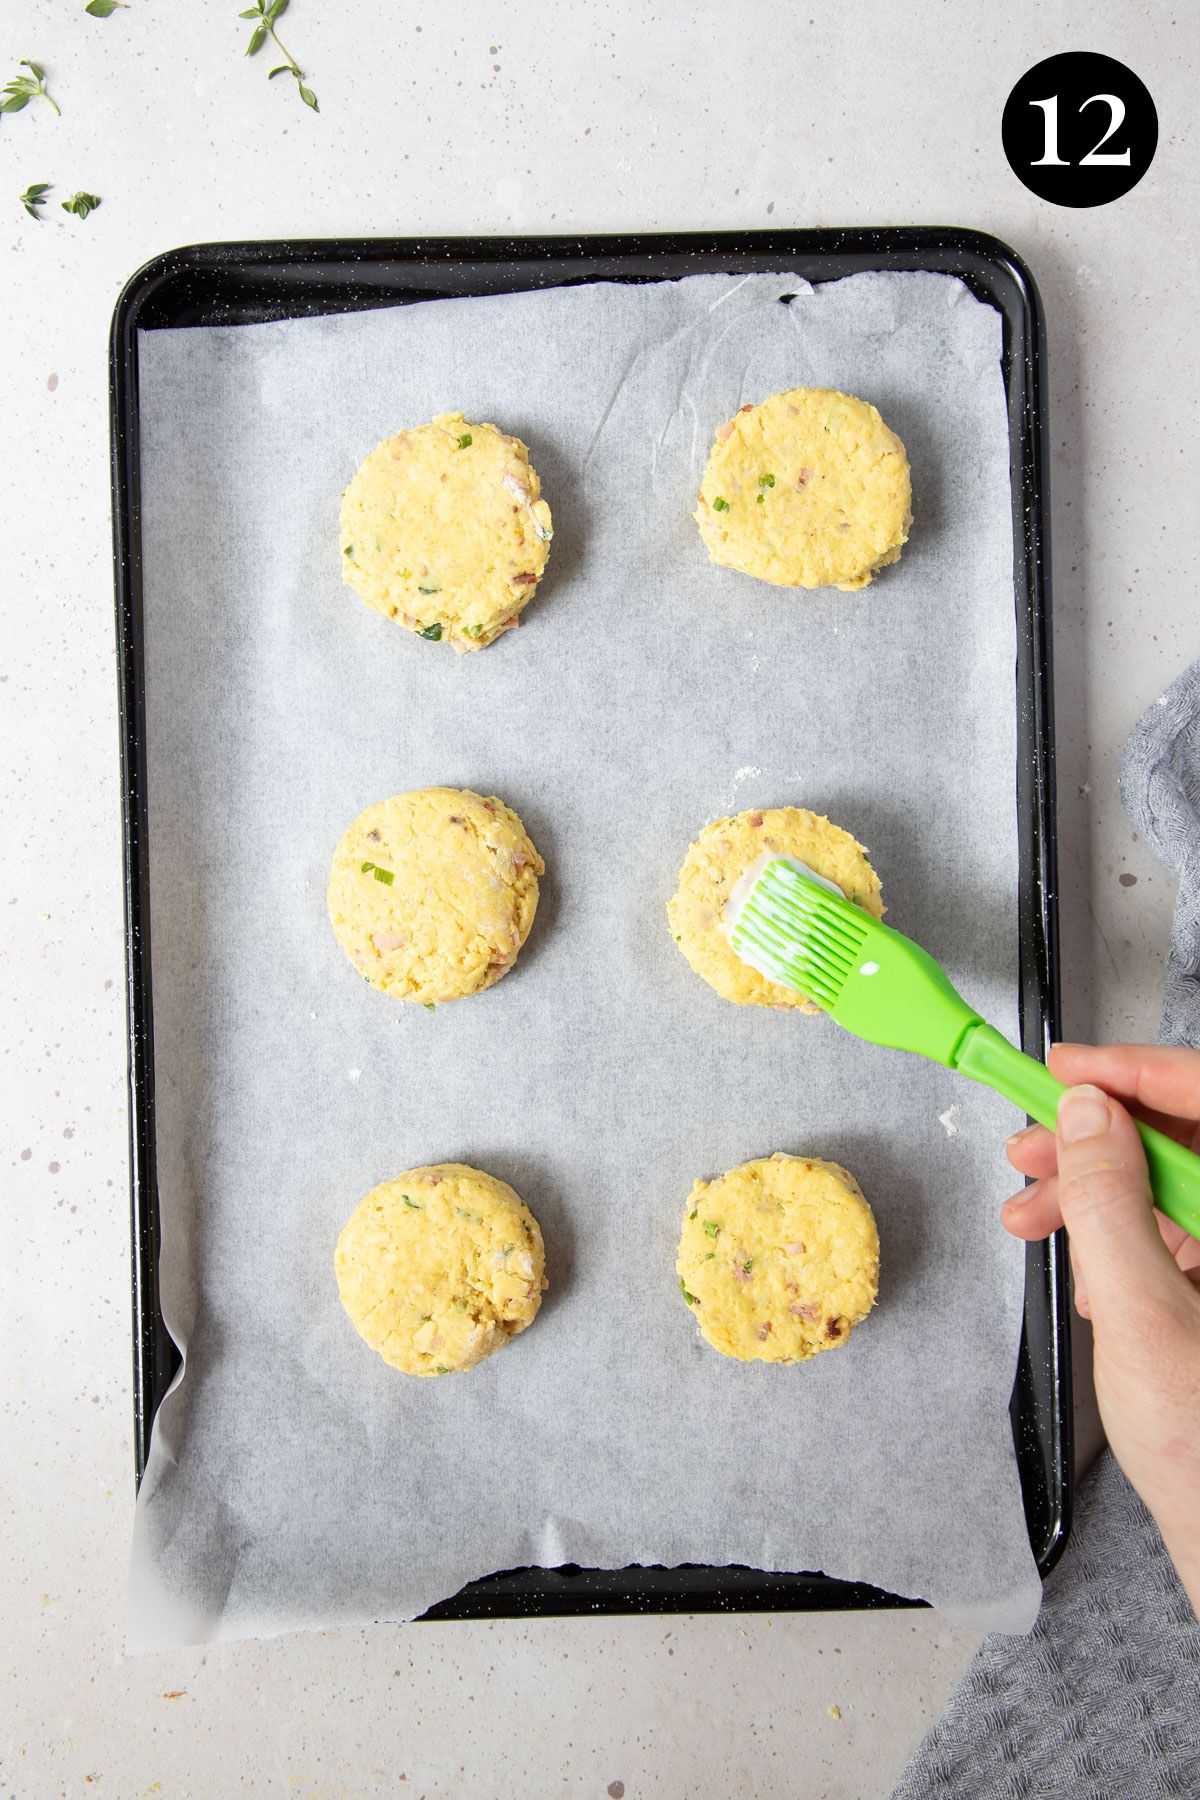
Step 4 – Bake;
Place the scones onto 1-2 baking trays lined with baking paper and use a pastry brush to glaze the tops of the scones with a little extra buttermilk (or some milk or melted butter) over the top.
Place the trays into the fridge while the oven heats, to keep the dough chilled.
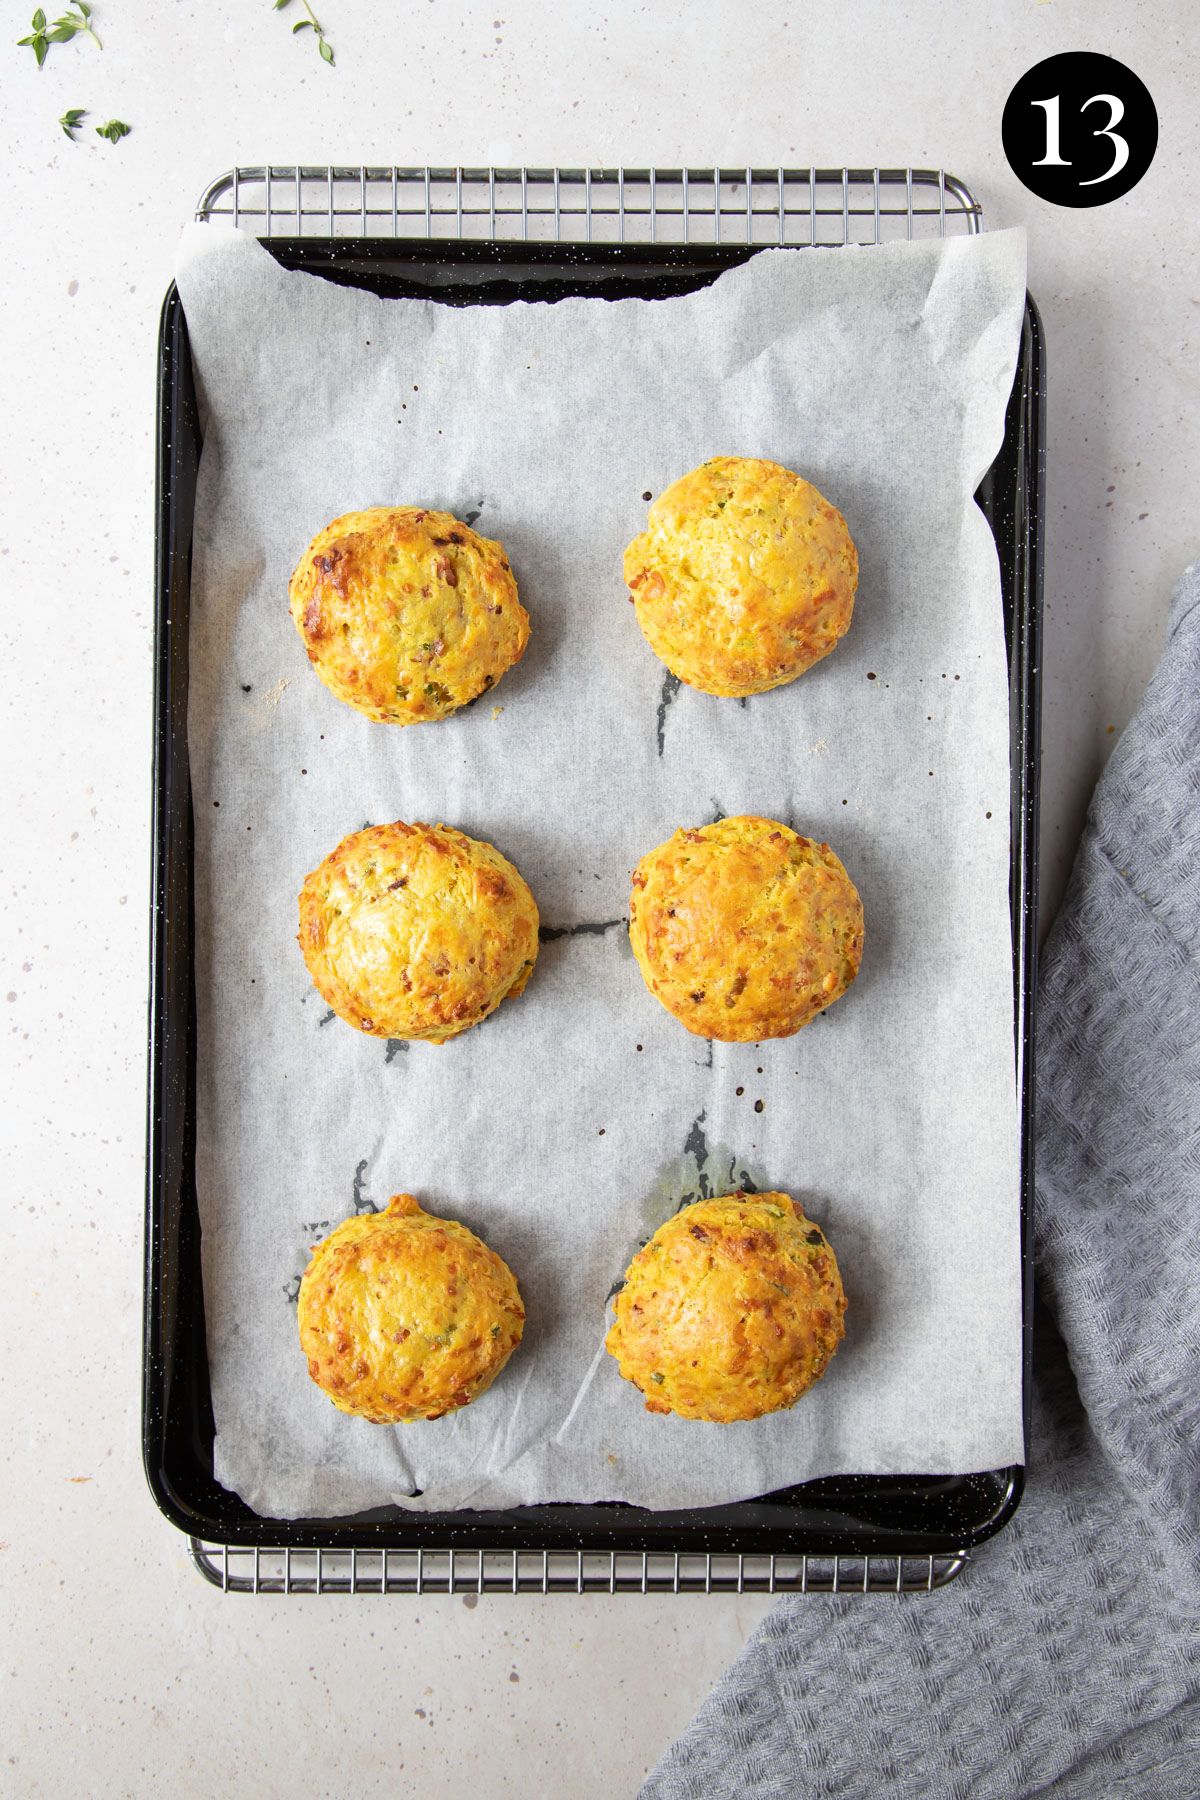
Bake the scones until golden brown. Cooked scones will have a “hollow” sound when tapped on top.
Full recipe quantities and instructions can be found in the detailed recipe card below.
Expert tips
- Don’t overmix the dough. You may be tempted to knead the dough until smooth, but less is more when baking scones! Work the dough only until everything just comes together. Over-mixing removes air, which will result in tough, chewy scones that don’t rise. We want high, fluffy scones!
- While they can be made ahead and stored for later, they are best eaten when hot, straight from the oven.
- Storage; wrap them in a hot towel when serving, to keep the heat and steam in. This will keep the scones warm and moist. Although please note that if you add curry powder, the scones may stain the towel- so use an old one! Store any cooled leftovers in an airtight container or plastic bag in the fridge for 1-2 days.
- Reheating leftovers – heat them (whole) in the oven at 160 C/ 320 F for around 5 minutes (or in an air fryer at 160 C for around 5 minutes), or until heated through and steaming hot in the middle. They can also be heated in the microwave for 10-20 seconds, until heated through.
- Keep the mixture cold. Keeping everything cold is imperative to making fluffy scones. Keep the cold ingredients in the fridge until ready for use and even pop the mixture into the fridge in between steps, to keep it cold.
- Similar to baking pie crust, the aim is to keep the butter as cold as possible while making the dough so that it melts when it enters the oven, rather than before. This creates super flaky, tender and fluffy scones.
- The butter can be cut into cubes, or grated to easily incorporate it into the flour.
- Refrigerate the dough before baking. This allows the gluten to relax and the butter to re-chill and firm up and the baking powder to start working. This creates high, fluffy and flaky scones.
- Place the dough on a floured bench or worktop to roll. If the dough is too sticky, add a little more flour. If it’s too dry, you can add 1-2 tablespoons more buttermilk.
- When the dough is rolled to 2cm thickness and cut into 6cm circles, you should end up with 12 scones. You can easily double or even triple the quantities for more. They can also be made smaller or larger, but cooking times will vary.
FAQs
Self-raising flour and baking powder are the ingredients that make these scones rise. Make sure that the baking powder is fresh and in-date. And don’t overwork the dough! Allow everything to just come together. It’s ok if the dough is still a little crumbly.
The main cause of tough, hard scones is overworking the dough. Overworking results in scones that are tough and chewy, rather than soft and flaky. The key is to mix the ingredients together lightly, until the dough just comes together.
If you’d like to make them ahead, scones can be frozen either baked, or unbaked. To freeze unbaked scones, cut the scones and place them on a baking sheet to freeze, before transferring them to an airtight container or zip-lock bag. You can bake them from frozen, just add a few minutes to the cooking time. To freeze cooked scones, allow them to cool completely and place them in an airtight container, wrapped in a bag or paper to prevent freezer damage. Use frozen scones within 3 months.
Savoury scones are best served straight from the oven, or warmed up with a generous coating of butter. Chilli jam or green tomato chutney also make a fabulous addition. They can be served with a side salad for lunch and are perfect dunked into your favourite soup for dinner.
Scones are ready when they are a light-golden colour on the outside and if you tap them lightly on top, they should sound hollow.

Related recipes


Tried this recipe? Please leave a star ⭐⭐⭐⭐⭐ rating or leave a review below and let you know how you went!
Hungry for more? Subscribe to my newsletter and follow along on Facebook, Instagram and Pinterest for the latest recipes and news.

Easy Savoury Scones with Cheese, Bacon and Chives
Ingredients
- 130 grams middle bacon about 2-3 strips/rashers, cut into very small pieces
- 265 grams self-raising flour 1 and ¾ cups, spooned and levelled. Weigh your flour for accuracy.
- 1 teaspoon baking powder
- ½ – 1 teaspoon mild curry powder Keens curry powder
- ¼ teaspoon table salt
- ¼ cup fresh chives chopped
- 1 tablespoon fresh thyme leaves
- 120 grams butter cubed or grated, chilled. Keep it in the fridge until ready for use.
- 100 grams grated tasty (cheddar) cheese weighed when freshly grated. About 1 ½ cups.
- 160 ml buttermilk ⅔ cup (plus a little extra, for the glaze). Keep it as cold as possible until ready for use.
- 1 egg yolk
Instructions
- Line 1-2 oven trays with baking paper and set aside.
- Fry the bacon pieces in a frying pan, until crisp. Transfer the bacon to a plate to cool and discard any excess oil. You can place it in the fridge or freezer for a short time to speed up this process.
- Whisk the self-raising flour, baking powder, curry powder, salt, chives and thyme together in a mixing bowl until combined.
- Add the chilled butter and use your fingertips to rub the butter into the flour, until it looks crumbly, like breadcrumbs. It’s ok if there are still some small lumps of butter. Alternatively, you can use a food processor for this step.
- Add the grated cheese and place the mixture into the fridge to keep cold while you prepare the buttermilk.
- In a small bowl, whisk the chilled buttermilk and egg yolk together until combined.
- Make a well in the middle of the flour mixture. Add the buttermilk and egg mixture and the cooled bacon and mix until the dough clumps together.
- Add the dough to a lightly floured bench and shape it with your hands. (Don't overwork the dough).
- Use a rolling pin to roll the dough to about 2cm thickness.
- Use a 6cm round pastry/scone cutter) to cut out 12 scones. After cutting a few scones, you will need to bring the dough back together with your hands and re-roll until the dough is all used up.
- Place the scones onto the lined baking trays and use a pastry brush to add a little extra buttermilk (or some milk or melted butter) over the top of the scones.
- Place the scones back into the fridge while you pre-heat the oven to 200°C/392 F.
- Bake for 18-20 minutes, or until golden brown and fluffy in the middle. Cooked scones will have a "hollow" sound when tapped on top.
- Serve hot, straight from the oven, topped with butter and some chilli jam or green tomato chutney.
Notes
- Don’t overmix the dough. You may be tempted to knead the dough until smooth, but less is more when baking scones! Work the dough only until everything just comes together. Over-mixing removes air, which will result in tough, chewy scones that don’t rise. We want high, fluffy scones!
- While they can be made ahead and stored for later, they are best eaten when hot, straight from the oven.
- Storage; wrap them in a hot towel when serving, to keep the heat and steam in. This will keep the scones warm and moist. Although please note that if you add curry powder, the scones may stain the towel- so use an old one! Store any cooled leftovers in an airtight container or plastic bag in the fridge for 1-2 days.
- Reheating leftovers – heat them (whole) in the oven at 160 C/ 320 F for around 5 minutes (or in an air fryer at 160 C for around 5 minutes), or until heated through and steaming hot in the middle. They can also be heated in the microwave for 10-20 seconds, until heated through.
- Place the dough on a floured bench or worktop to roll. If the dough is too sticky, add a little more flour. If it’s too dry, you can add 1-2 tablespoons more buttermilk.
- Keep the mixture cold. Keeping everything cold is imperative to making fluffy scones. Keep the cold ingredients in the fridge until ready for use and even pop the mixture into the fridge in between steps, to keep it cold.
- Similar to baking pie crust, the aim is to keep the butter as cold as possible while making the dough so that it melts when it enters the oven, rather than before. This creates super flaky, tender and fluffy scones.
- The butter can be cut into cubes, or grated to easily incorporate it into the flour. If the mixture warms as you mix it, place the cut scones on a baking tray in the fridge to chill while the oven pre-heats.
- Refrigerate the dough before baking. This allows the gluten to relax and the butter to re-chill and firm up and the baking powder to start working. This creates high, fluffy and flaky scones.
- When the dough is rolled to 2cm thickness and cut into 6cm circles, you will get 12 scones. You can easily double or even triple the quantities for more. They can also be made smaller or larger, but cooking times will vary.
- Freezing; If you’d like to make them ahead, scones can be frozen either baked, or unbaked. To freeze unbaked scones, cut the scones and place them on a baking sheet to freeze, before transferring them to an airtight container or zip-lock bag. You can bake them from frozen, just add a few minutes to the cooking time. To freeze cooked scones, allow them to cool completely and place them in an airtight container, wrapped in a bag or paper to prevent freezer damage. Use frozen scones within 3 months.
- When are they cooked? Scones are ready when they are a light-golden colour on the outside and if you tap them lightly on top, they should sound hollow.
- Please note that the nutrition information is based on the mixture being divided into 12 scones, with one scone being one serve. The nutritional information is an estimate only and does not take into account any additional toppings or sides served with the scones.
- This recipe is made using Australian cups and spoon measurements. Any reference to cups or spoons in this recipe is in Australian metric. Due to cup sizes varying from country to country, I advise adjusting if necessary.
Nutrition
Are you following us on Facebook, Instagram and Pinterest?
Update Notes: This recipe was originally published in February 2022, but was re-published with new information, helpful tips and photos in November 2022.


Leave a Reply